Knowledge base
1000 FAQs, 500 tutorials and explanatory videos. Here, there are only solutions!
This guide explains how to view the sales report and use filters to highlight the necessary figures to track your sales and establish your accounting (within the framework of the Infomaniak ticketing system).
Access the sales report
To do this:
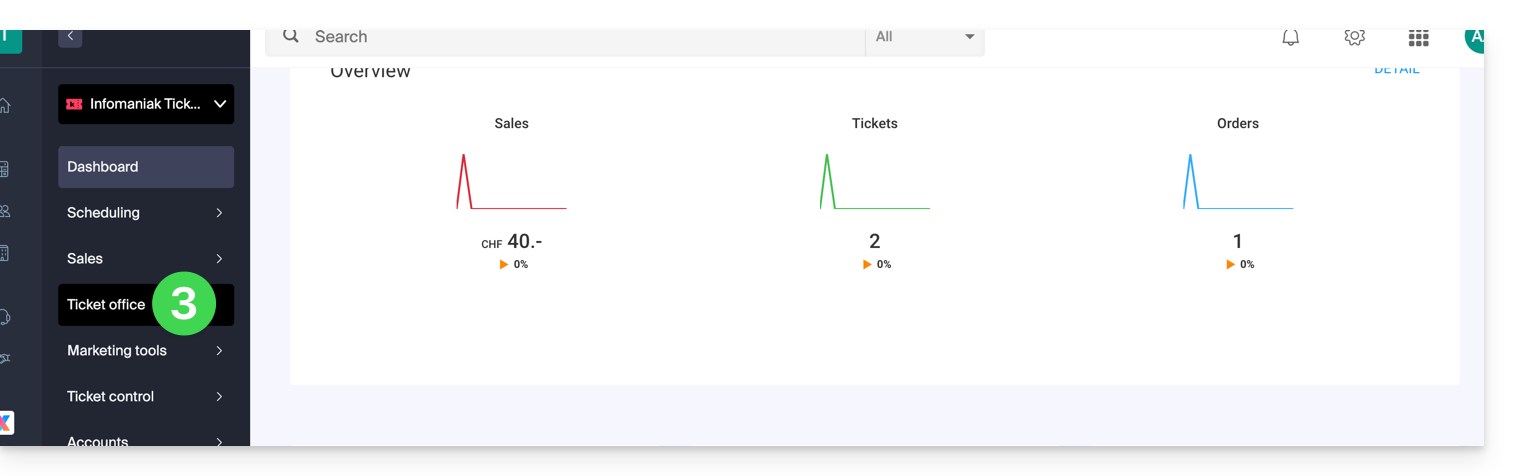
- Click here to access the management of your product on the Infomaniak Manager (need help?).
- Click directly on the name assigned to the ticketing concerned by the event.
- Click on Accounting in the left sidebar.
- Click on Sales Report:

Filtering and views for efficiency
The sales report offers a filter and saved views system that allows you to record and quickly retrieve the desired figures:
- By making good use of filters and saved views, you will no longer need to define search parameters for each of your consultations.
- The filters can be modified freely during each consultation, and if you wish to remember the new filters, simply save the filters or create a new view:

The different types of displays
It is possible to display the figures in several ways:
- Summary: Displays the overall figures by events or by sales channel without the details of each zone or pricing category. The second part displays the sales of global tickets
- Detailed: Allows you to display details by date, zone, and price. This is the display mode that allows you to see all the necessary accounting information.
- By pricing category: The display by pricing category allows you to have the figures grouped by prices. It is thus possible to retrieve figures for the desired categories for all events combined. It is thus used to identify, for example, the share of visitors who purchased full-price tickets, reduced-price tickets, or who went through subscriptions.

Add and modify filters
It is possible to add as many filters as necessary to refine the result of the sales report. To do this:
- Click on the blue Add a filter button.
- Select the desired type of filter and choose the elements to include or exclude.
Strict inclusion and exclusion allow you to display only the items that are fully affected by the filter.
In the example below, only orders paid 100% by credit card will appear. Therefore, any order that has been partially paid by credit card and another payment method will not appear on the list:
When applicable, it is possible to select all items in a list by clicking on the category:
The filter is added to the list of active filters:
To modify an active filter, click on it to display the menu.
Sales report views
By default, two views are available, each with its own display:
- Global view: has only one default filter, and thus allows you to see the global sales of the current month.
- Infomaniak Settlement: Displays only online transactions, allowing you to see the turnover corresponding to the statements sent each month with the payments:

Add, export and modify a view
To add a view with the selected filters, click on + Add a view in the list of views:
You will be able to name this new view:
To modify, export or delete a view, click on the dropdown to the right of the save button:
View sales report details
In detailed mode or by pricing category, you can find the details of each event, order, or price.
For example, you can see a quick breakdown of each line by hovering your pointer over the Amount of sales:
You can also view the exhaustive list of orders related to an event, a performance, or even a price by clicking on the action menu ⋮ located to the right of the item concerned:
To keep the sales report page open, it is recommended to open the orders page – accessible via this action – in a new tab.
This guide explains how to sell tickets with a pay-what-you-want price (within the Infomaniak ticketing system).
Preamble
- This pricing allows visitors to indicate the amount they wish to pay for their ticket.
- The pay-what-you-want price is not available in the case where the event takes place in Lausanne and is subject to the entertainment tax.
- The minimum price must be more than CHF/EUR 2.- due to the banking fees associated with online transactions.
Manage the pay-what-you-want prices for your event
To do this:
- Click here to access the management of your product on the Infomaniak Manager (need help?).
- Click directly on the name assigned to the ticketing concerned by the event.
- Click on Programming in the left sidebar menu.
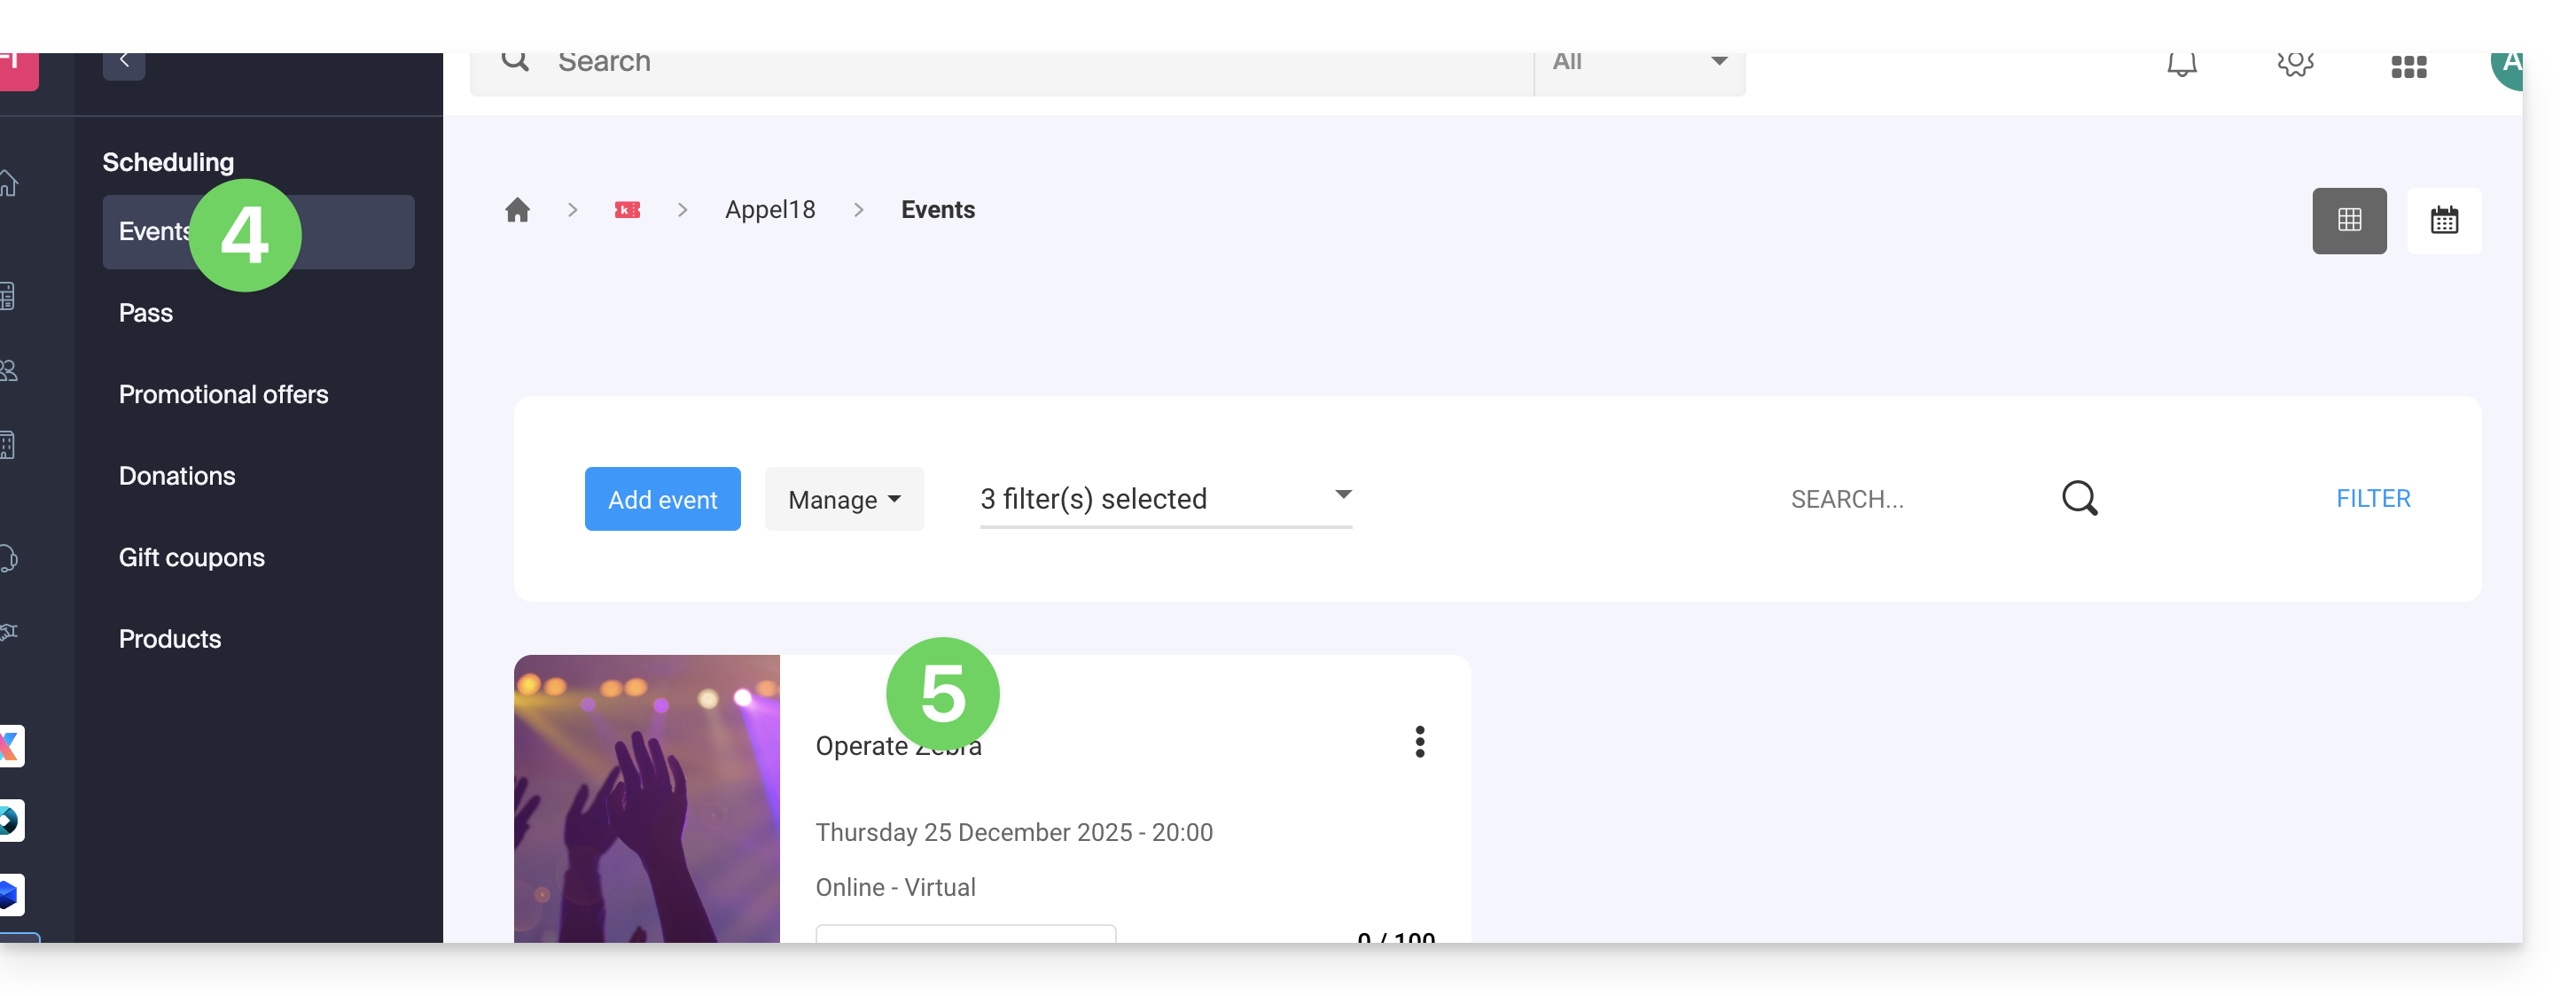
- Click on Events in the left sidebar menu.
- Click directly on the name of the event.
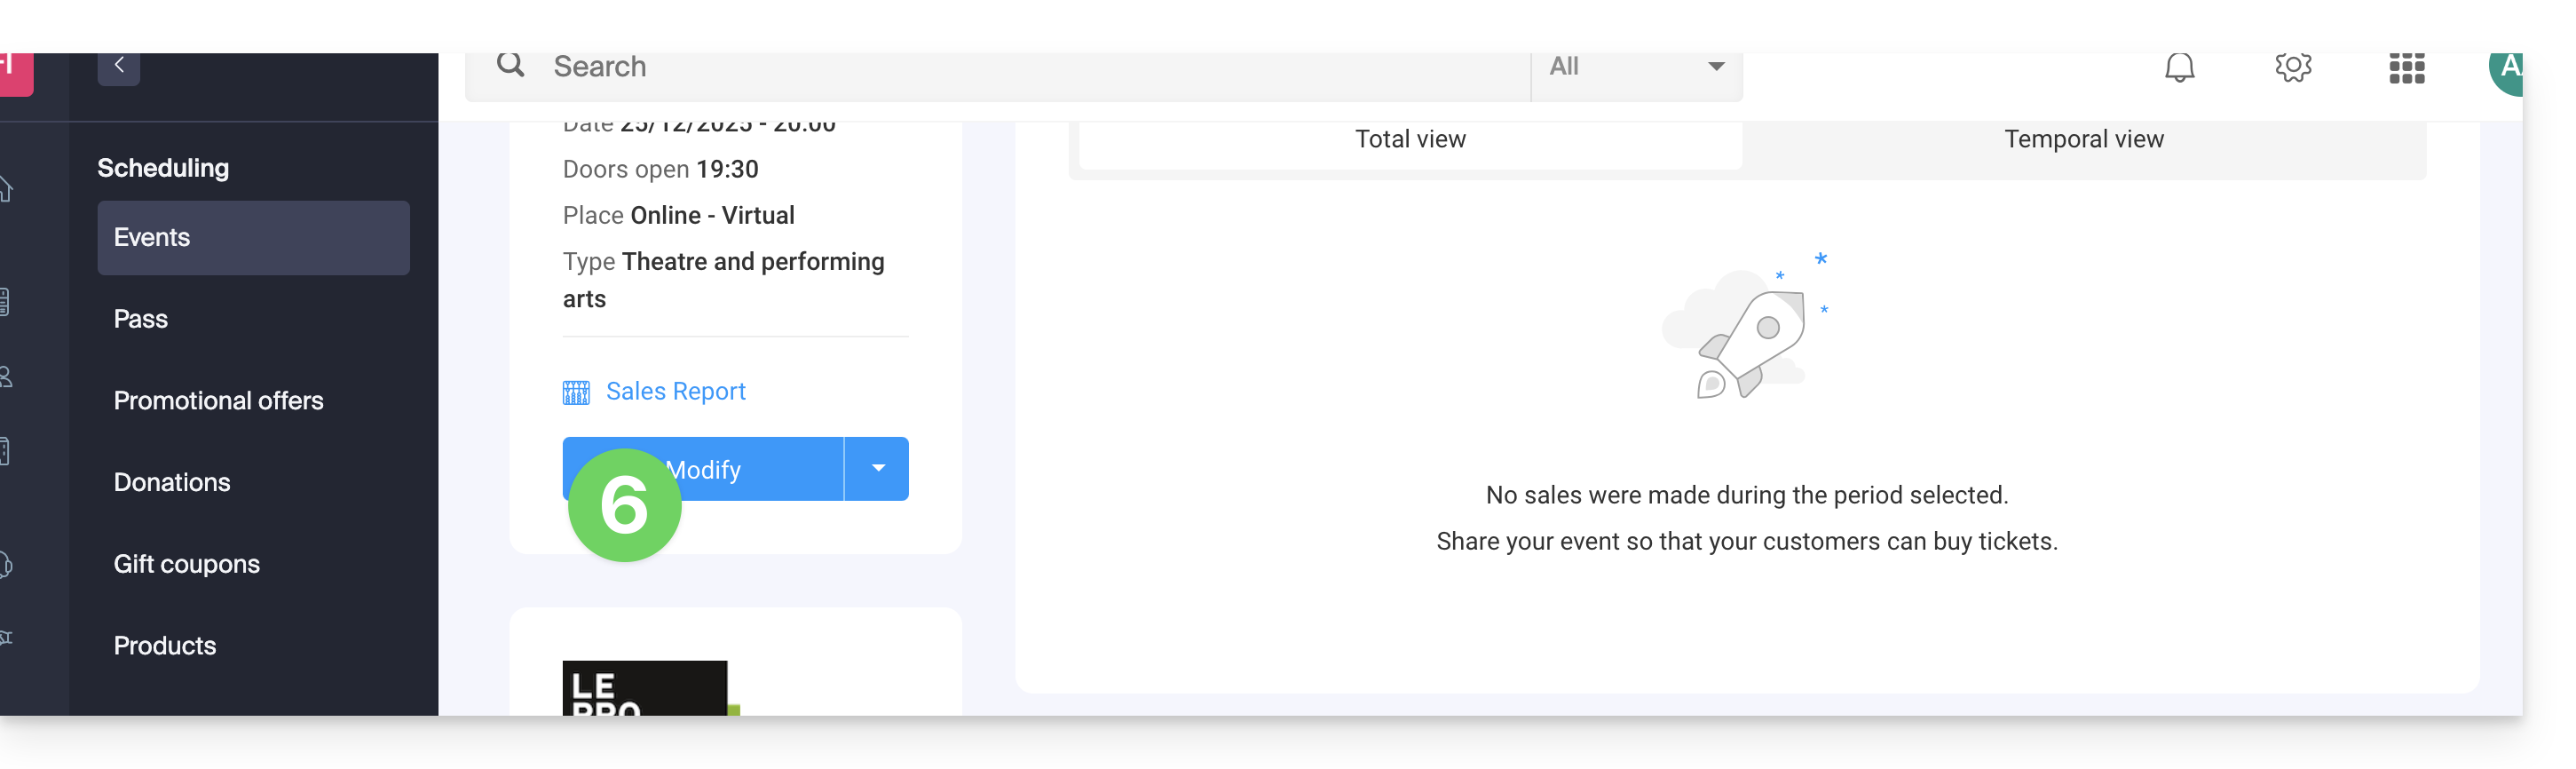
- Then click on the chevron to the right of the Modify button.
- Click on Add / modify a price:

- Choose to Add a price.
- Choose the Pay-what-you-want price.
- Specify the name and minimum prices in the desired currencies.
- Activate any advanced settings.
- Click on Next to proceed to the selection of dates and zones:

The display of the pricing varies depending on the type of event: for a multi-date event, it is managed via an action menu on the "Modify" button, while for a single-date event, it appears directly in the "Prices" tab at the top of the page.
This guide explains how to export customer and participant information for events (within the framework of the ticketing system Infomaniak).
Preamble
- Exports involve offering you a downloadable file in
CSVformat containing the collected information; in some cases, such as the one illustrated first below, the field separator type can be changed (e.g., semicolon). - For any information regarding the protection of personal data, refer to this other guide.
Retrieve customer information
Customers are the people who provided information by placing an order through your online ticketing system:
- Click here to access the management of your product on the Infomaniak Manager (need help?).
- Click directly on the name assigned to the ticketing related to the event.
- Click on Sales in the left sidebar.
- Click on Clients in the left sidebar.
- Click on Export customers

- Choose the criteria for the export:

Retrieve participant information
The information of the participants can be retrieved in two places:
- at the level of the form by rate: this allows you to retrieve an Excel file with all the participants' responses regardless of the date.
- For a specific event, date, or session: this will retrieve all forms used for the chosen event or date.
For a form
For this:
- Click here to access the management of your product on the Infomaniak Manager (need help?).
- Click directly on the name assigned to the ticketing related to the event.
- Click on Settings in the left sidebar.
- Click on Forms in the left sidebar.
- Select the form to export.
- Click on Export:

For a specific date
For this:
- Click here to access the management of your product on the Infomaniak Manager (need help?).
- Click directly on the name assigned to the ticketing related to the event.
- Click on Programming in the left sidebar.
- Click on Events in the left sidebar.
- Choose the event for which to export the information. In the case of a multi-date event, select the desired date.
- At the bottom of the page, click on the link Export ticketing form data to retrieve a file in
csvformat:
This guide explains how to duplicate an event from one ticketing system to another within the framework of the ticketing system Infomaniak.
Introduction
- The duplicated event will retain all the information and parameters of the event, except for the information related to the general parameters of the ticketing system and dates.
- Please carefully check all the information that requires manual updating.
- If necessary, refer to this other guide regarding the duplication (unique or recurring) of an event on the same ticketing system.
Duplicate an event
Prerequisites
To duplicate an event from one of your ticketing systems to another, you need to go to the ticketing system from which you want to duplicate the events, season or previous edition, for example:
- Click here to access the management of your product on the Infomaniak Manager (need help?).
- Click directly on the name assigned to the ticketing system where the event to be duplicated is located.
- Click on Scheduling in the left sidebar.
- Click on Events in the left sidebar.
- Click on the action menu ⋮ located to the right of the event to duplicate.
- Click on Duplicate:

- In the modal that opens, enable the option Duplicate to another ticketing system and select which one:

- If necessary, indicate the new name of the event, the new dates, and the other parameters of your event's performances.
- Click on Confirm to start duplication.
This guide explains how to put tickets from a pass up for resale (within the framework of the Infomaniak ticketing system).
Log in to the subscriber space
To do this:
- Use the link sent by the event organizer.
- Enter the email address and the code associated with the subscription to log in:

- Copy the code sent by email to validate access to the customer area:

- Enter the code received by email:

Put tickets up for resale
- Once logged in, in the quick actions column, click on Put tickets on sale:

- The overview screen displays the tickets available for sale.
- Check the event or events to put on sale:

- Choose how the refund will be processed. Depending on the options offered by the organizer, you will be able to choose from the following three options:
- Donate to the organizer
- Request a bank transfer
- Credit the amount to the subscription so that it can be reused for future purchases on the ticketing system

Management of tickets put up for sale
- The tickets put up for sale now appear on the overview screen:

- An email will inform you of the success or failure of the sale of a ticket.
- It will be possible to cancel the resale of a ticket at any time as long as it has not been resold.
The amount of the resale will depend on the price at which the ticket is resold. Only the event organizer can decide on the available refund methods.
This guide explains how to configure your IDP Smart51 badge printer for printing from the computer of your passes (as part of the ticketing system Infomaniak).
Printer Configuration
To this end:
- Access your computer's printer manager
- Select the IDP Smart 51 printer, then the option Printers and Scanners Preferences

- In the Resin Extract option choose Black Dots Only
- Paper size: CR80 Card (54x86mm)
- Orientation: Portrait
- AJUSTER: print all image


- It is possible to save these settings in order to keep them in memory
Read more
- Start Guide : Ticket
- Printing passes from a computer
- Installation and use of badge printers for passes
- Change the printer ribbon
- Printing passes from a tablet
This guide explains how to set up and use the 4G terminal to connect your sales pack or scanners linked to the Infomaniak ticketing system.
Preamble
- The 4G terminal functions as an access point for your on-site sales machines and scanners.
- It connects to a mobile phone network and creates a network to which tablets, printers, and scanners will connect.
- There is no need to use the RJ45 Ethernet connection to use the 4G terminal.
Setting up the 4G terminal
Prerequisites
- Have sufficient mobile network coverage for the 4G terminal to function.
Watch the video guide:
Operating the terminal
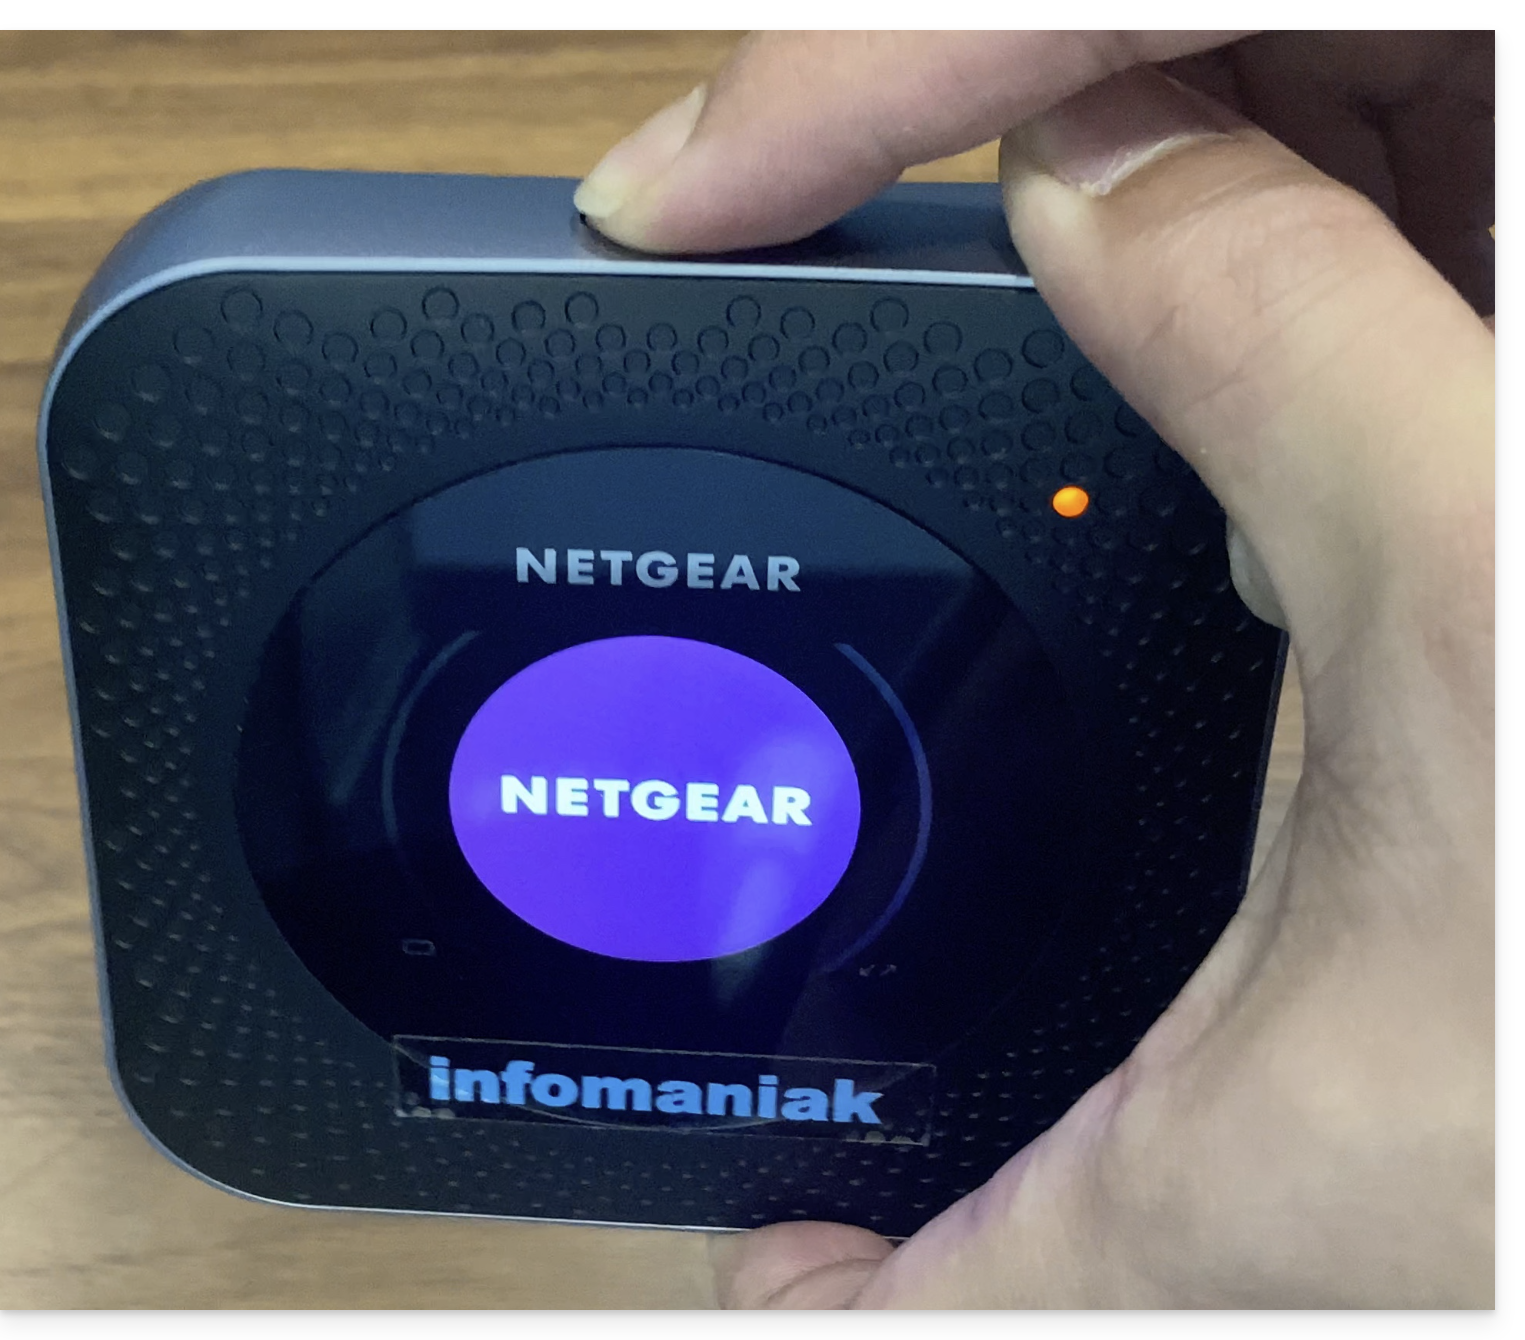
- Press the button on top of the machine for approximately 4 seconds:
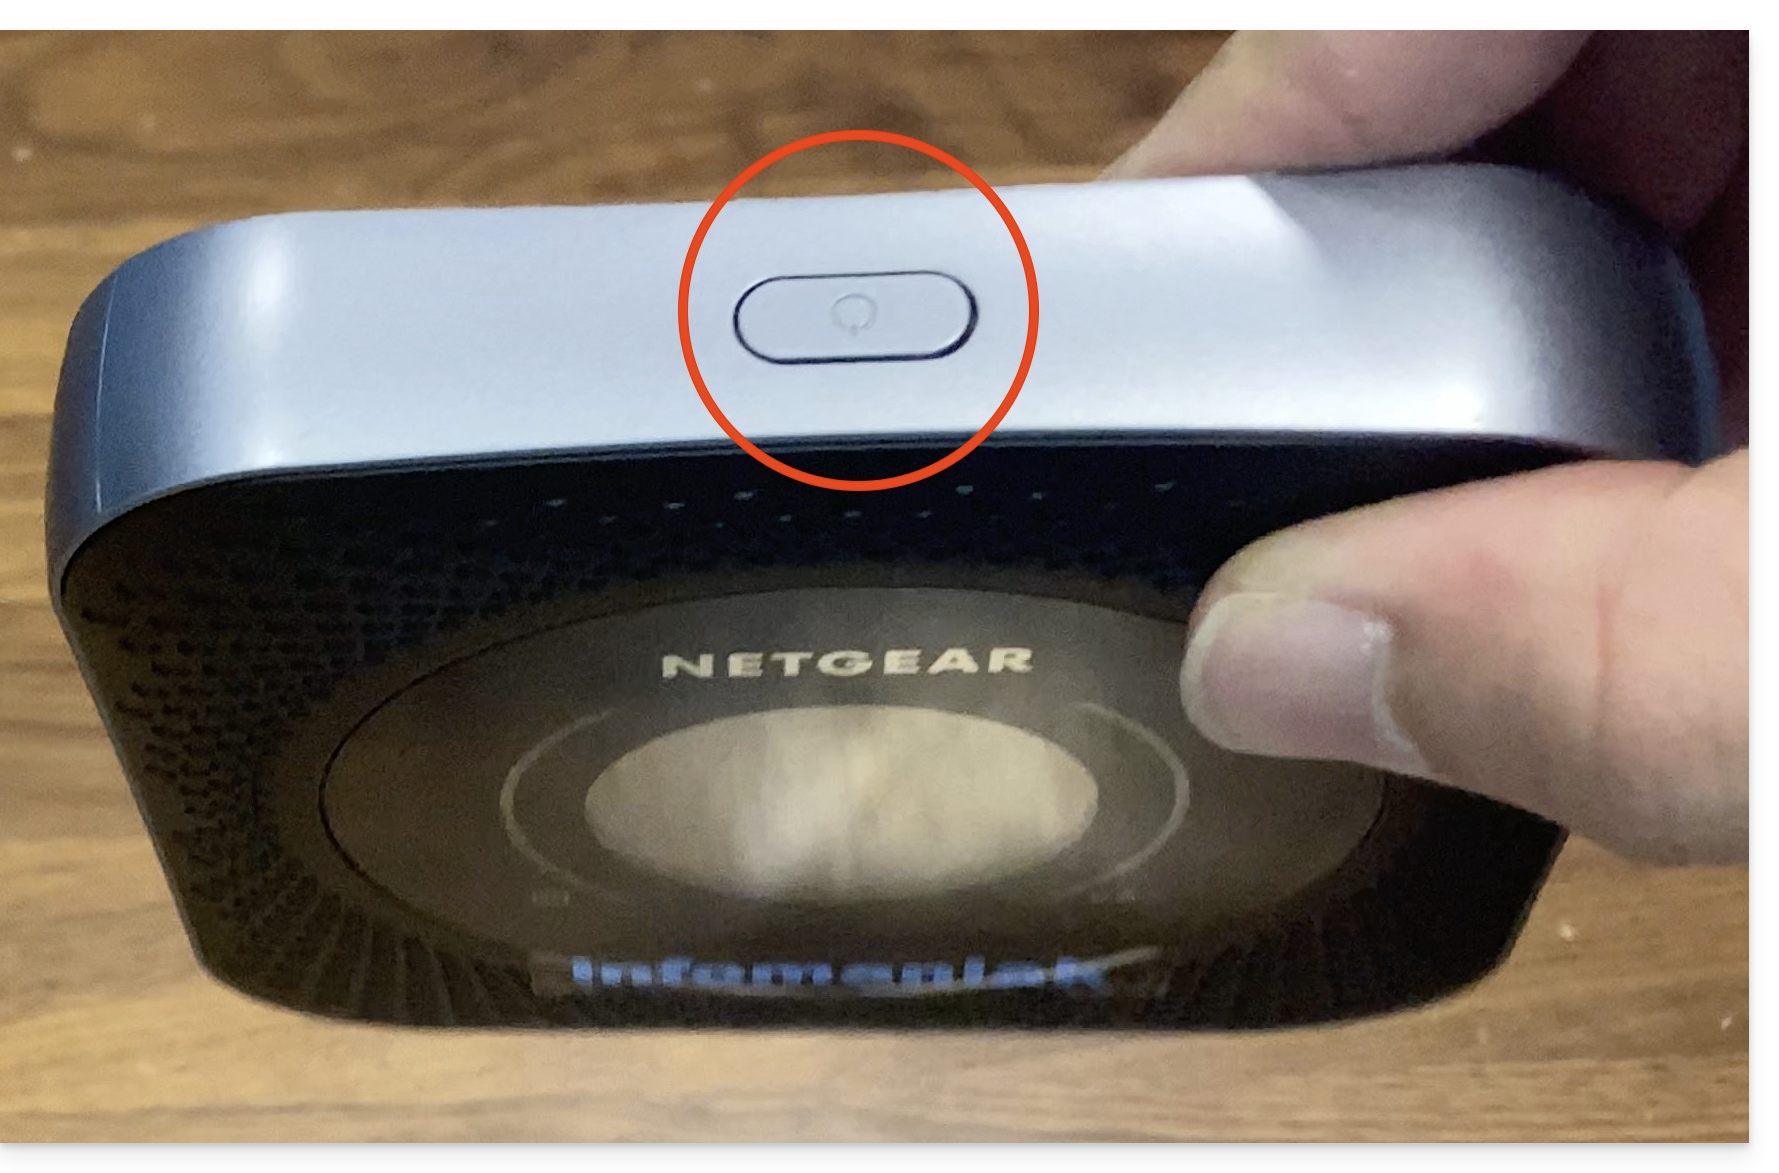
- The screen will light up:
- The terminal automatically connects to the Swisscom network and is ready for use:
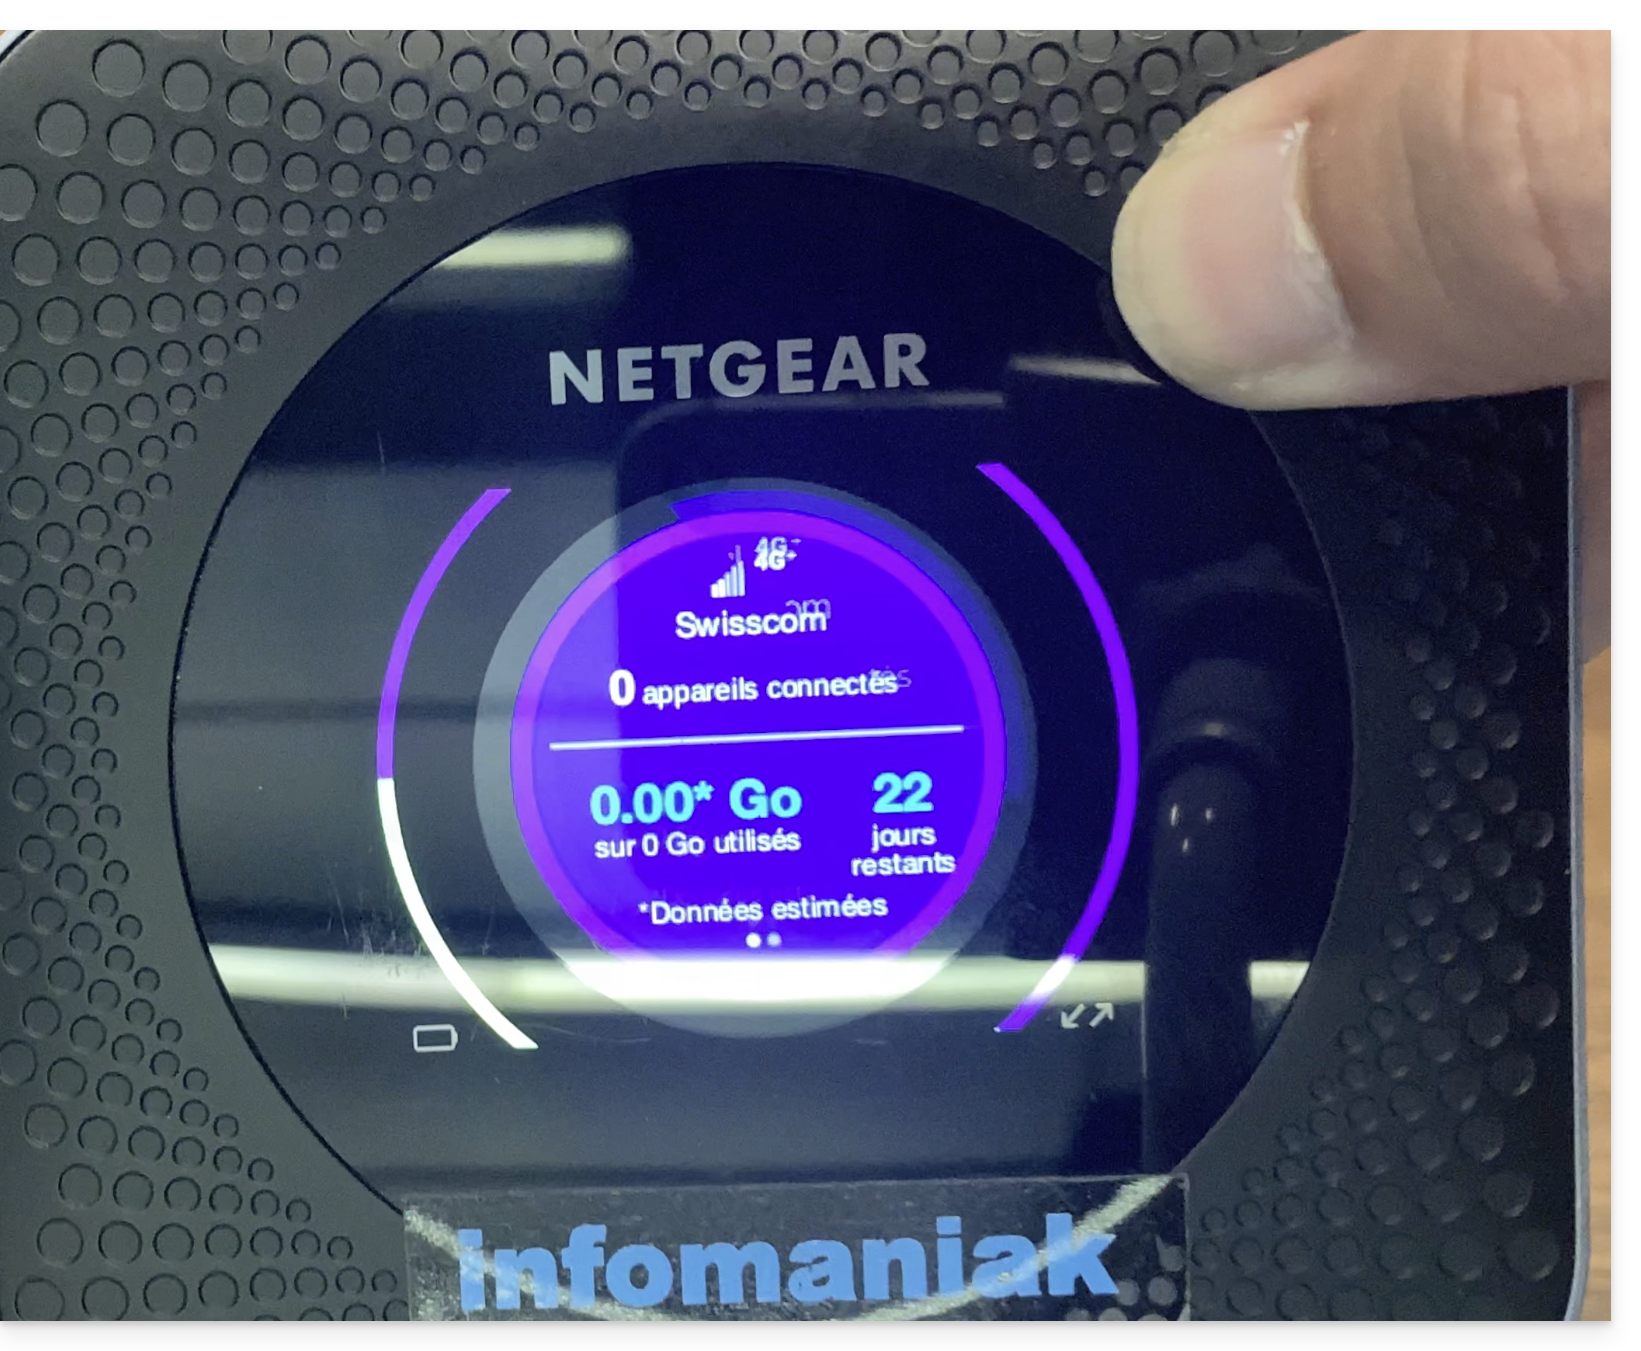
- It is possible to check the number of devices connected to the terminal with a simple press of the button.
- The number of days remaining is a countdown at the end of the month and has no consequence on the use of the terminal…
- Once the terminal is turned on and connected to the 4G network, the terminal will create a network named Infomaniak.
- Infomaniak printers, tablets, and scanners will automatically connect to this network.
This guide explains how to install IDP PVC badge printers for printing tickets for your ticketing system.
Badge printers are designed to work with the mobile kiosk on the tablet as well as the web kiosk on your computer. It can be connected to the network or used directly by connecting a USB cable.
What do you want to do
Video Guide
Learn more
This guide explains how to use the mobile ticket office on a tablet to sell tickets for your events (as part of the Infomaniak ticketing system).
1. The mobile ticket office and on-site sales
Infomaniak provides a free mobile application on Android as well as a rental service for the equipment needed for on-site sales.
The mobile ticket office allows you to create an order, manage the payment method used, and print the generated tickets.

Navigating the mobile ticket office
Once the tablet is turned on, log in with your Infomaniak account username and password.
You will be prompted to select the customer account, ticket office, and currency to use:
You can then navigate between the different menus using the tabs at the top of the screen.
The first three allow you to add items to the cart.
Once the orders are validated, they will be added to the order list.
Finally, the last tab allows you to export the cash register report from the ticket office:
- Event: for selling tickets for your events
- Pass: for selling passes
- Gift vouchers: for selling gift vouchers
- Cart: items added to the cart. You can add articles or modify the content at any time. This is where you can choose the payment method to validate the order
- Orders: a list of all orders with the possibility to print tickets. Useful for finding reservations or retrieving past orders.
- The sales report: to view and send the sales report by email

Next steps
- Adding items to the cart on the mobile ticket office
- Manage and validate the mobile kiosk cart
- Print tickets and manage orders from the mobile kiosk
This guide explains how to set up the questions asked of visitors when ordering a pass/subscription (as part of the Infomaniak ticketing system).
Preamble
- This information will be linked to the passes and is therefore independent of the form linked to the order.
- These settings will be available once the pass has been created.
- For an overview of the pass and everything it can do, refer to this other guide.
Set up information related to passes
To do this:
- Click here to access the management of your product on the Infomaniak Manager (need help?).
- Click directly on the name assigned to the ticketing concerned by the event.
- Click on Programming in the left sidebar menu.
- Click on Pass in the left sidebar menu.
- Click on the name of the pass concerned.
- Click on the Settings tab:

- Activate the desired options:
- Title: dropdown menu giving the choice between Mr. and Mrs.
- Last name: text field to indicate the last name
- First name: text field to indicate the first name
- Organizer, Company: text field to indicate the company
- Email: text field to indicate the email address
- Address: 5 text fields including the number and street, city and country
- Postal code: add a field between the number and street for the postal code
- Mobile phone: field for the phone number
- Date of birth: add a calendar to indicate the date of birth
- Photo: allows you to upload a photo that can be displayed on the pass
- Free field: text field for free information
This guide explains how to install the driver for the badge printer (as part of the Infomaniak ticketing system) and print from a computer using the USB cable.
Prerequisite: driver installation
The installation of drivers is only necessary when using the web ticket office for printing passes. Using the mobile ticket office from the tablet is Plug&Play:
- Turn on and connect the printer to the computer with the USB cable.
- Go to the download site: The IDP corps web site Support and Download tab.
- Select Product: SMART-51 Series and Product model: SMART-51S…
- For Mac and Linux, click on EXPAND ALL + to choose the correct version of your operating system:

- For Mac and Linux, click on EXPAND ALL + to choose the correct version of your operating system:
Printer settings
For optimal use of the printer, it is recommended to configure the printer before using it.
Printing passes from a computer
Once the printer driver is installed:
- Connect the printer to the computer.
- Open the front of the printer and insert the badges with the side to be printed facing up:

- On the computer, go to the Ticket Office.
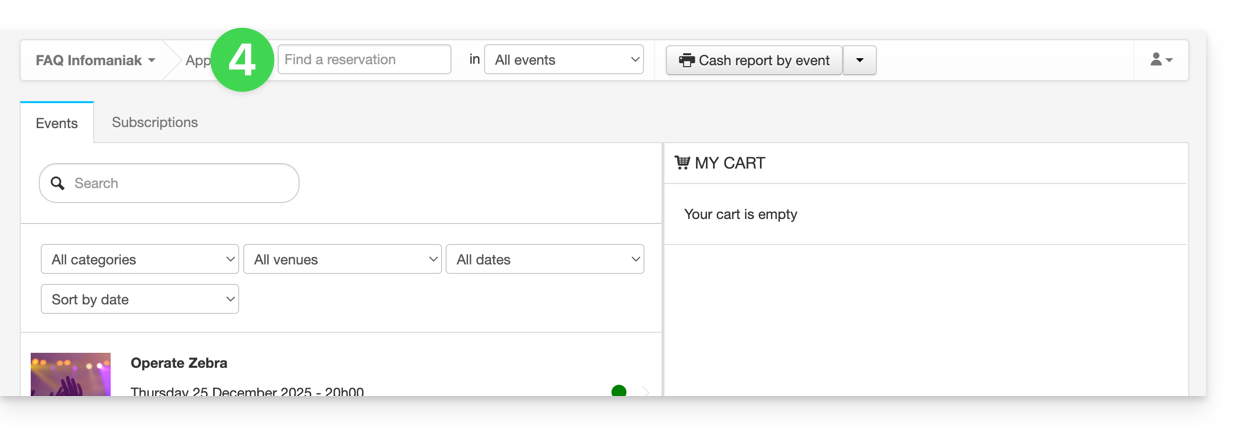
- Search for an order with a pass. You can click on Find a booking at the top of the ticket office for a quick search:

- In the pass section of the window that opens, click on Print passes to generate the PDF:
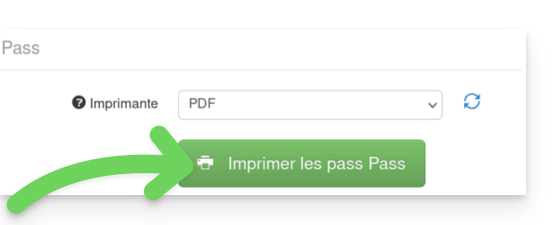
- From the generated PDF, start printing by selecting the Smart 51S printer.
This guide explains how to manage orders and print tickets from the mobile ticket office (as part of the ticketing system Infomaniak).
Preamble
- For an overview of the mobile ticket office, refer to this other guide.
4. Printing orders
To do this:
- Select the order to print.
- If you are in the sales process and have just validated an order, it will be selected by default when you reach this step.
- Click on the desired printer to print the ticket(s):

- In the case of a pass, the mobile ticket office will indicate the available badge printers:

Print a receipt with the ticket
You can print a receipt for the order by activating the option on the right of the prints. The receipt will be printed at the end of the tickets:
Search for an order and filter the order list
It is possible to filter the list of orders or perform a specific search. The search field allows you to use all information related to the order, such as the name, email address, order number, etc.
You can also filter orders by event date.

Manage orders
Each order has options allowing you to manage it more precisely:
- Add or modify the order's client:

- Send by email the invoice, the tickets or the confirmation email, or print the receipt:

- Manage tickets individually, either to print a selection of tickets, or, for reservations, split the reservation:

- If the order contains passes, access the pass options:

- If the order contains gift certificates, display them and copy the code to the clipboard:

Next steps
- Send the cash report (Coming Soon)
- The mobile ticket office settings (Coming Soon)
This feature allows subscribers who cannot attend one or more events during the season to sell the relevant tickets (included in their subscription) directly on the ticket office (within the framework of the Infomaniak ticketing system).
Preamble

- When a subscription holder cannot attend an event, they can put tickets up for resale from their pass menu.
- The resale of pass tickets only works for passes with numbered fixed seats.
- The areas concerned by the resale of pass tickets must have public rates (and not just pass rates).
- This ticket will be put back on sale on your ticket office and can be purchased by a new person following the normal ticket sales procedure.
- The proceeds from resales can be, at the choice of the ticket holder:
- refunded, fully or partially, to the owner-seller of the pass ticket
- credited, fully or partially, to the account of the owner-seller's pass
- converted into a donation for an association designated by the organizer
The refunds of resales to the subscription holder are the responsibility of the organizer.
Creation of the pass ticket resale campaign
Prerequisites
Then:
- Click here to access the management of your product on the Infomaniak Manager (need help?).
- Click directly on the name assigned to the ticket office concerned by the event.
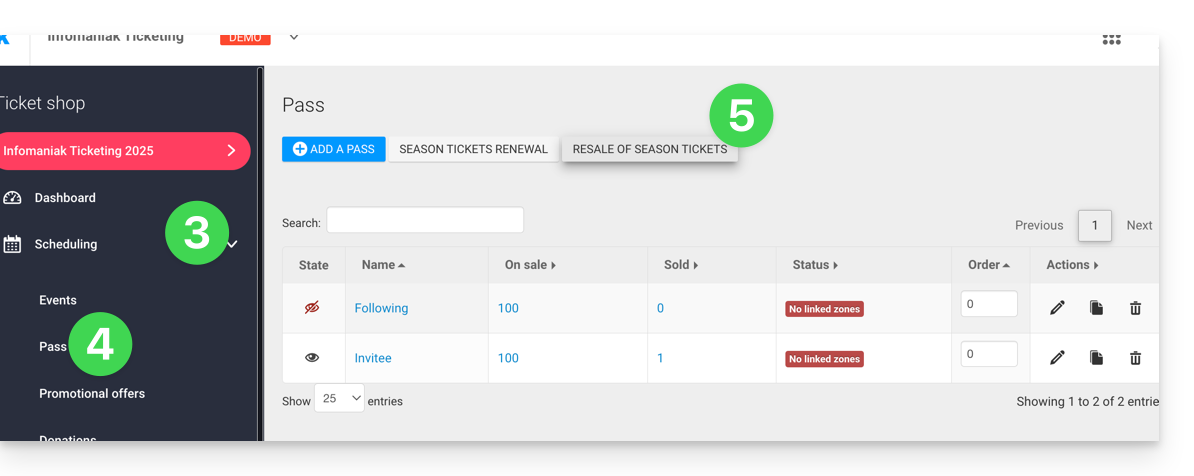
- Click on Programming in the left sidebar menu.
- Click on Pass in the left sidebar menu.
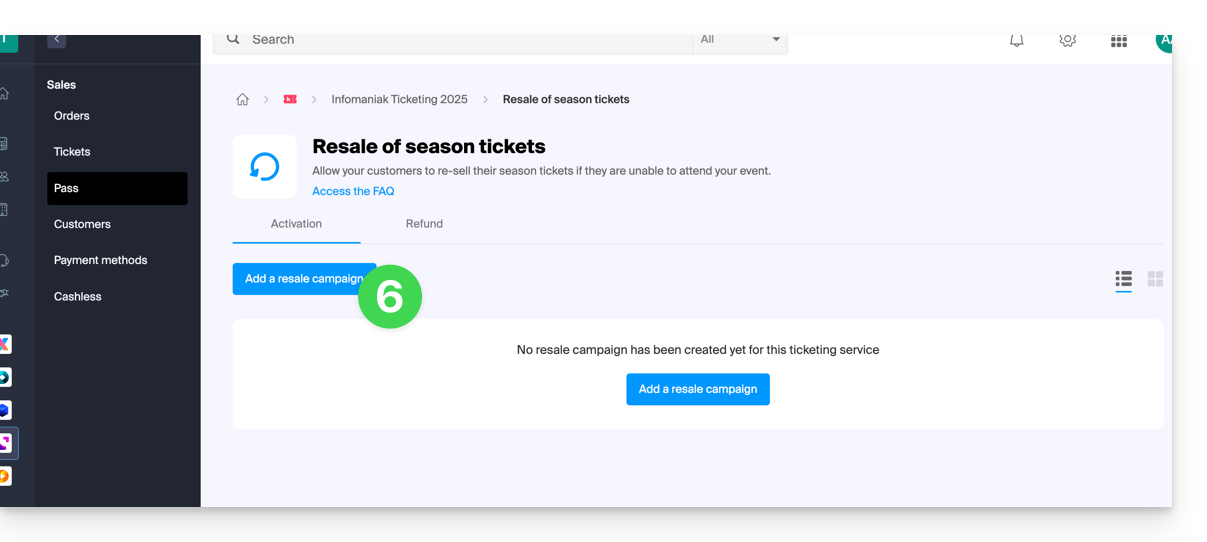
- Click on Subscription ticket resale:
- Click on Add a resale campaign:
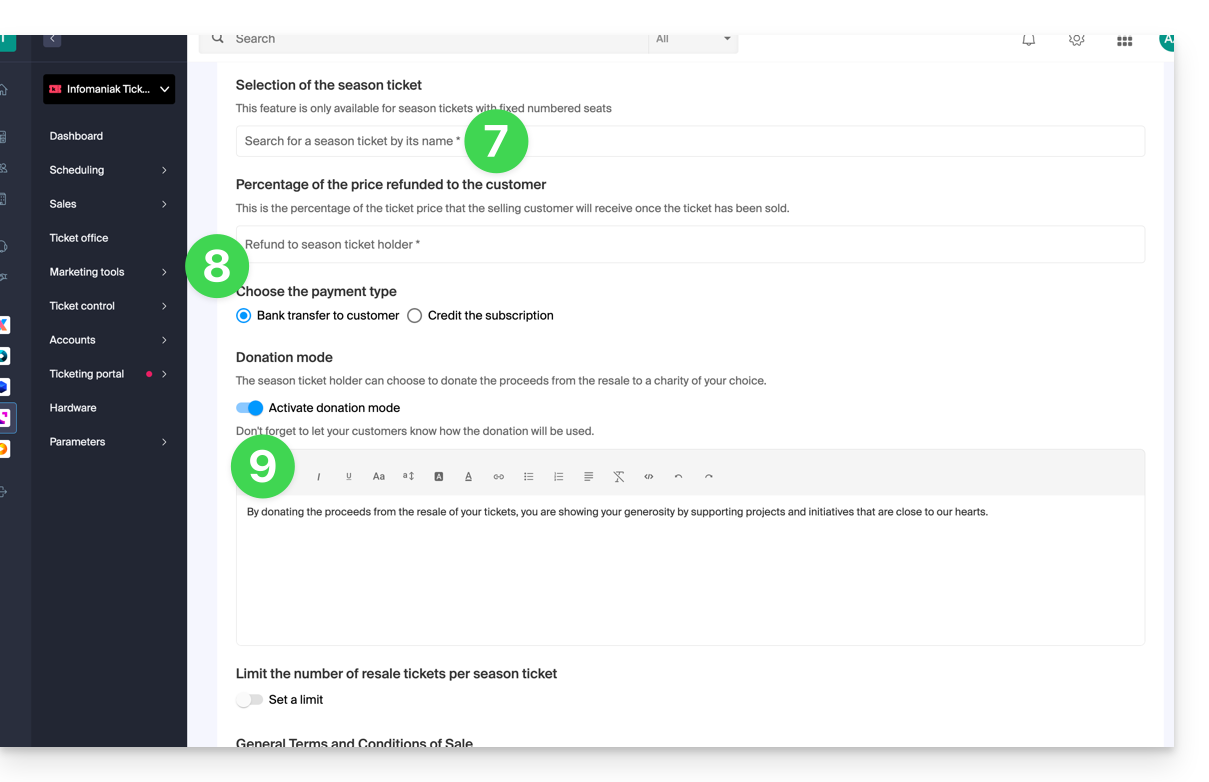
- Choose the pass for which to activate resales.
- Define the percentage of the resale price that will go to the subscription holder as well as the refund method:
- Bank transfer: the subscription holder will be invited to provide their bank details.
- Credit on the subscriber's pass to be reused for future purchases on the ticket office or for pass renewal.
- Define whether the subscriber can donate the amount to the organizer:
Procedure to be followed by the subscriber wishing to resell tickets
For customers wishing to resell their pass tickets, they will need to be provided with the link allowing them to access the resale page.
To do this, please generate the link to the desired ticket office, and add /pass-area at the end. Here is an example:
https://infomaniak.events/shop/abcABC4242I/pass-area
The subscriber can then follow this guide for managing their resales.
Tracking of ticket resales
The status of resales is viewable at any time from the Refund tab: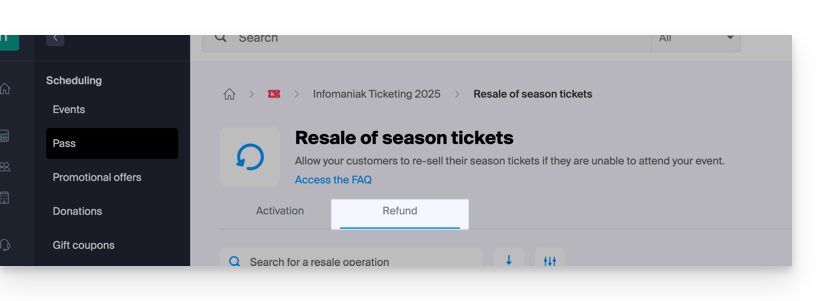
In the case of a bank refund, the bank details are available directly in the action menu ⋮ located to the right of the concerned item:

This guide explains how to configure the appearance of your pass (within the Infomaniak ticketing system).
For an overview of the pass and everything it can do, refer to this other guide.
Access the pass menu
To do this:
- Log in to your Infomaniak space
- Go to the
Ticketing
- From the left menu, under Programming, click on Pass
- Click on an existing pass
If you do not yet have a pass, refer to this other guide.
Set the visual appearance of the pass in PVC card R80 format
It is possible to set the color of the information appearing on the pass and the background image:
To change the background image, click on select a file and once the image is chosen, click on Save:
Appearance of the pass ticket
If the medium chosen for the pass is in ticket format, you can define a template for printing. You will need to create a ticket visual and save a template beforehand.
You can then simply choose the template you want:
Learn more
This guide explains how to use your bank's CAMT files to automatically validate orders paid by invoice (as part of the Infomaniak ticketing system).
Preamble
- If customers decide to pay an order by invoice, they receive an invoice directly with your banking information.
- You must therefore check if the payment has been received and manually validate the customer's order.
- The following procedure allows you to automate a large part of this procedure, and you can thus simply validate the orders in a few clicks.
Import the CAMT file
Prerequisites
- Make sure you have indicated a QR-IBAN to generate QR Invoices.
- CAMT imports require that the bank records the information related to the order, and this information is only present if the customer uses the QR-Invoice when paying the invoice.
- Please contact your bank to find out how you can retrieve a CAMT file (example of documentation).
Next:
- Click here to access the management of your product on the Infomaniak Manager (need help?).
- Click directly on the name assigned to the ticketing concerned by the event.
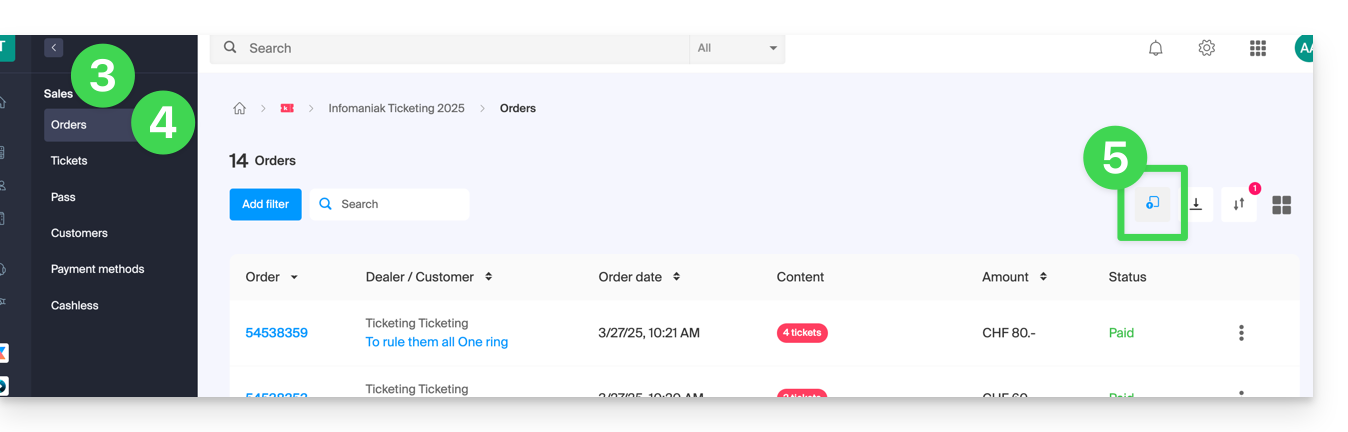
- Click on Sales in the left sidebar menu.
- Click on Orders in the left sidebar menu.
- Click on the top right button:
- Import the CAMT file:

- Select the orders to validate:
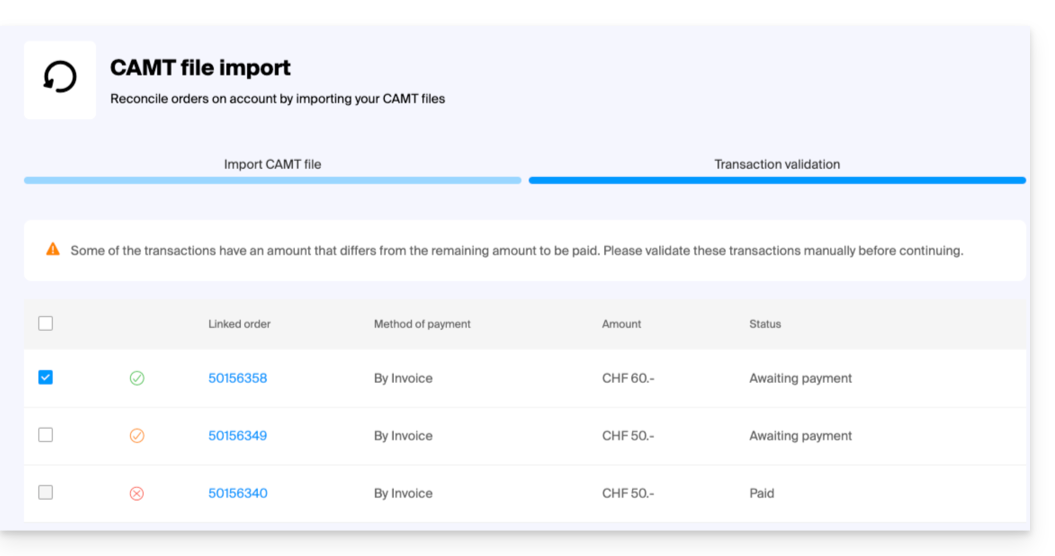
- The orders for which the payment corresponds to the amount of the invoice will be automatically selected.
- Orders with a partial payment can be manually validated, but will be recorded as complete on the ticketing.
- Once the orders to validate are selected, click on Validate the selected transactions.
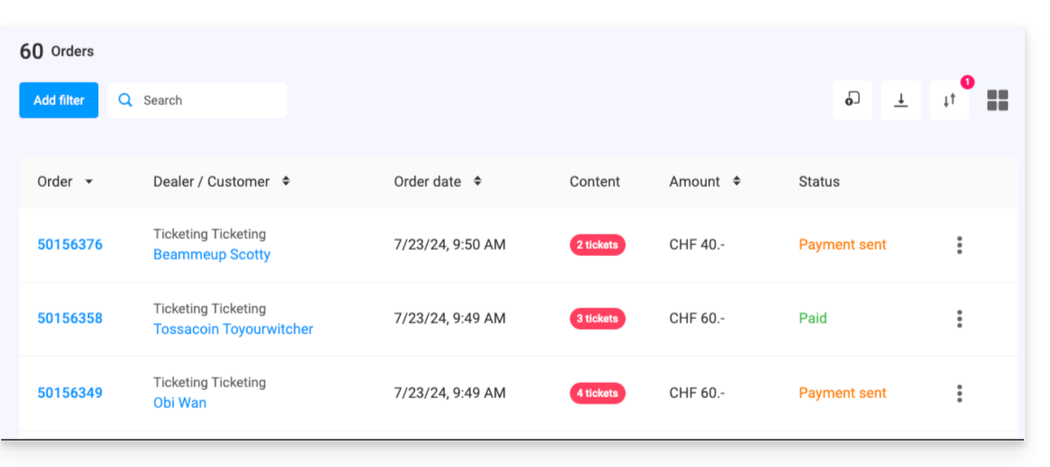
- The orders are automatically set to validated:
This guide explains how to modify the display of your events (within the framework of the Infomaniak ticketing system).
Access the options to configure the display
To do this:
- Click here to access the management of your product on the Infomaniak Manager (need help?).
- Click directly on the name assigned to the ticketing concerned by the event.
- Click on Programming in the left sidebar menu.
- Click on Events in the left sidebar menu.
- Click on the name of the event concerned:
- Click on the Edit button:
Choose a multi-date event display mode
To do this:
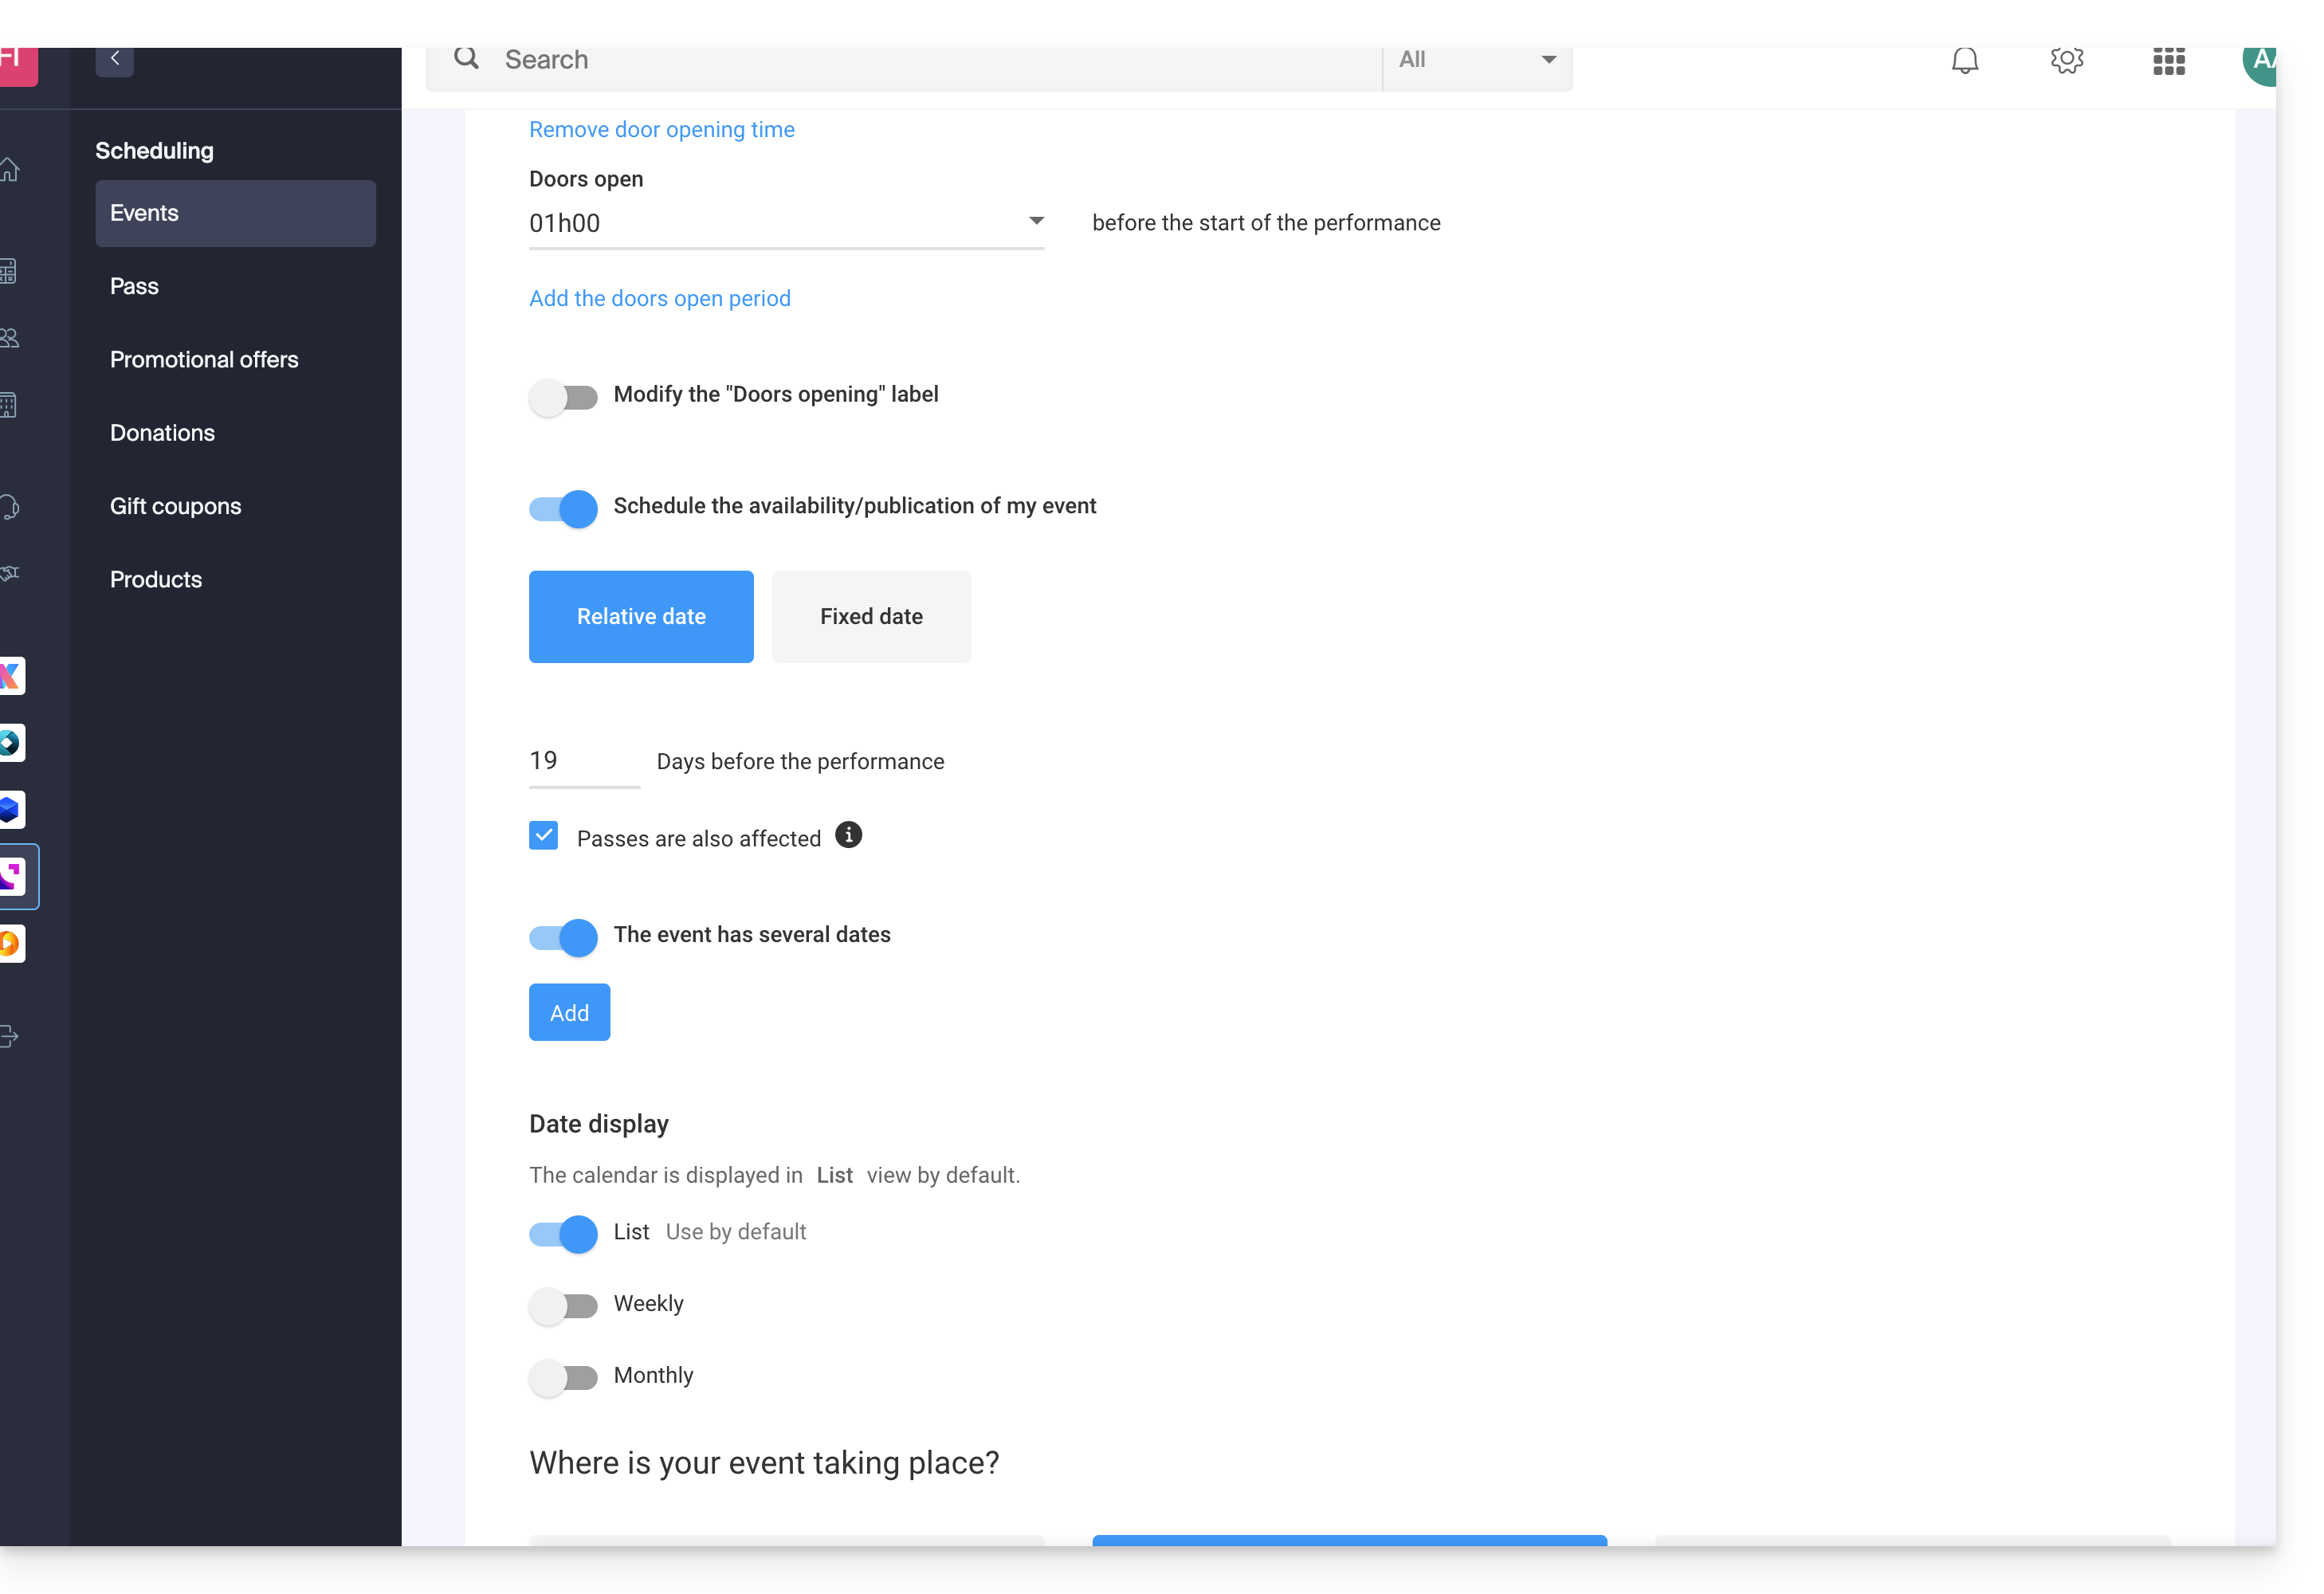
- Add new possible dates...
- Choose the methods for displaying these dates on the calendar; these modes will be available on the online ticketing and will allow your customers to switch between the different display modes they prefer (see below)...
- Choose which display mode will be used by default...
The different available displays
The list display
The list display is practical if the dates are spaced out over time with empty periods (weekly, or monthly for example) and/or if the ticketing needs to be able to offer several dates or sessions, without these being indicated on a calendar.
The monthly calendar
The monthly calendar allows you to place events on a monthly calendar. It is an effective display, but can be very busy if there are many sessions per day.
The weekly calendar
Very useful if you want to display the dates week by week, especially if there are several performances per day, or in the case where the event only lasts for a short period, and you want to display the days of the week.
This guide explains how to easily assign a customer to a pass when the latter has an address entered (within the framework of the Infomaniak ticketing system).
Prerequisites
- The customer record must exist with an associated email address.
- The pass must have an email address entered so that this feature can suggest customers to link.
- You must therefore make the option visible or mandatory in the pass configuration:

- You must therefore make the option visible or mandatory in the pass configuration:
Place the order by entering the email address
When adding passes to the cart, or once they are in the cart, please enter an email address. Multiple passes, each with their own email address, can be in the cart:
Only one customer can be linked to an order.

Once the pass is validated, on the Customer tab, an additional field will offer you the choice of customers to link to the order:
This guide shows you an example of a pass configured as a subscription where all events are included upon purchase (within the framework of the Infomaniak ticketing system).
Preamble
- For an overview of the pass and everything it can do, refer to this other guide.
The ticket pack
The example below allows you to have a pass that acts as a pack of multiple tickets. Typical uses of this type of pass would include:
- A pass with entries for 2, 3, or 4 evenings of a multi-day festival.
- A pass with different activities, such as a "museum entry with meal" pack where the entry and the meal are two individual and distinct events.
- A ticket pack including entry to multiple venues on the same day.
Pass creation
The pass is configured as a ticket so that participants can print each ticket individually: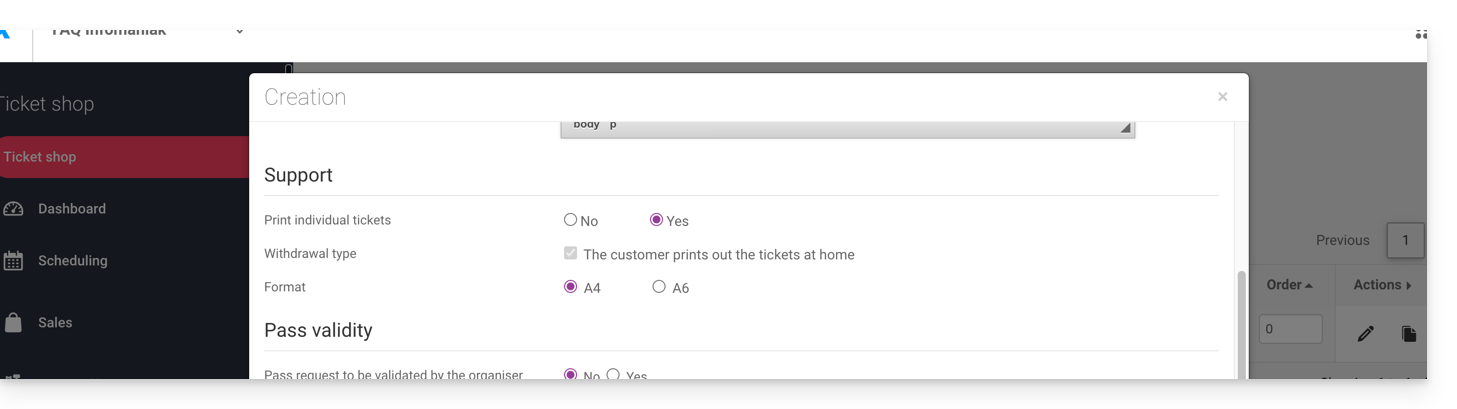
After filling in the information, such as the pass name, price, or quantity of passes available, you need to set the pass to Automatic: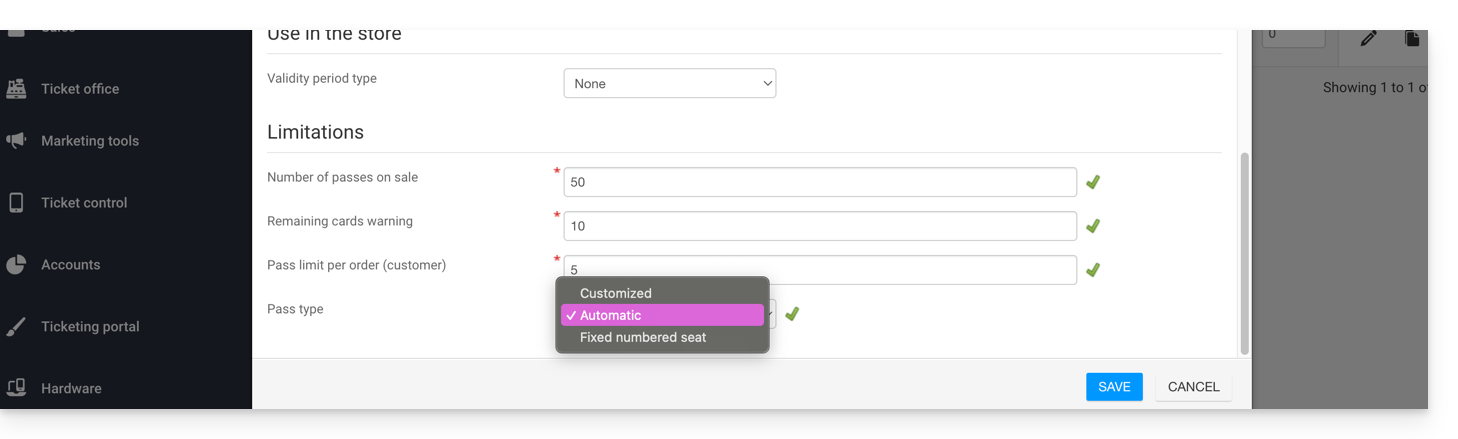
Event association
Events are associated with the pass, with a limit of one ticket per event and no additional cost:
This pass includes a ticket for event 1 and a ticket for event 2:

Pass visual
This pass will never be printed, as only the individual tickets linked to the events will be printed. Therefore, there is no need to configure the pass visual. The customer who purchases this pass will receive a ticket for event 1 and a ticket for event 2, so you will need to define the visual of these tickets.
Information requested
This pass is not nominative, but for easier identification, the option to provide the first and last name is available:
This guide explains how to split bookings with multiple tickets (within the Infomaniak ticketing system).
This allows you to validate part of a booking, in case the booking could include multiple tickets, but only part of it needs to be validated at the counter.
Prerequisites
- This operation requires that an order is currently set to pay on site.
- For more information about this payment method and how to activate it, refer to this other guide.
Split from the web counter
To do this:
- Click here to access the management of your product on the Infomaniak Manager (need help?).
- Click directly on the name assigned to the ticketing for the event in question.
- Click on Counter in the left sidebar:
- Find the booking from the search field at the top of the page; you can find the order using the order number or any other element related to the order:
- The booking appears in the right column; if it is a booking, you can click on the arrow to the right of the Validate button and Split the booking:

- The next screen allows you to choose the tickets to validate:

- Now, proceed to order the tickets to validate. You will notice that this has created a new order, and that the old order only contains the tickets not selected during the split:

Split from the sales tablet
The procedure for splitting an order on a tablet is similar to the procedure on the web counter:
- Log in to your Infomaniak account.
- Click on the Orders tab and find the order to split.
- Click on the Tickets tab of the order:

- Select the tickets to validate and click on Separate:

- Continue the order to validate it:

- The new order appears as validated, and the initial order shows the remaining tickets:

This guide explains how to set up a pass or subscription validation system (as part of the Infomaniak ticketing system).
Preamble
- This option allows you to create passes for which visitors must register, which you can validate before they can be used.
- This feature will be useful for any restricted access or validation of a request that must be done by the organizer.
- This can include accreditation requests, registrations for specialized courses requiring verification of certain documents, access to certain areas or events, etc.
- This can include accreditation requests, registrations for specialized courses requiring verification of certain documents, access to certain areas or events, etc.
Setting up the pass to be validated
To do this:
- Click here to access the management of your product on the Infomaniak Manager (need help?).
- Click directly on the name assigned to the ticketing concerned by the event.
- Click on Programming in the left sidebar menu.
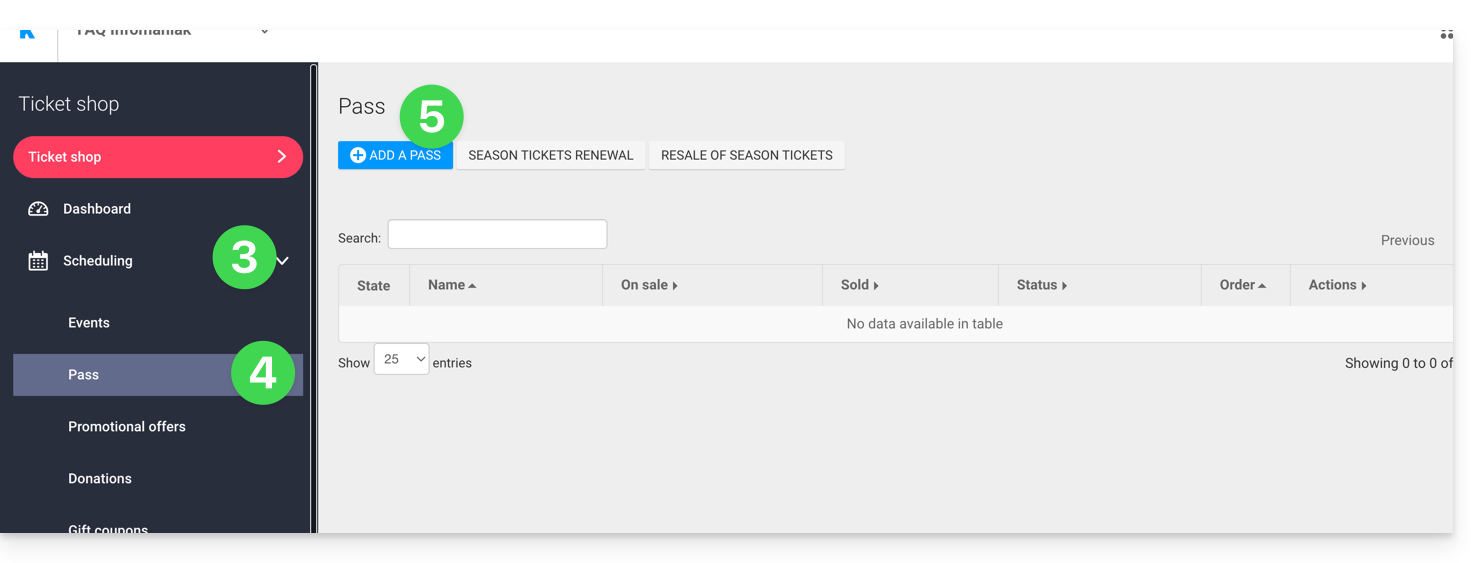
- Click on Pass in the left sidebar menu.
- Click on Add a pass:
- During the pass creation procedure, activate the Pass validity by setting Yes:
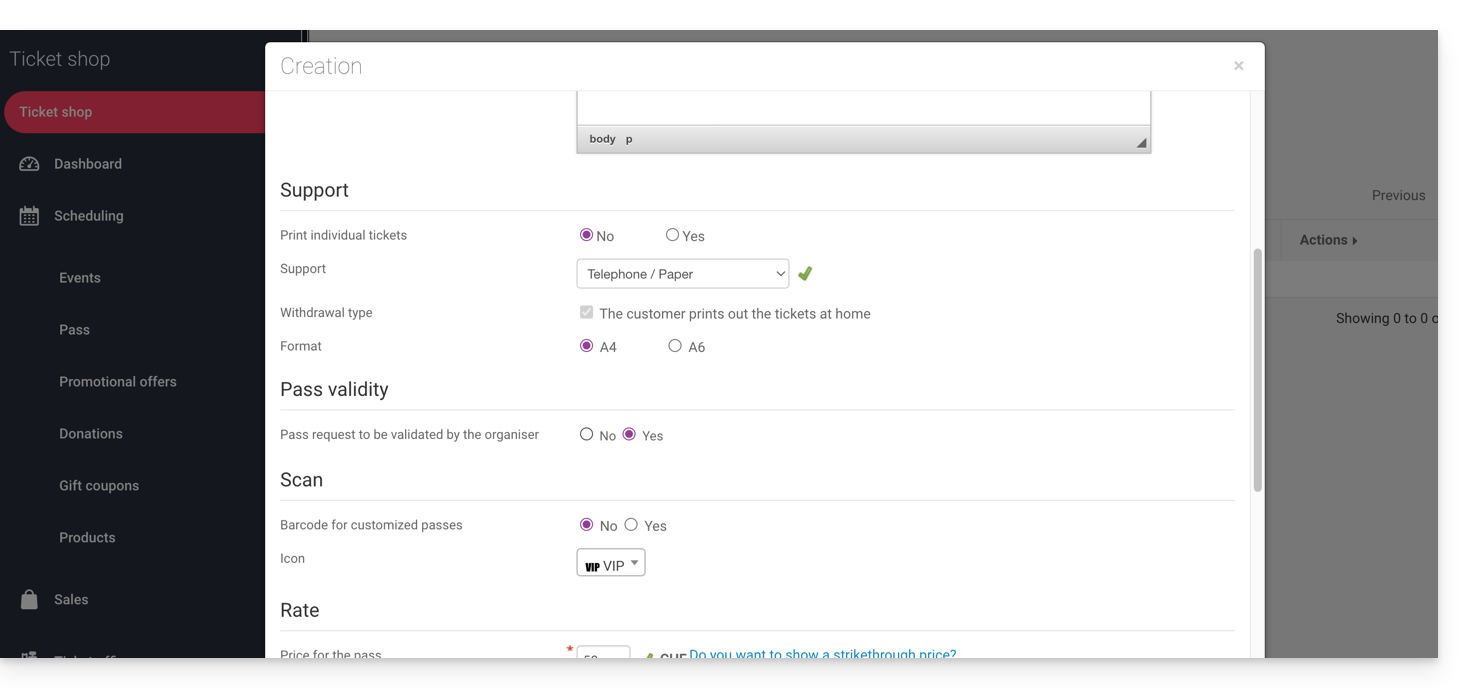
- This action will automatically set the necessary options for this feature, i.e. a free custom pass with a minimum of 0 tickets.
Once the pass is created, click on it to set the information requested from the visitor: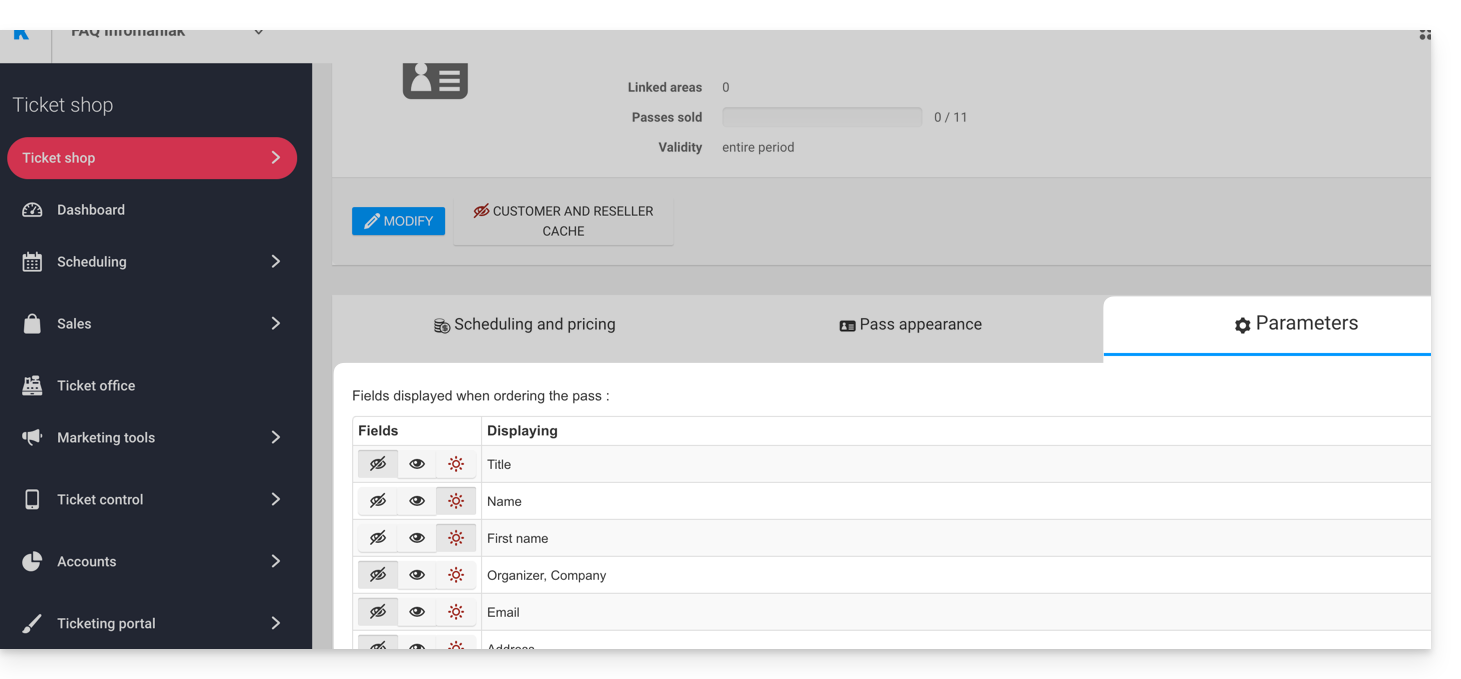
It is possible to make each field hidden , visible
, or mandatory
...
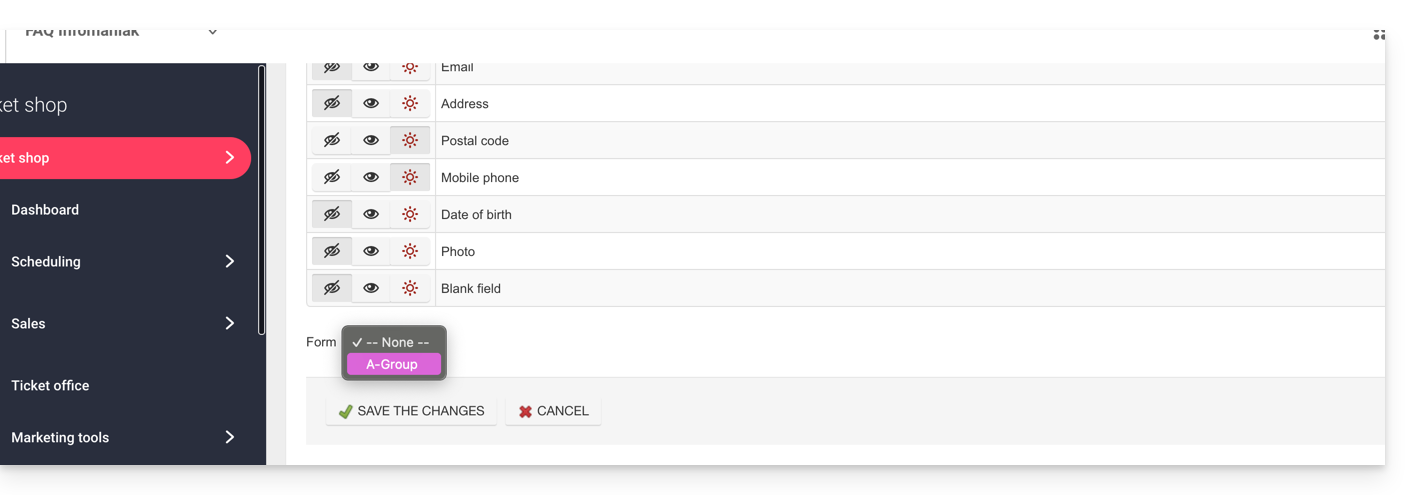
If more information or supporting documents are required, they can be added using the form function:
- Create a form per rate with the information requested from the visitor.
- Associate the form per rate with the pass:
Procedure for requesting a pass to be validated
The visitor will be able to order the pass like any other ordering procedure. Note a few differences:
- The terms used during the online procedure will mention validation requests instead of order.
- The visitor will receive a first e-mail confirming that their request has been taken into account and that they will receive news when their request is validated.
- The visitor will receive the pass in a confirmation e-mail when the pass is validated.
Procedure for validating a request
To validate a visitor's pass validation request, you will need to go to the list of passes:
- Click here to access the management of your product on the Infomaniak Manager (need help?).
- Click directly on the name assigned to the ticketing concerned by the event.
- Click on Sales in the left sidebar menu.
- Click on Pass in the left sidebar menu.
If necessary, use the filter to display only the passes to be validated and choose the desired pass category:
Verification before validation
Click on the passes to verify. All information is on the pass page.
If additional fields have been added via a form, they will be in the Modify information section: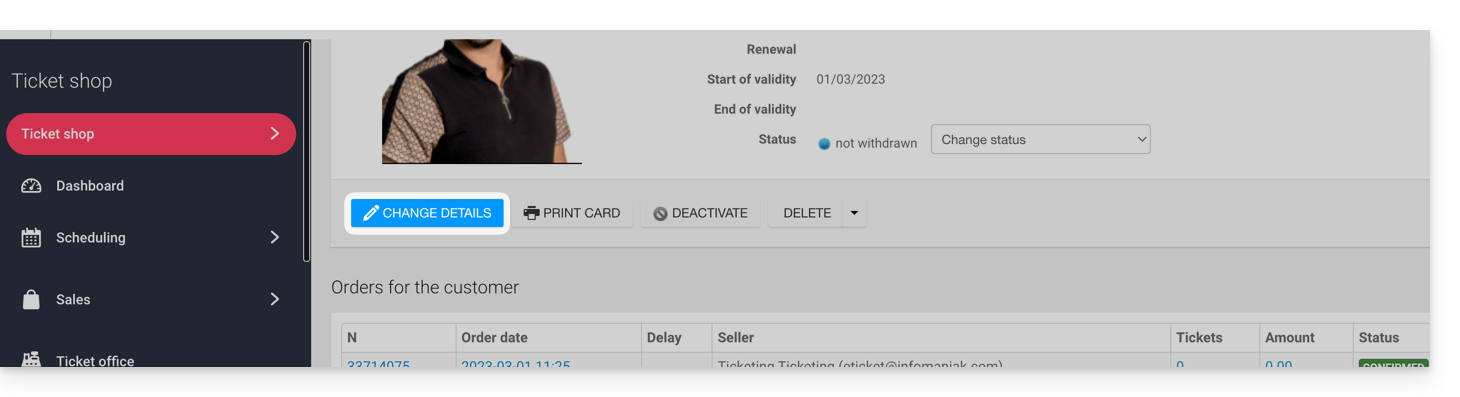
Example with files that the user has uploaded: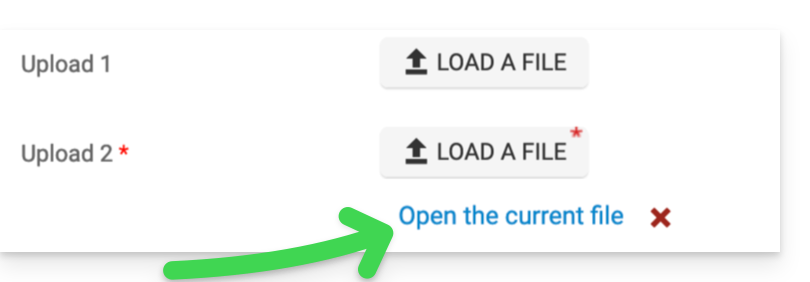
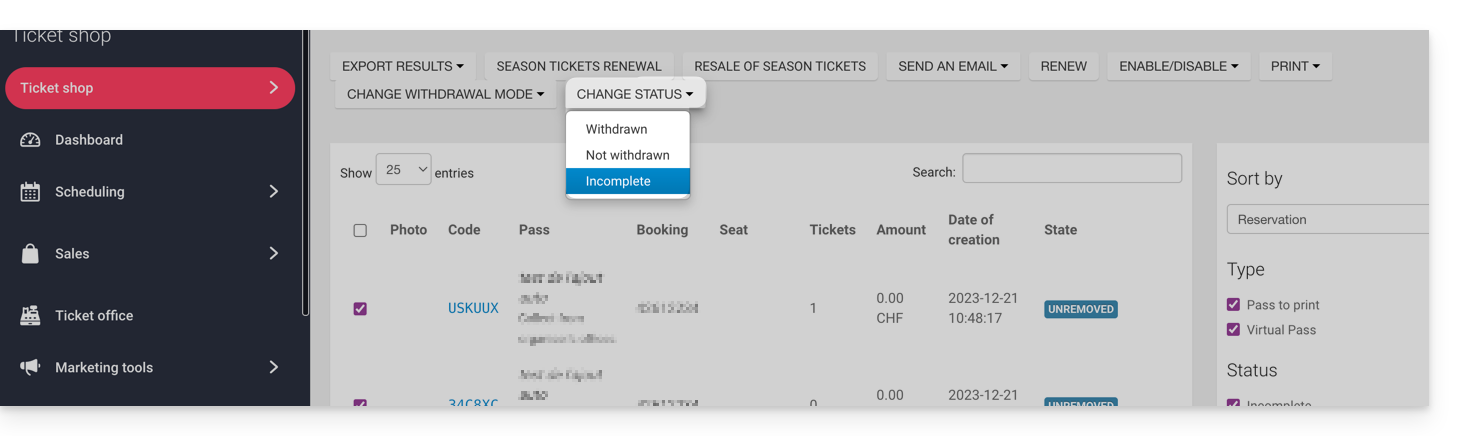
Modify the status
Change the status to Validated and Withdrawn or no, so that the pass is valid:
An e-mail will be automatically sent to the visitor with the information to fill out their pass with the tickets to be added.
In the case of a refusal, it is possible to send an e-mail to the visitor to invite them to change the information.
It is also possible to do this on the upstream page via a multiple selection, for example: