Knowledge base
1000 FAQs, 500 tutorials and instructional videos. Here, there are only solutions!
This guide provides instructions for connecting to kDrive using the WebDAV connection protocol.
Use the WebDAV protocol on kDrive for specific and occasional use cases: if you want to work on your files and share them, kDrive is the ideal tool. However, to secure your data against loss or corruption and ensure business continuity, Swiss Backup is the essential and appropriate solution.
✘ UNAVAILABLE with
kSuite free / kSuite Standard
my kSuite / my kSuite+ (ik.me, etik.com, ikmail.com)
Obtain the ID (kDrive ID)
To find your kDrive ID:
- Click here to access the Infomaniak kDrive web app (online service ksuite.infomaniak.com/kdrive).
- The kDrive file structure is displayed in the left-hand menu.
- The URL
https://ksuite.infomaniak.com/34567/kdrive/app/drive/123456/files/56789orhttps://ksuite.infomaniak.com/all/kdrive/app/drive/123456/displayed at the top of your browser contains a number: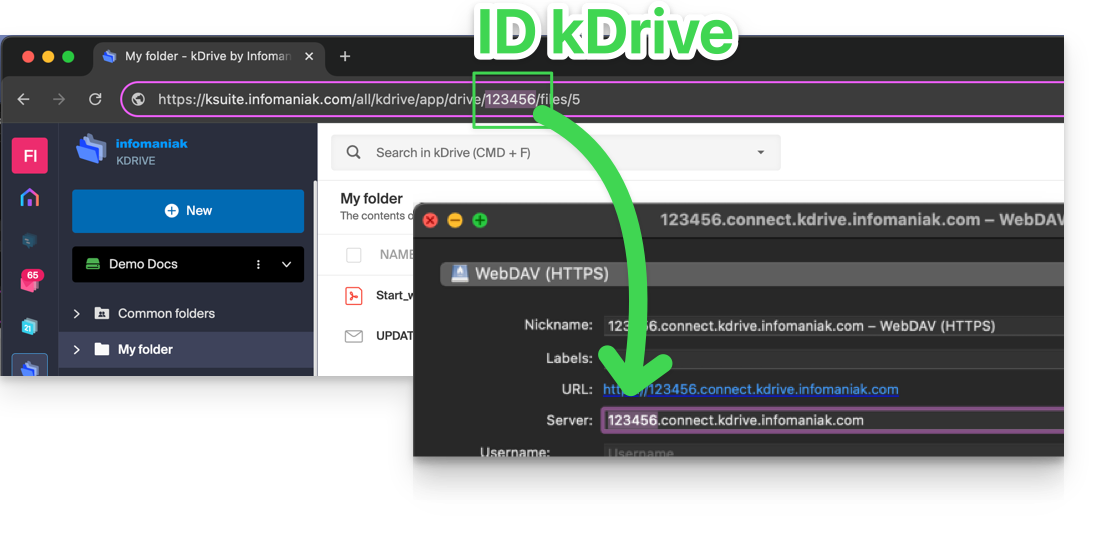
- In some cases, particularly when the Organization ID is mentioned in the URL, there may be several sets of numbers, but the principle remains the same: you need to take the number displayed after the term "/drive/":
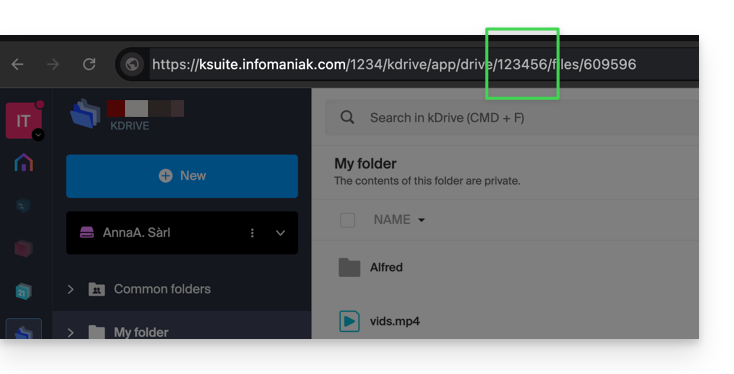
This number (in the example 123456) is your kDrive ID (IDkDrive).
You will therefore need to enter https://IDkDrive.connect.kdrive.infomaniak.com whenever necessary (e.g., https://123456.connect.kdrive.infomaniak.com as the WebDAV address).
Specific WebDAV Guides
Examples of synchronization via WebDAV:
WebDAV connection URL directly to a specific folder
To facilitate a direct connection via WebDAV to a specific folder, you can use the following URL (replacing 123456 as above):
https://12345.connect.kdrive.infomaniak.com/Common documents/folder-nameThis simple method allows you to quickly access the desired folder without manually navigating the directory structure. Simply replace "folder-name" with the exact name of the target folder to establish a direct and secure connection via WebDAV.
Link to this FAQ:
Has this FAQ been helpful?
This guide explains how to import external data (files, folders, etc.) to your kDrive using the WebDAV protocol provided by your Cloud host.
Preamble
- Refer to this other guide if you are looking for information on how to copy specific data from one kDrive to another when your user has access to both kDrives concerned.
Import external data via WebDAV
Prerequisites
- Have a kDrive or kSuite offer
- Have sufficient permissions within kDrive or kSuite.
- Do not change your passwords until the import is complete!
To access the import tool, where the data needs to be imported:
- Click here to access the Infomaniak kDrive Web app (online service ksuite.infomaniak.com/kdrive).
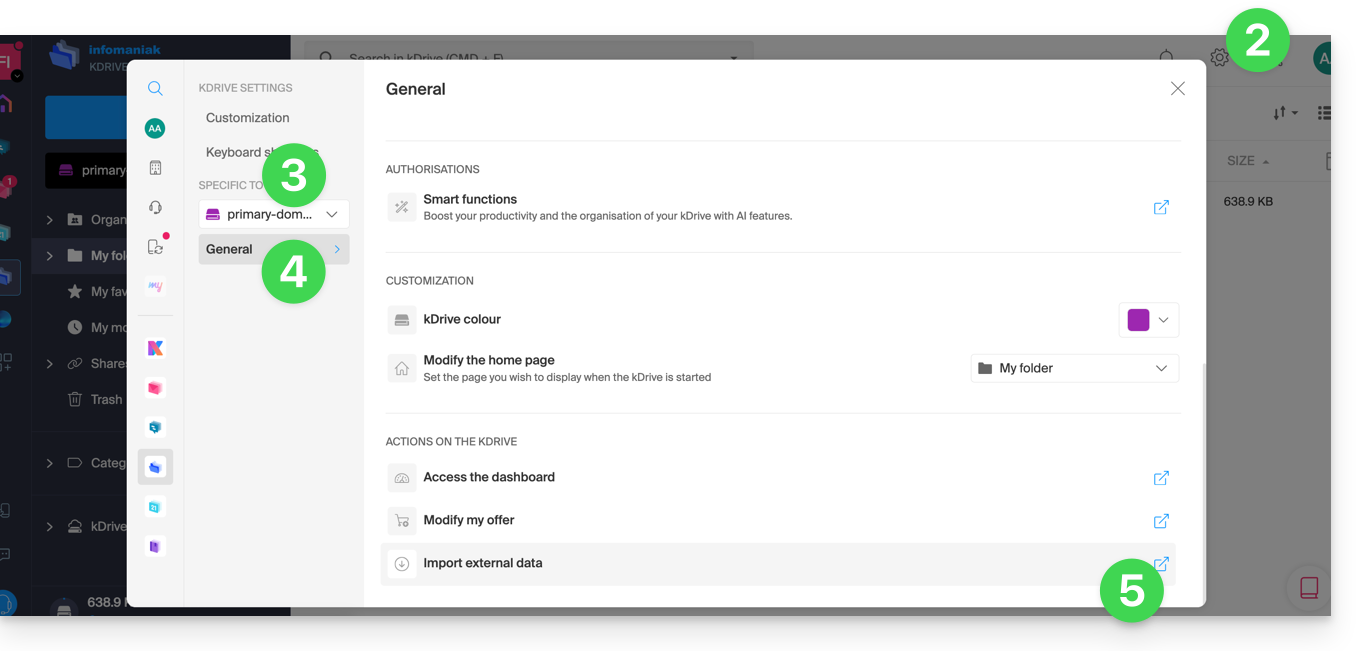
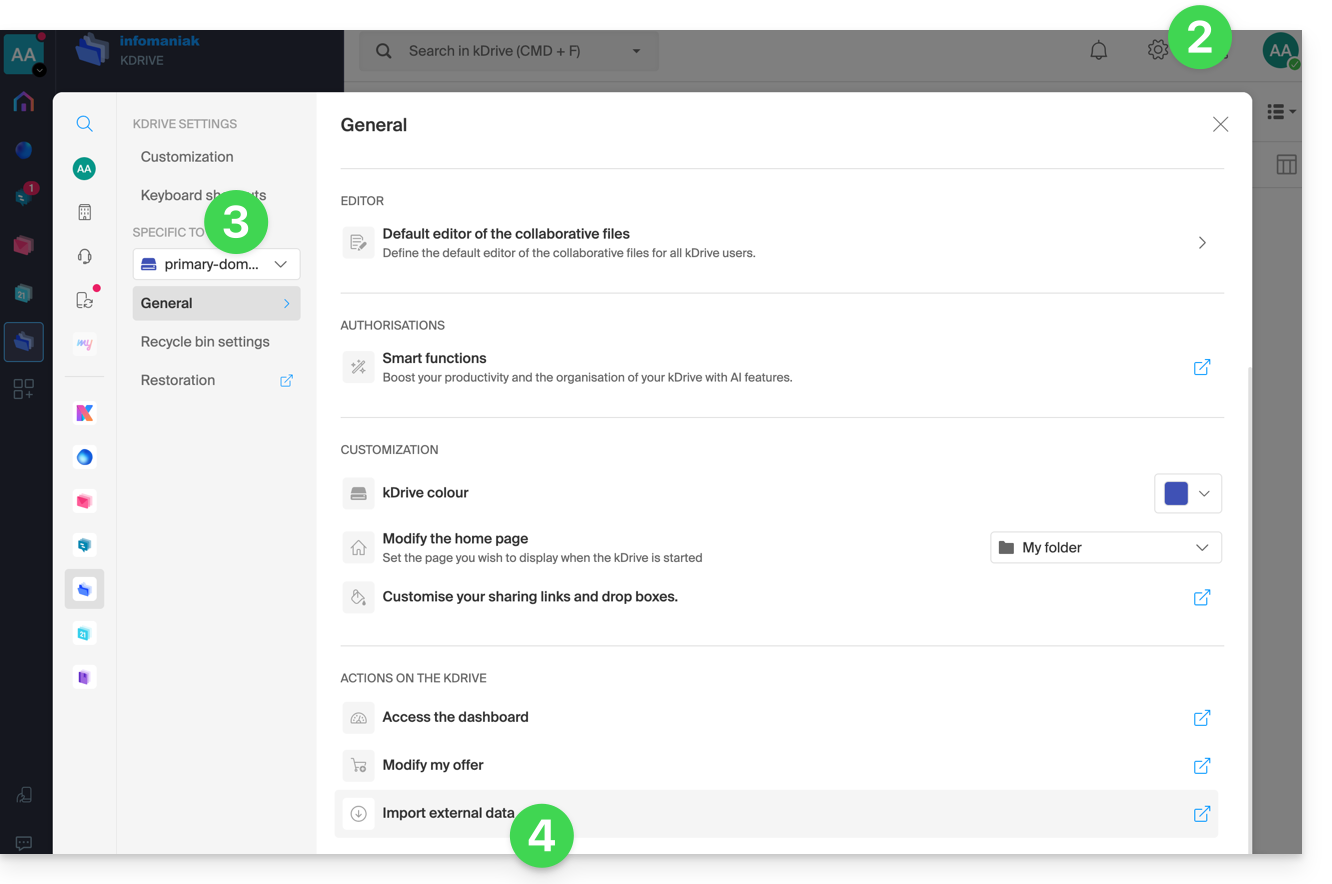
- Click on the Settings icon in the top right corner.
- Check or select the kDrive concerned in the dropdown menu of the left sidebar.
- Click on General in the left sidebar.
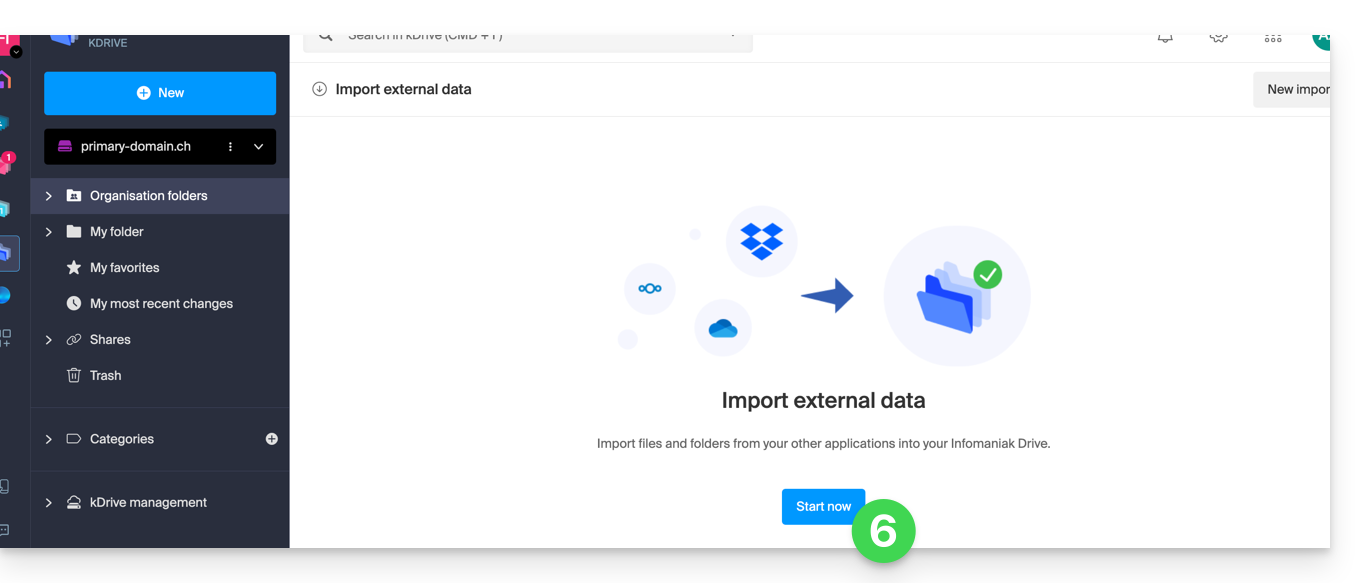
- Click on Import external data:
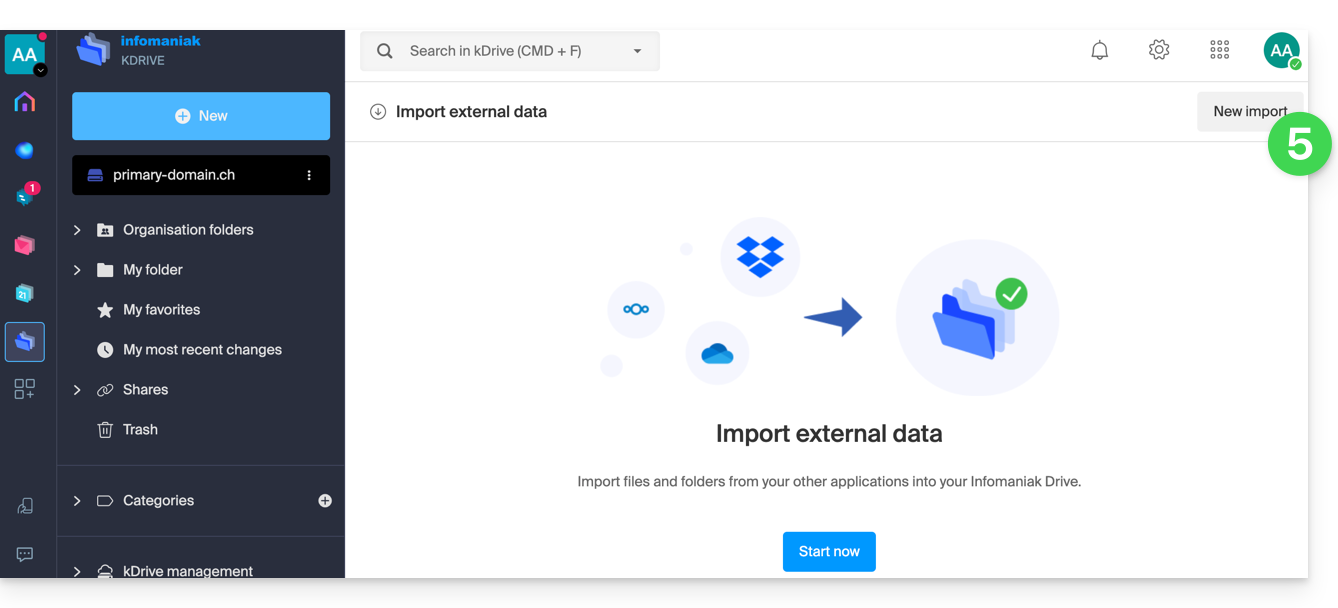
- Click the blue Start button:
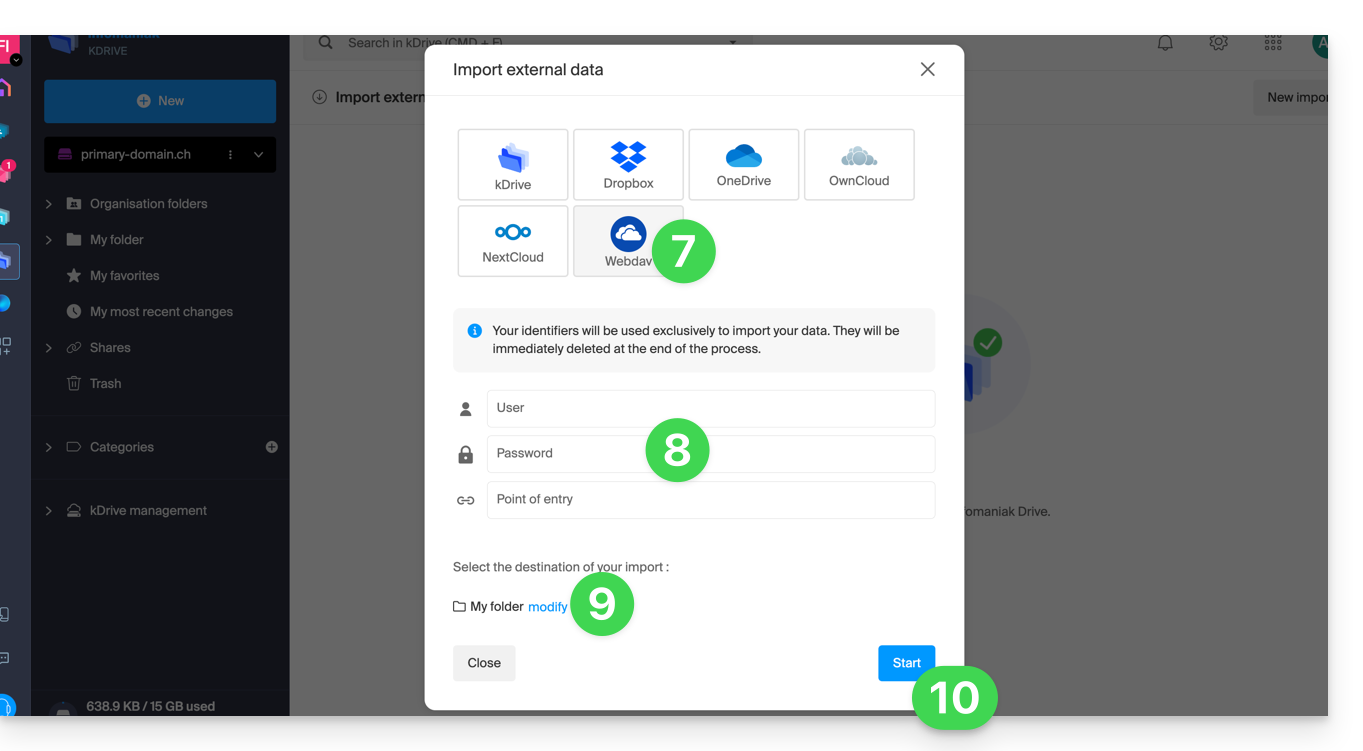
- Click on WebDAV.
- Complete the requested information based on the source (including the WebDAV address you have - obtained from the source).
- Choose the destination kDrive and the desired location to host the imported data.
- Click on Start:
Link to this FAQ:
Has this FAQ been helpful?
This guide explains how to import (one single time) to kDrive data (files, folders, etc.) from an external Cloud, such as your previous provider's, for example Dropbox or Microsoft.
Prerequisites
- Have a kDrive or my kSuite offer
- Have sufficient permissions within kDrive or my kSuite.
- Do not change your passwords until the import is complete!
Specific guides
Click on the link corresponding to your current host:
- Google Photos: complete guide to migrate photos from Google Photos to Infomaniak
- Google Drive
- Apple iCloud
- Any other Cloud provider offering the WebDAV protocol: refer to this other guide
Guide for any other external Cloud provider
For example:
- Dropbox
- OneDrive
- OwnCloud
- NextCloud
- Another kDrive to which your user account has access (except for "external" type access)
Data not imported
- Data that has been shared with you is not imported.
- Only data that truly belongs to you will be imported.
- Google documents such as Gdocs, Sheets, Slides, etc. …
- … are not imported during a Dropbox import.
- … are converted by Google when these files are downloaded from Google Drive on macOS/Windows.
- … are not converted when they are copied from the local Google Drive directory to the local kDrive directory. Therefore, it is imperative to download the files from the Web version of Google Drive.
- Dropbox Paper documents.
- Dropbox share links visible here.
- Individually shared Dropbox files, visible here (however, shared folders and common documents will be imported).
To proceed with the data import:
- Click here to access the Infomaniak kDrive Web app (online service ksuite.infomaniak.com/kdrive).
- Click on the Settings icon in the top right corner.
- Check or select the relevant kDrive in the dropdown menu of the left sidebar.
- Click on Import external data under General:
- Click on Start or New import at the top:
- Choose the relevant service.
- Choose the location where the imported files will be stored.
- Enter any required information if prompted and click the blue Start button:

- Enter any required information if prompted and click the blue Continue button.
- Complete the wizard.
- Wait while the data is being imported.
Manage the ongoing import
To monitor ongoing imports, return at any time to the page mentioned in point 5 above.
To stop an ongoing import, click on the action menu to the right of the import listed on the page and choose to cancel (in case of voluntary interruption, a report is sent by email to the administrator).
A second consecutive import would re-import all the data (to another kDrive directory), it is not differential synchronization and there is no duplicate management.
Check your imported data immediately after the operation.
Link to this FAQ:
Has this FAQ been helpful?