Knowledge base
1000 FAQs, 500 tutorials and instructional videos. Here, there are only solutions!
Connect to kDrive via WebDAV
This guide provides instructions for connecting to kDrive using the WebDAV connection protocol.
✘ UNAVAILABLE with
kSuite Free / kSuite Standard
my kSuite / my kSuite+ (ik.me, etik.com, ikmail.com)
⚠ WARNING ⚠
Use the WebDAV protocol on kDrive for specific and occasional use cases:
- If you want to work on your files and share them, kDrive is the ideal tool.
- However, to secure your data against loss or corruption and ensure business continuity, Swiss Backup is the essential and appropriate solution.
Infomaniak guarantees the compliance of its services with standard protocols (IMAP, S3, etc.) but does not provide additional support for external services or software, as their configuration may change depending on the provider or publisher. This guide is therefore provided for informational purposes only, and its implementation remains your responsibility (ref.: Support Policy / Art. 11.9 of the Terms of Service). If needed, a qualified professional can assist you.
Obtain the ID (kDrive ID)
To find your kDrive ID:
- Click here to access the Infomaniak kDrive web app (online service ksuite.infomaniak.com/kdrive).
- The kDrive file structure is displayed in the left-hand menu.
- The URL
https://ksuite.infomaniak.com/34567/kdrive/app/drive/123456/files/56789orhttps://ksuite.infomaniak.com/all/kdrive/app/drive/123456/displayed at the top of your browser contains a number: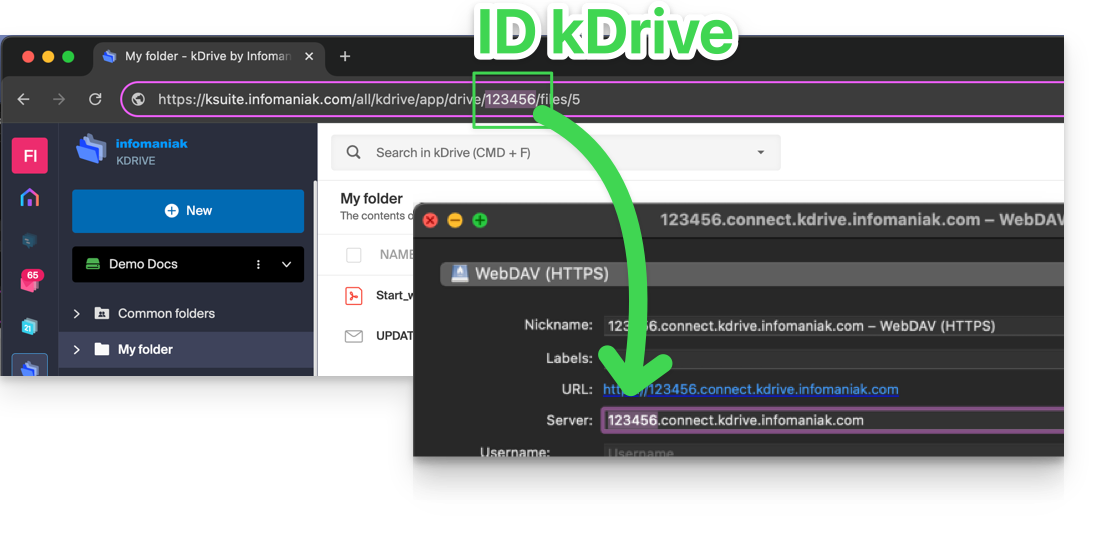
- In some cases, particularly when the Organization ID is mentioned in the URL, there may be several sets of numbers, but the principle remains the same: you need to take the number displayed after the term "/drive/":
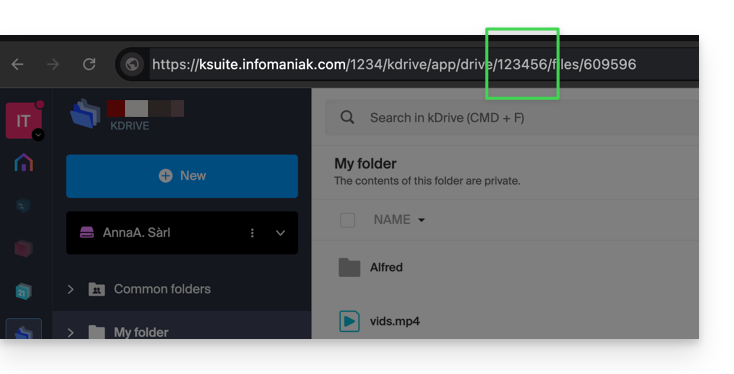
This number (in the example 123456) is your kDrive ID (IDkDrive).
You will therefore need to enter https://IDkDrive.connect.kdrive.infomaniak.com whenever necessary (e.g., https://123456.connect.kdrive.infomaniak.com as the WebDAV address).
Specific WebDAV Guides
Examples of synchronization via WebDAV:
WebDAV connection URL directly to a specific folder
To facilitate a direct connection via WebDAV to a specific folder, you can use the following URL (replacing 123456 as above):
https://12345.connect.kdrive.infomaniak.com/Common documents/folder-nameThis simple method allows you to quickly access the desired folder without manually navigating through the directory structure. Simply replace "folder-name" with the exact name of the target folder to establish a direct and secure connection via WebDAV.
Link to this FAQ: https://faq.infomaniak.com/2409
Has this FAQ been helpful?