Knowledge base
1000 FAQs, 500 tutorials and instructional videos. Here, there are only solutions!
Sync Thunderbird Contacts & Calendars (desktop app) with CardDAV/CalDAV
This guide explains how to configure the synchronisation of calendars and contacts Infomaniak with the desktop app Mozilla Thunderbird (desktop application on macOS / Windows / Linux).
Obtain the Advanced URL
Prerequisites
- Obtain your synchronisation information provided by the Infomaniak synchronisation assistant:
- account address:
https://sync.infomaniak.com - username: for example
AB12345 - application password if two-factor authentication is enabled or your Infomaniak account password if you have not enabled 2FA
- account address:
To obtain a more detailed synchronisation URL, generally required for synchronisation with Thunderbird:
- Open the Infomaniak synchronisation assistant.
- Click on the blue link Select a device:
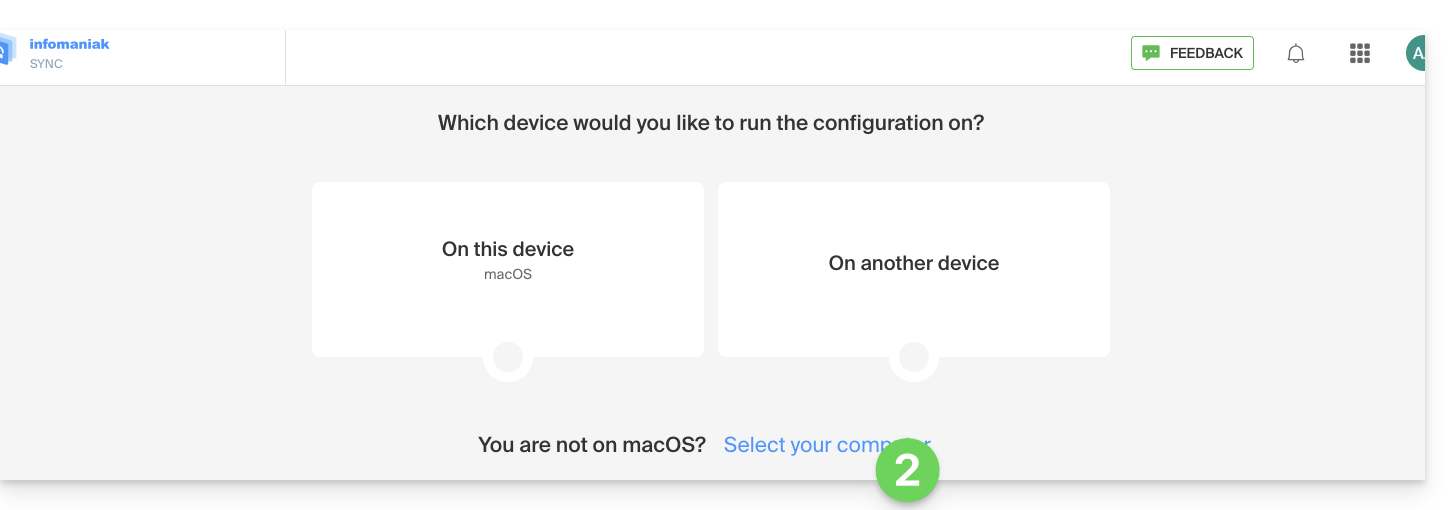
- Choose a GNU/Linux type synchronisation.
- Note the complete synchronisation URL displayed in step 4 of the assistant:

Synchronise Calendars and Address Books
Connect to an Address Book CardDAV
With the latest versions of Thunderbird, synchronizing your Infomaniak calendars and address books is offered to you immediately after configuring your email address within the software: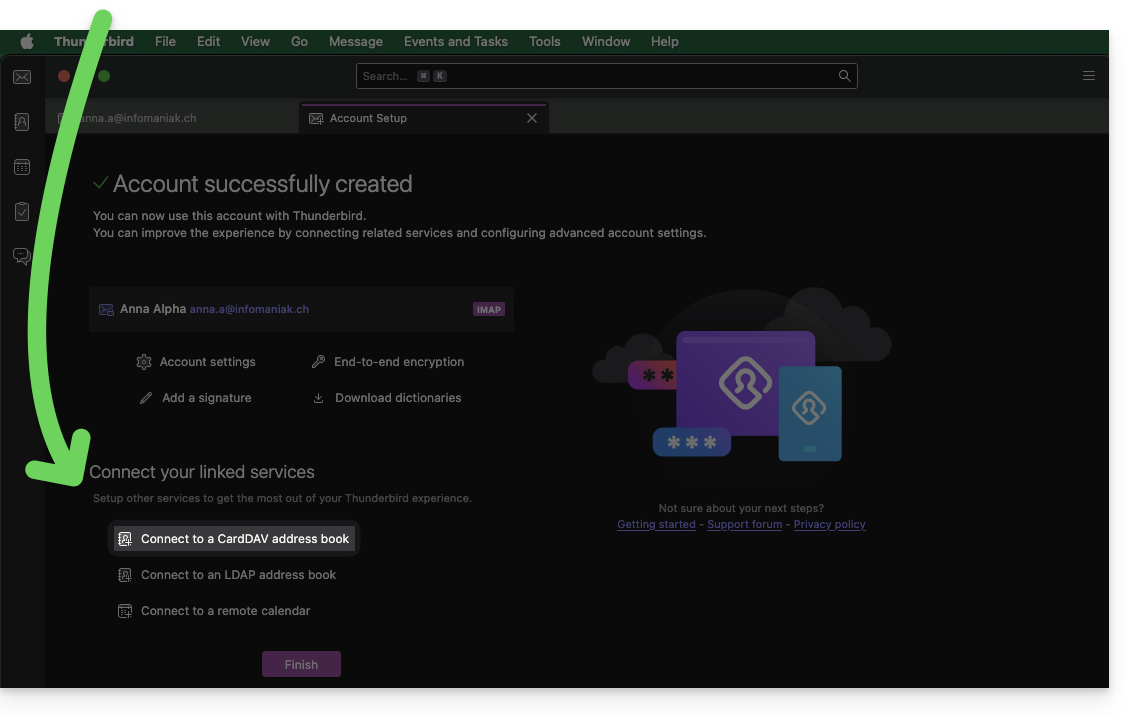
Click on it; the configuration starts:
- Enter your short username and the advanced URL (see above).
- Press Continue.
- Thunderbird then asks for the password (see above).
- Press OK:

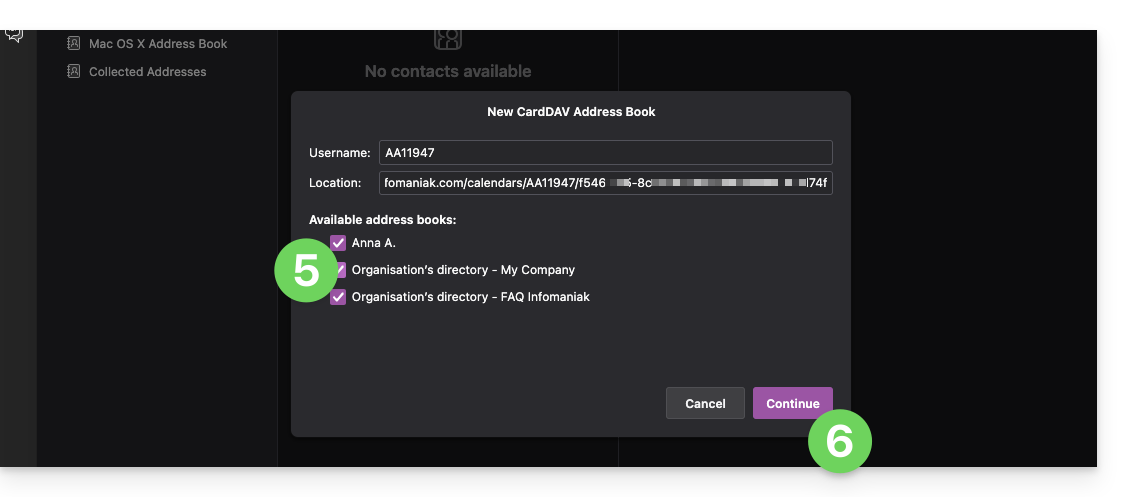
- Once authentication is successful, the application shows you the address books associated with your Infomaniak account; choose which ones to synchronize.
- Press Continue to finish:
Connecting to a remote calendar
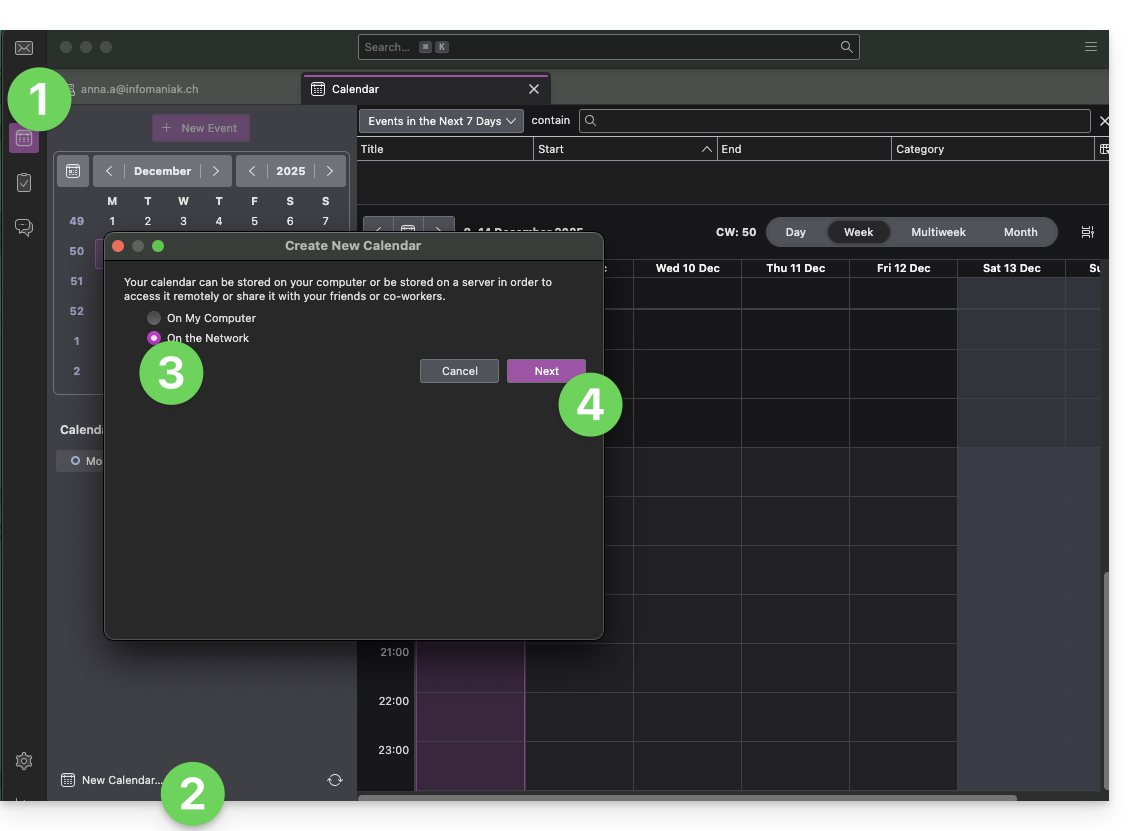
Add a new calendar in Thunderbird:
- If necessary, switch to Calendars.
- Click on New Calendar…
- Choose On the Network.
- Click on Next:
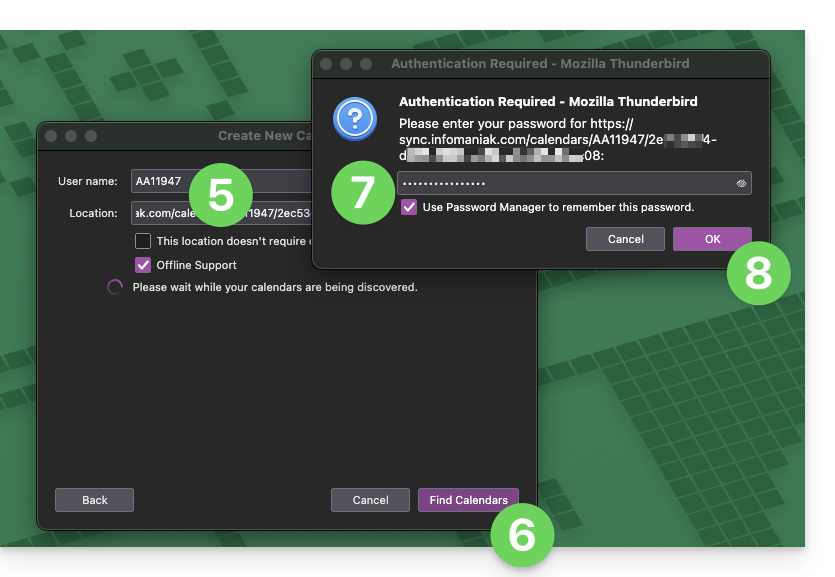
- Enter your short username and the advanced URL (see above).
- Press the button to find the associated Calendars.
- Thunderbird then asks for the password (see above).
- Tap OK:
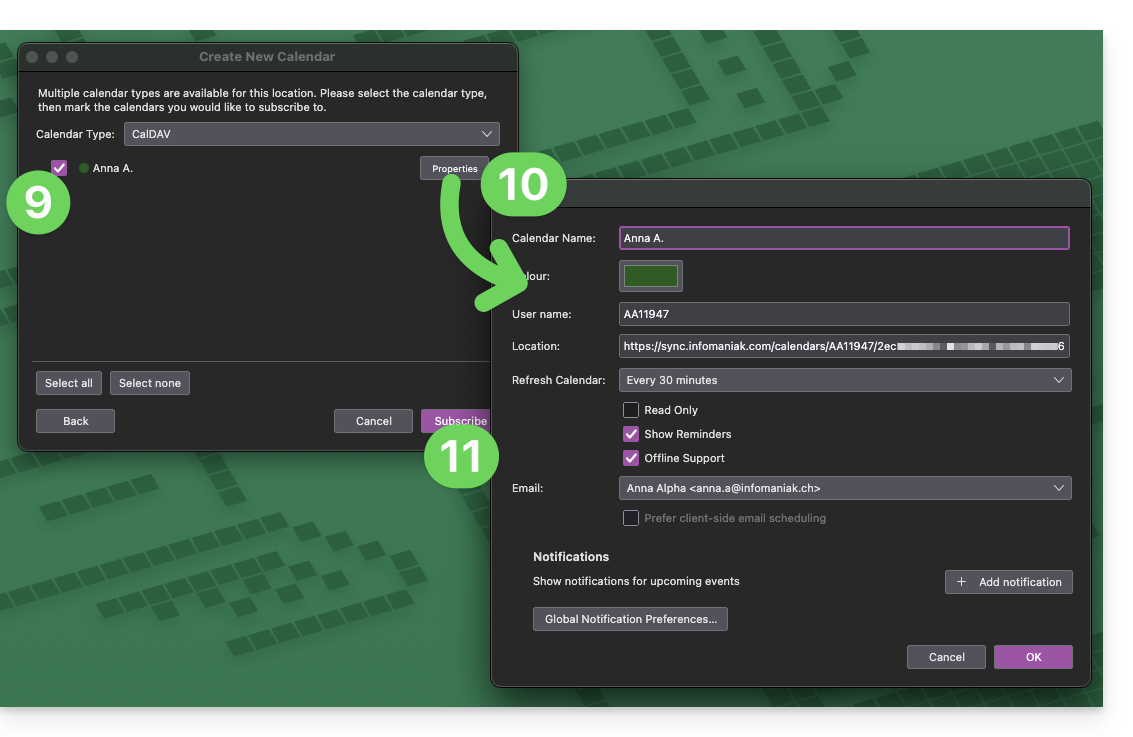
- Once authentication is complete, the application will display the calendars associated with your Infomaniak account; choose which ones to synchronize.
- If necessary, you can manage advanced properties for your calendars in Thunderbird.
- Tap the button to Subscribe and finish:
Refer to this other guide if you need to troubleshoot a configuration issue with Thunderbird (email, contacts, calendars)…
Link to this FAQ: https://faq.infomaniak.com/2046
Has this FAQ been helpful?