Knowledge base
1000 FAQs, 500 tutorials and instructional videos. Here, there are only solutions!
Import Google Photos to kDrive
This guide explains how to export your photos from Google Photos (https://photos.google.com/) and then import them into kDrive Infomaniak.
1. Exporting your Google Photos
To retrieve the photos stored in Google Photos on your computer, use Google Takeout. This service allows you to export all items or select only certain albums if you prefer to proceed in stages:
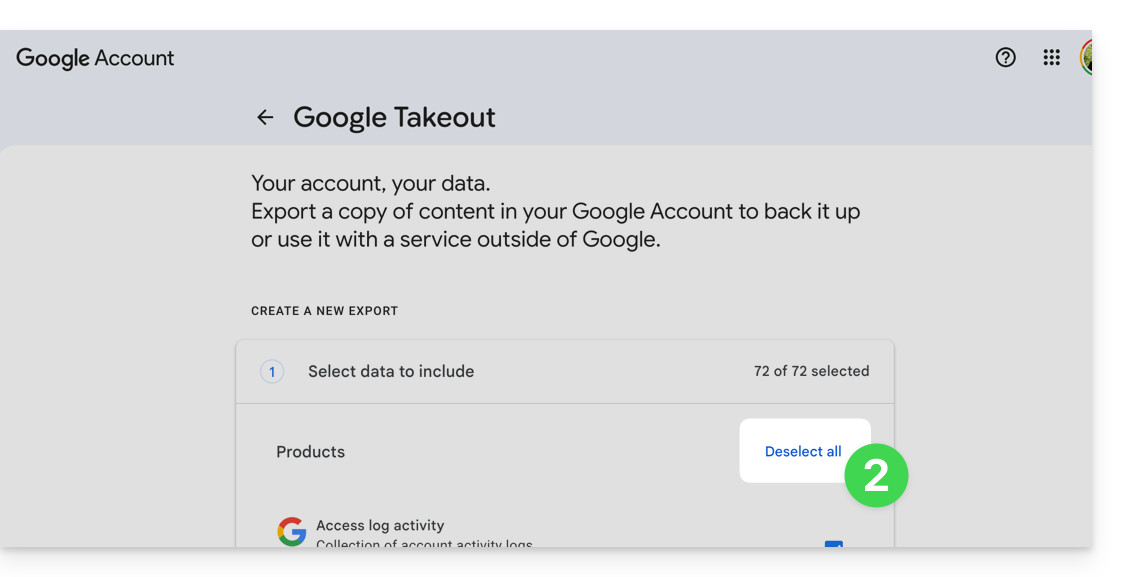
- Log in to Google Takeout.
- Deselect all products to keep only Google Photos:
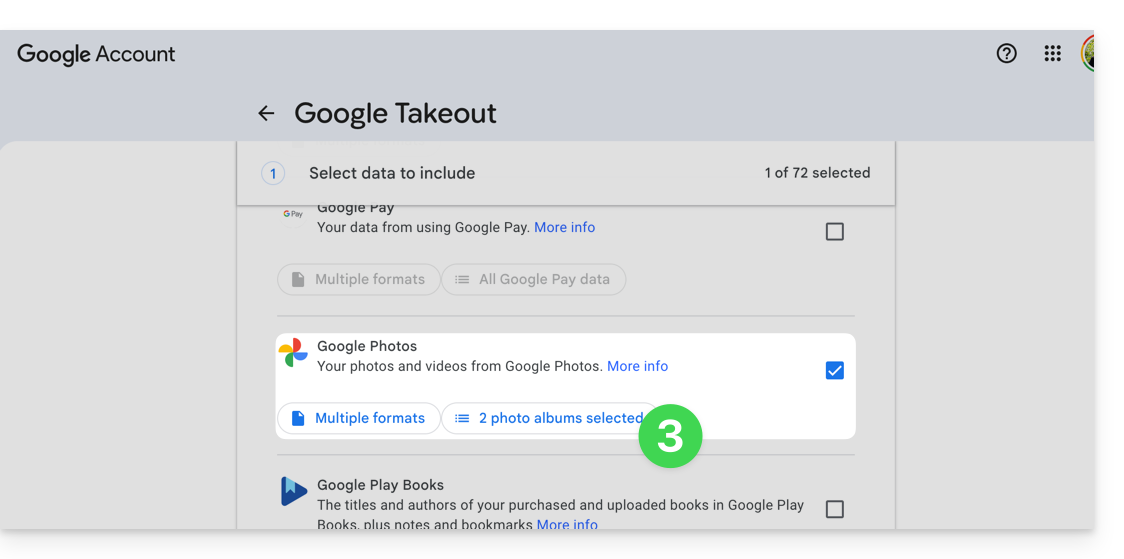
- If necessary, deselect the albums you do not want to export:
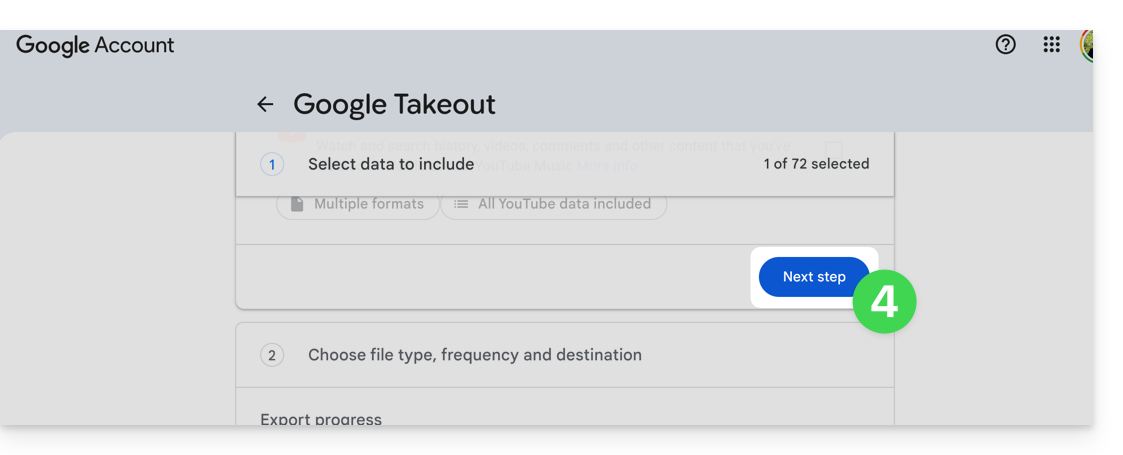
- Go to the next step at the bottom of the page:
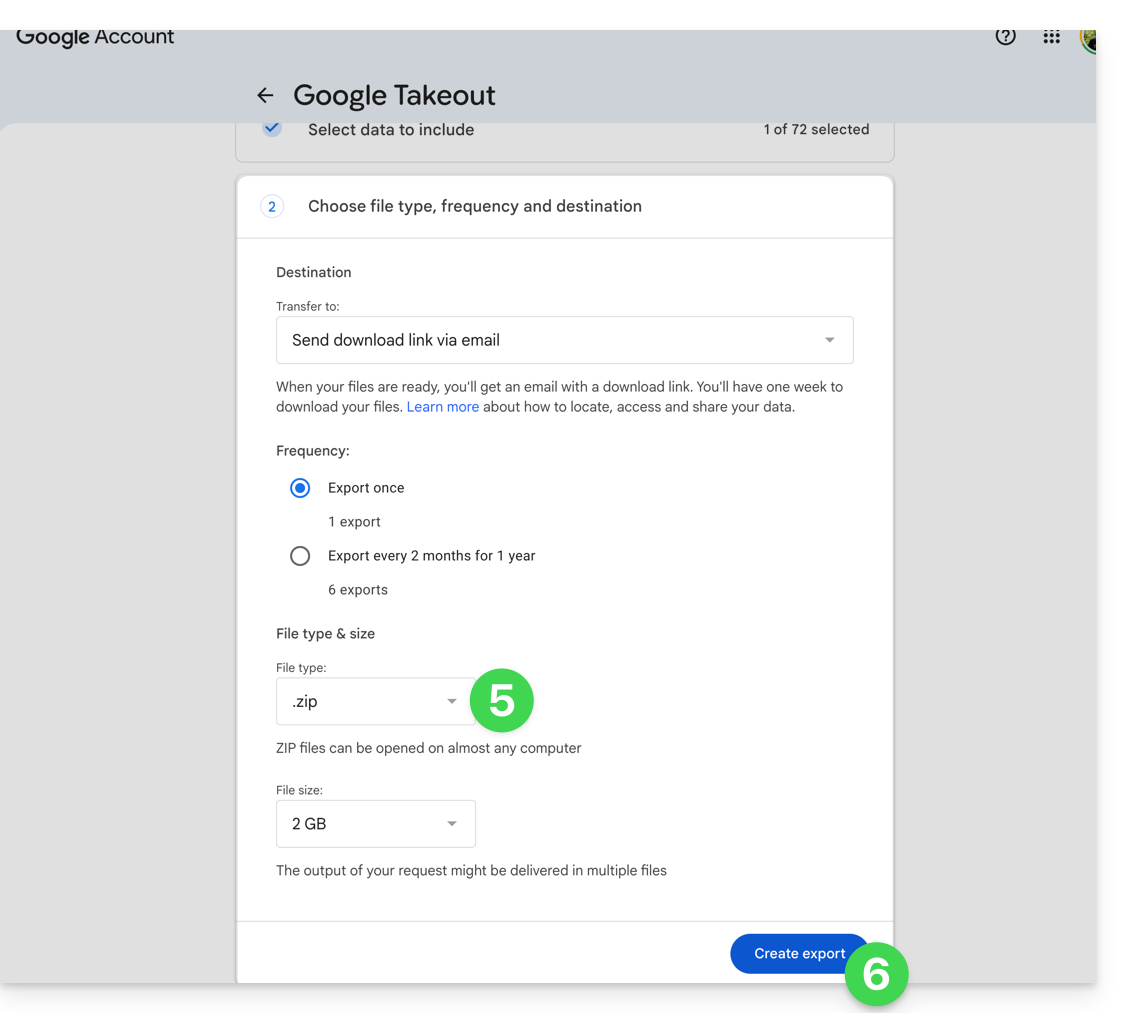
- Configure the export to ZIP format.
- Click the Create export button to start the export:
- Wait for the email containing the download links. Depending on the volume of data, preparing the export may take several hours or even days.
- Download the ZIP archives and then unzip them on your computer:
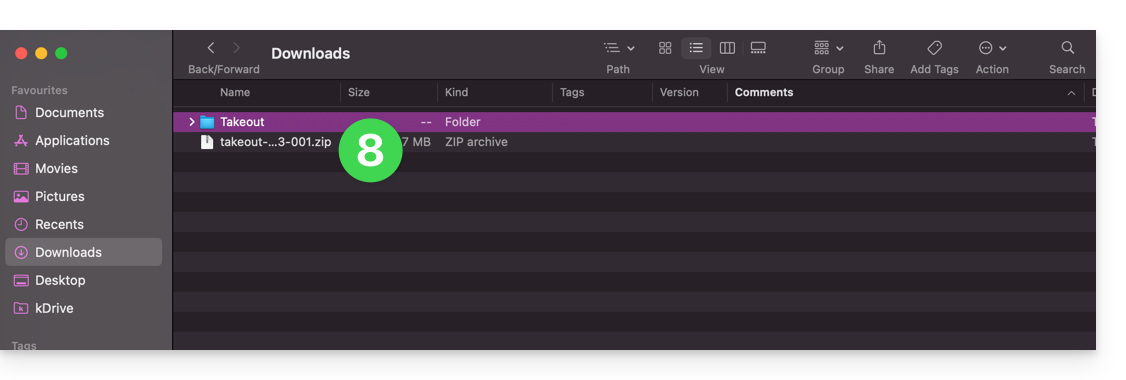
- If necessary, group the exported folders together before importing them into kDrive.
2. Correct the dates of the exported files
During an export, the system dates of the files may be replaced by the export date instead of the original capture date. If the chronological order of the photos is incorrect after the export, you can correct these dates before importing them into kDrive.
Before running a script, work on a copy of your exported files. Do not delete the .json files provided by Google Takeout before processing: they may contain the original date when it is not available in the file's EXIF metadata.
The scripts below search for a date in this order: file metadata, associated Google Takeout JSON file, and then the date present in the file name. Files without an exploitable date are listed in a DateError.txt file created on the desktop. The corrected files are listed in DateFound.txt.
To limit the risk of blocking on very large exports, process the files in batches of a few thousand items.
Correct the dates on macOS
- Download and install ExifTool from https://exiftool.org/index.html by choosing the macOS package.
- Open the Terminal application from the Applications > Utilities folder.
- Copy and paste the entire block below into Terminal, then validate if necessary with the Enter key.
- Select the folder containing the files exported from Google Takeout.
- Let the processing finish, then check the
DateFound.txtandDateError.txtfiles created on the desktop.
The script to copy and paste entirely:
/bin/bash <<'BASH'
#!/bin/bash
set -u

ROOT="$(osascript -e 'POSIX path of (choose folder with prompt "Select the folder containing the files to update")')" || exit 0

DESKTOP="$HOME/Desktop"
LOG_FOUND="$DESKTOP/DateFound.txt"
LOG_ERROR="$DESKTOP/DateError.txt"
: > "$LOG_FOUND"
: > "$LOG_ERROR"

find_exiftool() {
    if command -v exiftool >/dev/null 2>&1; then
        command -v exiftool
        return 0
    fi
    if [ -x "/usr/local/bin/exiftool" ]; then
        printf '%s\n' "/usr/local/bin/exiftool"
        return 0
    fi
    if [ -x "/opt/homebrew/bin/exiftool" ]; then
        printf '%s\n' "/opt/homebrew/bin/exiftool"
        return 0
    fi
    return 1
}

EXIFTOOL="$(find_exiftool)" || {
    printf '%s\n' "ExifTool not found. Install it, then run the script again." >> "$LOG_ERROR"
    printf '%s\n' "ExifTool not found. Check DateError.txt on the desktop."
    exit 1
}

if [ ! -d "$ROOT" ]; then
    printf 'Invalid folder: %s\n' "$ROOT" >> "$LOG_ERROR"
    printf '%s\n' "Invalid folder. Check DateError.txt on the desktop."
    exit 1
fi

get_exif_date() {
    "$EXIFTOOL" -s3 -d "%Y:%m:%d %H:%M:%S" -DateTimeOriginal -CreateDate -MediaCreateDate -TrackCreateDate -CreationDate -ModifyDate -- "$1" 2>/dev/null | awk '/^[0-9]{4}:[0-9]{2}:[0-9]{2} [0-9]{2}:[0-9]{2}:[0-9]{2}/ { print substr($0, 1, 19); exit }'
}

get_json_date() {
    local file="$1"
    local json=""
    if [ -f "$file.json" ]; then
        json="$file.json"
    elif [ -f "${file%.*}.json" ]; then
        json="${file%.*}.json"
    fi
    [ -z "$json" ] && return 1

    /usr/bin/perl -MTime::Piece -0777 -ne 'if (/"photoTakenTime"\s*:\s*\{.*?"timestamp"\s*:\s*"([0-9]+)"/s || /"creationTime"\s*:\s*\{.*?"timestamp"\s*:\s*"([0-9]+)"/s) { print localtime($1)->strftime("%Y:%m:%d %H:%M:%S"); }' "$json"
}

get_name_date() {
    local name
    name="$(basename "$1")"
    if [[ "$name" =~ ([12][0-9]{3})[-_]?([01][0-9])[-_]?([0-3][0-9])([_\ -]?([0-2][0-9])[-_\.]?([0-5][0-9])[-_\.]?([0-5][0-9]))? ]]; then
        local year="${BASH_REMATCH[1]}"
        local month="${BASH_REMATCH[2]}"
        local day="${BASH_REMATCH[3]}"
        local hour="12"
        local minute="00"
        local second="00"
        if [ -n "${BASH_REMATCH[5]:-}" ]; then
            hour="${BASH_REMATCH[5]}"
            minute="${BASH_REMATCH[6]}"
            second="${BASH_REMATCH[7]}"
        fi
        printf '%s:%s:%s %s:%s:%s\n' "$year" "$month" "$day" "$hour" "$minute" "$second"
        return 0
    fi
    return 1
}

is_valid_date() {
    date -j -f "%Y:%m:%d %H:%M:%S" "$1" "+%Y:%m:%d %H:%M:%S" >/dev/null 2>&1
}

to_touch_date() {
    printf '%s' "$1" | sed -E 's/^([0-9]{4}):([0-9]{2}):([0-9]{2}) ([0-9]{2}):([0-9]{2}):([0-9]{2})$/\1\2\3\4\5.\6/'
}

write_metadata() {
    local file="$1"
    local date_value="$2"
    "$EXIFTOOL" -overwrite_original "-DateTimeOriginal=$date_value" "-CreateDate=$date_value" "-ModifyDate=$date_value" -- "$file" >/dev/null 2>&1 || true
}

process_file() {
    local file="$1"
    local date_value=""
    local source=""

    date_value="$(get_exif_date "$file")"
    if [ -n "$date_value" ]; then
        source="EXIF"
    else
        date_value="$(get_json_date "$file")"
        if [ -n "$date_value" ]; then
            source="Google Takeout JSON"
        else
            date_value="$(get_name_date "$file")"
            if [ -n "$date_value" ]; then
                source="file name"
            fi
        fi
    fi

    if [ -n "$date_value" ] && is_valid_date "$date_value"; then
        local touch_value
        touch_value="$(to_touch_date "$date_value")"
        if [ "$source" != "EXIF" ]; then
            write_metadata "$file" "$date_value"
        fi
        if touch -t "$touch_value" "$file" 2>/dev/null; then
            printf '%s | %s | %s\n' "$source" "$date_value" "$file" >> "$LOG_FOUND"
        else
            printf 'Unable to update file date: %s\n' "$file" >> "$LOG_ERROR"
        fi
    else
        printf 'No valid date found: %s\n' "$file" >> "$LOG_ERROR"
    fi
}

while IFS= read -r -d '' file; do
    case "$file" in
        *.json|*_original) continue ;;
    esac
    process_file "$file"
done < <(find "$ROOT" -type f -print0)

printf '%s\n' "Done. Check DateFound.txt and DateError.txt on the desktop."
BASH
Correcting Dates on Windows
- Download ExifTool from https://exiftool.org/index.html by selecting the Windows executable.
- Place it in an accessible folder, for example
C:\ExifTool. - Rename the file
exiftool(-k).exetoexiftool.exe. - Verify that the full path is indeed
C:\ExifTool\exiftool.exe.- If you place ExifTool elsewhere, modify the first line of the configuration in the script below.
- Copy and paste the script below into Notepad.
- Save the file with the
.ps1extension, for exampleUpdateExifDates.ps1. - Right-click on the
.ps1file, then run it with PowerShell. - Select the folder containing the files exported from Google Takeout.
- Allow the process to complete, then check the
DateFound.txtandDateError.txtfiles created on the desktop.
If PowerShell blocks the execution of the script, open PowerShell and run the command Set-ExecutionPolicy RemoteSigned -Scope CurrentUser, then confirm the change when Windows prompts you.
The script to copy and paste in its entirety:
# === Configuration ===
$ExifToolPath = "C:\ExifTool\exiftool.exe"
$Desktop = [Environment]::GetFolderPath("Desktop")
$LogFound = Join-Path $Desktop "DateFound.txt"
$LogError = Join-Path $Desktop "DateError.txt"
Set-Content -Path $LogFound -Value ""
Set-Content -Path $LogError -Value ""

if (-not (Test-Path -LiteralPath $ExifToolPath)) {
    Add-Content -Path $LogError -Value "ExifTool not found: $ExifToolPath"
    Write-Host "ExifTool not found. Check the path in the script."
    exit
}

# === Folder selection dialog ===
Add-Type -AssemblyName System.Windows.Forms
$FolderBrowser = New-Object System.Windows.Forms.FolderBrowserDialog
$FolderBrowser.Description = "Select the folder to process"
if ($FolderBrowser.ShowDialog() -ne [System.Windows.Forms.DialogResult]::OK) { exit }
$Folder = $FolderBrowser.SelectedPath

function Get-DateFromExif {
    param ([string]$FilePath)

    $Tags = @("DateTimeOriginal", "CreateDate", "MediaCreateDate", "TrackCreateDate", "CreationDate", "ModifyDate")
    foreach ($Tag in $Tags) {
        $Value = (& $ExifToolPath "-$Tag" -s3 -d "%Y:%m:%d %H:%M:%S" -- "$FilePath" 2>$null | Select-Object -First 1)
        if ($Value -match '^(\d{4}):(\d{2}):(\d{2}) (\d{2}):(\d{2}):(\d{2})') {
            try {
                return [datetime]::ParseExact($Matches[0], "yyyy:MM:dd HH:mm:ss", [Globalization.CultureInfo]::InvariantCulture)
            } catch {}
        }
    }
    return $null
}

function Get-DateFromJson {
    param ([string]$FilePath)

    $JsonPaths = @("$FilePath.json", [System.IO.Path]::ChangeExtension($FilePath, ".json")) | Select-Object -Unique
    foreach ($JsonPath in $JsonPaths) {
        if (Test-Path -LiteralPath $JsonPath) {
            try {
                $Json = Get-Content -LiteralPath $JsonPath -Raw -ErrorAction Stop | ConvertFrom-Json -ErrorAction Stop
                $Timestamp = $null
                if ($Json.photoTakenTime -and $Json.photoTakenTime.timestamp) {
                    $Timestamp = [int64]$Json.photoTakenTime.timestamp
                } elseif ($Json.creationTime -and $Json.creationTime.timestamp) {
                    $Timestamp = [int64]$Json.creationTime.timestamp
                }

                if ($null -ne $Timestamp) {
                    return ([DateTimeOffset]::FromUnixTimeSeconds($Timestamp)).LocalDateTime
                }
            } catch {}
        }
    }
    return $null
}

function Get-DateFromFileName {
    param ([string]$FileName)

    if ($FileName -match '([12]\d{3})[-_]?(0[1-9]|1[0-2])[-_]?(0[1-9]|[12]\d|3[01])(?:[ _-]?([01]\d|2[0-3])[-_.]?([0-5]\d)[-_.]?([0-5]\d))?') {
        $Year = $Matches[1]
        $Month = $Matches[2]
        $Day = $Matches[3]
        $Hour = "12"
        $Minute = "00"
        $Second = "00"

        if ($Matches[4]) {
            $Hour = $Matches[4]
            $Minute = $Matches[5]
            $Second = $Matches[6]
        }

        $DateString = "$Year$Month$Day$Hour$Minute$Second"
        try {
            return [datetime]::ParseExact($DateString, "yyyyMMddHHmmss", [Globalization.CultureInfo]::InvariantCulture)
        } catch {}
    }
    return $null
}

function Write-Metadata {
    param (
        [string]$FilePath,
        [datetime]$DateValue
    )

    $ExifDate = $DateValue.ToString("yyyy:MM:dd HH:mm:ss", [Globalization.CultureInfo]::InvariantCulture)
    & $ExifToolPath -overwrite_original "-DateTimeOriginal=$ExifDate" "-CreateDate=$ExifDate" "-ModifyDate=$ExifDate" -- "$FilePath" 2>$null | Out-Null
}

function Set-FileDates {
    param (
        [string]$FilePath,
        [datetime]$DateValue
    )

    [System.IO.File]::SetCreationTime($FilePath, $DateValue)
    [System.IO.File]::SetLastWriteTime($FilePath, $DateValue)
    [System.IO.File]::SetLastAccessTime($FilePath, $DateValue)
}

Get-ChildItem -LiteralPath $Folder -Recurse -File | Where-Object {
    $_.Extension -ne ".json" -and $_.Name -notlike "*_original"
} | ForEach-Object {
    $File = $_
    $FilePath = $File.FullName
    $DateValue = Get-DateFromExif -FilePath $FilePath
    $Source = "EXIF"

    if (-not $DateValue) {
        $DateValue = Get-DateFromJson -FilePath $FilePath
        $Source = "Google Takeout JSON"
    }

    if (-not $DateValue) {
        $DateValue = Get-DateFromFileName -FileName $File.Name
        $Source = "file name"
    }

    if ($DateValue) {
        try {
            if ($Source -ne "EXIF") {
                Write-Metadata -FilePath $FilePath -DateValue $DateValue
            }
            Set-FileDates -FilePath $FilePath -DateValue $DateValue
            Add-Content -Path $LogFound -Value "$Source | $($DateValue.ToString('yyyy-MM-dd HH:mm:ss')) | $FilePath"
        } catch {
            Add-Content -Path $LogError -Value "Unable to update file date: $FilePath"
        }
    } else {
        Add-Content -Path $LogError -Value "No valid date found: $FilePath"
    }
}

[System.Windows.Forms.MessageBox]::Show("Done. Check DateFound.txt and DateError.txt on the desktop.")
3. Import Photos to kDrive
Do not change your passwords until the import or synchronization is complete.
Once your files are ready, you can import them from the kDrive web app if the number of files and your internet connection allow for uploading from the browser:
- Go to the Infomaniak kDrive web app at https://ksuite.infomaniak.com/kdrive.
- Open the location where the photos should be imported.
- Click on the New button in the top left corner.
- Click on Import a folder.
- Select the folder containing your photos on your computer.
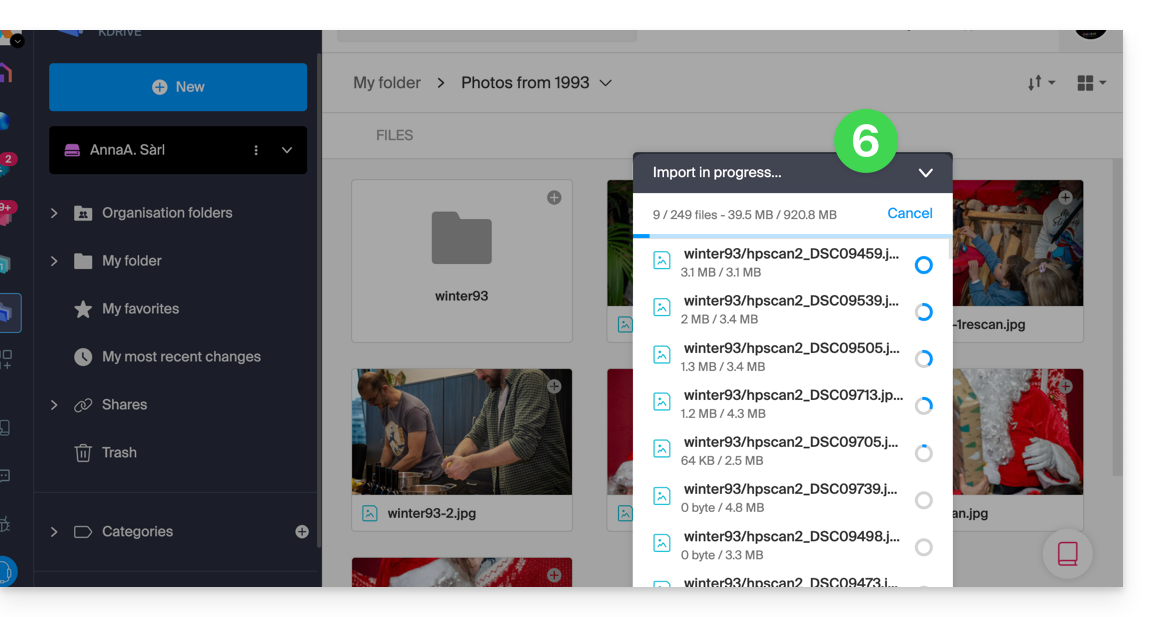
- Wait for the import to finish. The activity log is displayed in the bottom right corner:
If you are using the kDrive desktop app, you can also place the folder containing your photos in the folder structure of your kDrive on your computer. The synchronization will then start automatically and the files will be sent to the Infomaniak servers.
4. Accessing photos from your devices
Once the import or synchronization is complete, your photos can be accessed from devices connected to your kDrive.
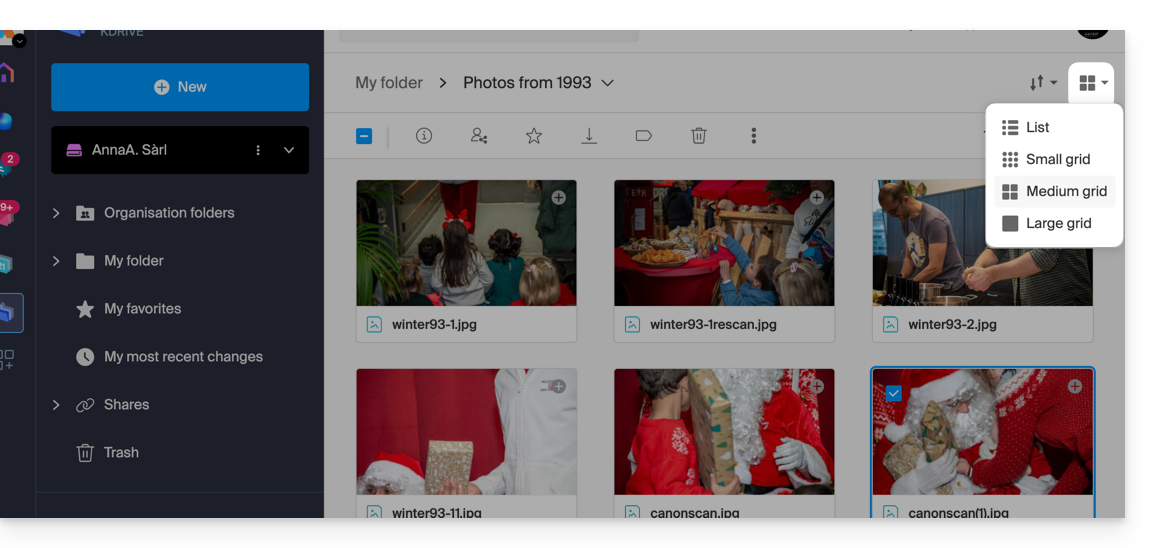
- In the kDrive web app, you can change the display to enlarge the thumbnails and browse your photos more easily:
Link to this FAQ: https://faq.infomaniak.com/2540
Has this FAQ been helpful?