Knowledge base
1000 FAQs, 500 tutorials and instructional videos. Here, there are only solutions!
Create a snapshot on a Cloud VPS
This guide explains how to back up a Cloud VPS in the form of a snapshot.
Introduction
- A snapshot is like a picture of your Cloud VPS at a specific point in time, containing everything on your server, including your operating system, applications, data, etc.
- Snapshots can be used, in particular, to…
- … protect your Cloud VPS in case of a problem: if you encounter a problem with your Cloud VPS, you can restore a snapshot to return to a previous state.
- … test changes without risk: before making significant changes to your Cloud VPS, you can create a snapshot so that you can revert if necessary.
- You benefit from one free snapshot to back up your entire server in a dedicated space; if needed, it is possible to order additional space or delete a snapshot to create a new one.
- Two types of backup are possible:
- Snapshot of the data: allows you to create an image of the volume that contains your data (not available for Windows distributions).
- Snapshot of the operating system: allows you to create an image of the volume that contains your operating system. This type of backup involves a brief interruption of a few minutes for your applications and websites.
- It is recommended to create snapshots regularly, for example once a week or once a month; this will allow you to have a history of your Cloud VPS and to be able to revert in case of a problem.
- It is obviously possible to restore the Cloud VPS to its previous state using the snapshot created earlier.
Create a snapshot
To do this:
- Click here to access the management of your product in the Infomaniak Manager (need help?).
- Click directly on the name assigned to the product in question.
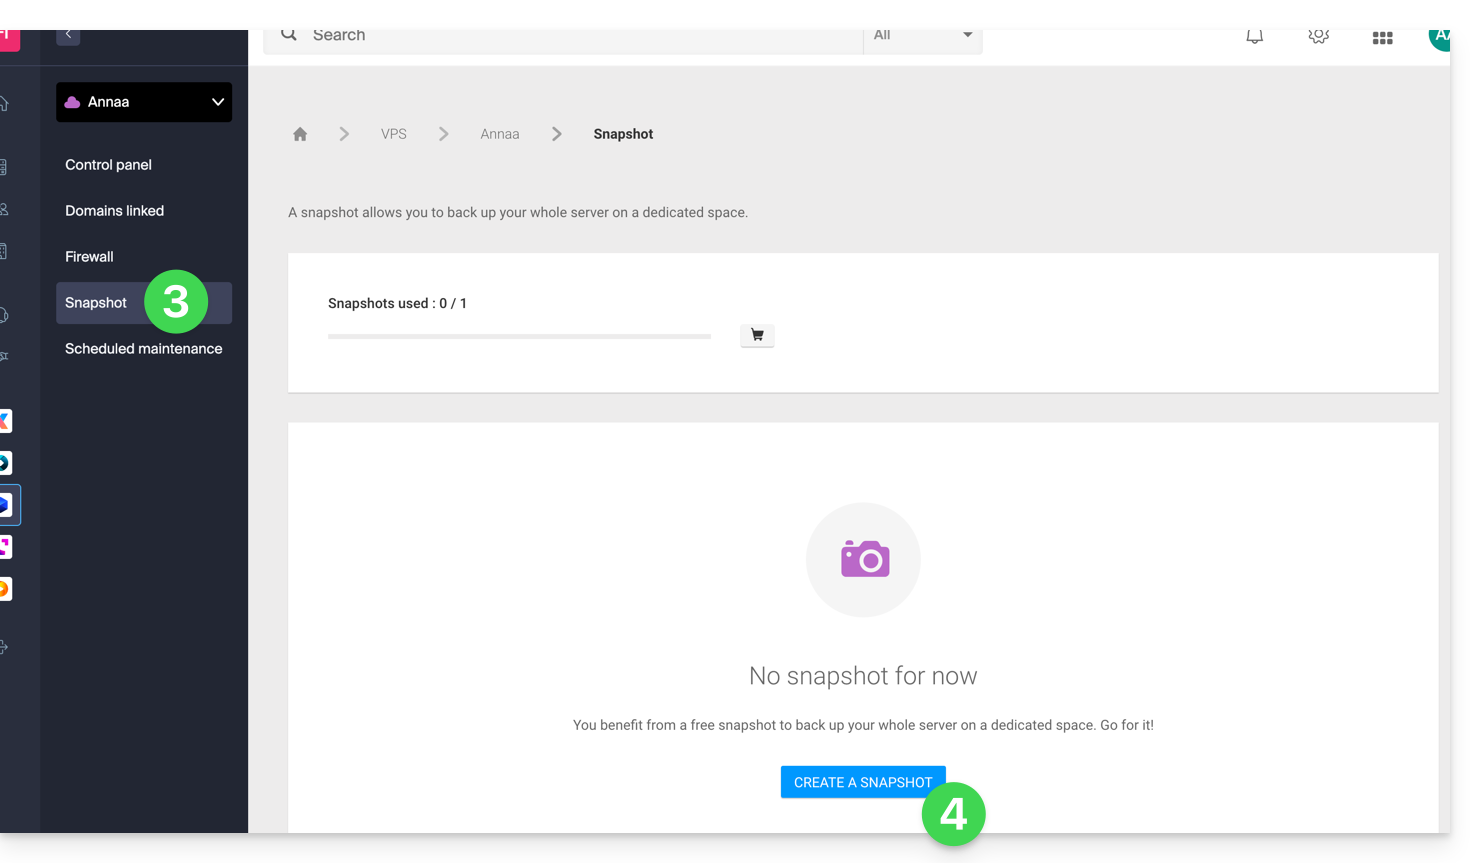
- Click on Snapshot in the left-hand menu.
- Click on the blue Create a snapshot button:
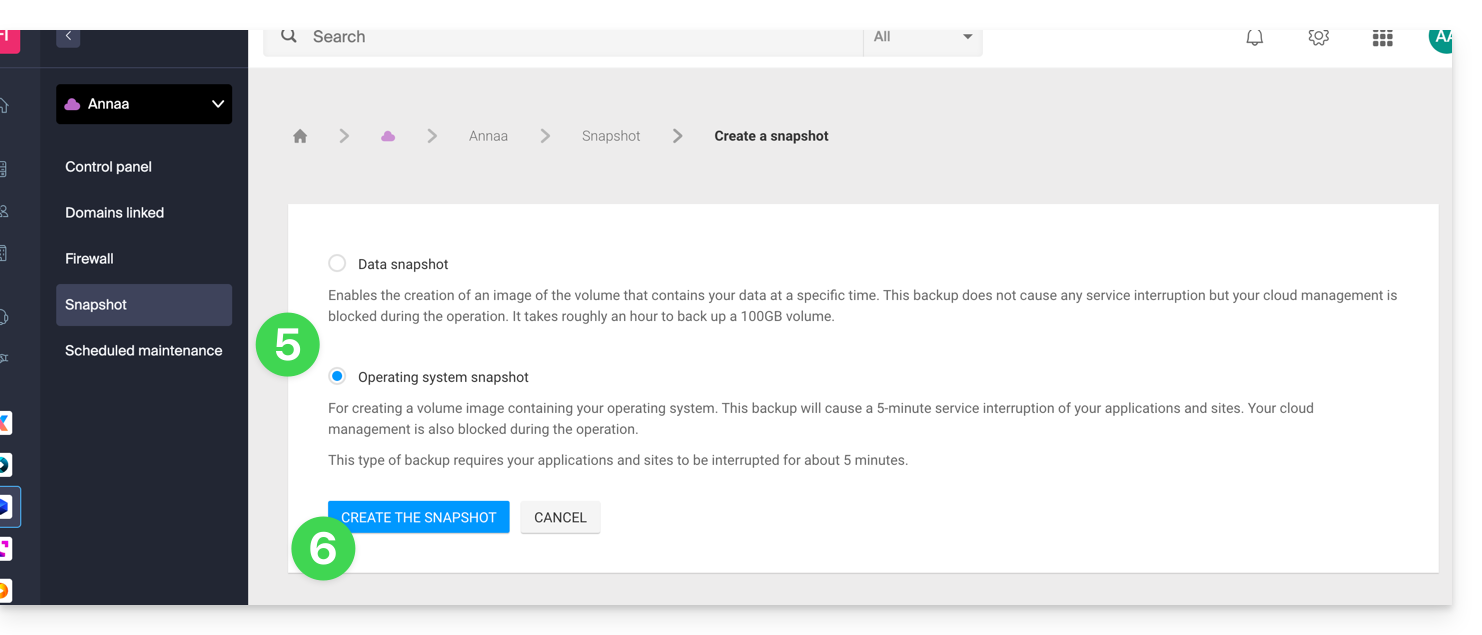
- Choose the type of snapshot to create (data or operating system).
- Click on the blue button to start creating the snapshot:
- An email is sent when the snapshot is generated.
Delete a snapshot
To do this:
- Click here to access the management of your product in the Infomaniak Manager (need help?).
- Click directly on the name assigned to the product in question.
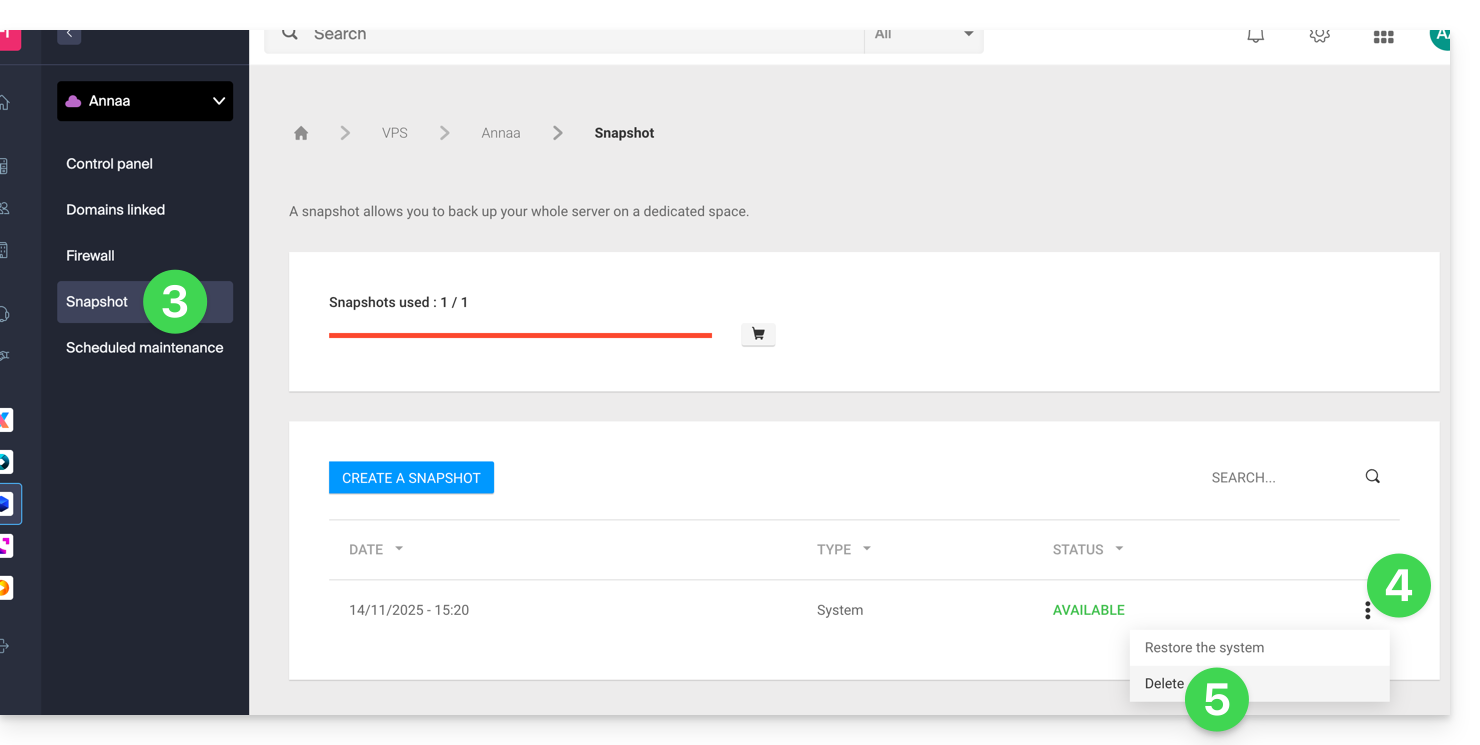
- Click on Snapshot in the left-hand menu.
- Click on the action menu ⋮ to the right of the item in question in the table that appears.
- Click on Delete:
Order additional snapshots
To do this:
- Click here to access the management of your product on the Infomaniak Manager (need help?).
- Click directly on the name assigned to the product in question.
- Click on Snapshot in the left-hand menu.
- Click on the shopping cart icon:
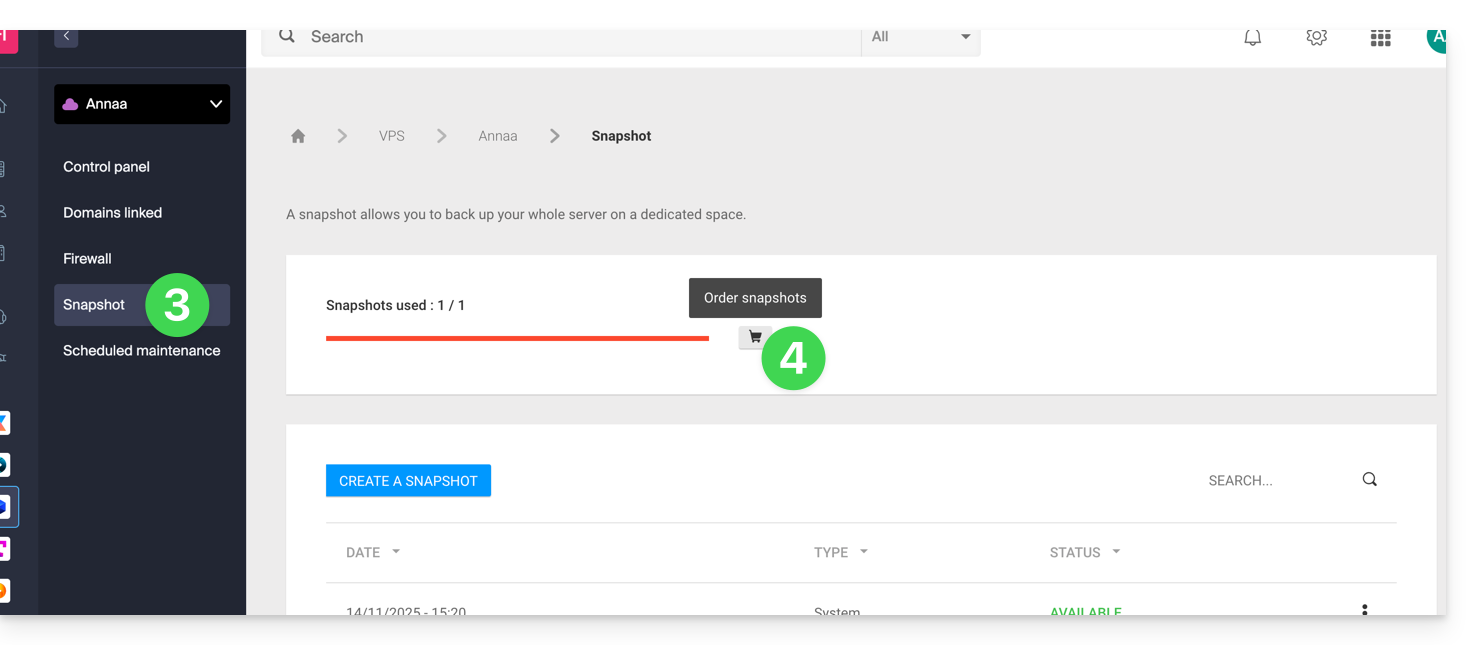
- Follow the instructions to complete the order.
It is not possible to order an additional snapshot if a snapshot is currently in progress.
Link to this FAQ: https://faq.infomaniak.com/1495
Has this FAQ been helpful?