
Knowledge base
1000 FAQs, 500 tutorials and explanatory videos. Here, there are only solutions!
Generate an email password quickly
This guide explains how to quickly obtain a password when you need to access an Infomaniak email address.
Generate an email address password
If you are unable to complete these steps because you receive different information on the screen, you probably lack the necessary permissions if you are not the original creator of the email address — refer to this other guide — for example, an administrator can add the email address directly to your Web app Mail or send you a link to generate a password yourself.
To add a password to the example address demonstration@exemple-domaine.ch:
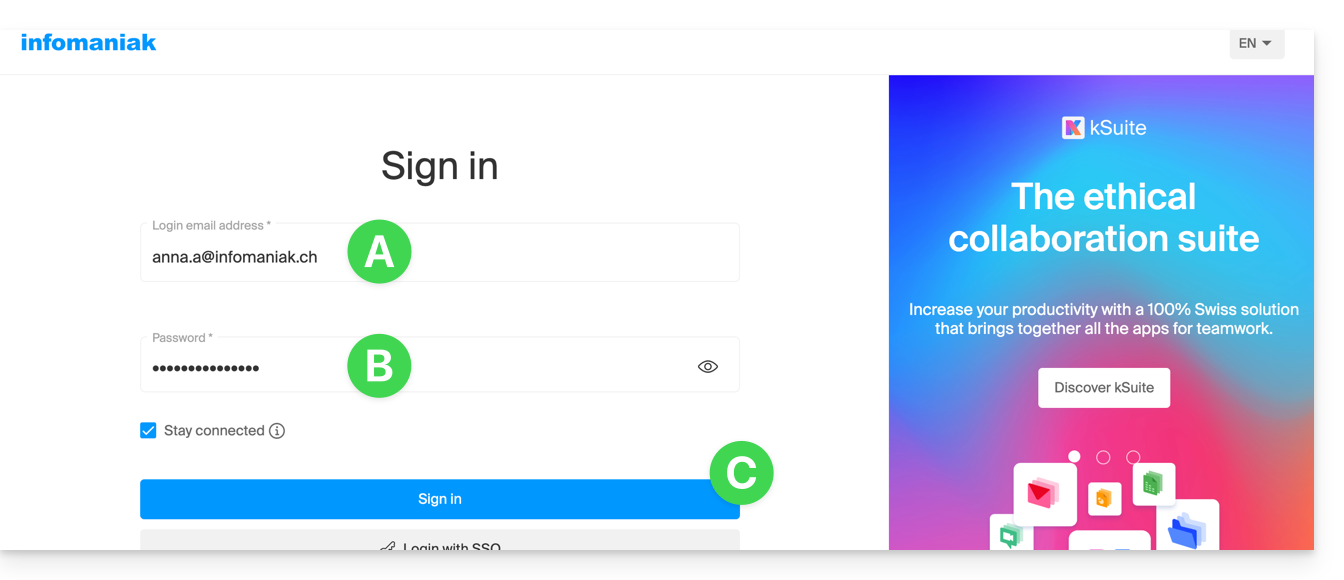
- Enter your Infomaniak account login and password on the page https://manager.infomaniak.com/:
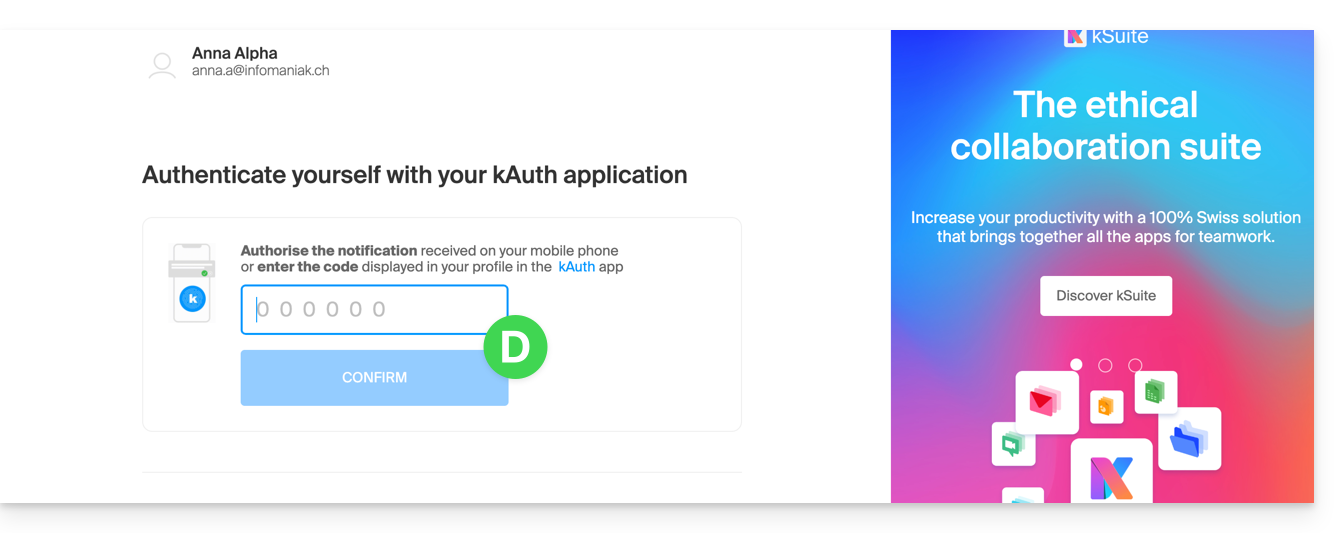
- Validate the entry in the Manager with the 2FA (two-factor authentication) method initially defined:
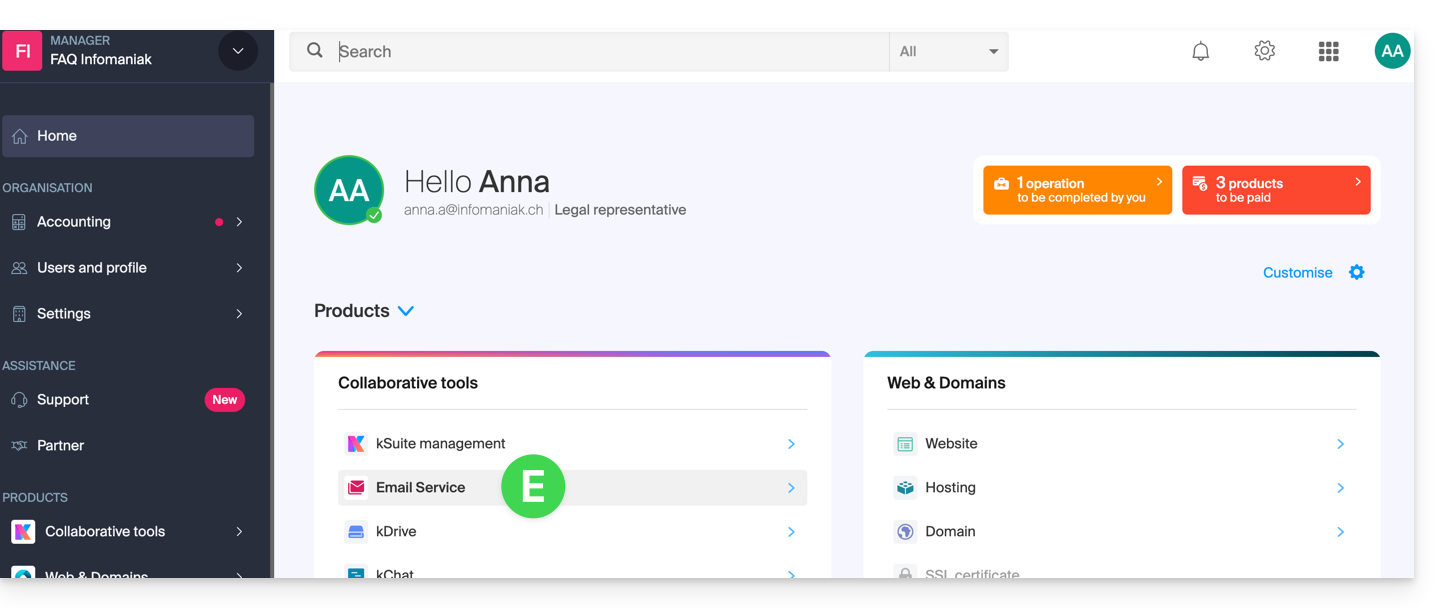
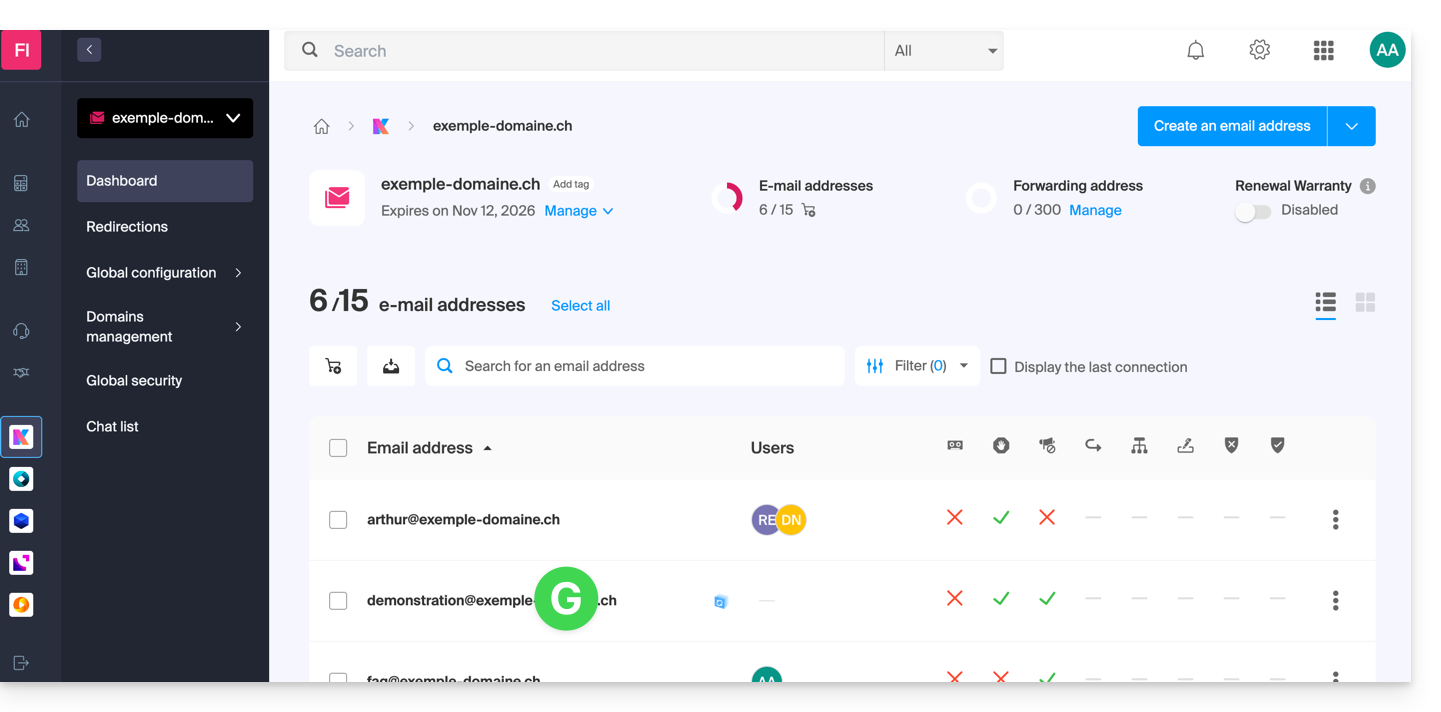
- Once on the dashboard, click on Mail Service:
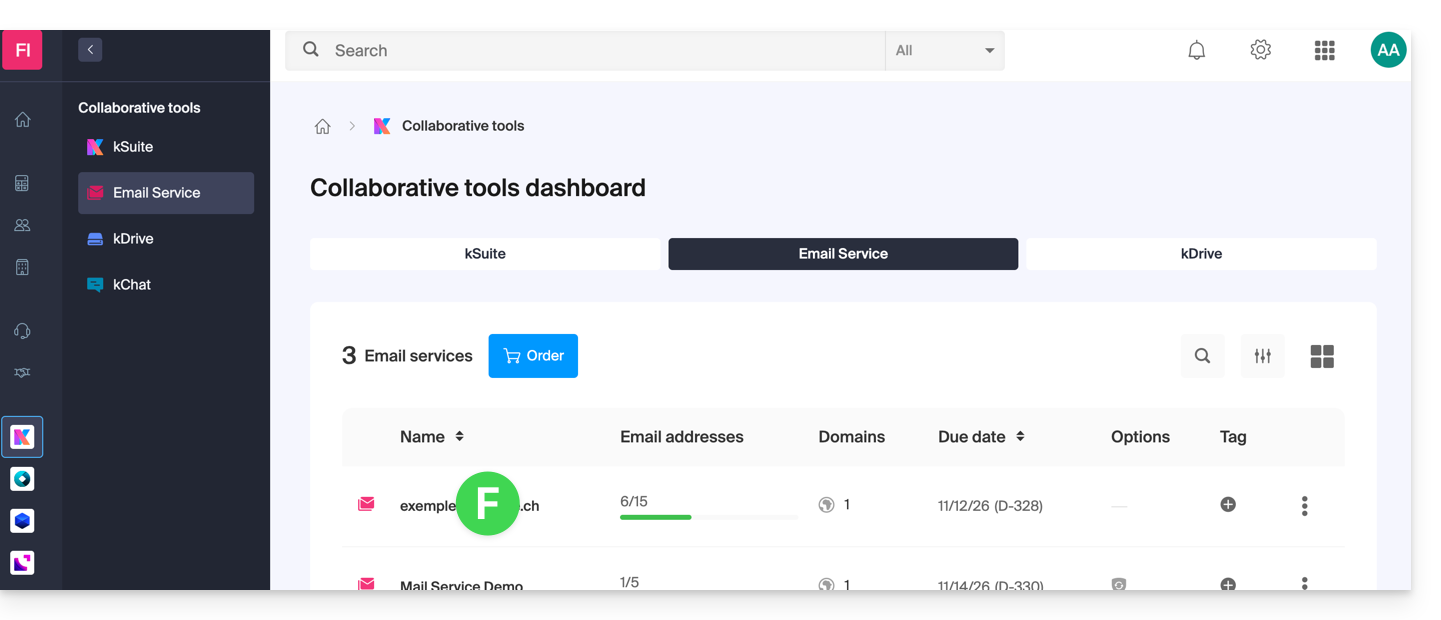
- Once on your Mail Services, click on the name / domain name to which the email address in question belongs:
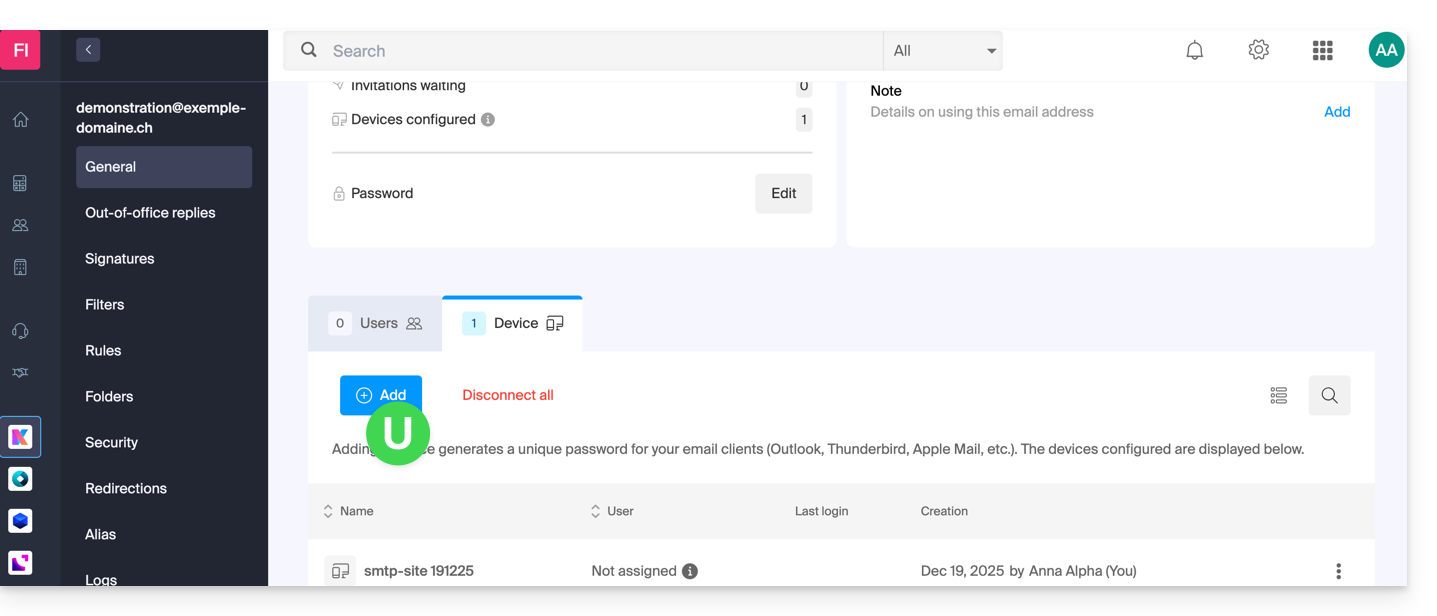
- Once on the Mail Service to which the address belongs, click on the email address in question:
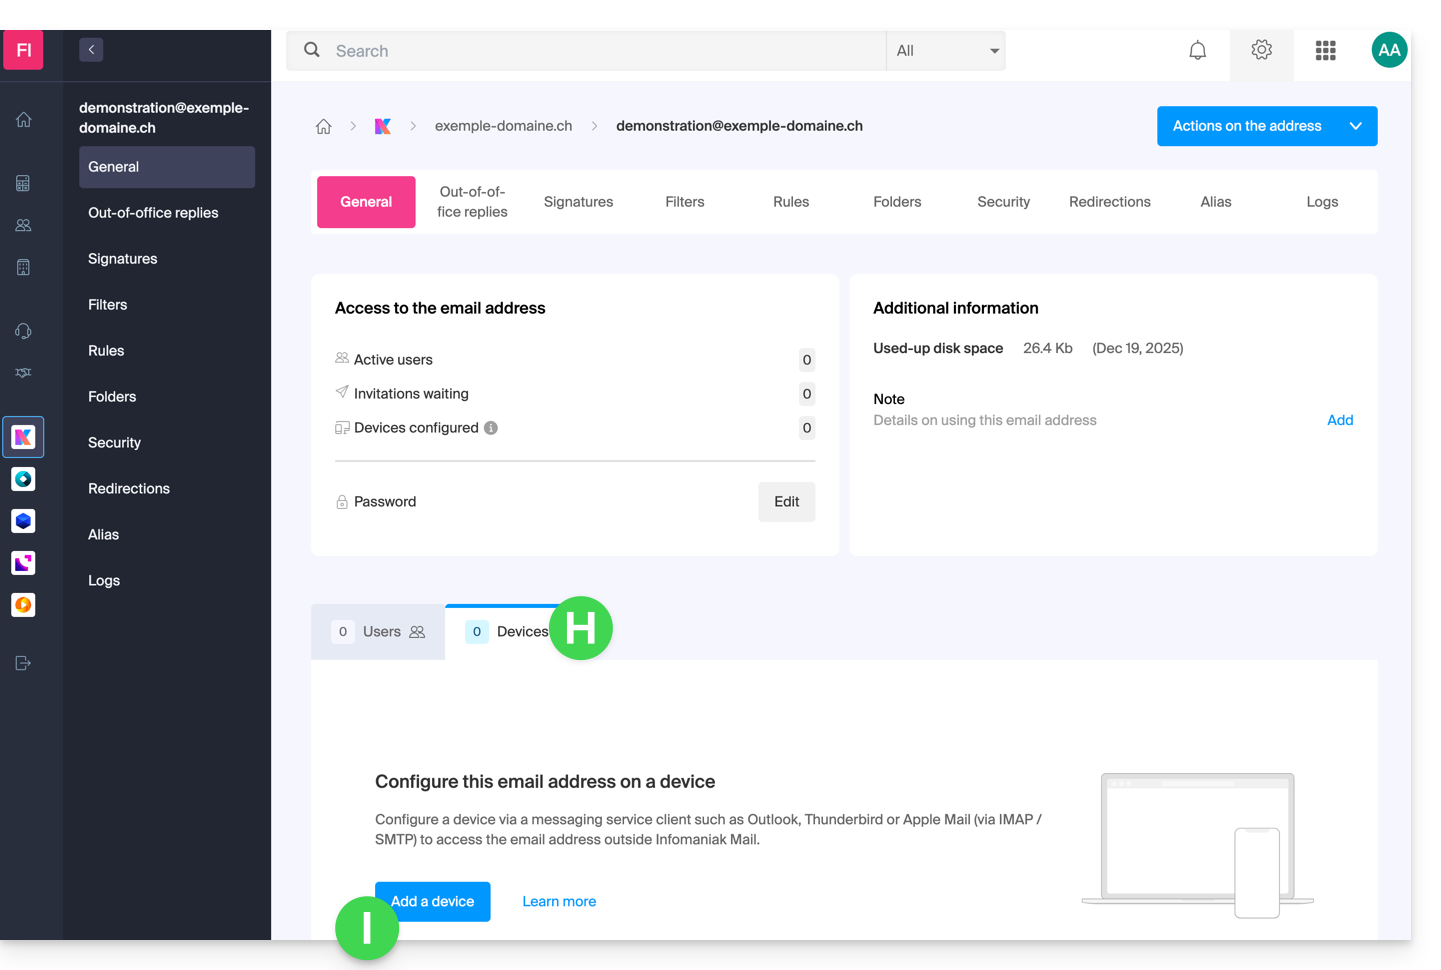
- Once on the email address in question, click on the Devices tab and then on Add a device:
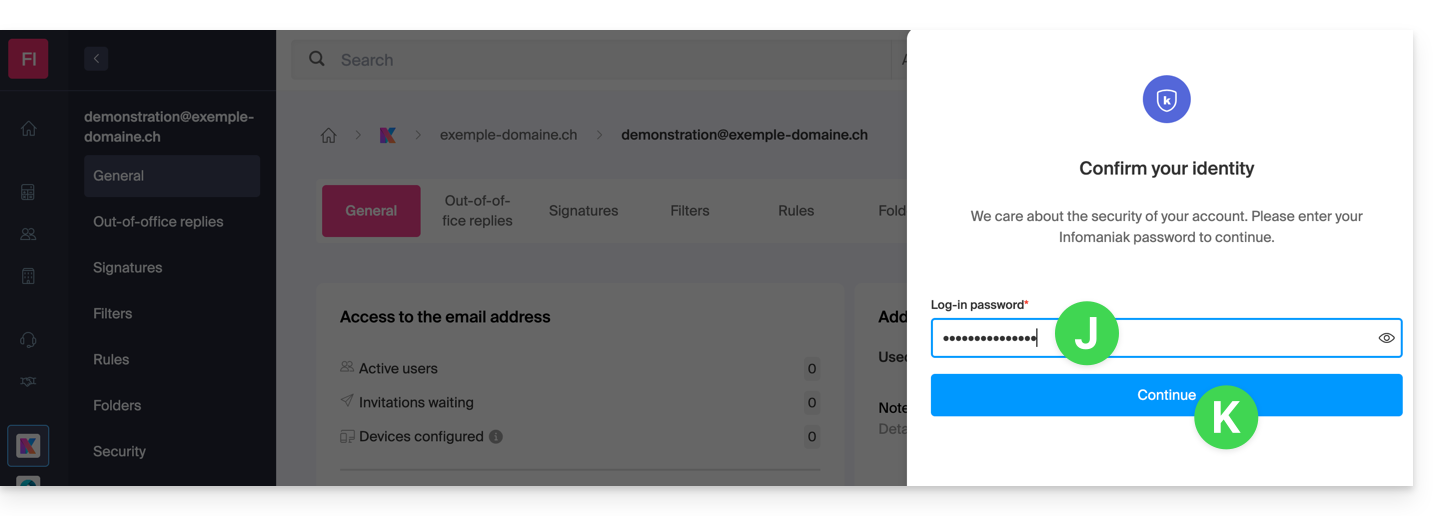
- At this stage, it may be necessary to re-enter the login password (the one from point B above):
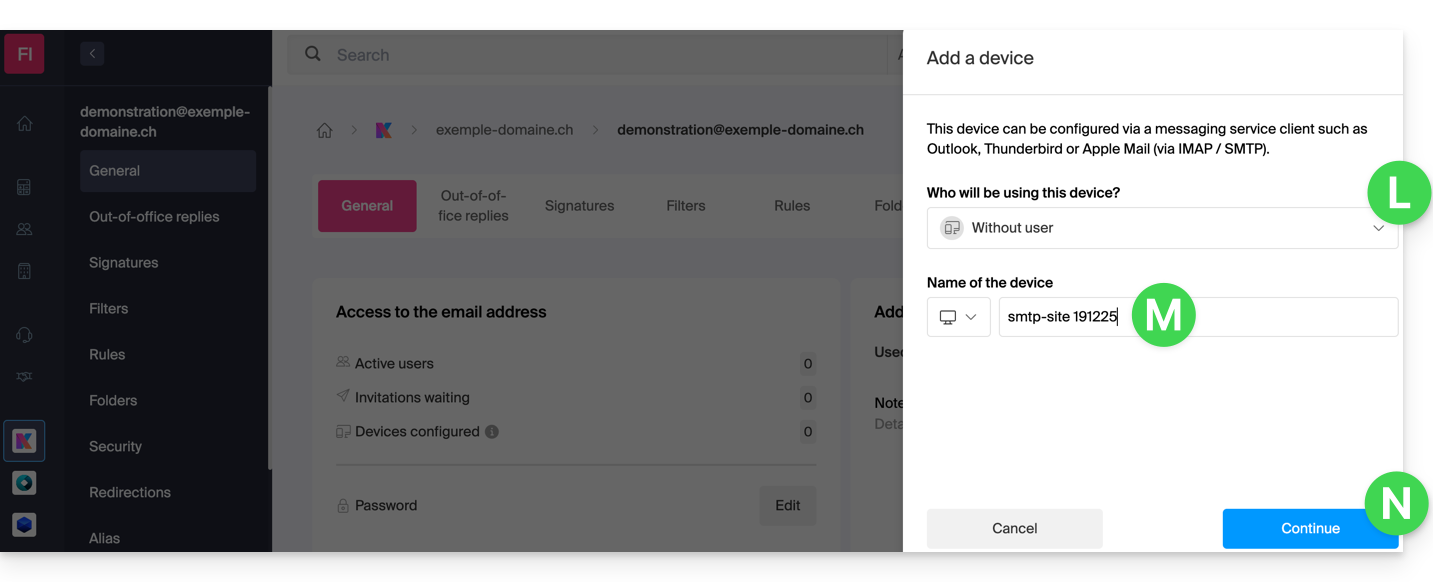
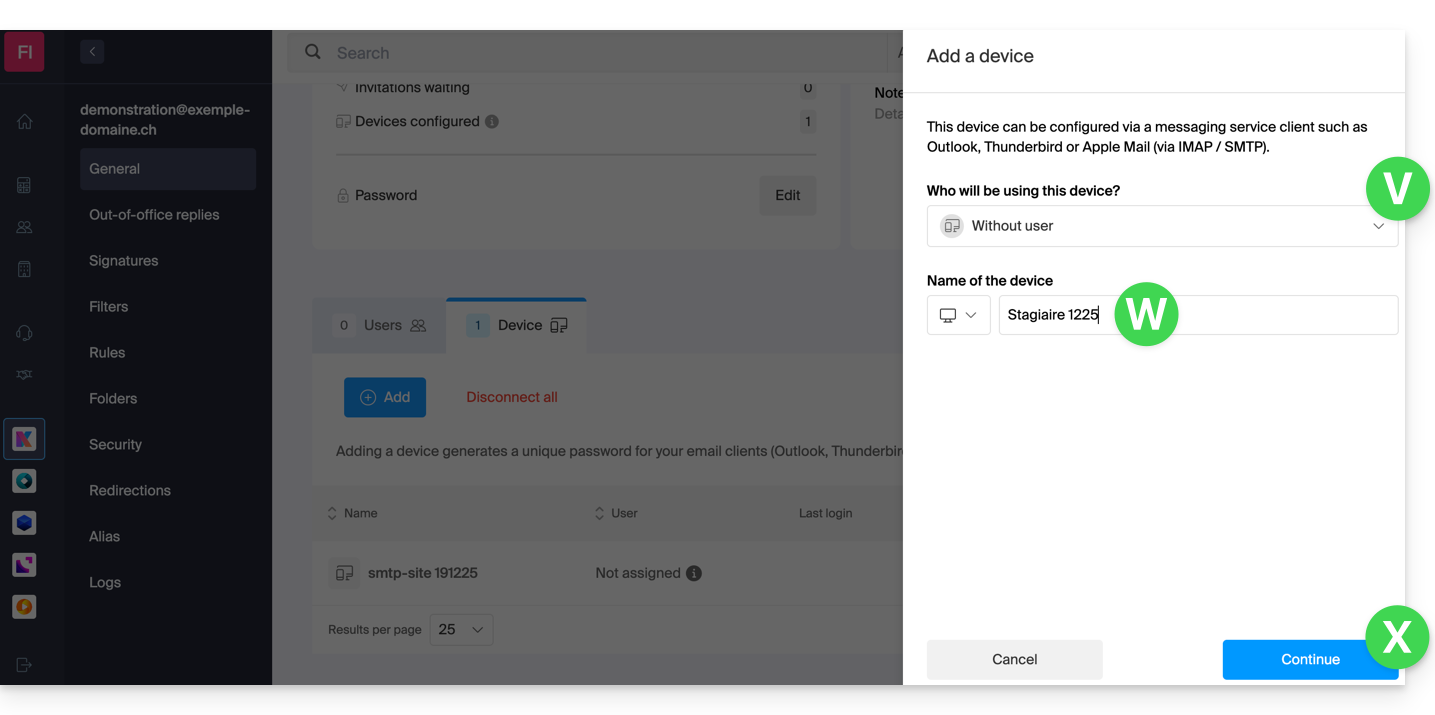
- Then choose not to specify a particular user, and enter a name that allows you to identify the reason for creating this device (here the user needs a password to be able to send emails from a site, and they add the current date as useful information):
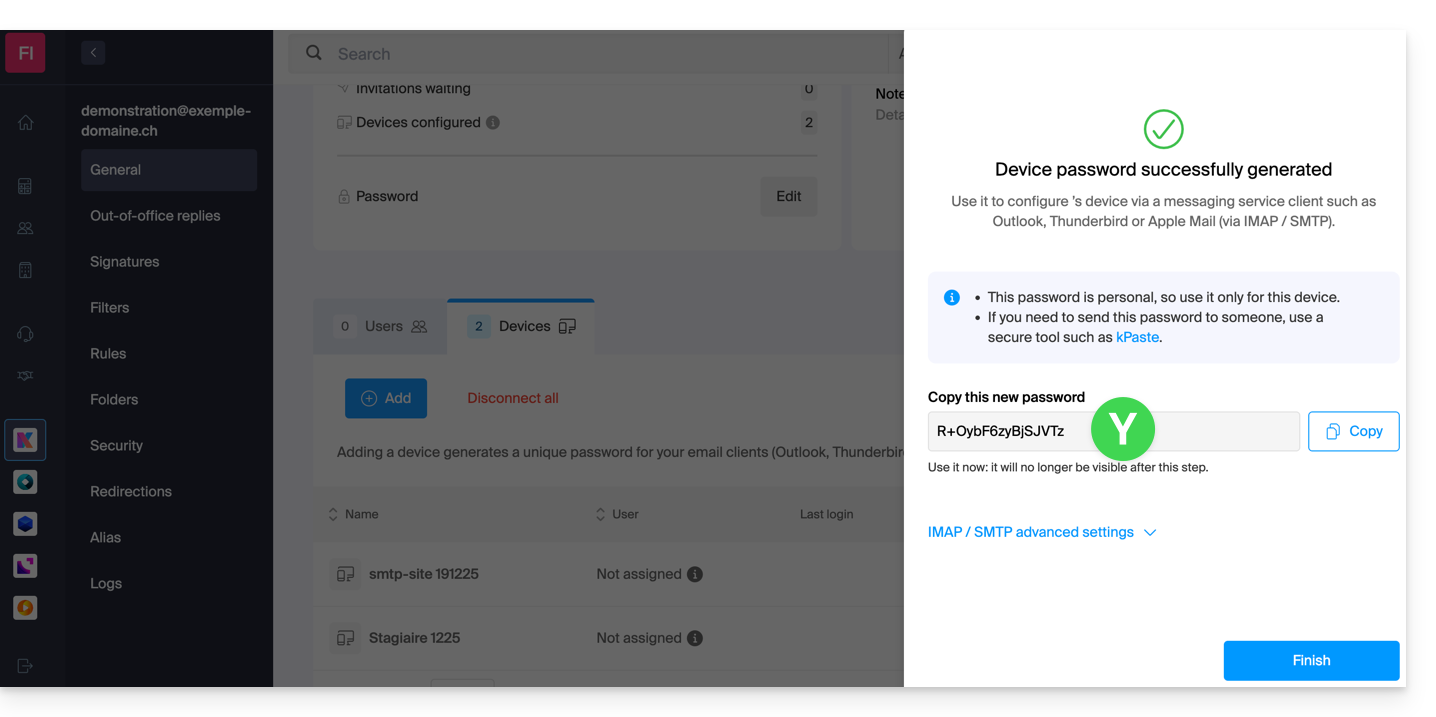
- Here is the password, you can use it for your chosen purpose (note, it will not be possible to display it again later):
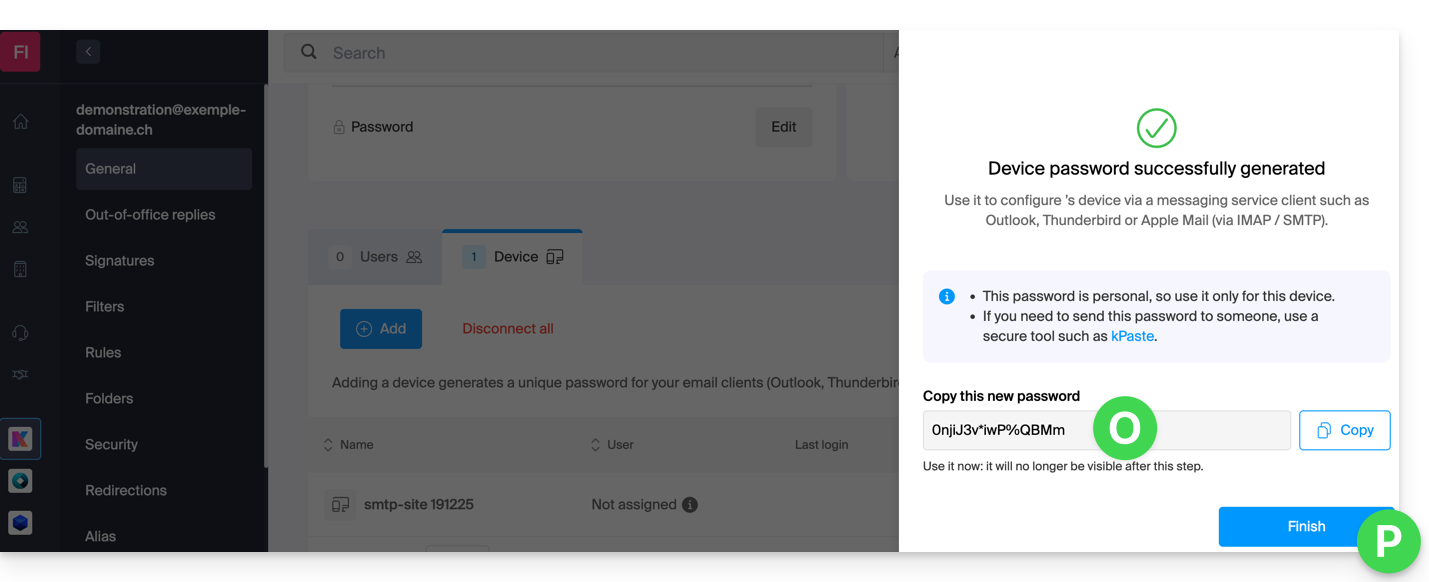
You clicked the “Finish” button (above “P”) without noting the password? No problem, generate a new one!
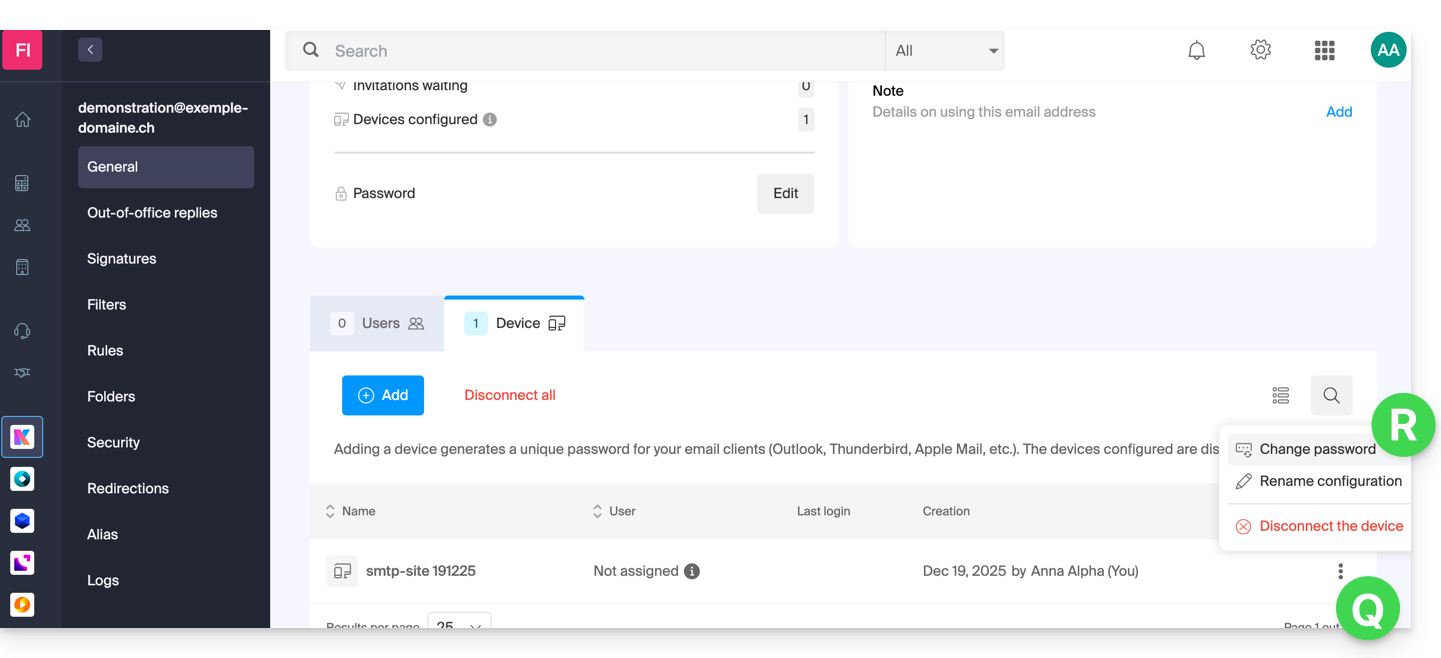
- Click on the action menu ⋮ located to the right of the newly created device to randomly generate a new password that will cancel the old one:
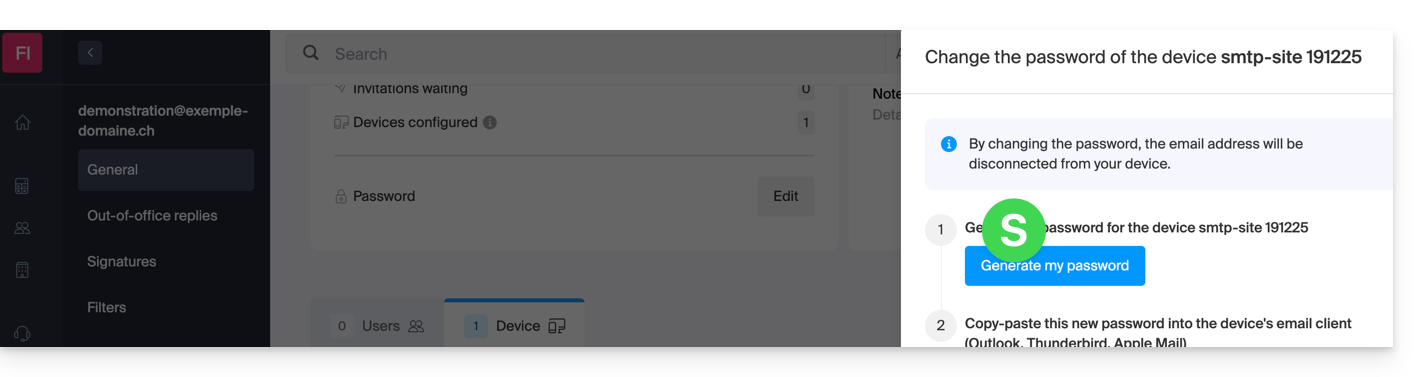
- Click the button to generate a new password:
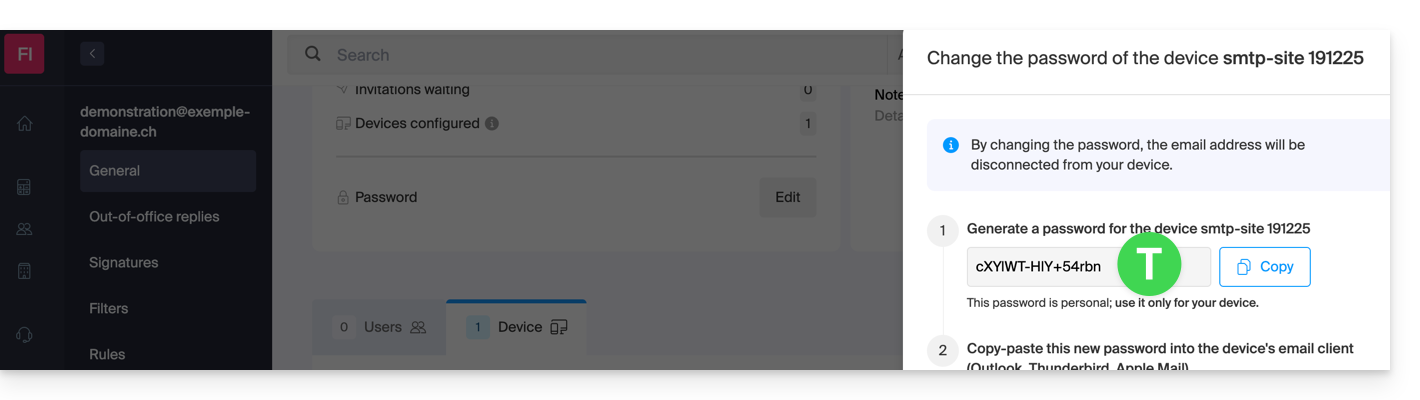
- Here is the password that replaces the old one, you can use it for your chosen purpose (note, it will not be possible to display it again later):
Do you need a password for a secondary and temporary user? No problem, generate a second one!
- Click the button to Add an additional new device:
- Then choose not to specify a particular user, and enter a name that allows you to identify the reason for creating this device (here the user needs a password for an intern for a week):
- Here it is, the password is displayed. You can use it for any purpose (note that it will not be possible to display it again afterwards. However, as before, it will of course be possible to regenerate one):
Link to this FAQ: