Knowledge base
1000 FAQs, 500 tutorials and instructional videos. Here, there are only solutions!
Schedule email sending on the Infomaniak Webmail app
This guide explains how to schedule an email to be sent at a specific date and time in the future, using the Infomaniak Web app Mail (online service ksuite.infomaniak.com/mail), even if you are no longer connected at that time.
Preamble
- Scheduling is also possible on the mobile app Infomaniak Mail (app for iOS/Android smartphone or tablet).
- kSuite free / my kSuite / Mail Service Starter do not allow customization of the time when scheduling.
Delayed sending: schedule a message
To send an email at a later date and time:
- Click here to access the Infomaniak Web app Mail (online service ksuite.infomaniak.com/mail).
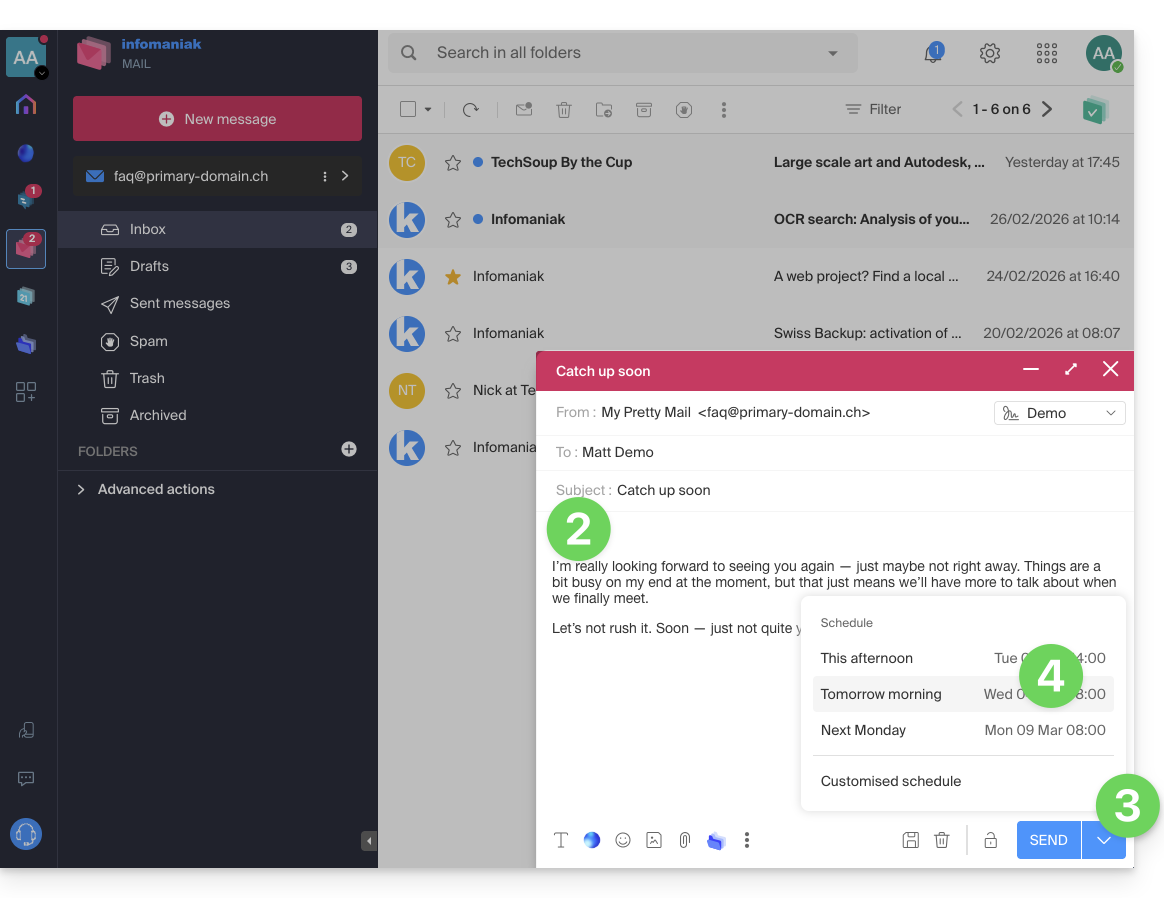
- Compose a new message as usual.
- Click on the chevron to the right of the Send button to access additional actions.
- Choose the time the message should be sent, from the suggestions or by customizing the time (see preamble above):
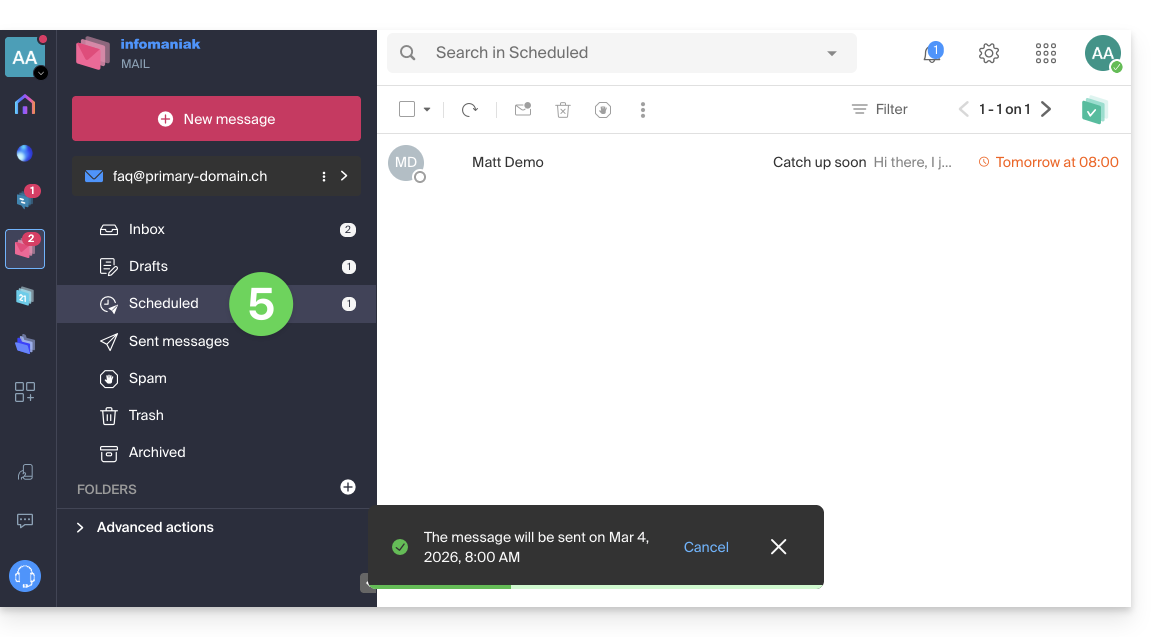
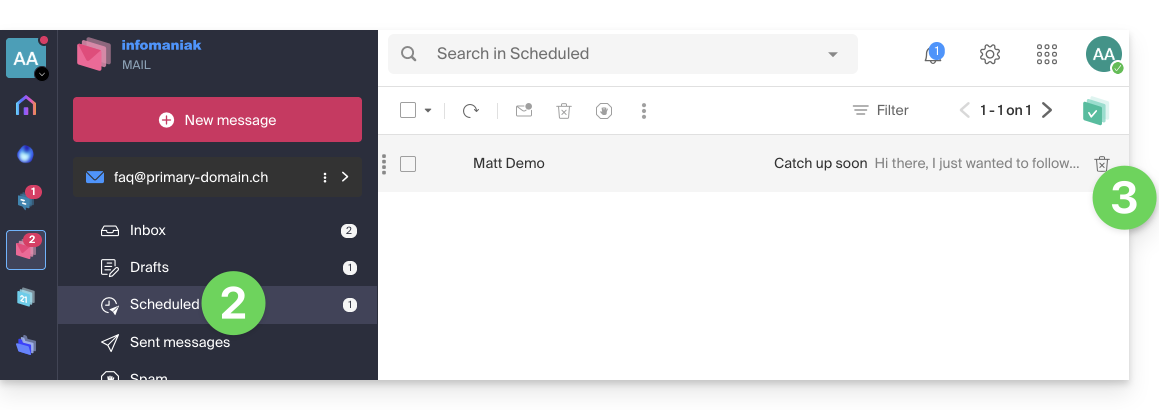
- You can then find your scheduled messages in a new dedicated section:
Reschedule or cancel a scheduled send
To modify the sending time of a message already scheduled to be sent later:
- Click here to access the Infomaniak Web app Mail (online service ksuite.infomaniak.com/mail).
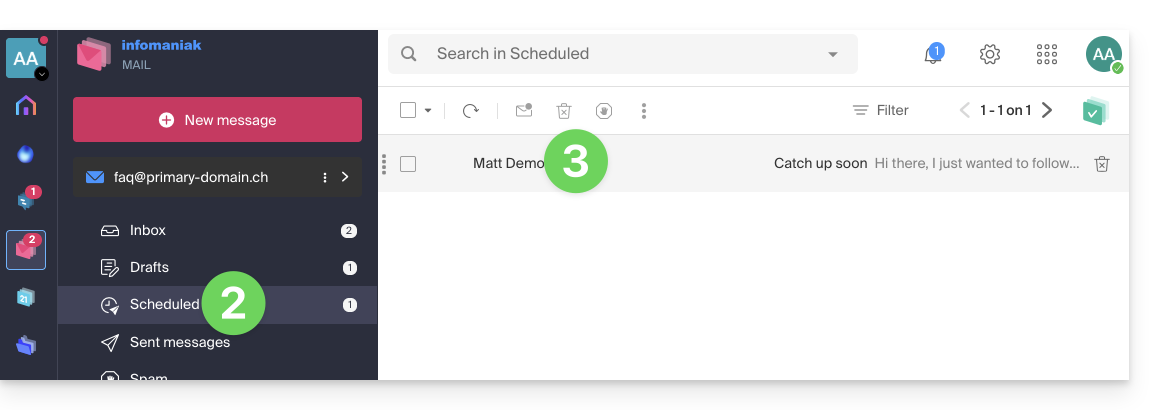
- Click on Scheduled sends in the left sidebar.
- Open the message for which you want to modify the future sending time:
- Click to Reschedule the send at the time you need to specify using the dropdown menu…
- OR click on the ✎ Edit draft button:
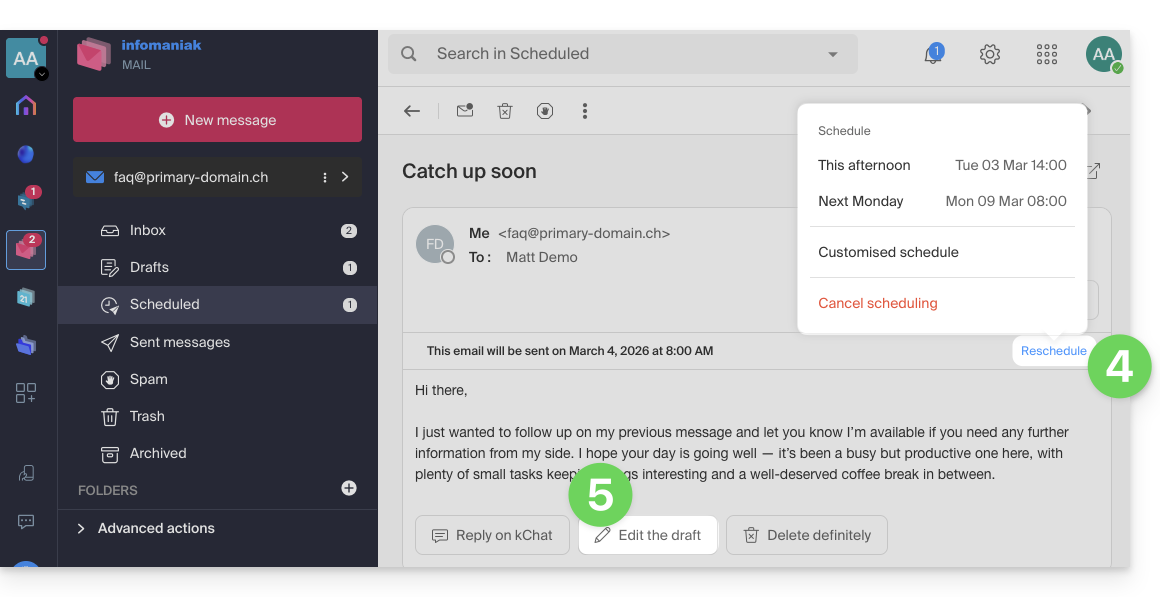
- Accept that the message is moved to drafts and that the scheduled send is therefore cancelled.
- Go back to step 3 of the first chapter above to reschedule a send in the future.
Completely delete a scheduled message
To permanently delete a message without the possibility of recovering it:
- Click here to access the Infomaniak Web app Mail (online service ksuite.infomaniak.com/mail).
- Click on Scheduled sends in the left sidebar.
- Hover over the message to delete and click on the trash can:
- Confirm the deletion to permanently destroy the draft.
Link to this FAQ:
Has this FAQ been helpful?