
Knowledge base
1000 FAQs, 500 tutorials and explanatory videos. Here, there are only solutions!
Install WordPress MS (multisite) ex-WPMU
This guide explains how to set up a WordPress multisite network to manage multiple sites from a single Infomaniak WordPress installation, with URLs of the type site1.domain.xyz, site2.domain.xyz, or even with domain1.com, domain2.com, etc.
Make your life easier! If needed, local partners referenced by Infomaniak can handle these procedures. Launch a free call for tenders. They take care of everything, freeing you from technical details.
Installing WordPress multisite
To get started:
- Install WordPress via Infomaniak on your hosting space with a main domain name:

- This first WordPress site must be reachable and function correctly:

- This first WordPress site must be reachable and function correctly:
- Connect via FTP.
- Edit the
wp-config.phpfile of this first WordPress site concerned. - Above the line "
/* That's all, stop editing! Happy blogging. */" (#94) copy-paste the codedefine('WP_ALLOW_MULTISITE', true);:
- Save your changes.
- Then log in to the administration of your WordPress site.
- Temporarily disable all WordPress plugins:

- Go to the TOOLS menu to create a Network:
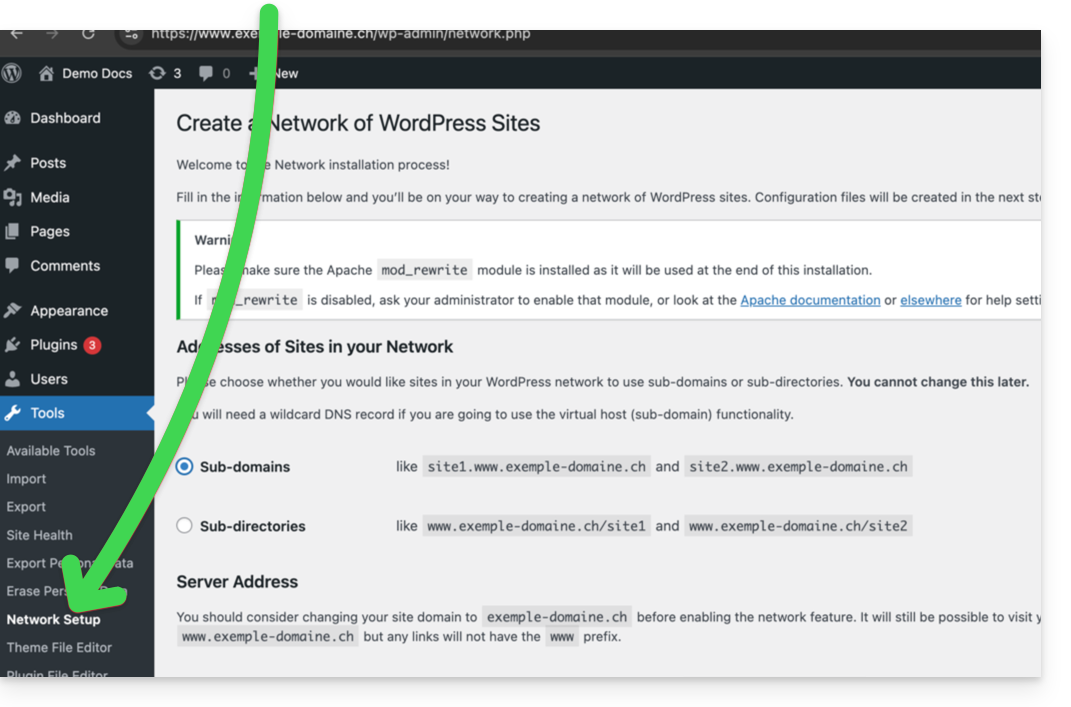
- Choose the method for creating your different WordPress sites (on subdomains)…
- Click the installation button:

- Add the instructions that appear on the screen to the
wp-config.phpand.htaccesson the server. - After reconnecting to your WordPress, you will get a new "My Sites" menu in which you can add and manage your different sites from the same network:

- Re-enable your disabled plugins.
- On the Manager, add an alias to your site in the form
*.your-domain-here (the asterisk allows you to create a wildcard alias) with DNS update so that the correctCNAMEis automatically added to the zone:
- Install or update your SSL certificates:

- When you create a new site within the network, for example by naming it
home2, it will then be accessible viahome2.domain.xyzand so on:
Link to this FAQ: