Knowledge base
1000 FAQs, 500 tutorials and instructional videos. Here, there are only solutions!
Manage website maintenance mode
This guide explains how to enable or disable maintenance mode on a website hosted with Infomaniak Hosting.
Preamble
- Maintenance mode allows you to display a custom message to your visitors, for example while resolving a technical issue.
- It is also possible to specify IP addresses that can bypass this page.
- An email is sent to the Organization's users.
Enable maintenance mode
To activate a page that temporarily replaces your usual homepage:
- Click here to access the management of your product on the Infomaniak Manager (need help?).
- Click directly on the name assigned to the product in question.
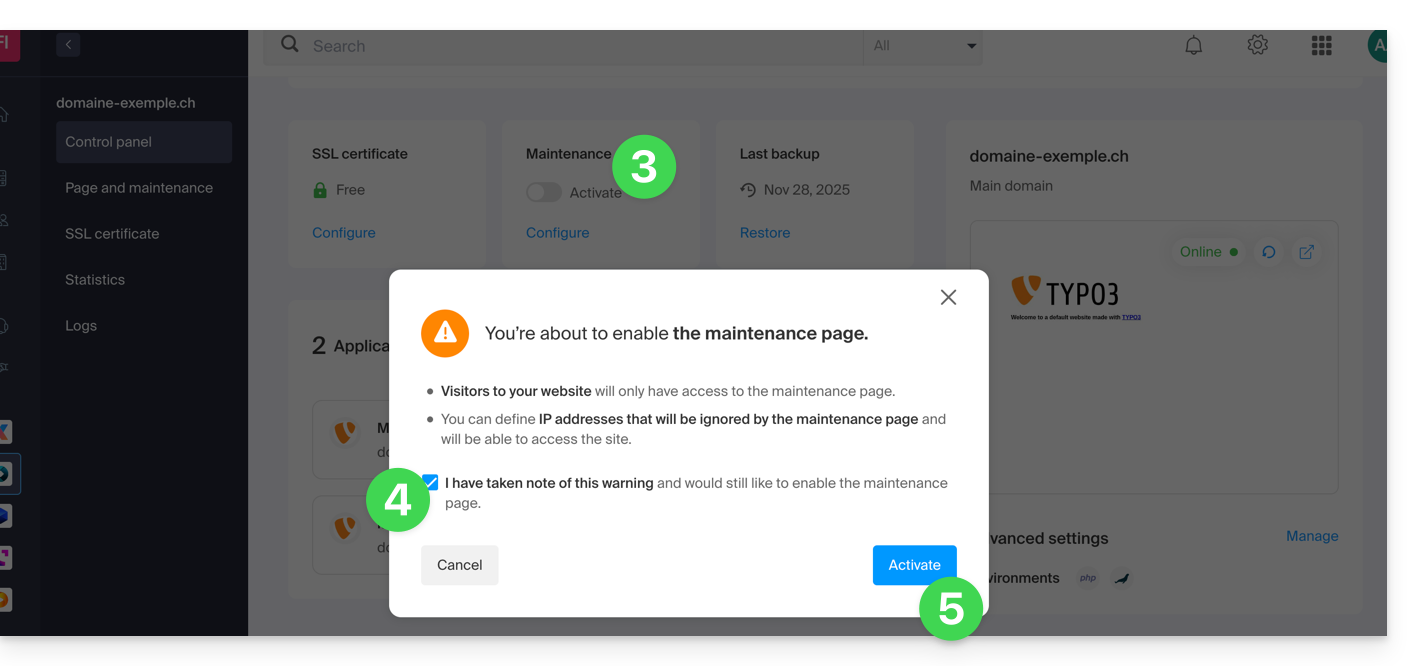
- Click the toggle switch to enable the maintenance page.
- Confirm the warning.
- Click the button to enable:
Customize the maintenance page
To set up a page with your desired message:
- Click here to access the management of your product on the Infomaniak Manager (need help?).
- Click directly on the name assigned to the product in question.
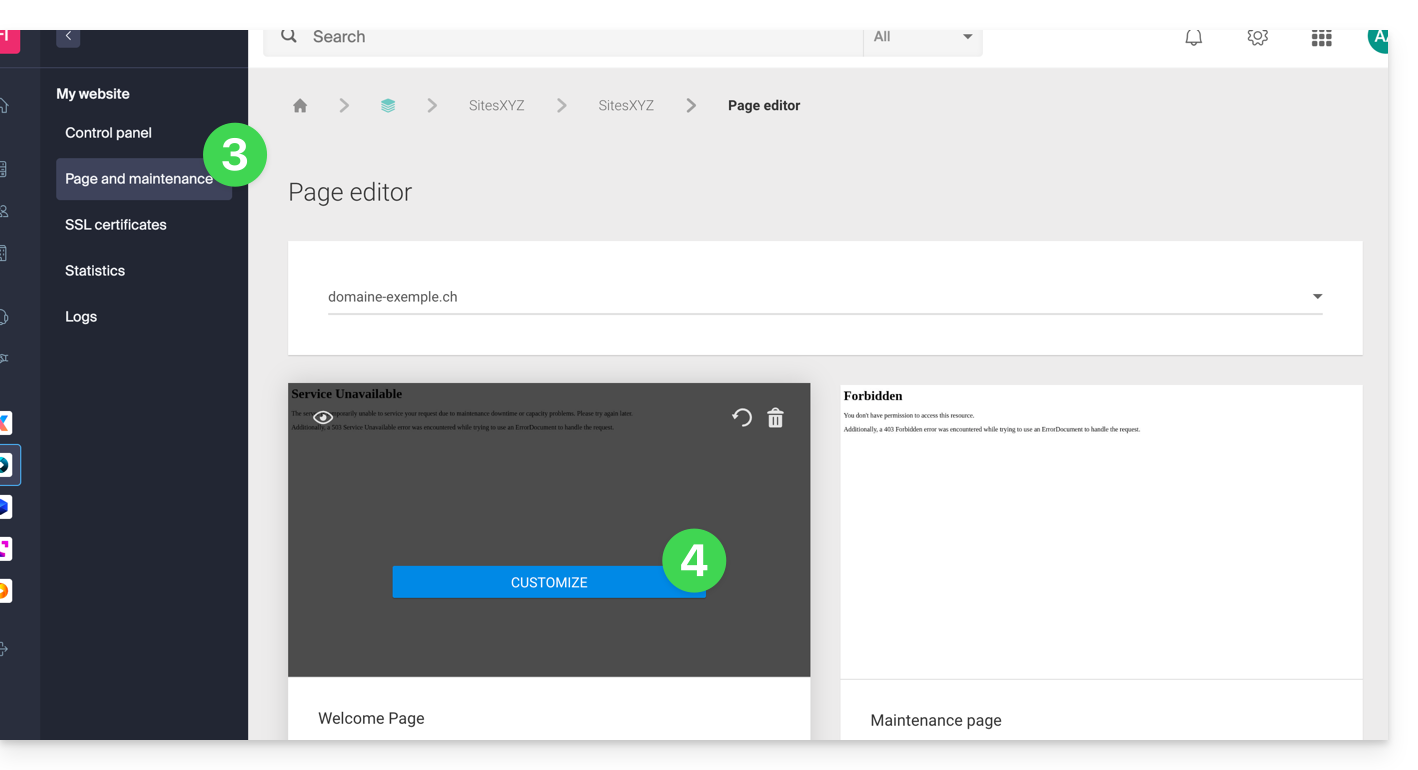
- Click on Page and Maintenance in the left sidebar menu.
- Click on Create a page or the Customize button if it already exists:
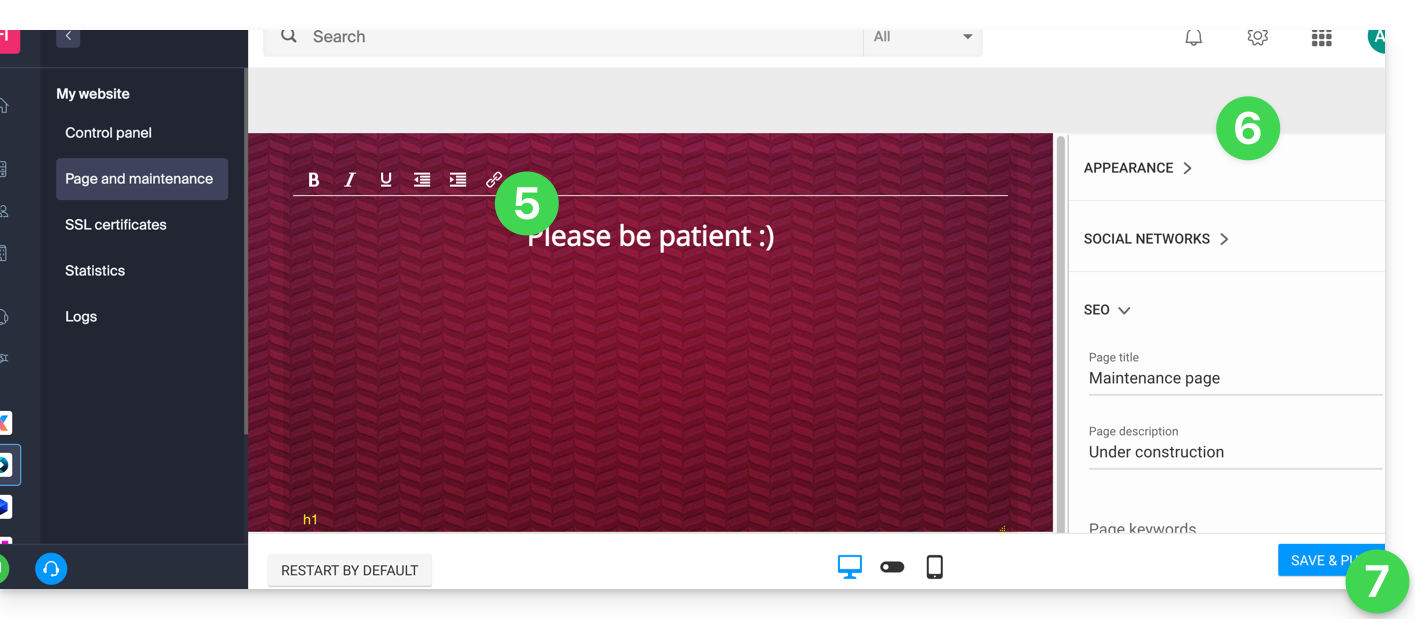
- Format the text of your choice.
- Configure the display using the elements on the right.
- Click on Save & Activate to publish the page:
Allow IP addresses to bypass the suspension
It is possible to display the actual site even with maintenance mode activated. To do this, it is necessary to enter the IP addresses of the computers that need to be able to bypass maintenance mode:
- Activate maintenance mode according to the procedure above.
- Go back to the maintenance page configuration page (see procedure above).
- Under Maintenance on the right, click on Insert my IP address to allow your computer to display the site without maintenance mode:
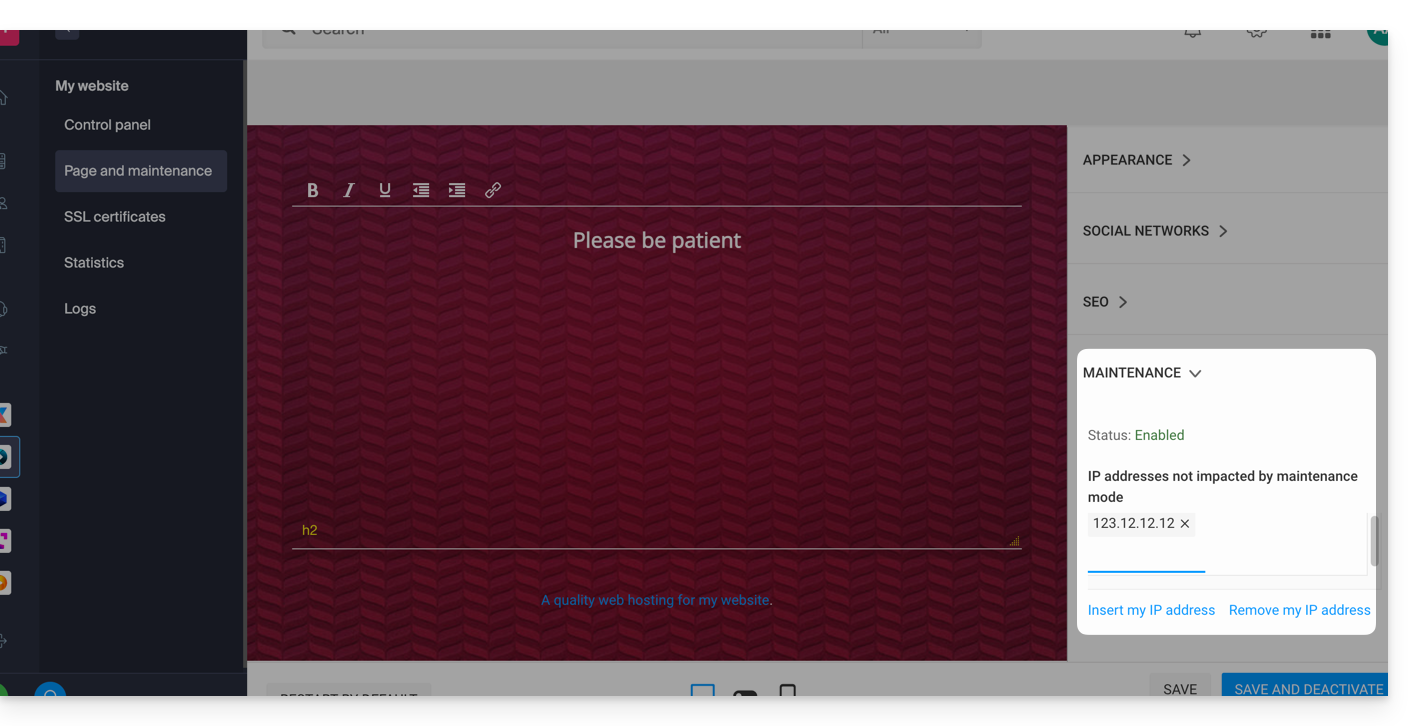
- It is also possible to manually enter the IP addresses to authorize.
- Click on Save and publish.
If the IP addresses of the added computers change, it will be necessary to repeat these steps.
Disable maintenance mode
To disable the message that appears on your site during maintenance:
- Click here to access the management of your product on the Infomaniak Manager (need help?).
- Click directly on the name assigned to the product in question.
- Click either on the Disable button or on the toggle switch to disable the maintenance page:
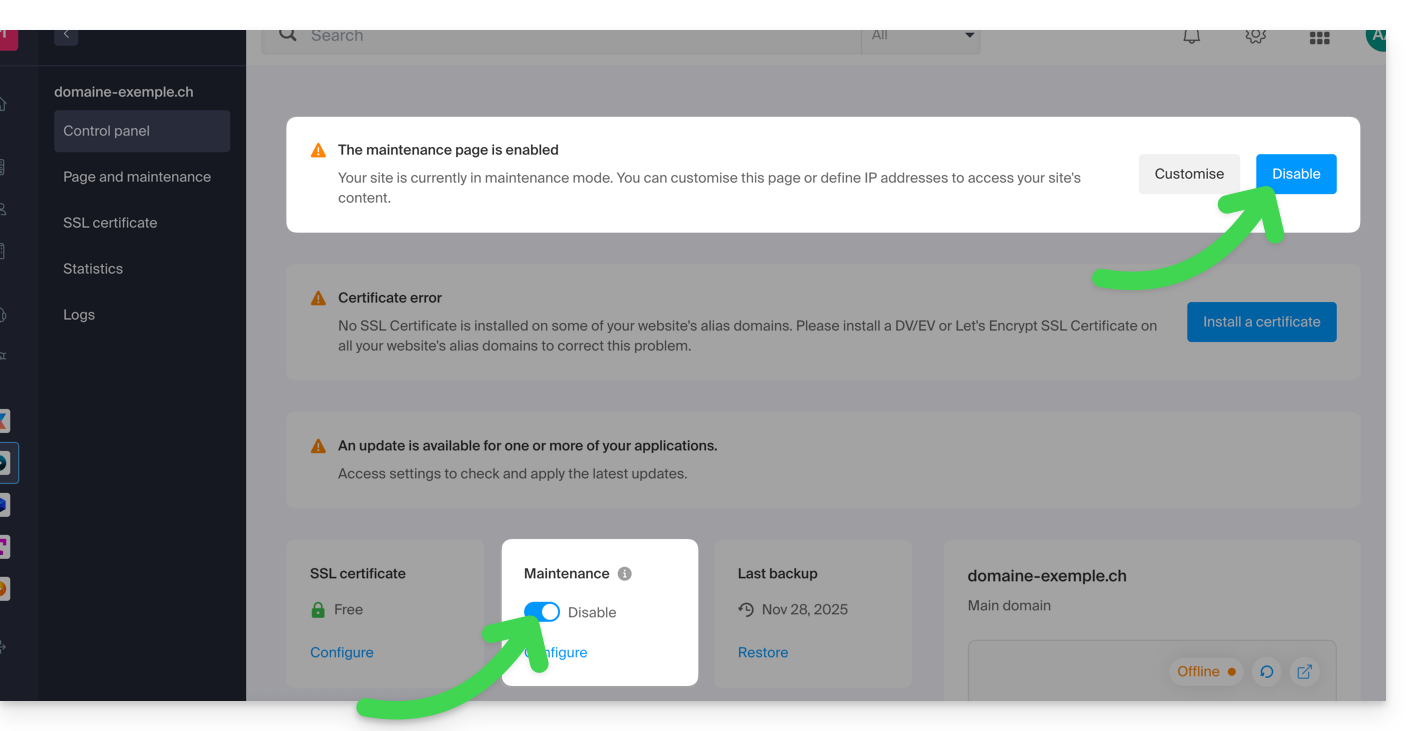
- Confirm the deactivation of maintenance.
Alternative method for WordPress
It is not recommended to activate the Infomaniak maintenance page above to then work in WordPress.
It is recommended to install a WordPress extension (there are dozens available) dedicated to maintenance within the CMS itself.
Otherwise, you can add the code <?php $upgrading = time(); ?> in a new empty file named .maintenance (the dot before the file name is important) placed on the server at the root of your site, which will disable all your pages except the WordPress homepage.
Link to this FAQ: https://faq.infomaniak.com/2063
Has this FAQ been helpful?