Knowledge base
1000 FAQs, 500 tutorials and instructional videos. Here, there are only solutions!
It is not possible to order and obtain additional IP addresses on a Cloud VPS / VPS Lite.
Possible alternatives would be to use…
- … a Public Cloud hosting solution (you can add as many IP addresses as you need),
- … the Newsletter tool, tailored to your needs.
Link to this FAQ: https://faq.infomaniak.com/2816
Has this FAQ been helpful?
This guide explains how to authorize certain incoming and/or outgoing ports in the firewall of a VPS Cloud / VPS Lite server.
Accessing the management tool
To manage the Cloud VPS / VPS Lite firewall:
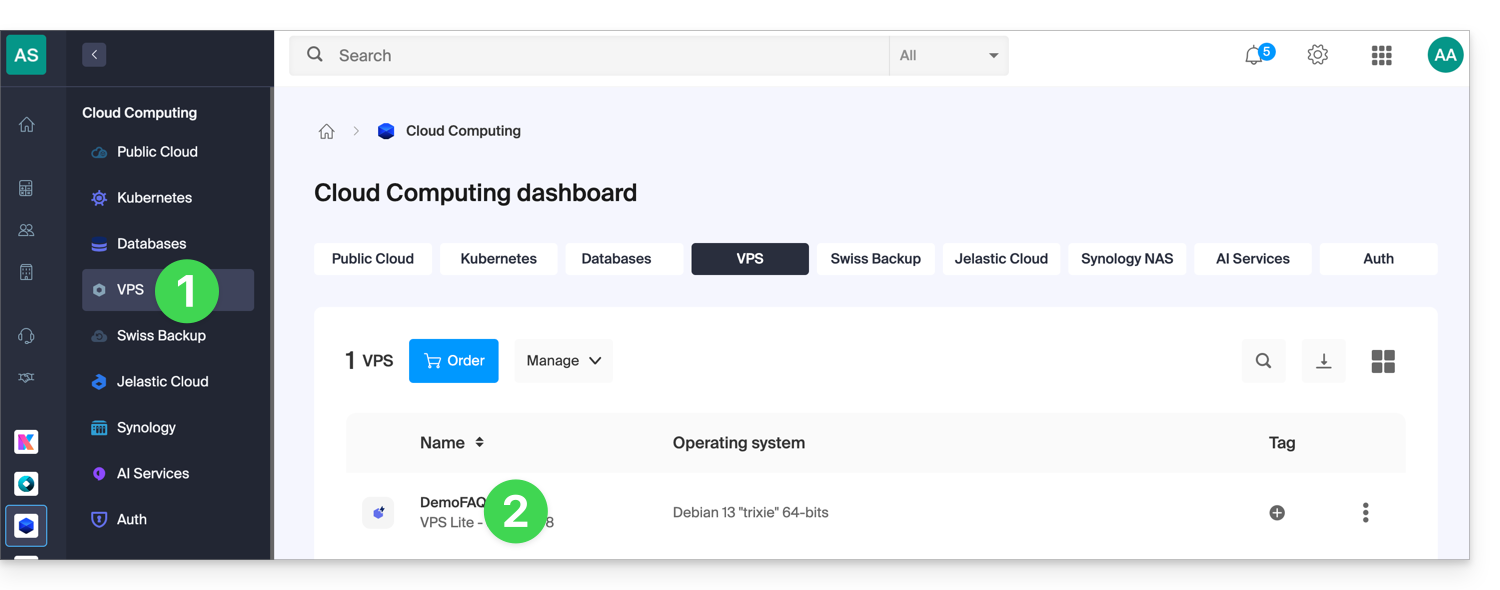
- Click here to access your VPS management interface on the Infomaniak Manager (need help?).
- Click directly on the name assigned to the VPS in question:
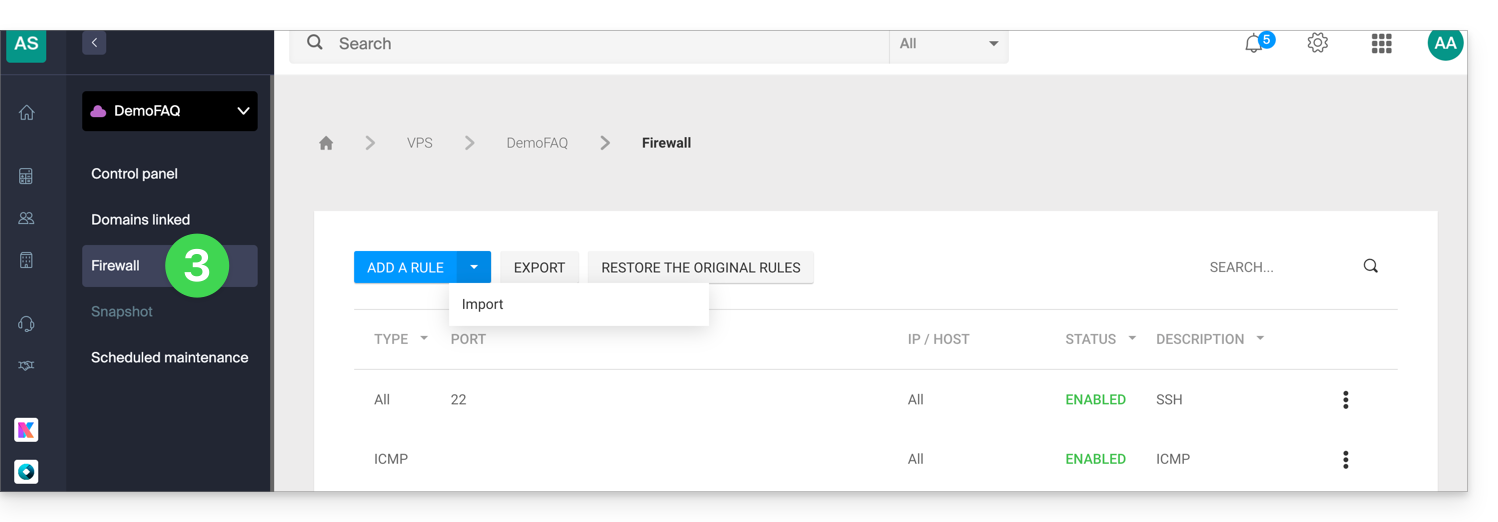
- Click on Firewall in the left-hand menu:
Rule for allowing ping on Cloud VPS / VPS Lite
To add a rule to the firewall:
- Click the blue button to Add a rule.
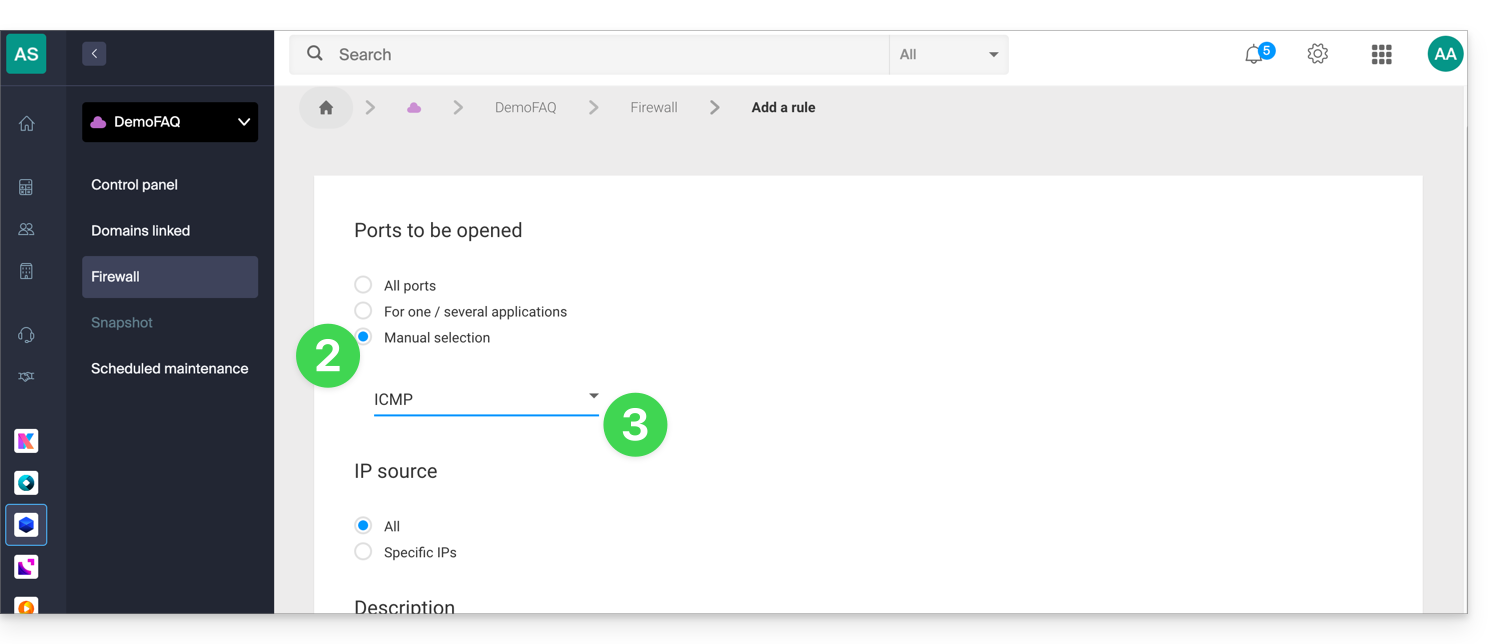
- Click Manual selection.
- Select ICMP:
- Confirm at the bottom of the page.
Globally open outgoing port 25
It is recommended to use an authenticated email sending solution.
The outgoing port 25 (Mail SMTP port) is blocked by default. To open this port:
- On Cloud VPS, you can submit a request to open it: contact Infomaniak support and justify your request.
- On VPS Lite, it is not possible to open this port.
Link to this FAQ: https://faq.infomaniak.com/2822
Has this FAQ been helpful?
Infomaniak does not offer virtual disk encryption on VPS Cloud / VPS Lite but provides a block device that you can format and encrypt if you wish.
Link to this FAQ: https://faq.infomaniak.com/2823
Has this FAQ been helpful?
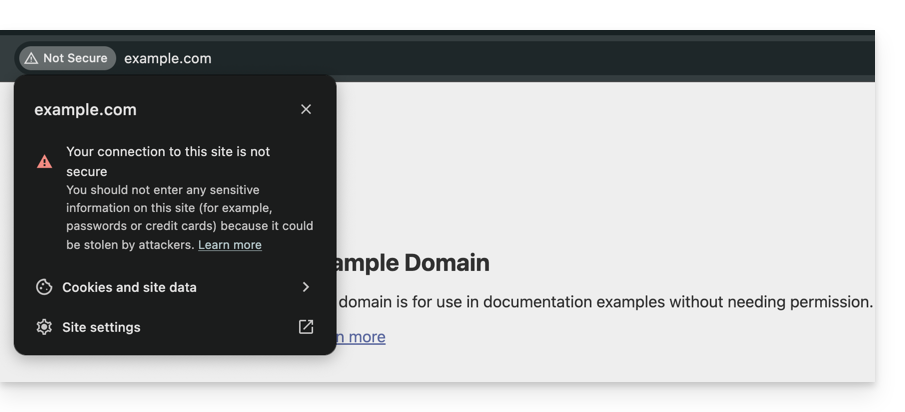
This guide helps you diagnose and resolve the "Your connection is not private" error (or NET::ERR_CERT_AUTHORITY_INVALID). This security alert may affect both the visitors to a website and its administrators.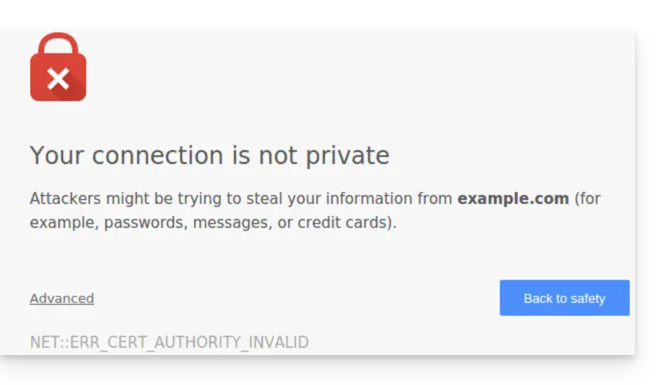
Introduction
- This alert is a security mechanism for your browser.
- It indicates that a secure connection could not be established with the server for one of the following reasons:
- The site does not have an SSL/TLS security certificate.
- The installed certificate is expired or incorrectly configured.
- The connection between your device and the server is being intercepted or disrupted.
- Warning: on a site displaying this error, the data you enter (passwords, credit card numbers) is not encrypted and may be intercepted by third parties.
Solutions for visitors
If you encounter this error on a website that you do not manage, the problem may sometimes be due to your own configuration. Here are the points to check:
- Check your device's time: if your computer or smartphone is not set to the correct date/time, certificate validation will consistently fail.
- Test in private browsing mode: if the error disappears, clear your browser's cache and cookies.
- Check your network: avoid public Wi-Fi networks that may force their own login portals.
- Antivirus and Firewall: some security software analyzes HTTPS connections and may cause false positives.
Solutions for Infomaniak website owners
If you are the website administrator, you must ensure that your SSL certificate is active and valid to cover all of your domain names.
1. Is the SSL certificate installed?
If your website is still using HTTP, you need to generate a certificate (free via Let's Encrypt or paid). Learn about the certificates available from Infomaniak.
Important: If you have added aliases (secondary domain names) to your website after installing the SSL certificate, you need to update the certificate to include them.
2. Check Validity and Expiration
At Infomaniak, certificates are automatically renewed, but a technical issue can sometimes occur. To check the status of your certificate:
- Click here to access your certificate management in the Manager (need help?).
- Check the status and expiration date in the dashboard:

3. Enforce HTTPS and fix "Mixed Content"
If your certificate is valid but the error persists (or the padlock is not green), it is possible that your site is still loading some elements (images, scripts) over HTTP. To fix this, please refer to this other guide.
Link to this FAQ: https://faq.infomaniak.com/2833
Has this FAQ been helpful?
This guide explains how to check and configure DHCPv6 support on the operating system of your Infomaniak Cloud VPS.
Introduction
- During a planned operation requiring the migration of your Cloud VPS to another cluster, the assignment of the current IPv6 address will now rely on DHCPv6 in order to retain the address already assigned to the server.
- DHCPv6 is only used to automatically transmit this same IPv6 address to the operating system of the Cloud VPS.
- This change only concerns VPS Cloud where you manage the operating system yourself.
- This does not apply to managed Cloud Servers.
- If your operating system does not support DHCPv6, you can configure the IPv6 address statically in the operating system of your Cloud VPS.
- The IPv6 address to use is displayed in the dashboard of your Cloud VPS, accessible from the Infomaniak Manager.
Check that IPv6 is enabled
DHCPv6 cannot function if IPv6 is disabled on the system. Check the status of IPv6 using the following commands:
sysctl net.ipv6.conf.all.disable_ipv6
cat /proc/net/if_inet6
ip -6 addr show
The first command should return 0. The /proc/net/if_inet6 file must contain at least one IPv6 address.
Check that router advertisements are being accepted
Prerequisites
- Identify the name of the network interface in question, for example
eth0,ens3orenp1s0. - Replace
<interface>in the commands below with the name of this interface.
DHCPv6 triggering depends on the flags transmitted by router advertisements, called Router Advertisements (RA), and not only on the server's local configuration.
The router announces the following two indicators:
- M — Managed: use DHCPv6 to obtain the IPv6 address in stateful mode
- O — Other: use DHCPv6 only to obtain additional parameters, such as DNS servers, while the IPv6 address is assigned by SLAAC.
Verify that the interface accepts RA announcements:
sysctl net.ipv6.conf.<interface>.accept_raPossible values are:
0: RA ads are not allowed1: RA ads are allowed2: RA advertisements are accepted even when routing is enabled.
If the ndisc6 package is installed on Debian, Ubuntu, Fedora, or RHEL, display the received advertisements:
rdisc6 <interface>The following line indicates that the network is requesting the use of DHCPv6 to assign the IPv6 address:
Stateful address configuration: Yes
Configure DHCPv6 according to the network manager
The configuration to apply depends on the network manager used by the operating system of your Cloud VPS.
NetworkManager
NetworkManager is notably used by RHEL, Rocky Linux, AlmaLinux, CentOS Stream, Fedora, and frequently by Ubuntu Desktop.
Display the NetworkManager connections to identify the name of the one associated with the network interface:
nmcli connection showIn the following commands, replace <connection> with the name of this connection.
Display its IPv6 settings:
nmcli connection show "<connection>" | grep ipv6The key parameter is ipv6.method. It can contain the following values, among others:
auto: processes RA announcements and uses DHCPv6 when the router's transmitted indicators request it.dhcp: force the use of stateful DHCPv6manual: uses a manual IPv6 configurationdisabled: disables IPv6 for this connection
The auto value is recommended so that NetworkManager processes RA announcements and uses DHCPv6 when the network requests it.
To apply this configuration:
nmcli connection modify "<connection>" ipv6.method auto
nmcli connection up "<connection>"
Networking (Debian 11 Bullseye and earlier versions)
Debian versions up to Debian 11 (Bullseye) generally use the network manager.networking (ifupdown).
Check the network interface configuration:
cat /etc/network/interfacesMake sure that the relevant interface contains the following line:
iface <interface> inet6 dhcpThen, check that the networking service is active:
systemctl status networking
systemd-networkd (Debian 12 Bookworm and later)
Since Debian 12 (Bookworm), systemd-networkd is commonly used on server installations.
Check that the service is running:
systemctl status systemd-networkdNext, inspect the network configuration files:
cat /etc/systemd/network/*.networkThe file corresponding to the interface in question must contain one of the following configurations:
[Network]
DHCP=yes        # enable DHCPv4 & DHCPv6
or:
[Network]
DHCP=ipv6       # enable only DHCPv6
You can then check the overall network status or the status of a specific interface:
networkctl status
networkctl status <interface>
Netplan
Netplan is notably used by Ubuntu since version 18.04. It is an overlay that generates a configuration for systemd-networkd or NetworkManager.
In the corresponding file under /etc/netplan/*.yaml, enable DHCPv6 for the interface in question:
network:
  version: 2
  ethernets:
    eth0:
      dhcp6: true
      accept-ra: true
Replace eth0 with the name of the interface in question, then display the effective configuration and apply it:
netplan get
netplan apply
wicked
wicked is notably used by openSUSE and SUSE Linux Enterprise Server.
Check the DHCLIENT6_MODE setting in the file corresponding to the interface:
/etc/sysconfig/network/ifcfg-<interface>Then, check the status of the interface:
wicked show <interface>
Direct DHCPv6 client
The following commands allow you to perform a manual DHCPv6 test or use it directly, especially on Alpine Linux, Gentoo, and some Arch Linux installations.
With the ISC DHCP client:
dhclient -6 -v <interface>DHCPv6 leases are stored in:
/var/lib/dhcp/dhclient6.leasesWith dhcpcd:
dhcpcd -6 <interface>
Configure the IPv6 address statically
If the operating system of your Cloud VPS does not support DHCPv6, or if you cannot use it, configure the IPv6 address indicated in the dashboard of your Cloud VPS directly from the Infomaniak Manager.
The method depends on the network manager used by the operating system. In all cases, make sure to use the exact IPv6 address, prefix, and gateway provided for your Cloud VPS.
Link to this FAQ: https://faq.infomaniak.com/2914
Has this FAQ been helpful?