Knowledge base
1000 FAQs, 500 tutorials and instructional videos. Here, there are only solutions!
This guide explains how to use the Infomaniak Newsletter tool with an external domain name (not managed with Infomaniak).
Prerequisites
- The domain name must belong to you.
- Synonymous domains and their main domain cannot be used to send newsletters.
- You can configure your synonyms as aliases.
Link an external domain
To access the management of domains for sending newsletters:
- Click here to access your product management interface in the Infomaniak Manager (need help?).
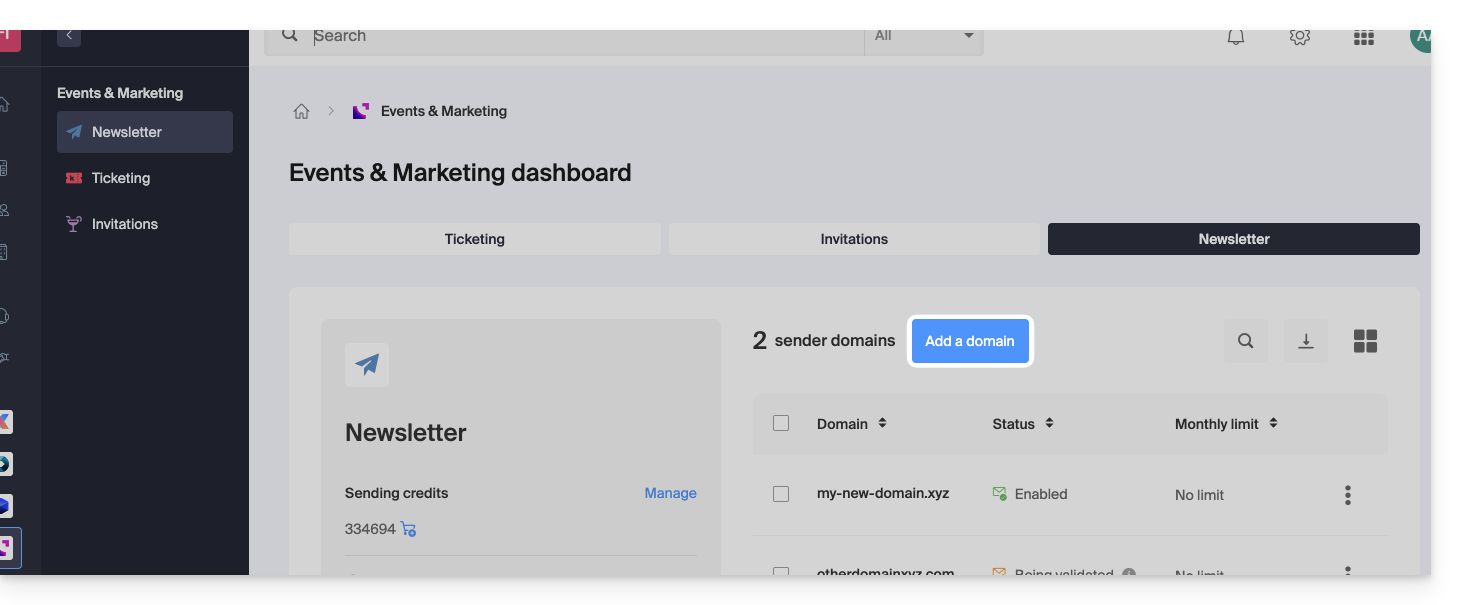
- If you already have a Newsletter, click on Add a domain:
- Otherwise, click on Start for free:
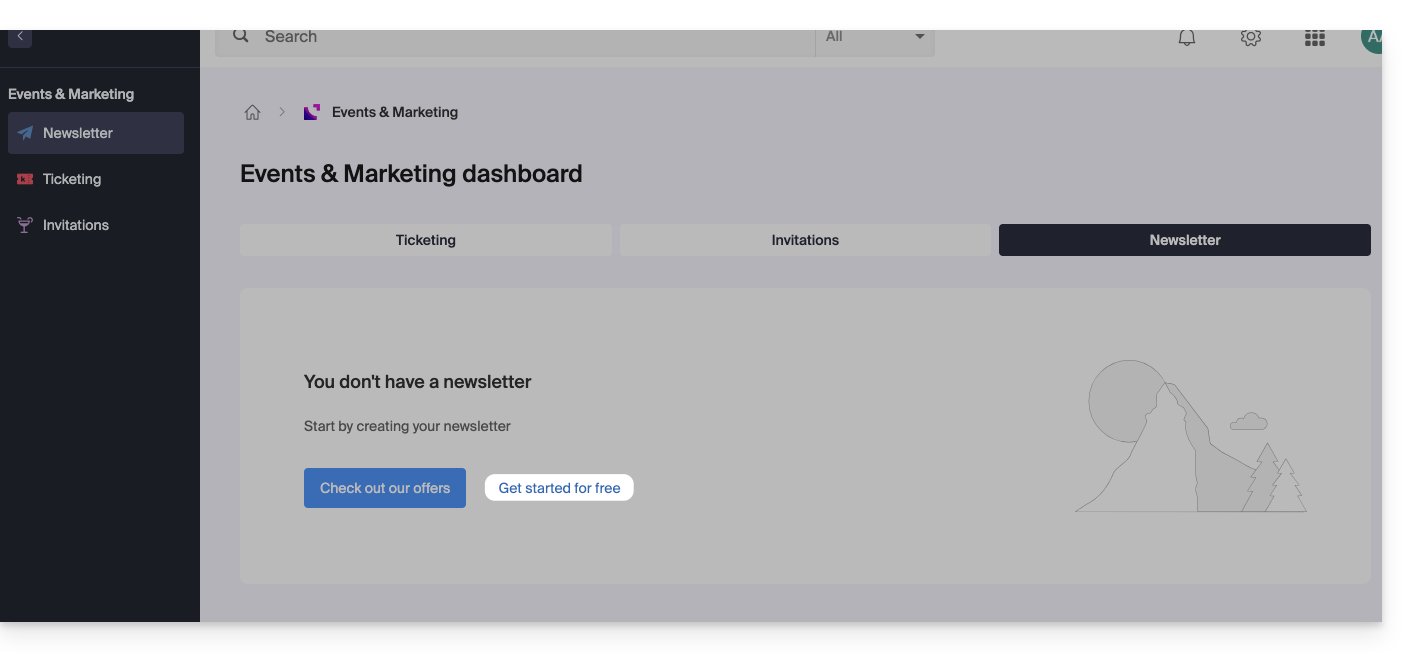
- Otherwise, click on Start for free:
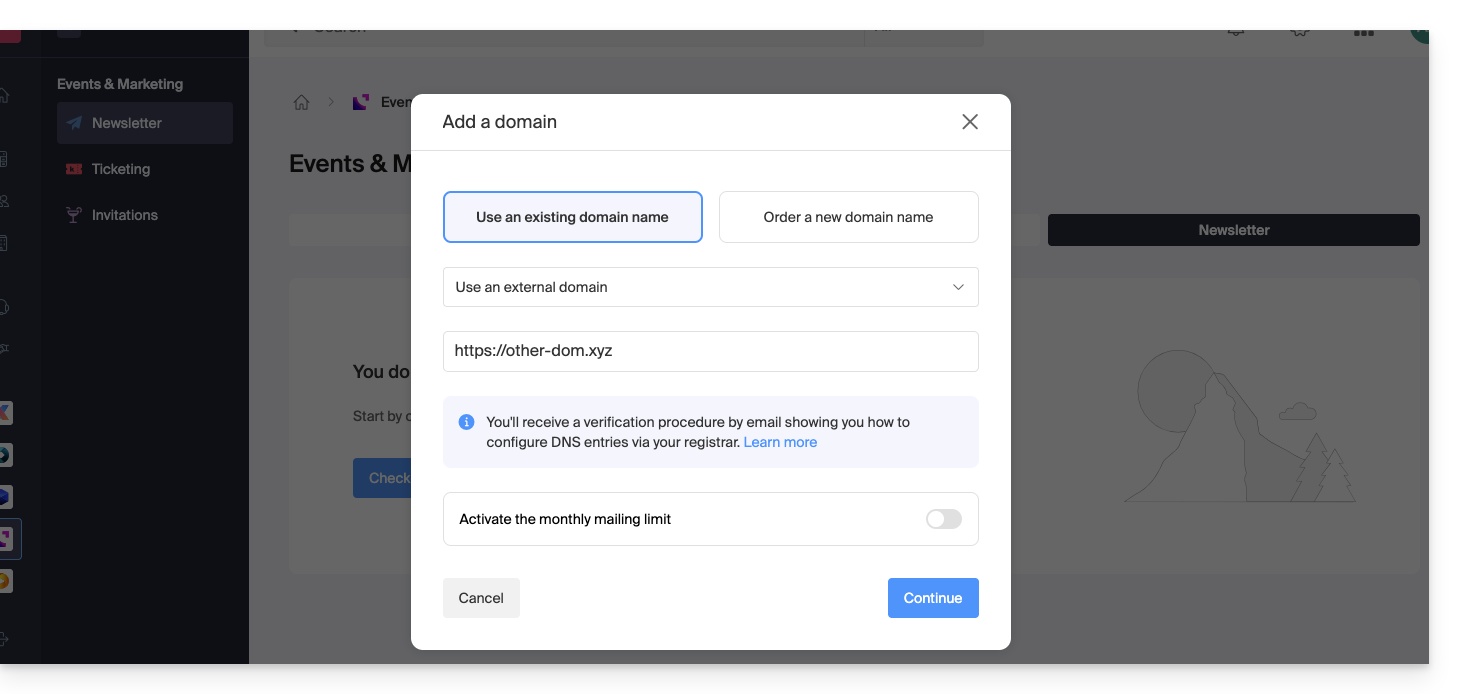
- Select Other domain from the drop-down menu before entering (or enter directly) the domain name you want to use to send newsletters.
- Choose an optional monthly limit.
- Click the button to Continue:
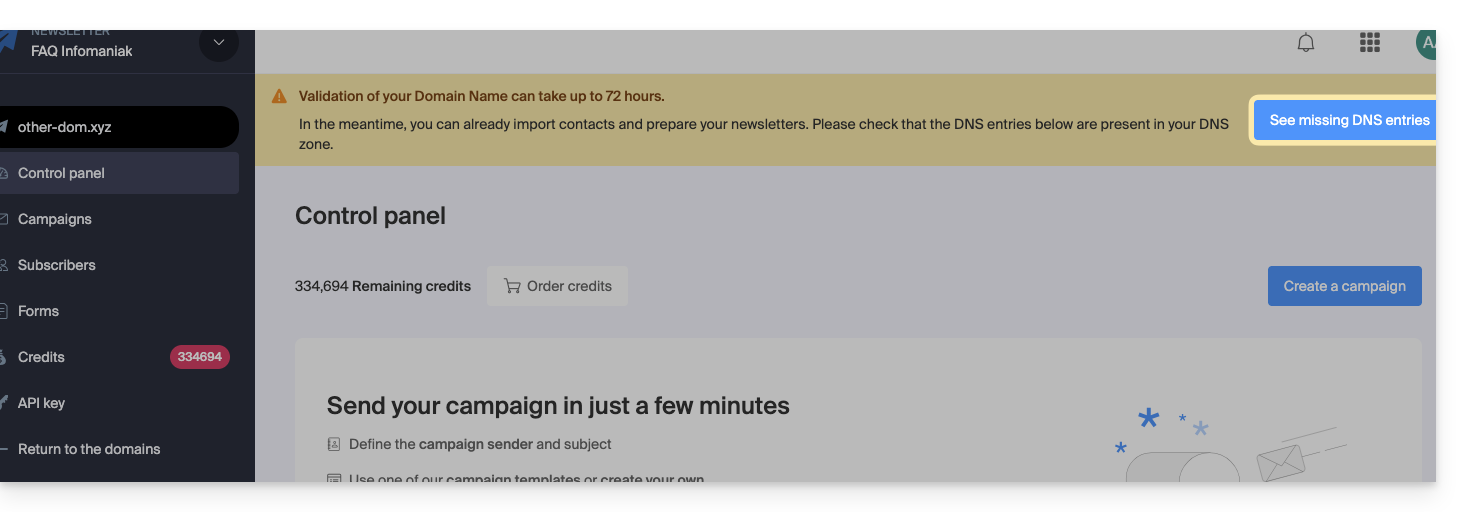
- Add it to your registrar the TXT / CNAME / DKIM records that you will receive by email and which can be viewed in the interface by clicking on the button:
Link to this FAQ: https://faq.infomaniak.com/2241
Has this FAQ been helpful?
This guide explains how to receive an email notification when a new subscriber joins your Newsletter via one of your contact forms.
Be Notified When a New Contact Subscribes
To access your Newsletter:
- Click here to access the Newsletter management in the Infomaniak Manager (need help?).
- If necessary, click on the domain name concerned in the table that appears:
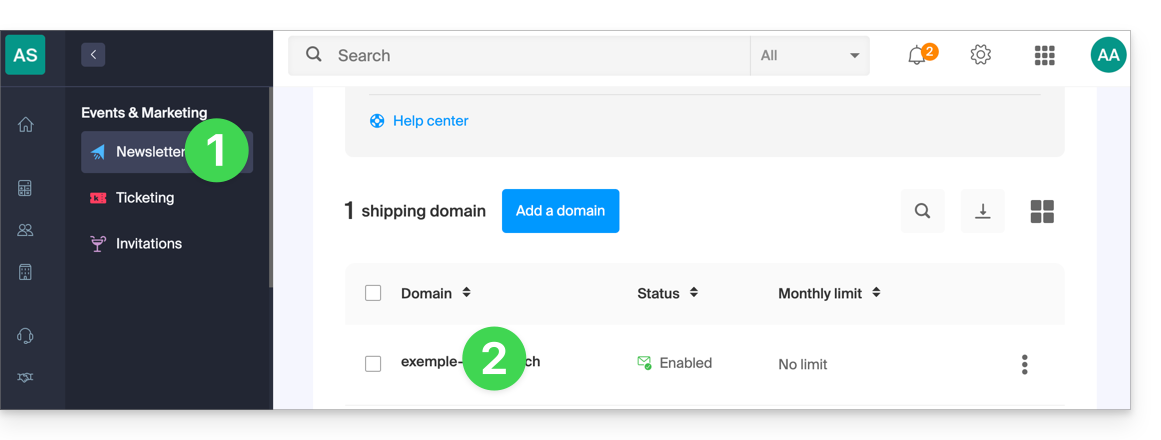
- The Newsletter interface appears.
Then, to access the Newsletter subscription form:
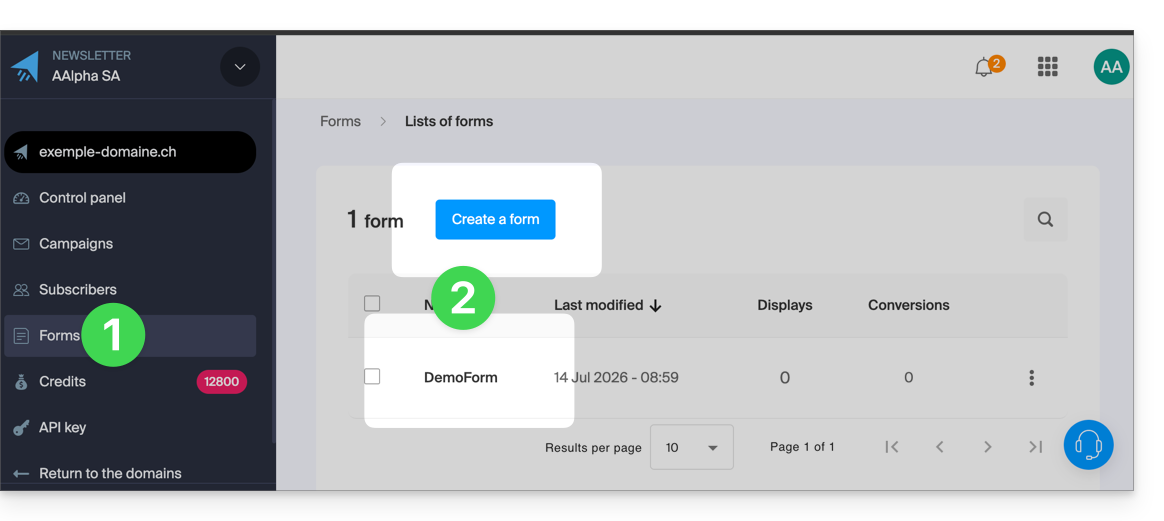
- Click on Forms in the left-hand menu.
- Create or edit the form for which you want to track subscriptions:
- At the very bottom of the page, check the box Receive an email when a new subscription is made.
- Click on the blue Save button to validate the changes:
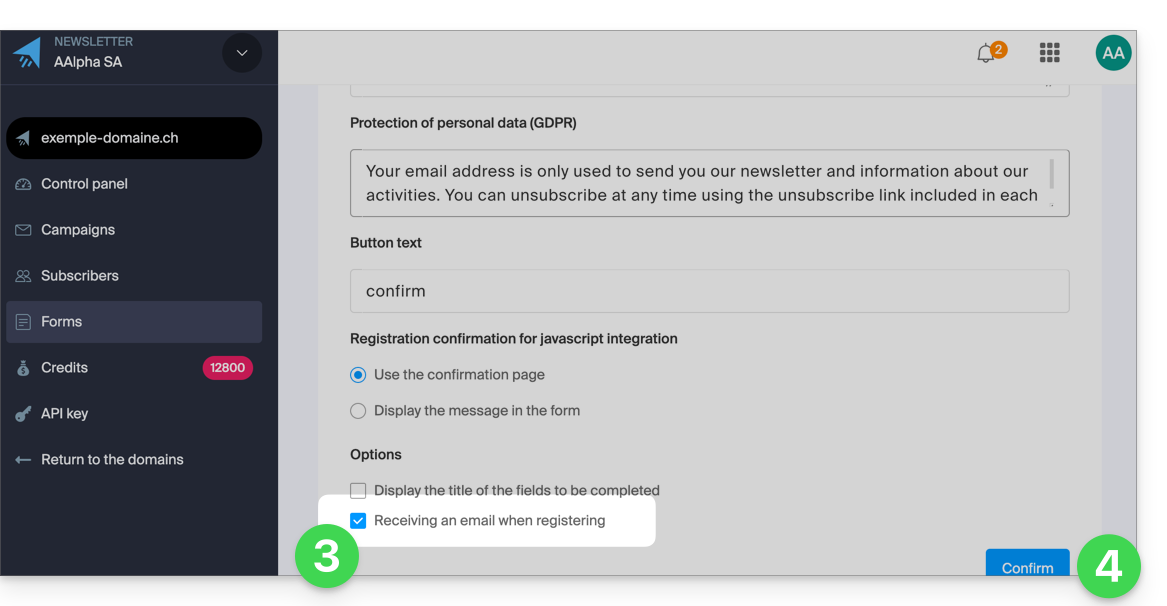
You will now receive an email as soon as a contact subscribes to your Newsletter via this subscription form.
Simply uncheck the box at any time to stop receiving email notifications.
Link to this FAQ: https://faq.infomaniak.com/2245
Has this FAQ been helpful?
This guide explains how to create and manage your authentication tokens to interact with the Infomaniak API (❓: help) securely.
Introduction
- Token features:
- Number: no limit to the number of tokens that can be created
- Validity: unlimited by default (customizable upon creation)
- Inactivity: a token is automatically deactivated if it is not used for one year
- Example of use:
- Token for the Newsletter API (❓: help)
Manage API tokens
When creating a token, you must define the application and the scope of access:
- Click here to access the token management section in the Manager (❓: help).
- Click on Create a token:
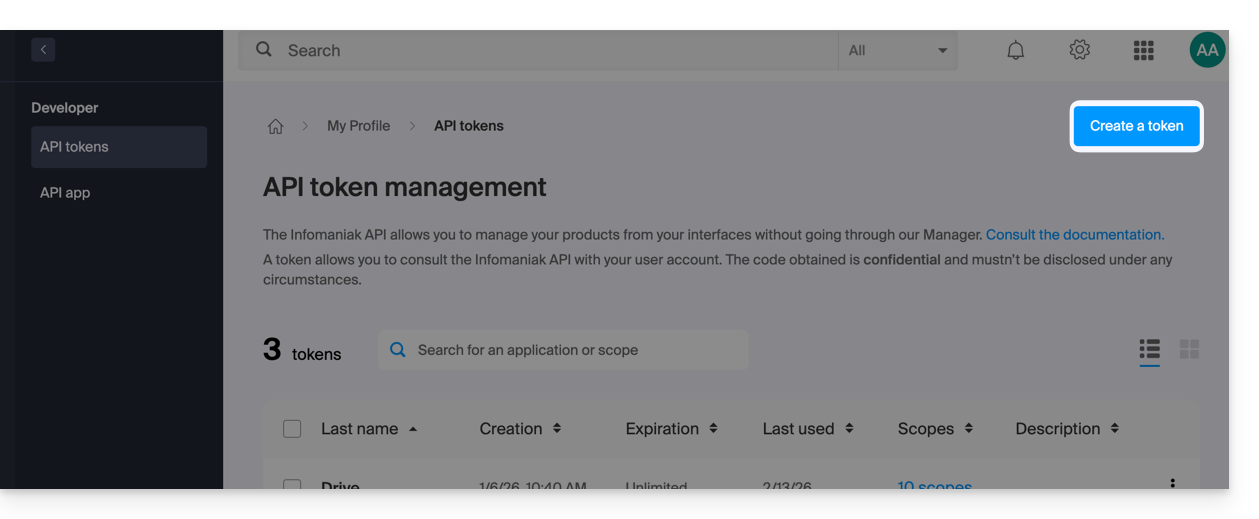
- Select the product/application and the validity period:
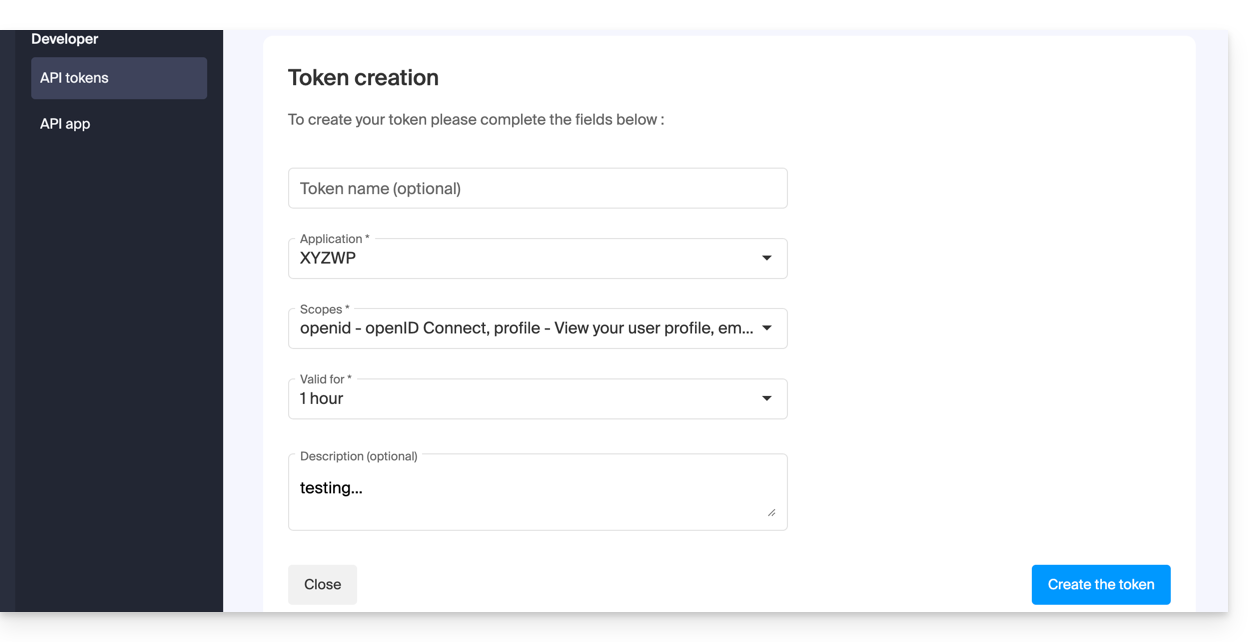
- Confirm the operation with your account password.
- Important: Copy the token and keep it in a safe place; it will no longer be displayed afterward.
To delete them, select them and click on the revocation button that appears: 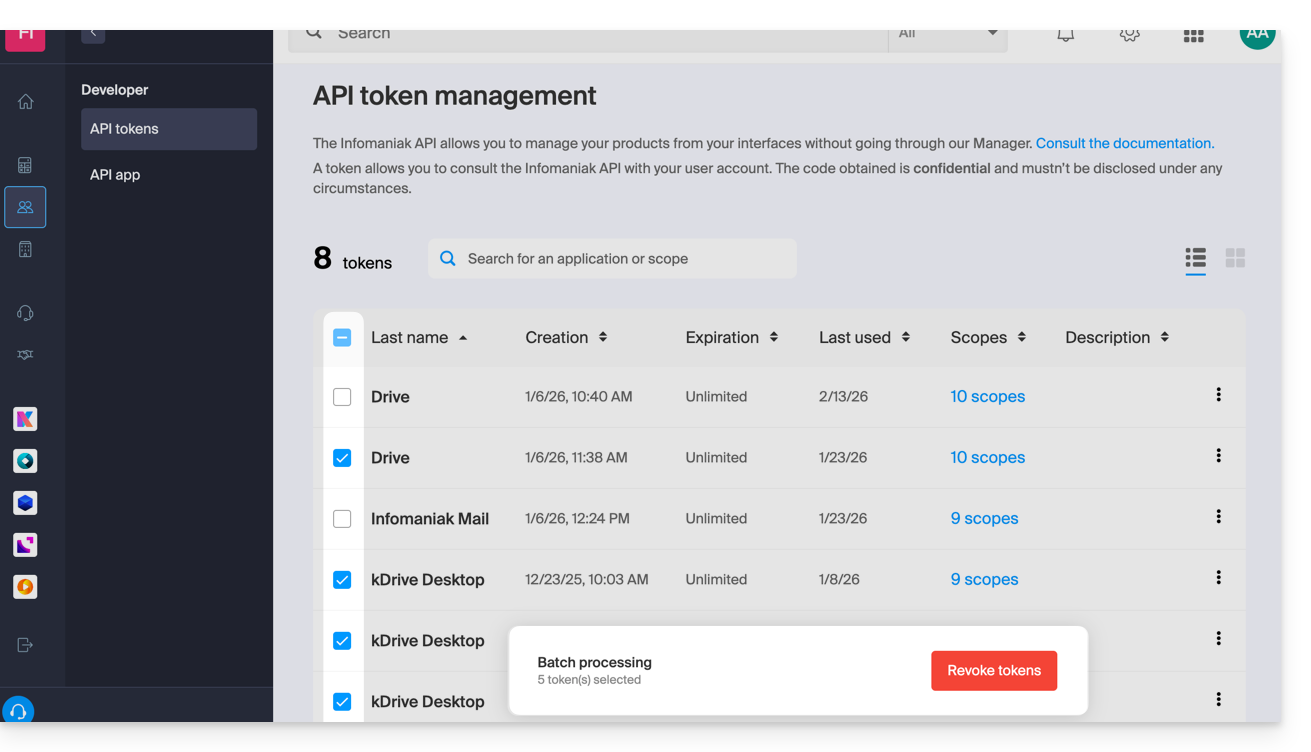
Link to this FAQ: https://faq.infomaniak.com/2582
Has this FAQ been helpful?
This guide explains how to manage the forms used to subscribe to the Newsletter that you manage on Infomaniak.
Prerequisites
- Have access to the Newsletter product.
- Have created at least one subscription form.
Copy the code needed to integrate the form
To access your Newsletter forms and obtain the integration code:
- Click here to access the management interface for your product in the Infomaniak Manager (need help?).
- Click directly on the domain name assigned to the product in question.
- Click on Forms in the left-hand menu.
- Click on the action menu ⋮ to the right of the item in question in the table that appears.
- Click on Embed Code:
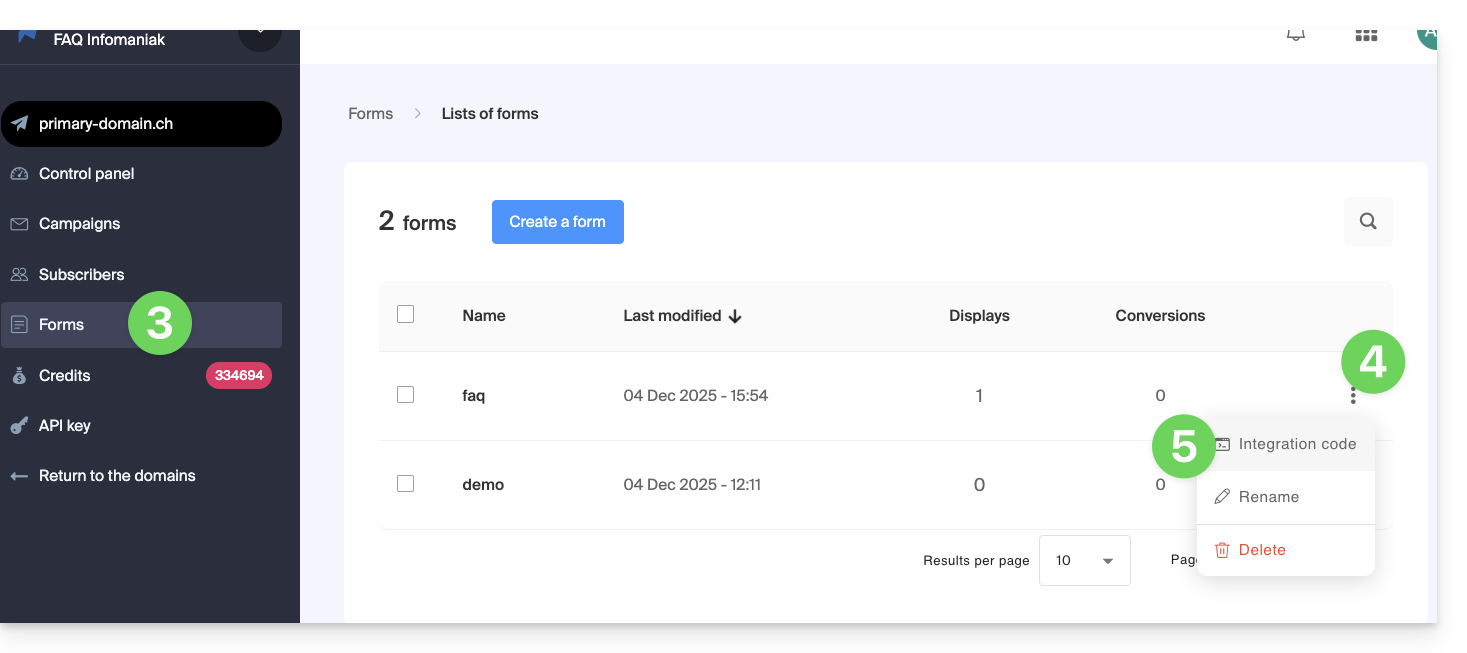
- Choose between the JAVASCRIPT and HTML tabs to obtain one of the two types of code useful for inserting your form on your pages, and click on the blue button to copy the code to the clipboard:
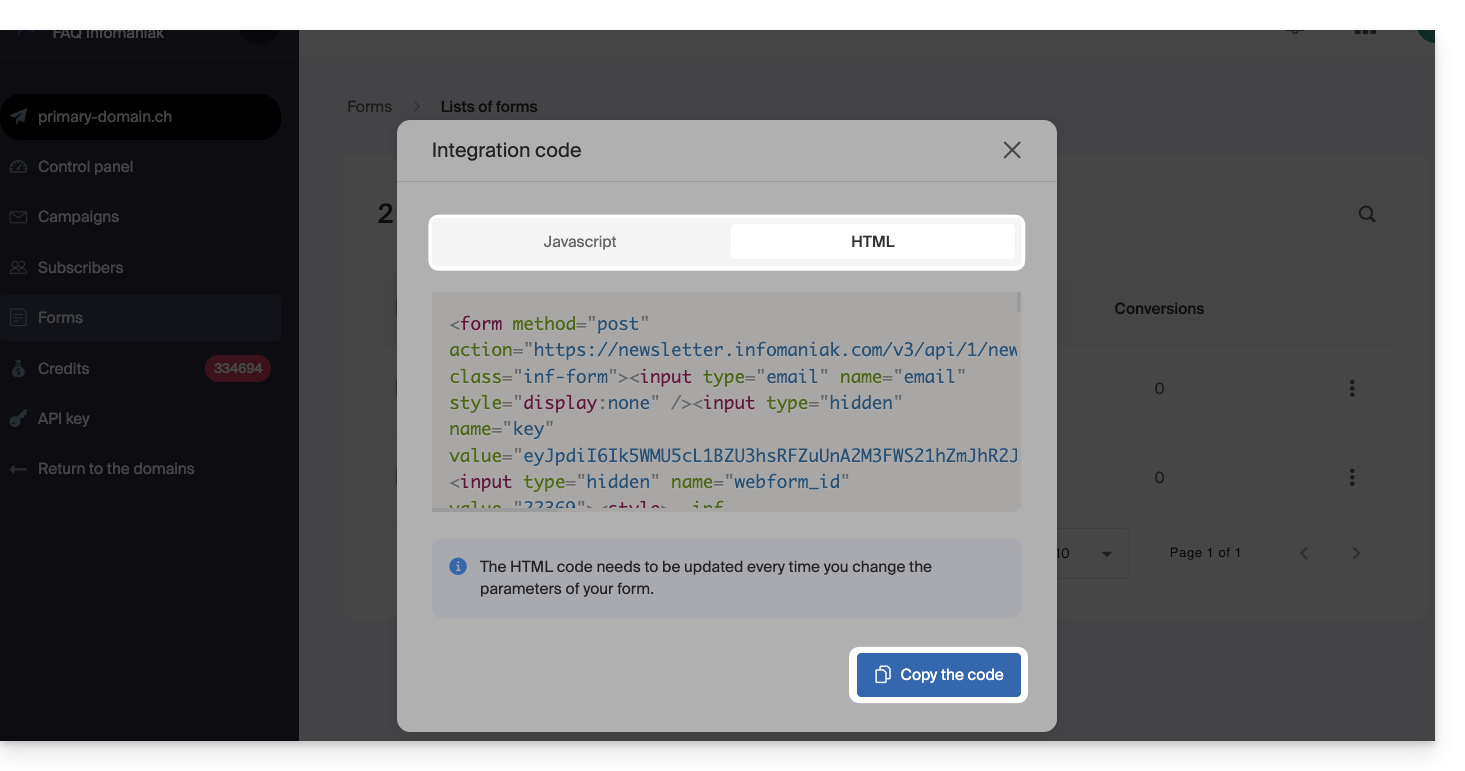
The HTML code needs to be updated each time you change the settings of your form (you will therefore need to re-insert the HTML code if you make changes in the form editor
Insert the form on a website…
You can insert the same form in different locations. You can also create multiple forms (to populate different contact groups, for example). Obviously, a newsletter is only sent once per contact, even if that contact is present in different lists/groups:
… with WordPress
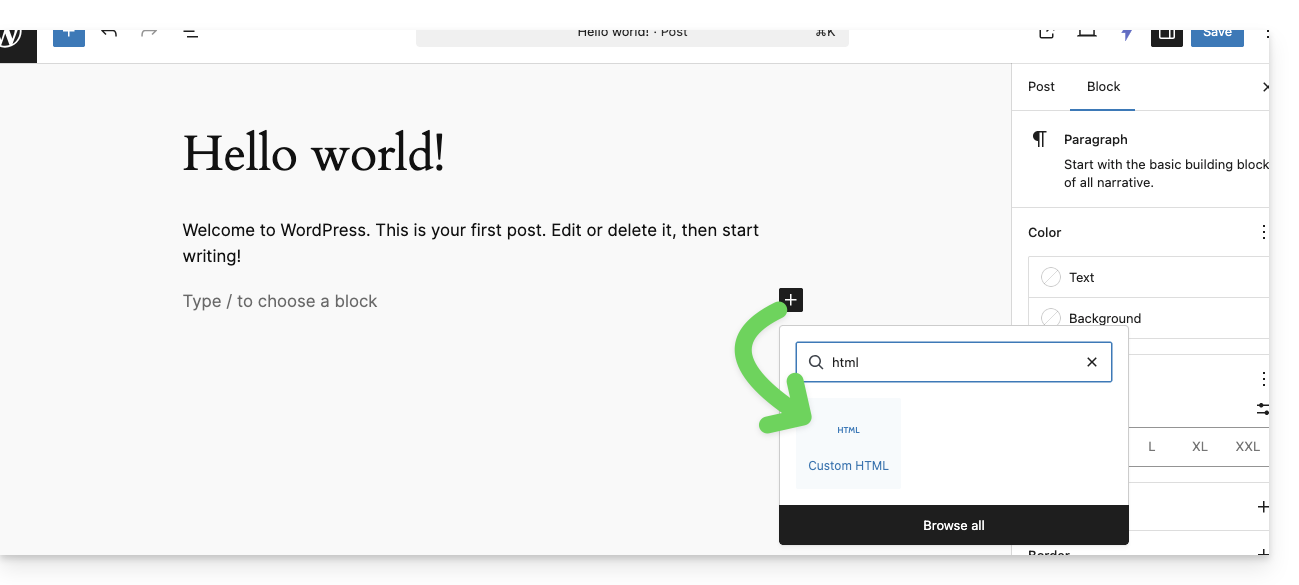
- Insert a new HTML block at the desired location:
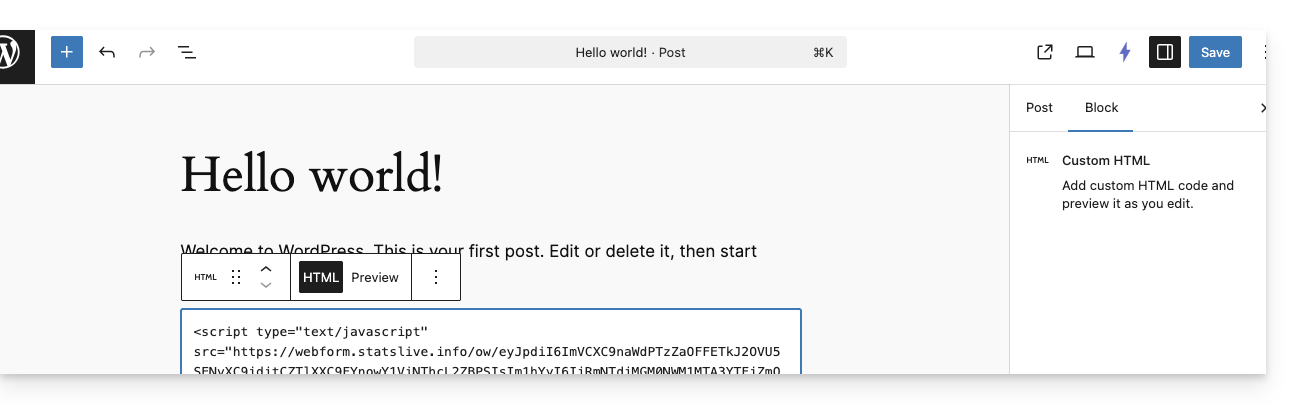
- Paste the HTML or JAVASCRIPT code obtained in step 6 above and save:
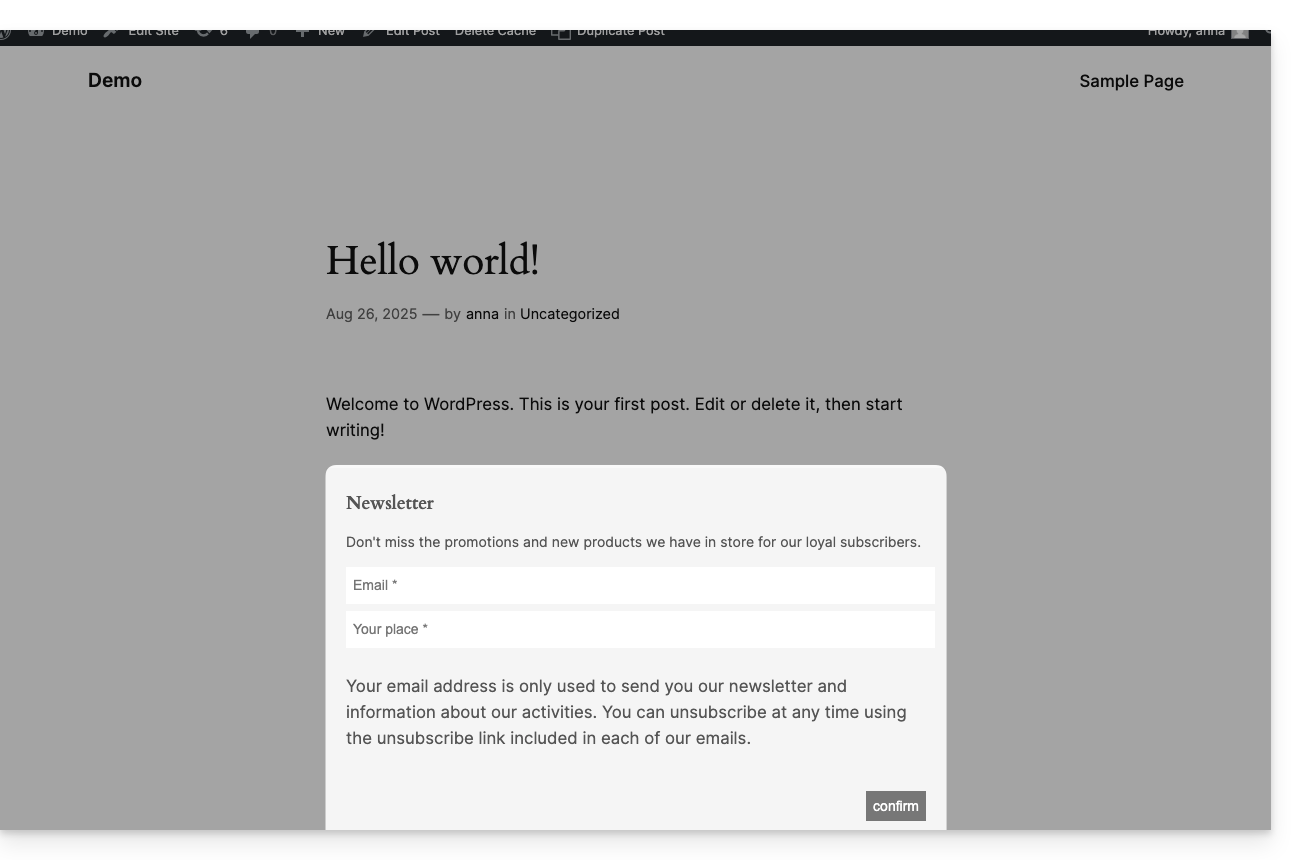
- The form configured previously will be displayed on your site:
… with Infomaniak Site Creator
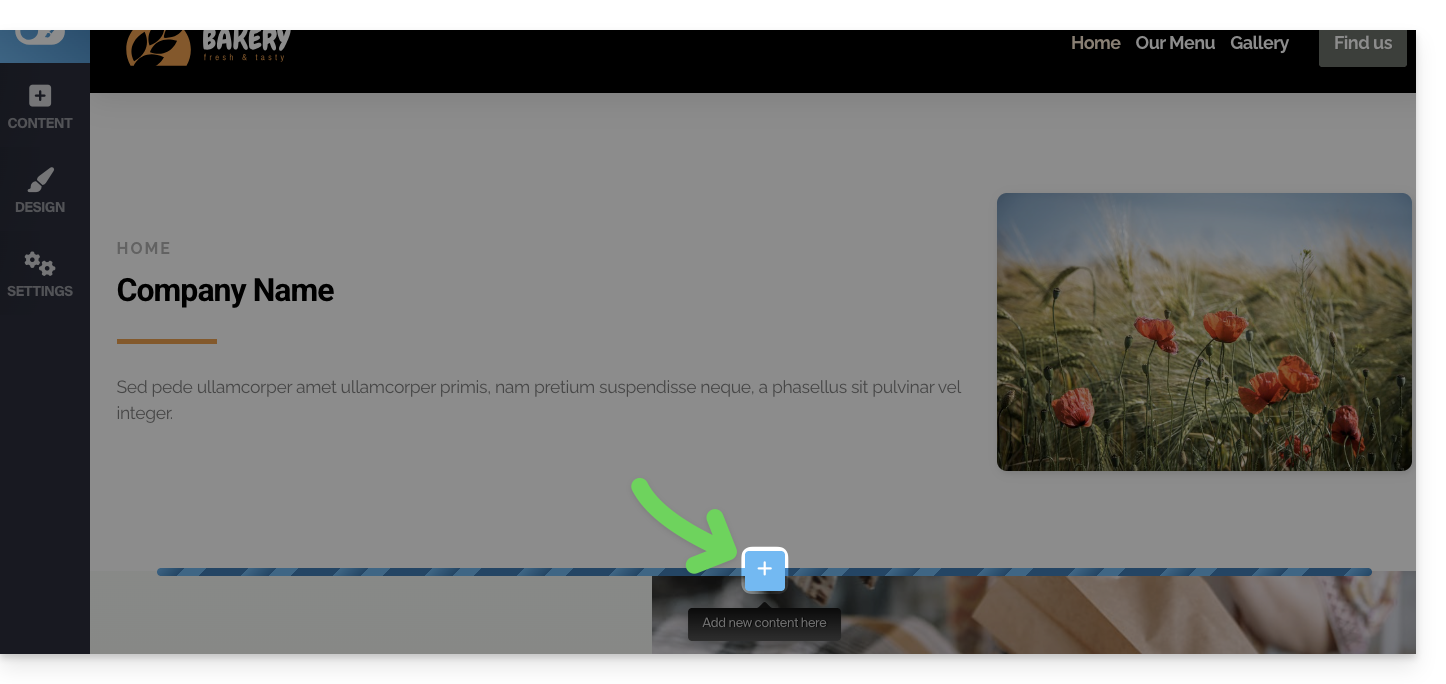
- Hover over the desired location on the page to display a PLUS button, allowing you to add a block:
- Click the MORE button to choose a custom HTML code block:
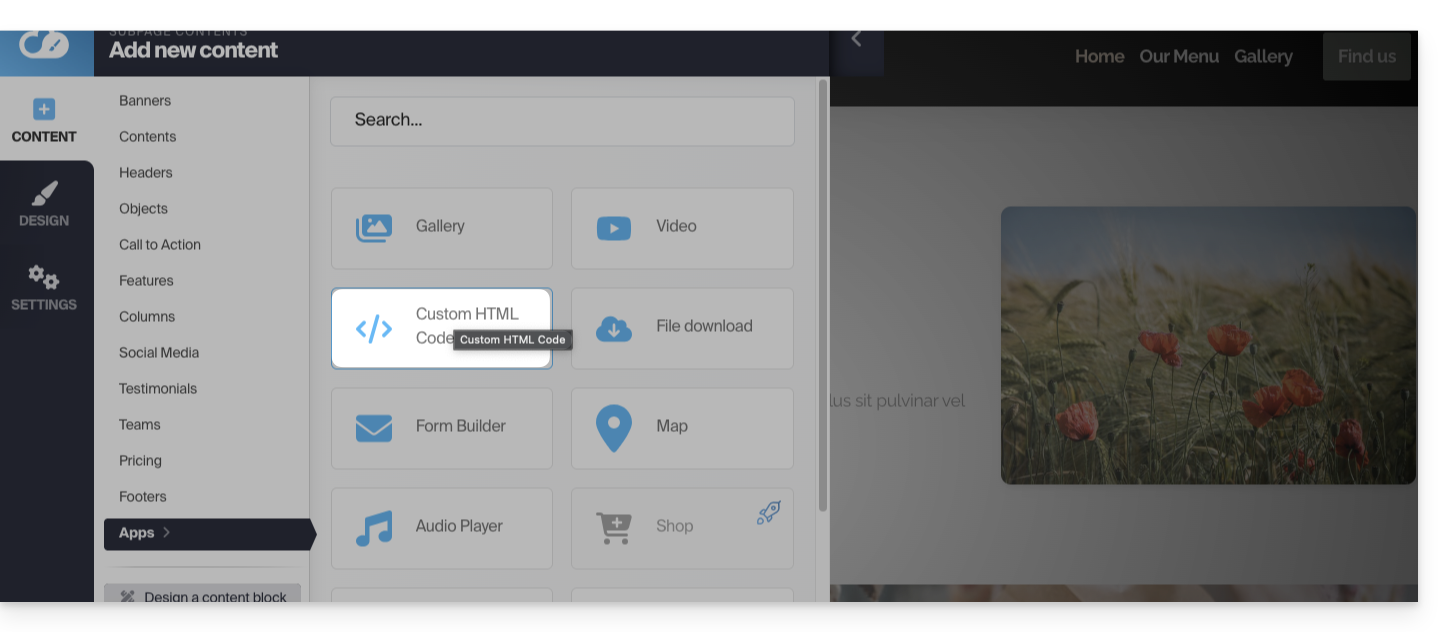
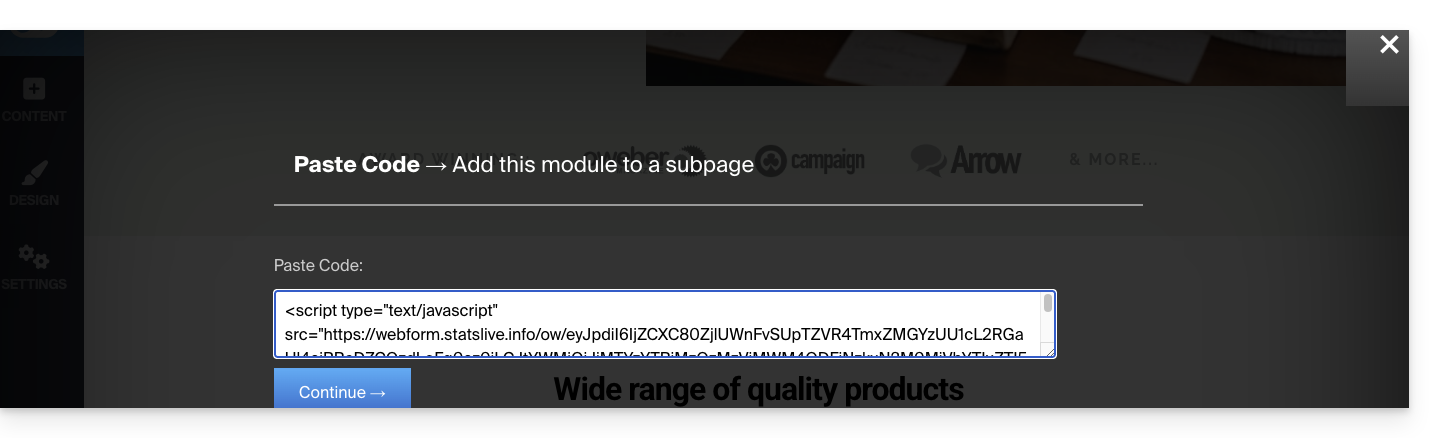
- Paste the HTML or JAVASCRIPT code obtained in step 6 above and click the button to Continue:
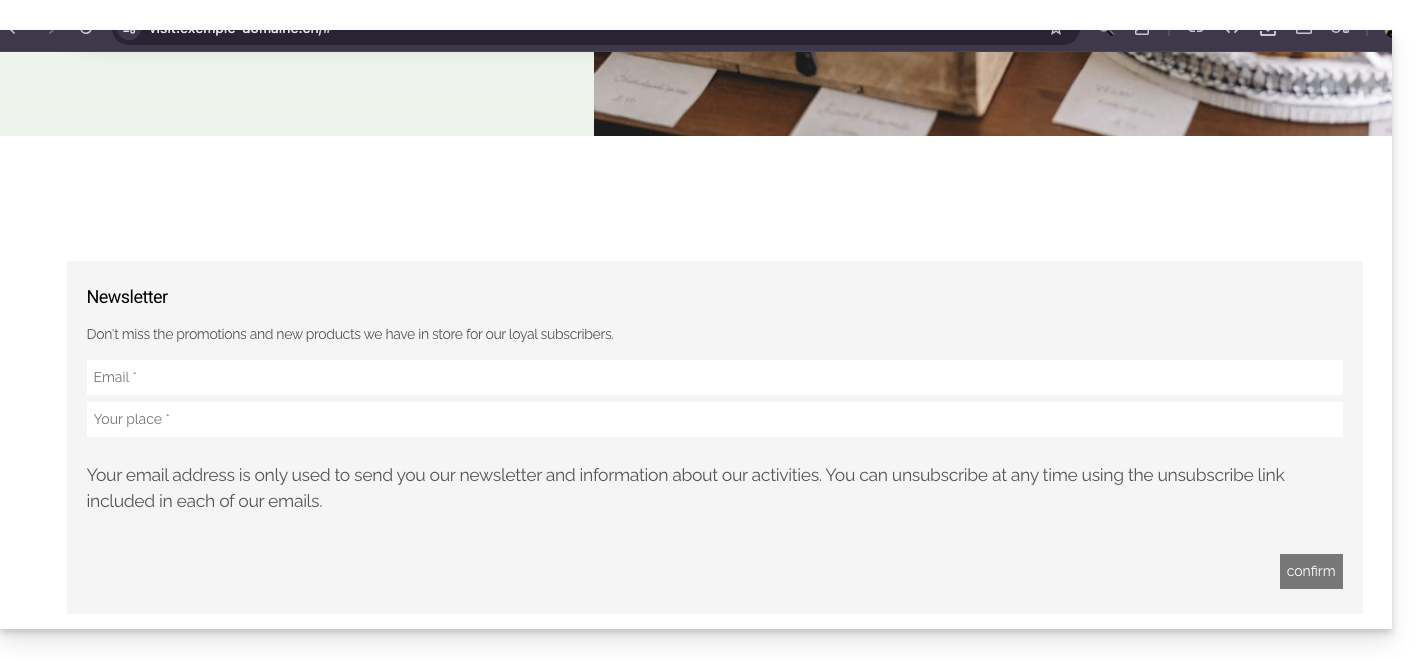
- The form is displayed as a preview on your editing page and will be visible to your visitors:
Link to this FAQ: https://faq.infomaniak.com/2878
Has this FAQ been helpful?