Knowledge base
1000 FAQs, 500 tutorials and instructional videos. Here, there are only solutions!
This guide explains how to do a 360° live stream with Infomaniak's video streaming service.
Prerequisites
- Have a 360° camera compatible with one of the following formats:
- 360 equirectangular monoscopic (2D)
- 360 equirectangular stereoscopic (3D) side by side (left/right separation)
- 360 equirectangular stereoscopic (3D) top/bottom (top/bottom separation)
- Your encoder or camera must also be able to send a stream via an RTMP connection (learn more).
- Finally, note that a 360° video stream requires a source with a high bitrate and a bitrate control set to CBR mode; the bitrate will depend on the type of content and data consumption, which will also be higher than with a standard stream.
Create a 360° player
Broadcasting a 360° live stream requires a 360° player. This option is free and activates quickly:
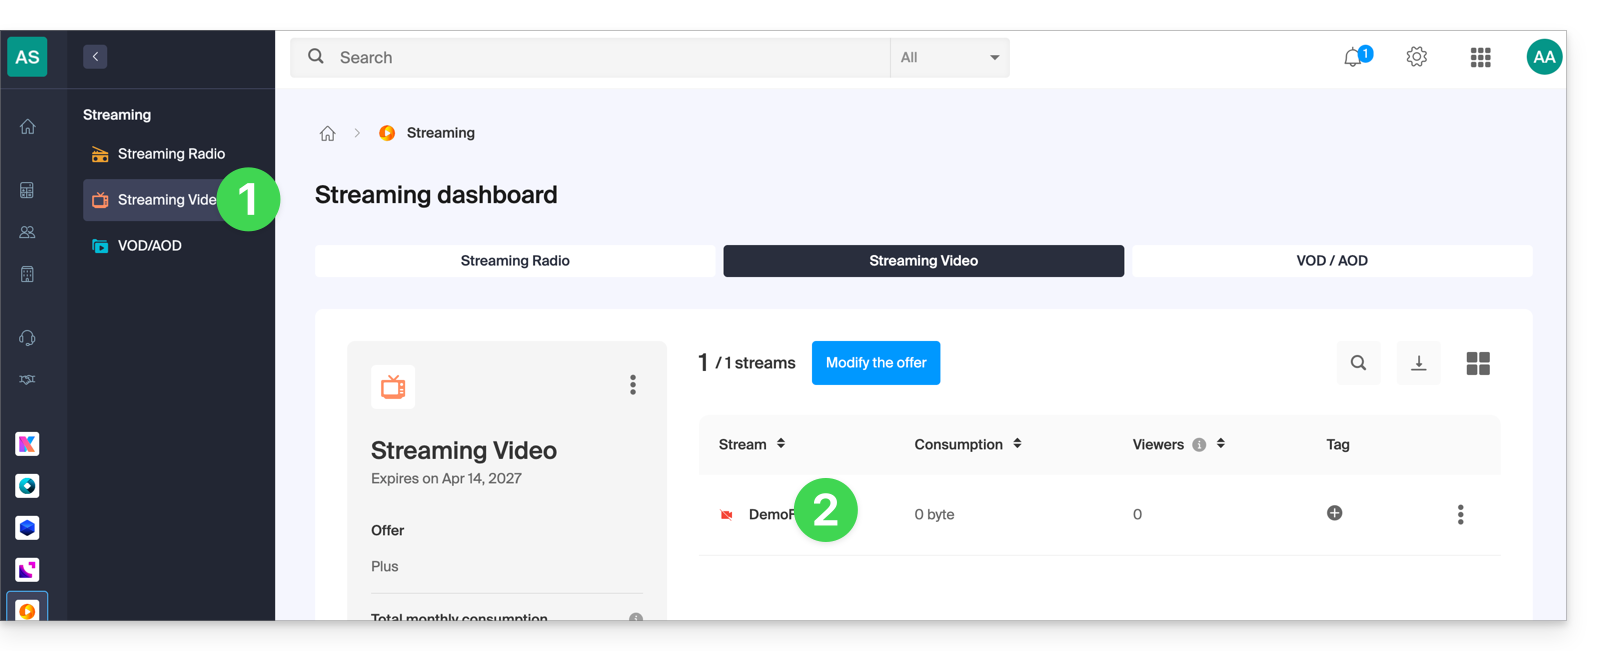
- Click here to access the management of your product on the Infomaniak Manager (need help?).
- Click directly on the name assigned to the product concerned:
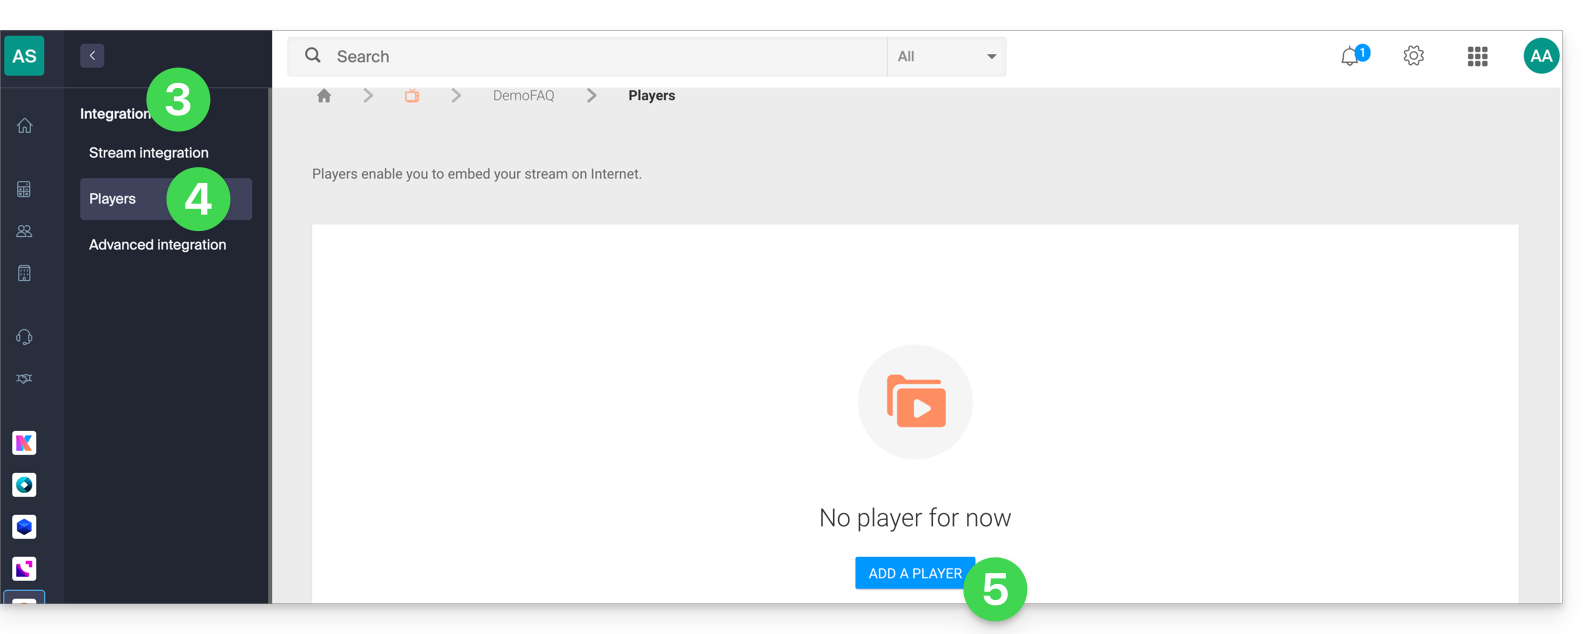
- Click on Integration in the left sidebar.
- Click on Players in the left sidebar.
- Click to create or edit an existing player:
- Check the 360° Player box and configure the projection (360 format):
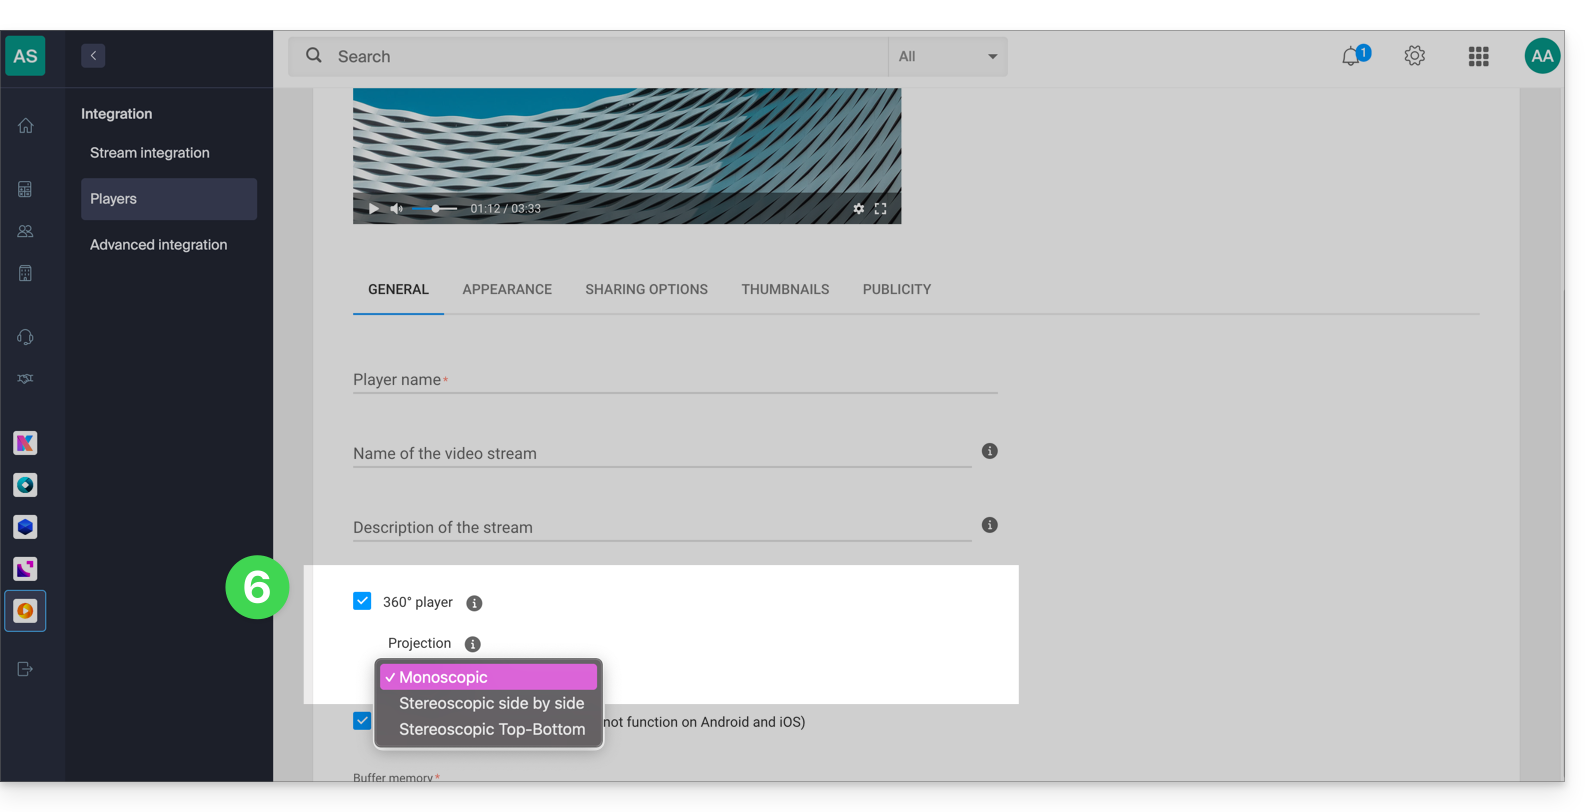
- Click the Save button at the bottom of the page.
- All content broadcast by this player (whether it is in 360° format or not) will now be interpreted as 360°.
Link to this FAQ:
Has this FAQ been helpful?
This guide explains how to configure the Infomaniak encoder.
1. Default Access and Password Configuration
Once the connections are made, the encoder will be accessible on your network at the following address: 192.168.1.168
Configuration is done from a web browser at the following address: http://192.168.1.168
- Username: admin
- Password: admin
First, set a strong password:
2. Network Configuration
If accessing the address 192.168.1.168 is suitable for you, you can proceed directly to step 3.
Otherwise, if your network is configured with DHCP or if you want to specify a different IP address, the System > Network page allows you to define the access parameters. You may need to contact your network administrator to make the various settings and authorize this new device at the firewall level.
3. Main Stream Configuration
3.1 In the case where only one stream is sent
This applies to the following cases:
- Transcoding in the Cloud => see points (1) and (1.3) of this guide
- or Single Bitrate => see point (3) of this guide
Please adjust the following parameters:
- The bitrate (kbit) and resolution (encoded size) should be adjusted according to your needs.
- RTMP PUBLISH URL corresponds to the publish URL indicated in your Manager in the stream configuration:
The encoder does not allow you to enter a stream key. It is therefore necessary to concatenate it with the URL.
Example: rtmp://stream.vprimary.infomaniak.com/livecast?key=XXXXXX/stream
The “stream” value and the password (key=XXXXXX) must be replaced with your personal data.
3.2 In the case where multiple streams are sent
For more information on this case, please refer to sections (2) and (2.2) of this guide.
If multiple streams are sent, you will be in a multi-bitrate mode with n streams encoded on the encoder.
The Substream1, Substream2, and Substream3 submenus allow you to configure the encoding for up to 3 additional streams:
3.3 Audio configuration
The audio input should be adjusted according to the connections made. The bitrate can also be adjusted according to the type of content. It is recommended to use the following codec: 128 Kbps AAC, at 44100 Hz.
Link to this FAQ:
Has this FAQ been helpful?
This guide explains how to restrict access to Infomaniak's Video Streaming streams based on geographical criteria (geolocation).
Restrict access to broadcasts via GeoIP
To do this:
- Click here to access the management of your product on the Infomaniak Manager (need help?).
- Click directly on the name assigned to the product in question.
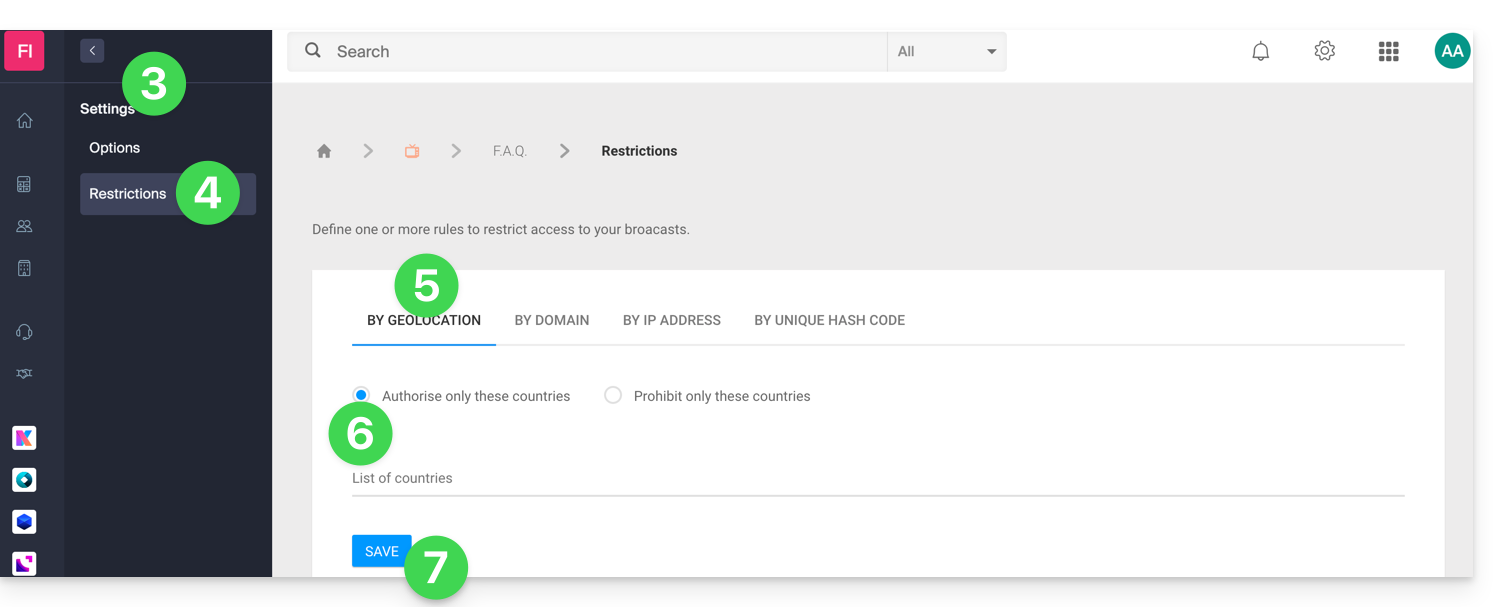
- Click on Settings in the left sidebar.
- Click on Restrictions in the left sidebar.
- Click on the Geolocation Restriction tab.
- Define the countries that should be specifically allowed or blocked.
- Click on the Save button:
Refer to this other guide to customize the replacement image offered to blocked viewers.
Link to this FAQ:
Has this FAQ been helpful?
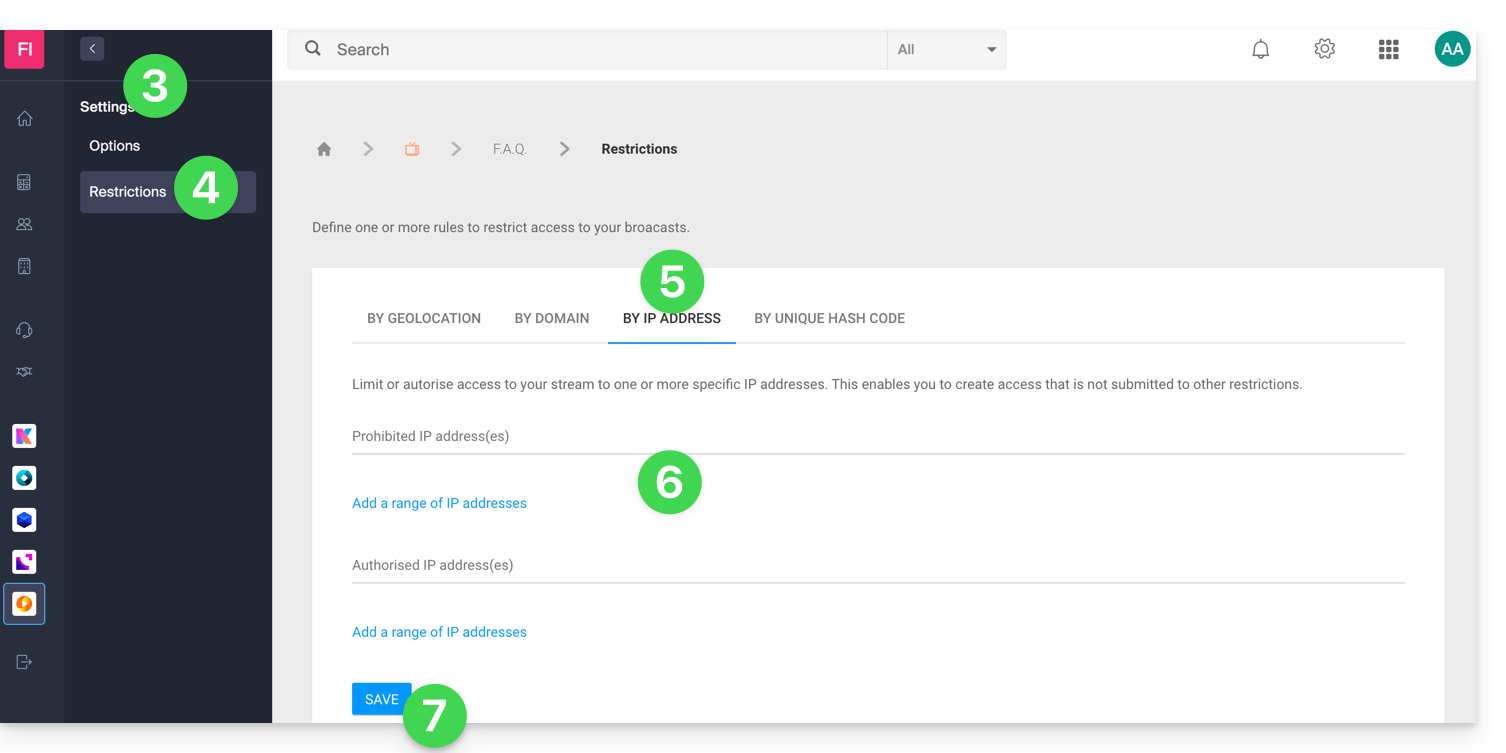
This guide explains how to restrict access to Infomaniak's Video Streaming streams based on the IP addresses of visitors/viewers.
Restrict access to broadcasts by IP addresses
To do this:
- Click here to access the management of your product on the Infomaniak Manager (need help?).
- Click directly on the name assigned to the product in question.
- Click on Settings in the left sidebar.
- Click on Restrictions in the left sidebar.
- Click on the IP address restriction tab.
- Define the IP addresses (or IP ranges) that should be specifically allowed or blocked.
- Click on the Save button:
Refer to this other guide to customize the replacement image offered to blocked viewers.
Link to this FAQ:
Has this FAQ been helpful?
This guide details the steps required to configure OBS Studio to stream a live feed to the Infomaniak Video Streaming platform.
Preamble
- OBS Studio is a free and open-source, multi-platform software widely used for video recording and live streaming.
- Thanks to its flexibility and numerous configuration options, it allows you to easily manage audio and video sources, scenes, and advanced streaming parameters.
- It does not have an official mobile version, but third-party apps allow you to stream from a smartphone or use it in conjunction with OBS on a computer.
Configure OBS Studio
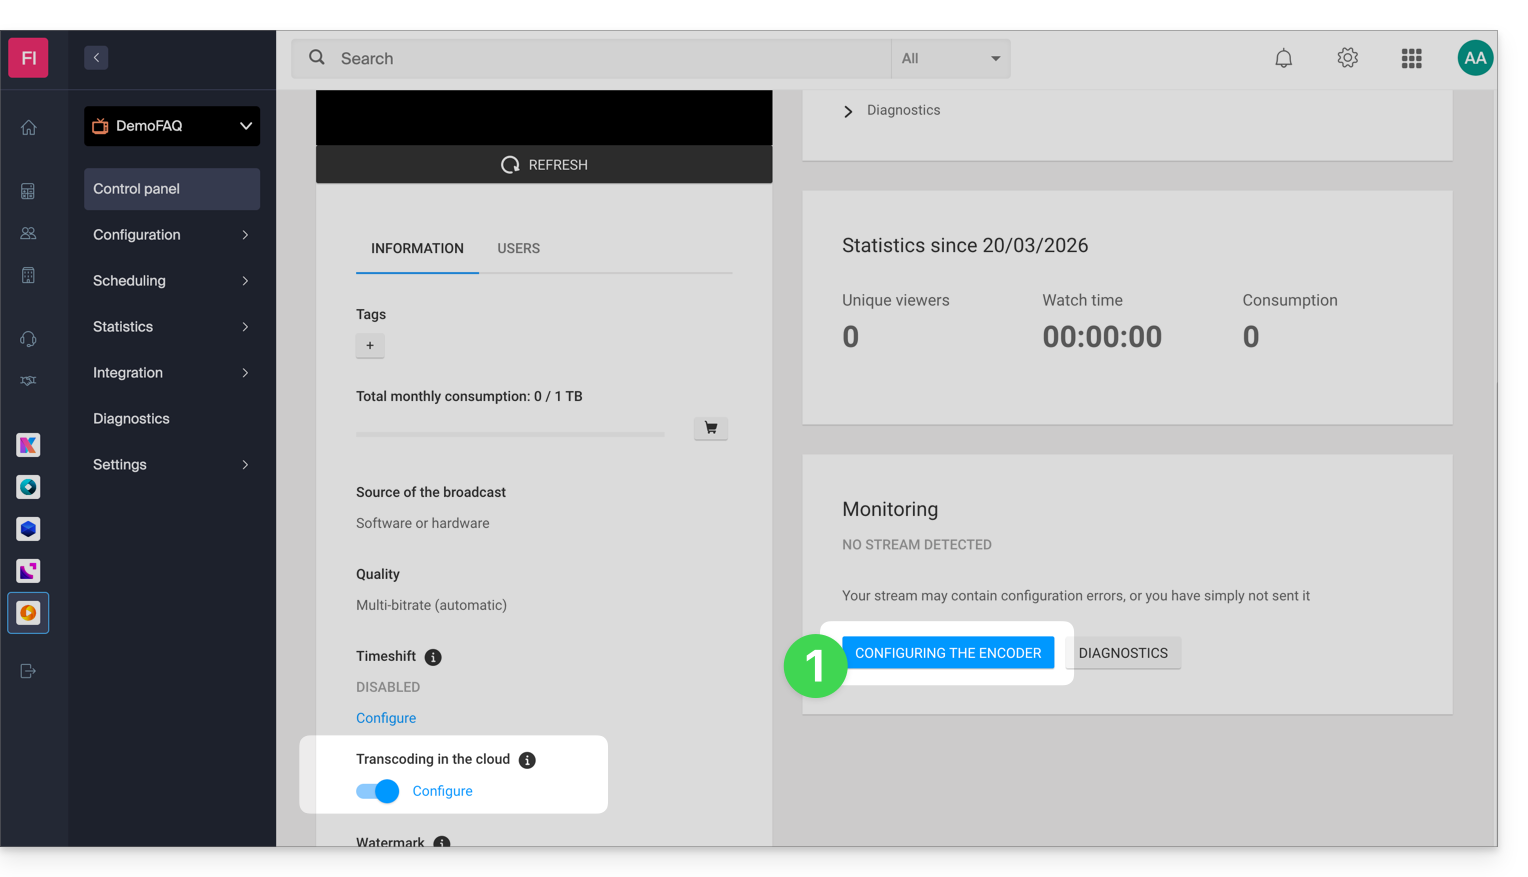
On the Infomaniak side, you have a stream and have activated the Cloud transcoding option.
- Click the button to access your streaming settings:
- Copy the login information:
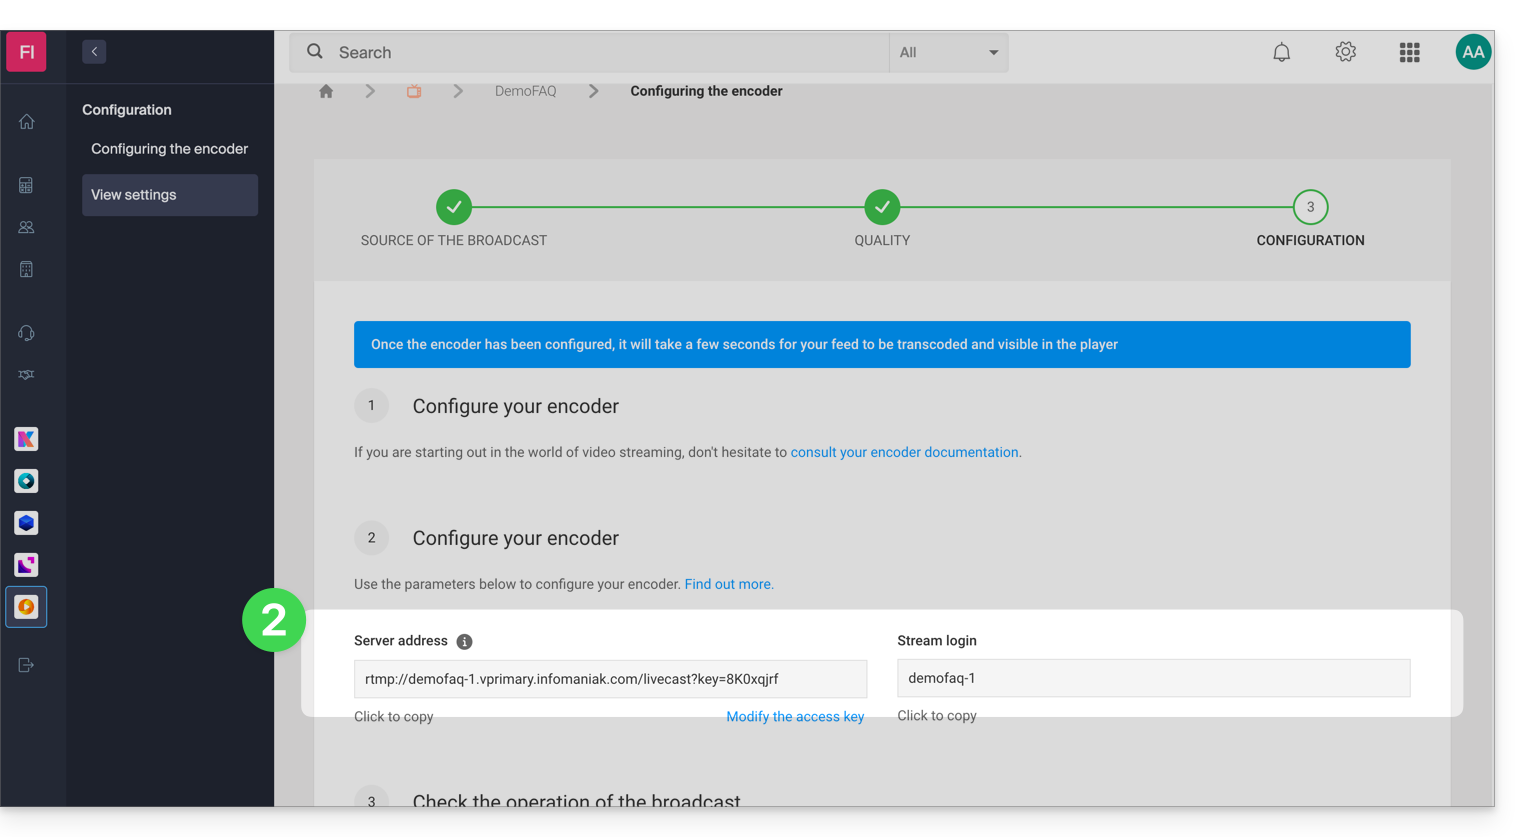
- Paste this information into the custom settings of your OBS stream, as in the example below (
Stream login=Stream key):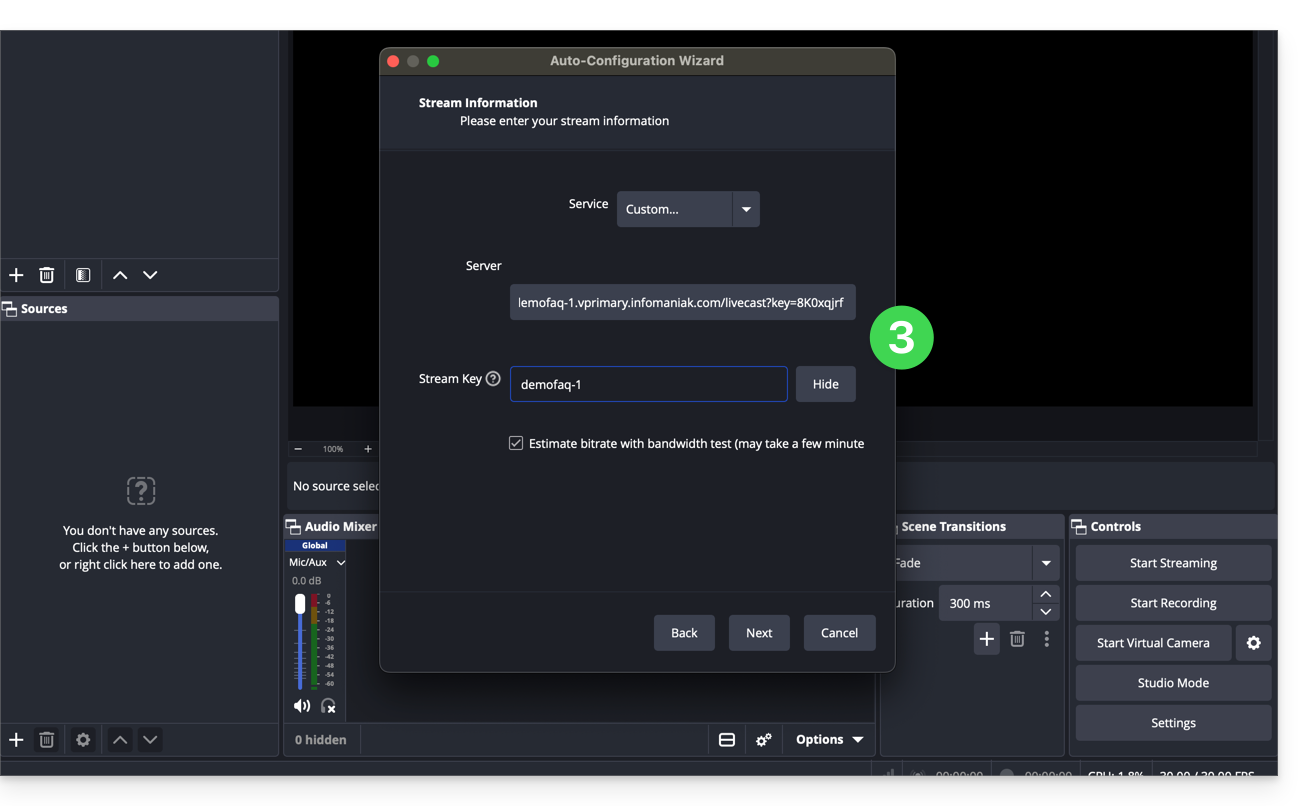
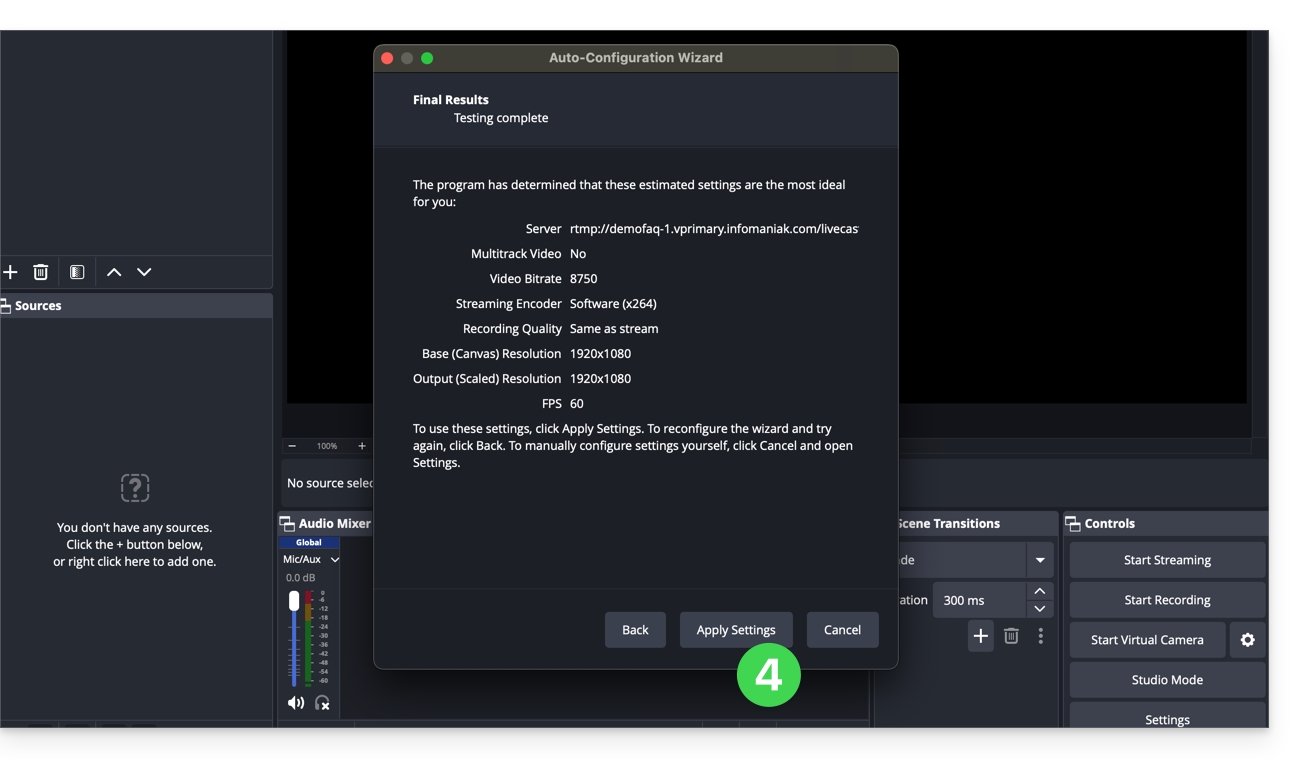
- Validate the streaming settings:
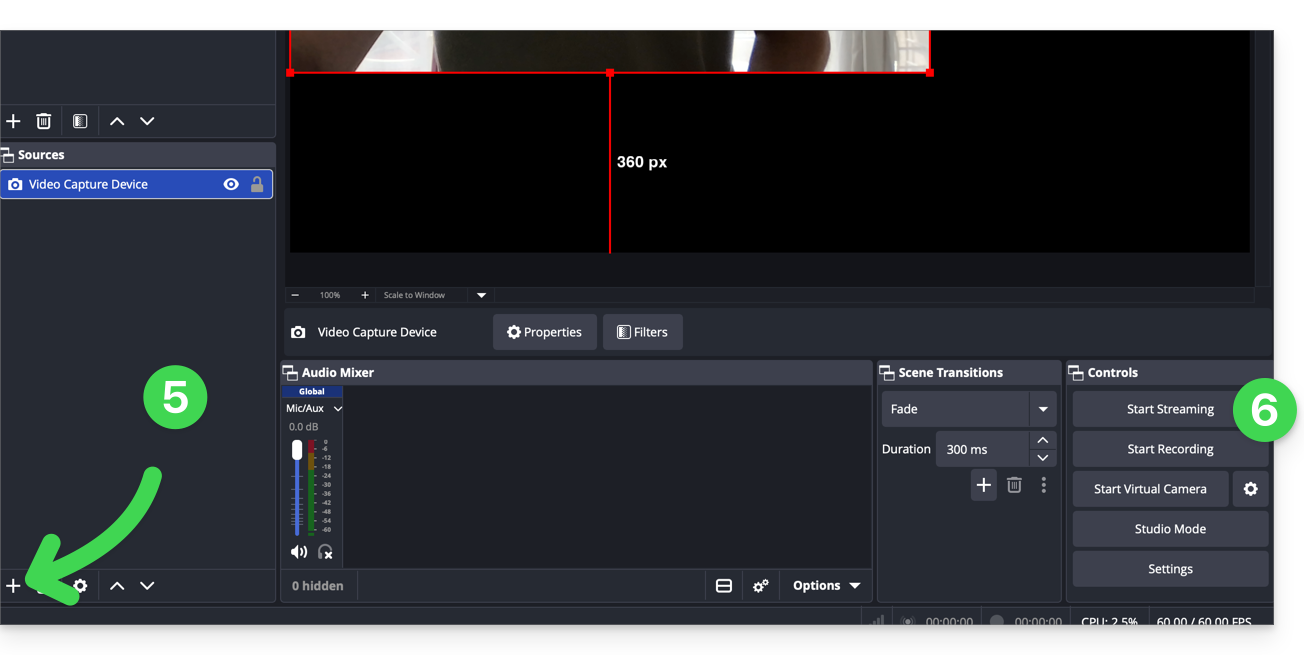
- Then add a streaming source.
- Click on Start Streaming:
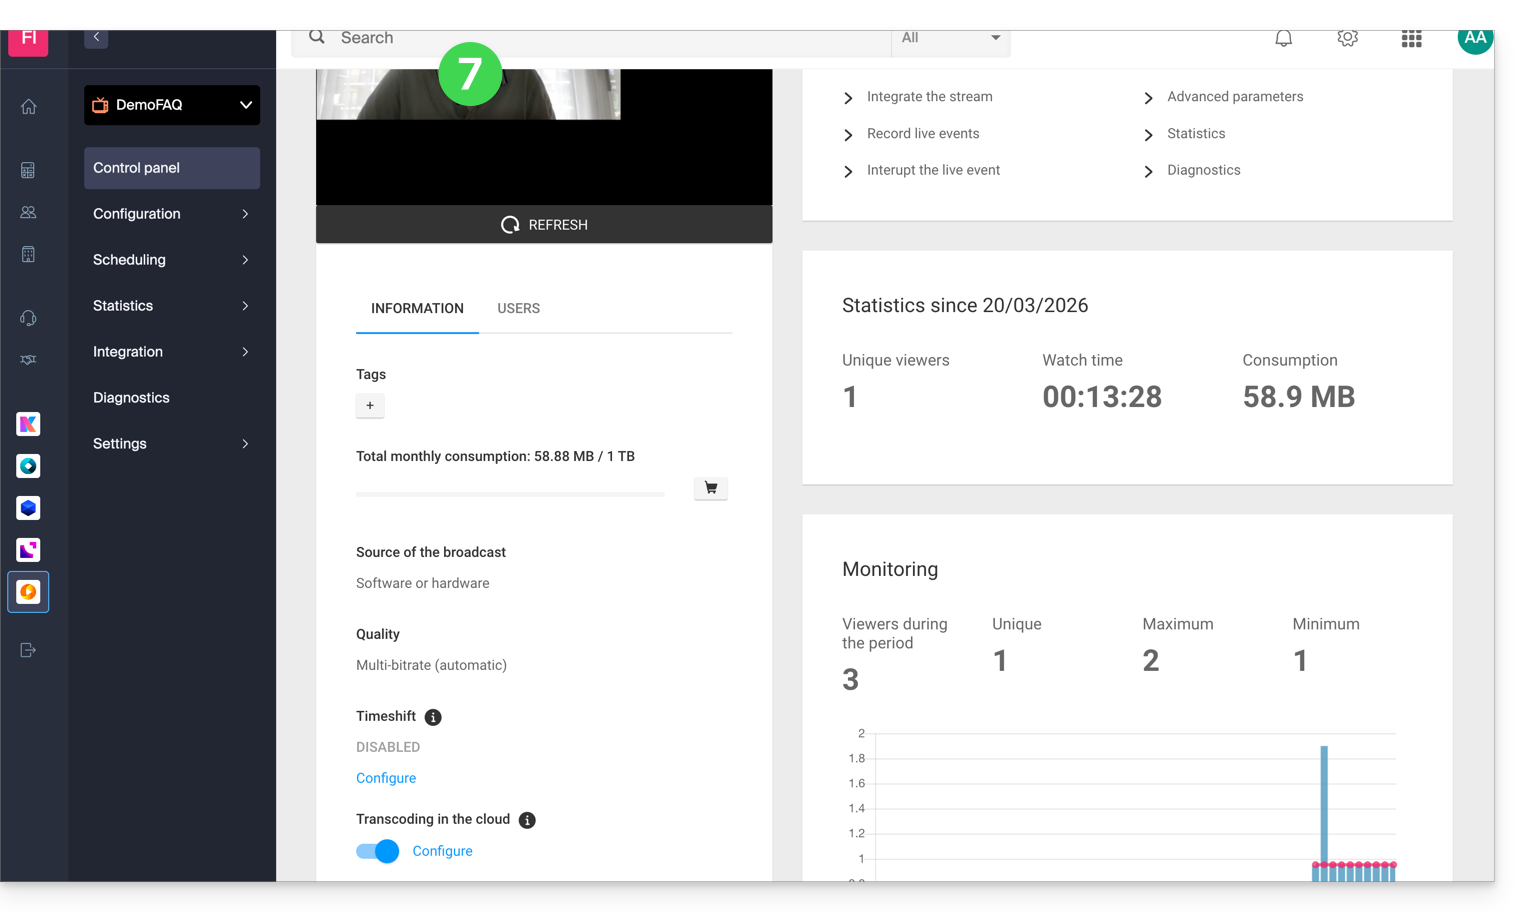
- There you go, the stream is displayed on the Infomaniak side, you can then configure a Player to get the information needed to share your stream:
Link to this FAQ:
Has this FAQ been helpful?