Knowledge base
1000 FAQs, 500 tutorials and instructional videos. Here, there are only solutions!
This guide details the limitations of Infomaniak's Site Creator.
Site Creator Limitations
Access the description of the Site Creator Free, Lite, and Pro plans to compare the limitations based on the plan you have.
In summary, Site Creator is available…
- … with every paid web hosting plan (the plan is equivalent to a Site Creator Pro without the included domain name)
- … or as a standalone product (available in 3 versions: Free, Lite, and Pro) and does not require any other specific plan.
Content
- The maximum number of pages that can be created, as indicated on the sales page, includes any legal pages if you use them.
- With the Pro version, there is no limit to the number of pages or store items that can be added via Site Creator.
- The remaining disk space available, depending on your plan, is specified in your dashboard:
FTP Management
- You cannot access your website's files on the server, either via FTP or by any means other than the manager provided in the Infomaniak Manager.
Website Export
- It is not possible to import or export the website (to another hosting provider, for example).
- Themes or modules cannot be exported (nor imported – see this other guide).
Link to this FAQ:
Has this FAQ been helpful?
This guide explains how to redirect visitors arriving on non-existent pages (e.g., old pages from a previous website) when your website is currently managed with Infomaniak's Site Creator.
Prerequisites
- Know the web address (URL) of the page that is no longer available.
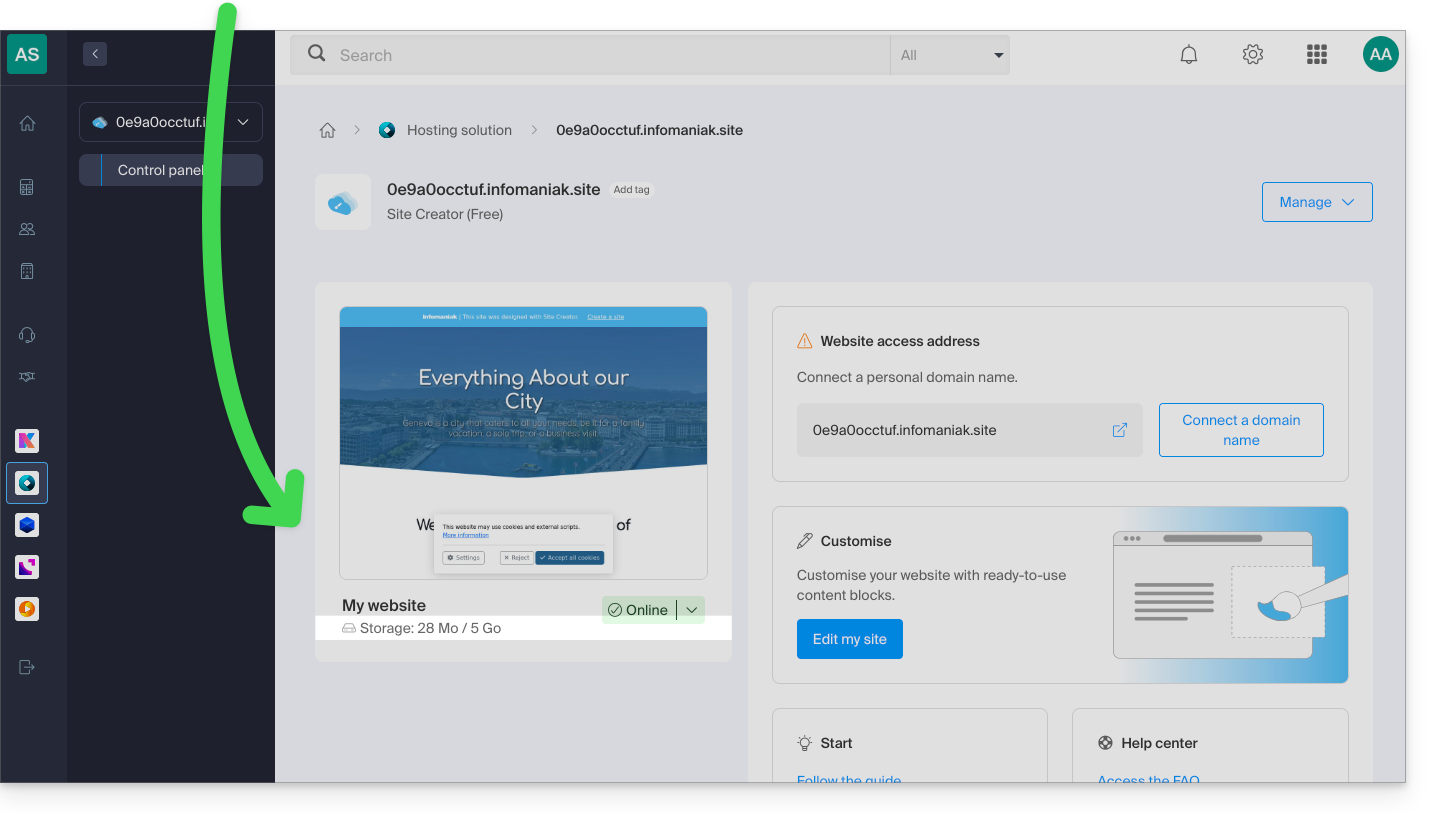
- Access Site Creator:
- Click here to access the management of your product on the Infomaniak Manager (need help?).
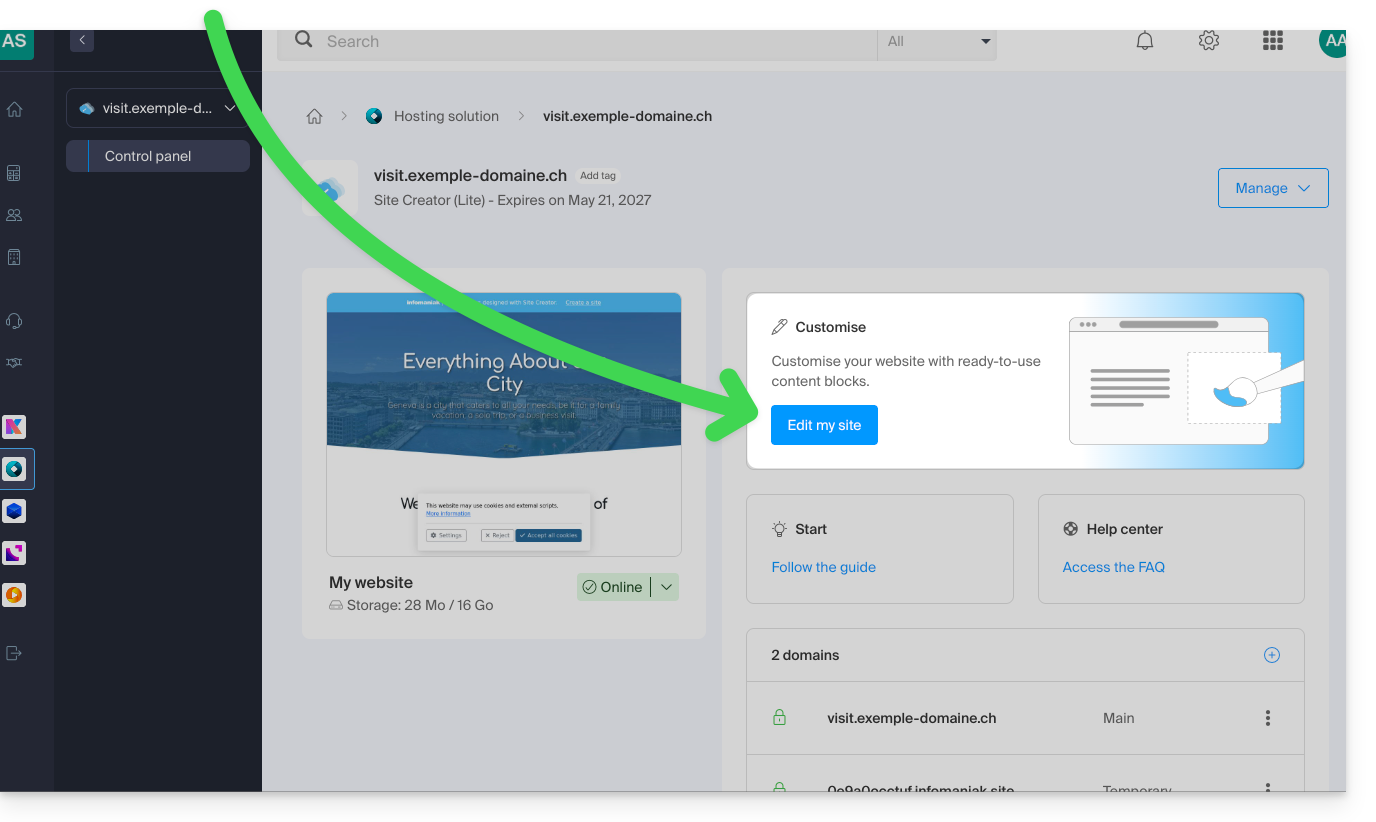
- Click directly on the name assigned to the Site Creator in question.
- Click on the Edit my site button to start the editor:
Redirect visitors to the new Site Creator page
In the left-hand menu of Site Creator:
- Click on Settings.
- Click on General settings:
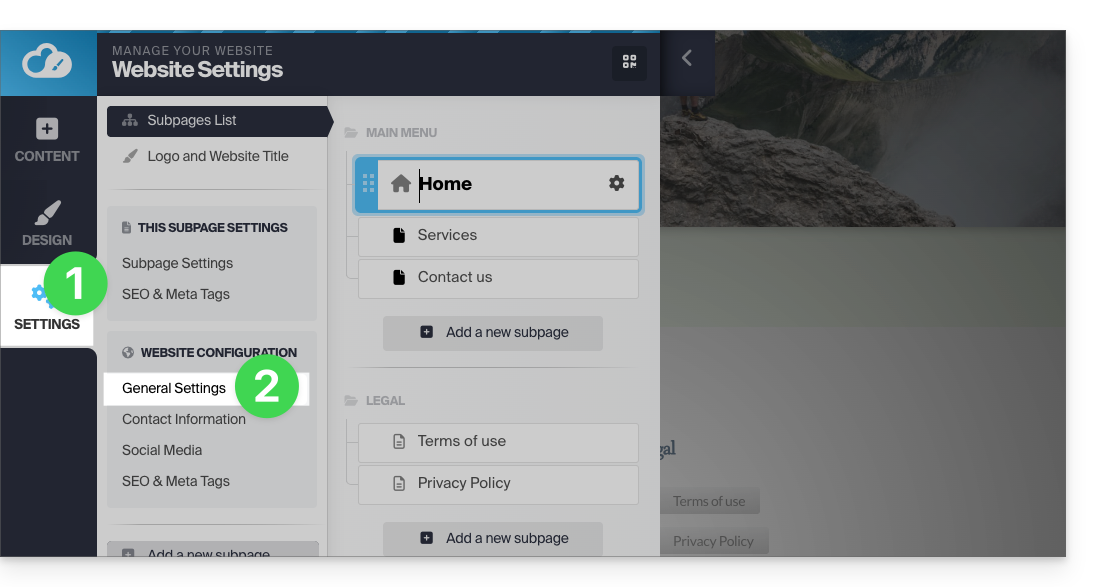
- Click on SEO & Meta Tags.
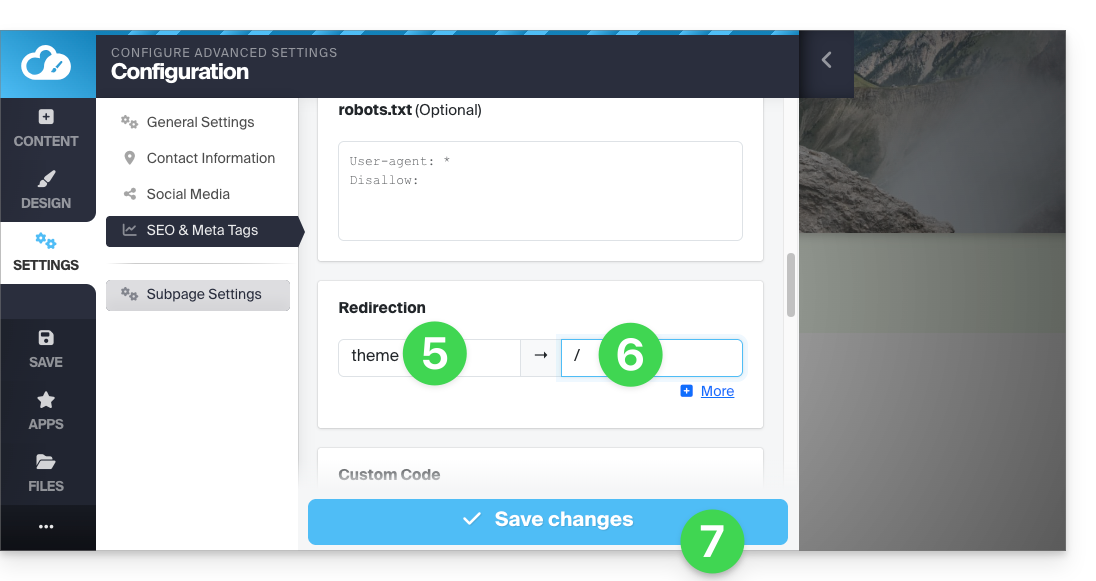
- Click on Add a redirection:

- Enter the address of the old page (without the name of your site) under Redirection.
- Enter the address of the new page (or
/to redirect the visitor to the root of your site, i.e., the homepage). - Save using the blue button at the bottom of the page:
For example:
- Your previous website contained a contact page at the address
domainxyz.com/company/contact.html. - Now your contact page is located at
domainxyz.com/about. - Therefore, you must enter
company/contact.htmlin the left field… - …and
aboutin the right field so that visitors who still arrive at the old address (due to outdated SEO or clicking on a bookmark, for example) are automatically redirected to the new page.
An alternative method is to add a new Site Creator page with the name of your old page address, then specify a redirection to the URL of your choice, and make it invisible using the toggle switch located below the redirection field: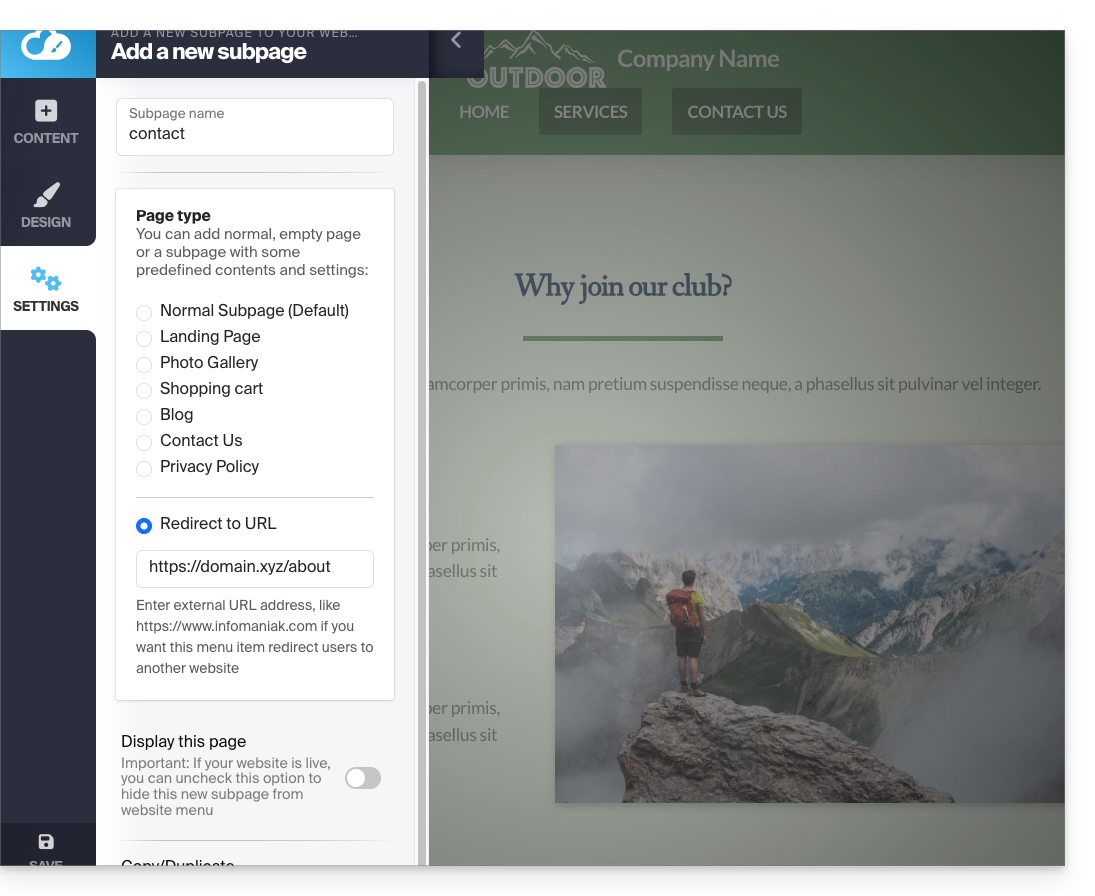
Link to this FAQ:
Has this FAQ been helpful?
This guide concerns the management of forms that allow registration for the Newsletter that you manage on Infomaniak.
Prerequisites
- Have access to the Newsletter product.
- Have created at least one registration form.
Copy the code necessary for integrating the form
To access the forms of your Newsletter and obtain the integration code:
- Click here to access the management of your product on the Infomaniak Manager (need help?).
- Click directly on the domain name assigned to the product concerned.
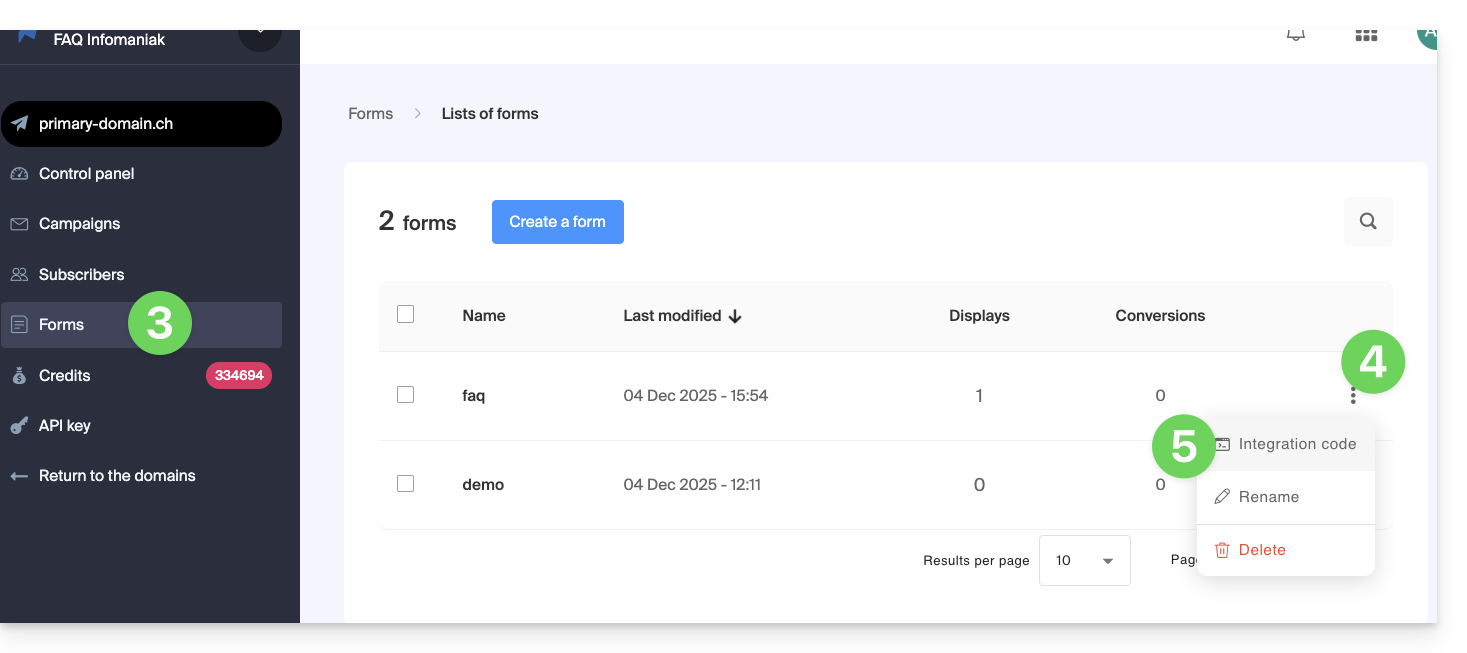
- Click on Forms in the left sidebar.
- Click on the action menu ⋮ to the right of the object concerned in the table that appears.
- Click on Integration code:
- Choose between the JAVASCRIPT and HTML tabs to obtain one of the two types of codes useful for inserting your form on your pages and click the blue button to copy the code to the clipboard:
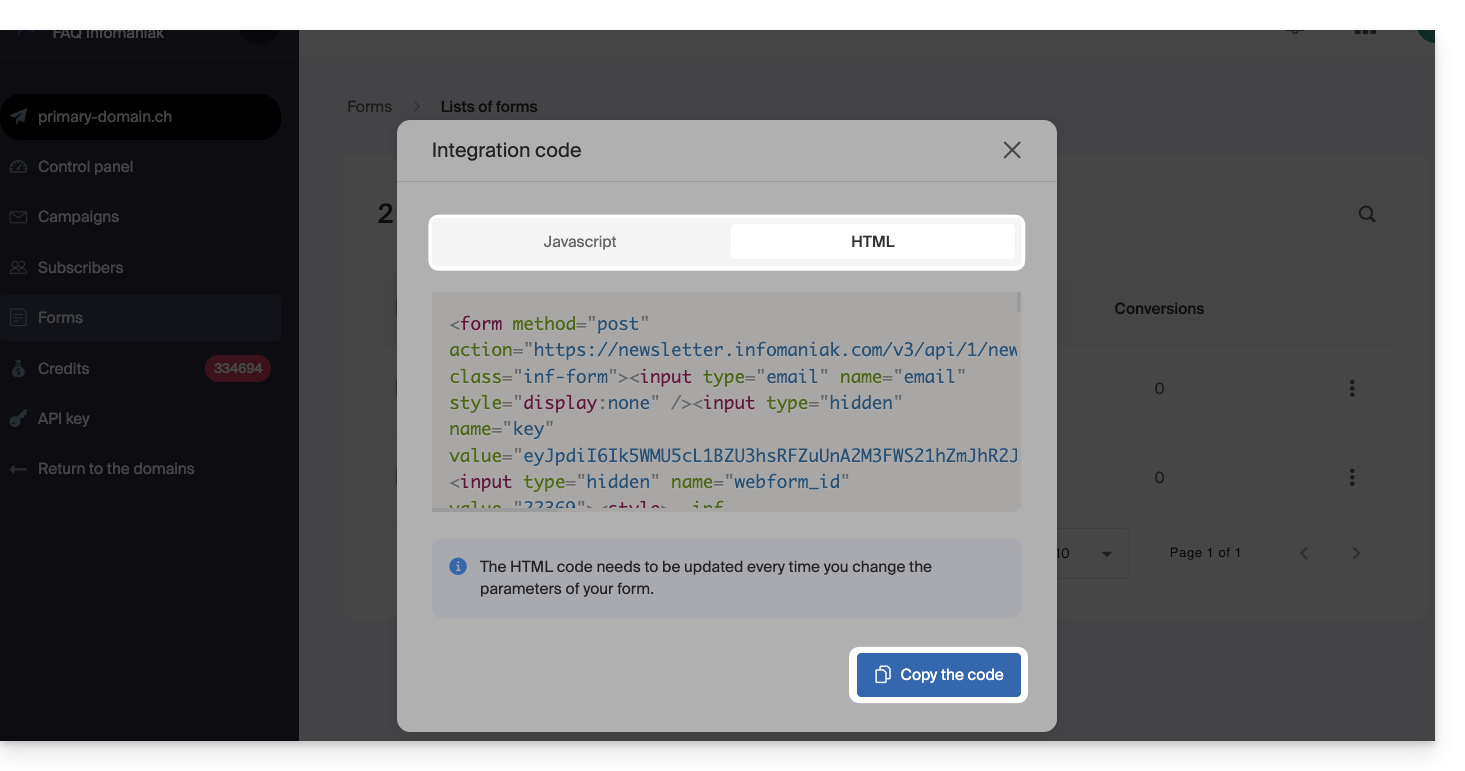
The HTML code requires an update every time you change the parameters of your form (you will therefore need to reinsert the HTML code in case of changes on the registration form editor).
Insert the form on a website…
You can insert the same form in different places. You can also create multiple forms (to populate different contact groups, for example). Obviously, a Newsletter is sent only once per contact, even if that contact is present in different lists/groups:
… with WordPress
- Insert a new HTML block where desired:
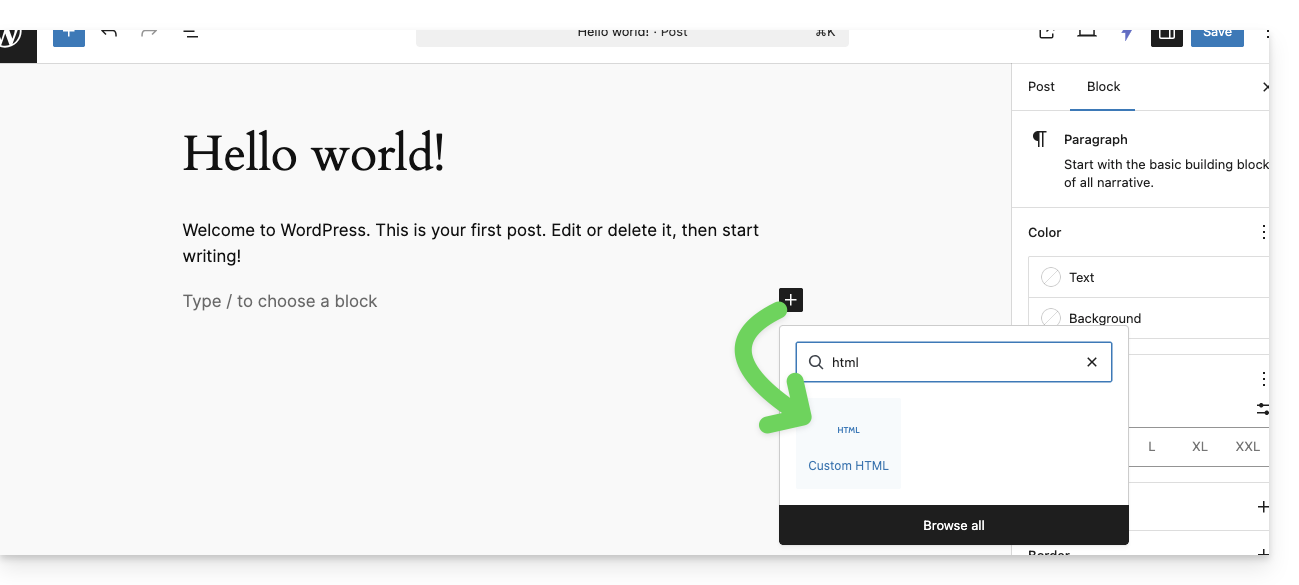
- Paste the HTML or JAVASCRIPT code obtained in step 6 above and save:
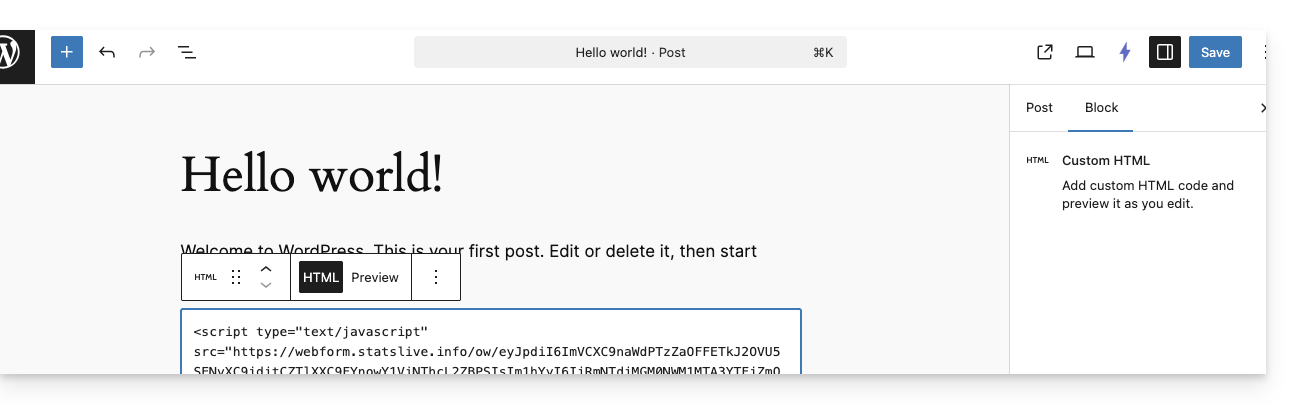
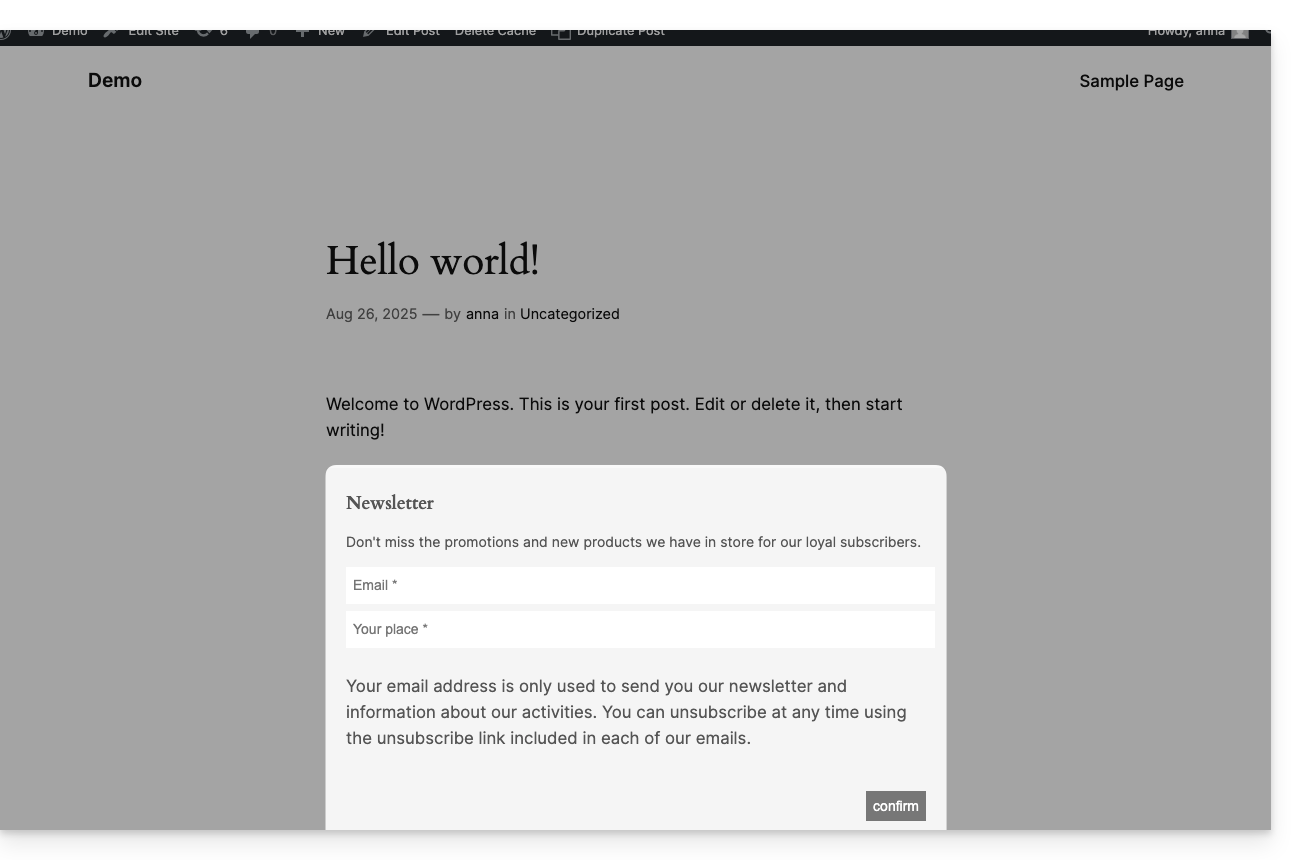
- The previously configured form is displayed on your site:
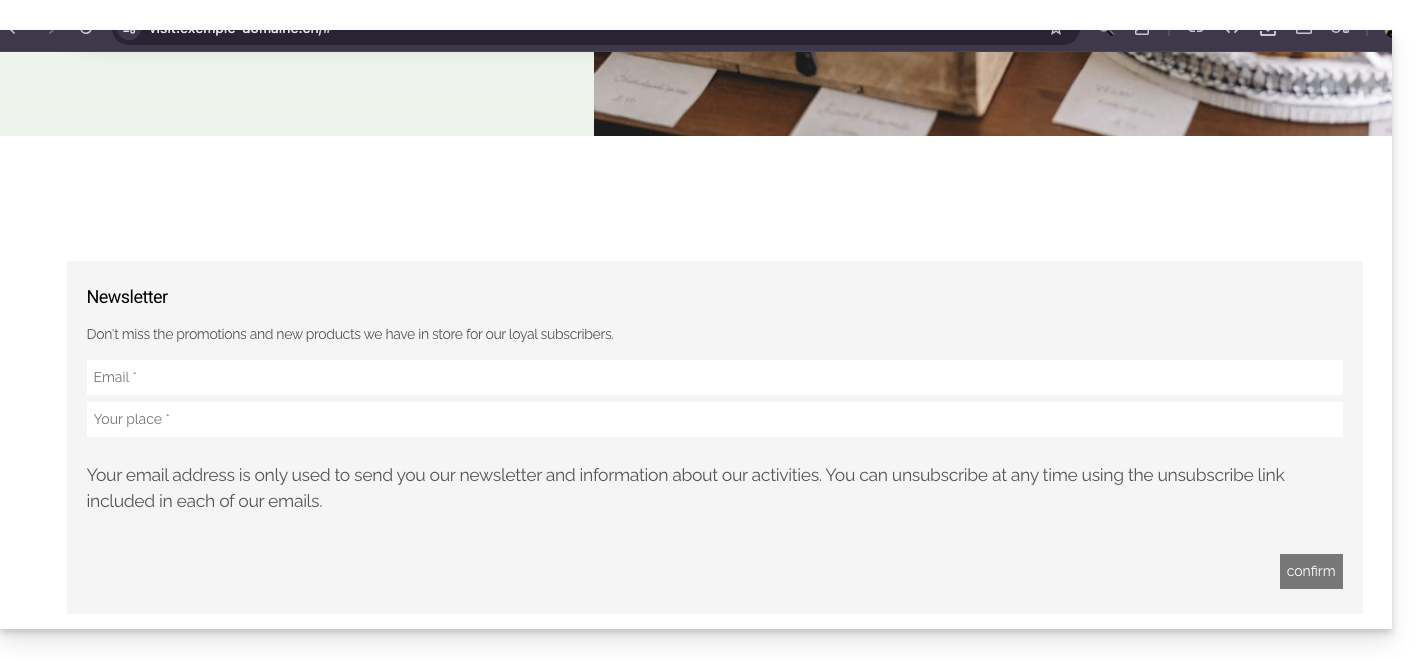
… with Infomaniak Site Creator
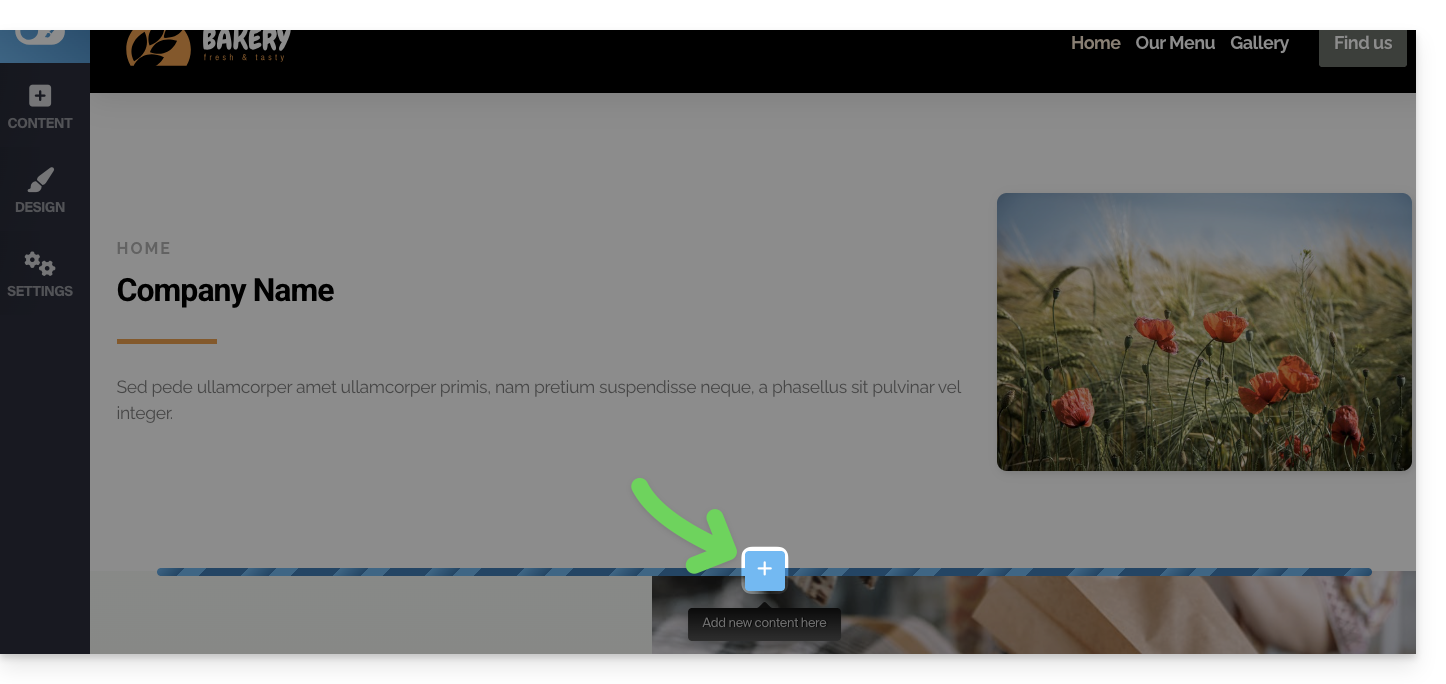
- Hover over the desired location on the page to display a PLUS button to add a block:
- Click on the PLUS button to choose a custom HTML code block:
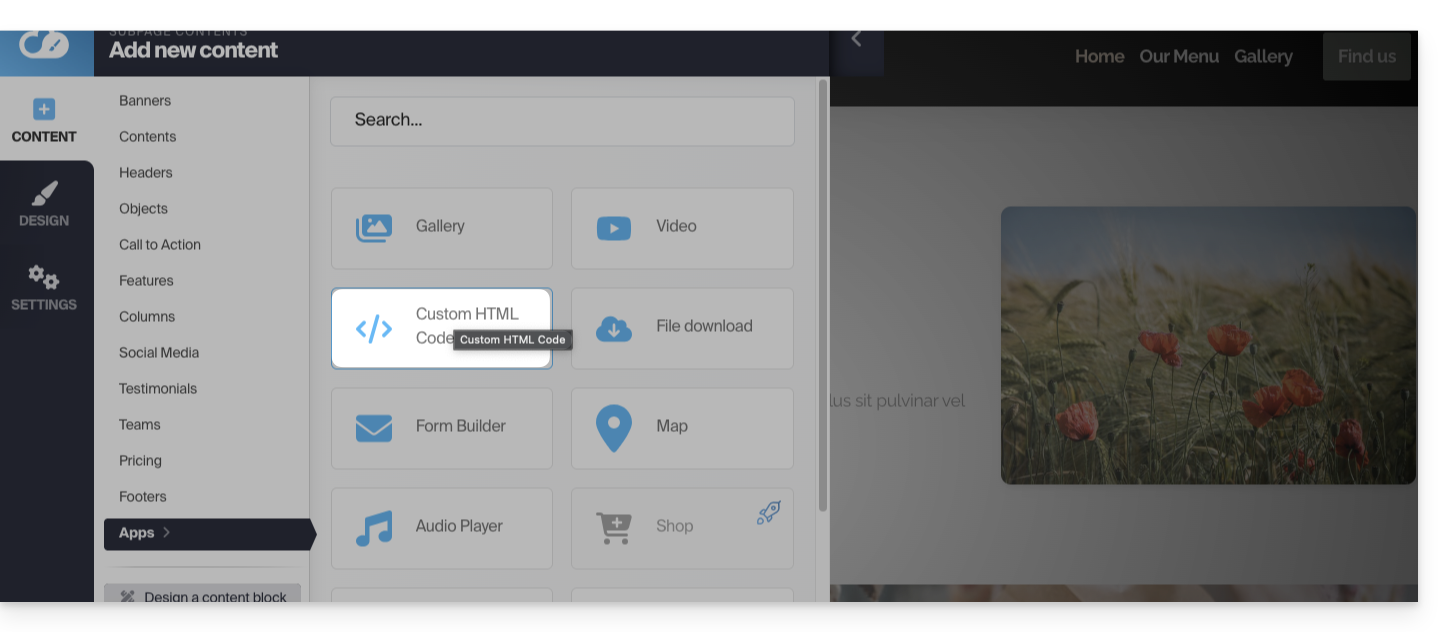
- Paste the HTML or JAVASCRIPT code obtained in step 6 above and click the button to Continue:

- The form is previewed on your editing page and displayed for your visitors:
Link to this FAQ:
Has this FAQ been helpful?