Knowledge base
1000 FAQs, 500 tutorials and instructional videos. Here, there are only solutions!
Import external data into kDrive
This guide explains how to import (once only) data (files, folders, etc.) from an external cloud, such as that of your previous provider (e.g., Dropbox or Microsoft), into kDrive.
Prerequisites
- Have a kDrive or kSuite plan.
- Have sufficient permissions within kDrive or kSuite.
- Do not change your passwords until the import is complete!
Specific guides
Click on the link corresponding to your current hosting provider:
- Google Photos: complete guide for migrating photos from Google Photos to Infomaniak
- Google Drive
- Apple iCloud
- ⚠️ For security reasons, importing is no longer possible via WebDAV, or from ownCloud / Nextcloud; perform a manual import or use the kDrive app
Guide for any other external Cloud provider
For example:
- Another kDrive to which your user account has access (except for "external" access).
- Dropbox
- OneDrive
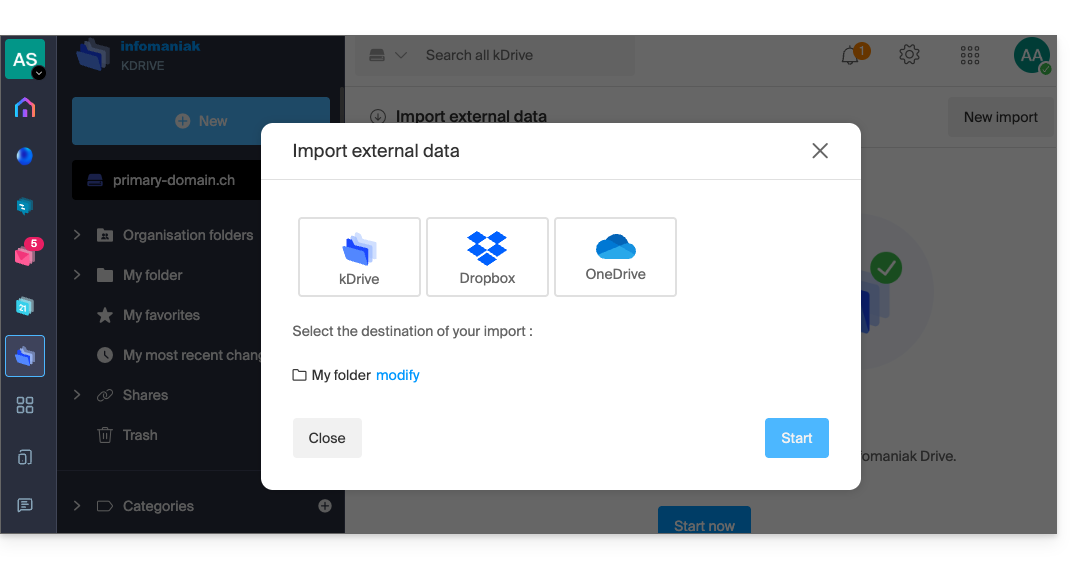
Data not imported
- The data that was shared with you has not been imported.
- Only the data that actually belongs to you will be imported.
- Google documents of the type Gdocs, Sheets, Slides, etc. …
- … are not imported during a Dropbox import.
- … are converted by Google when these files are downloaded from Google Drive to macOS/Windows.
- … are not converted when they are copied from the local Google Drive directory to the local kDrive directory. Therefore, it is essential to download the files from the web version of Google Drive.
- Dropbox Paper documents.
- Dropbox sharing links, viewable here.
- Individually shared Dropbox files, viewable here(however, shared folders and shared documents will be imported).
To proceed with the data import:
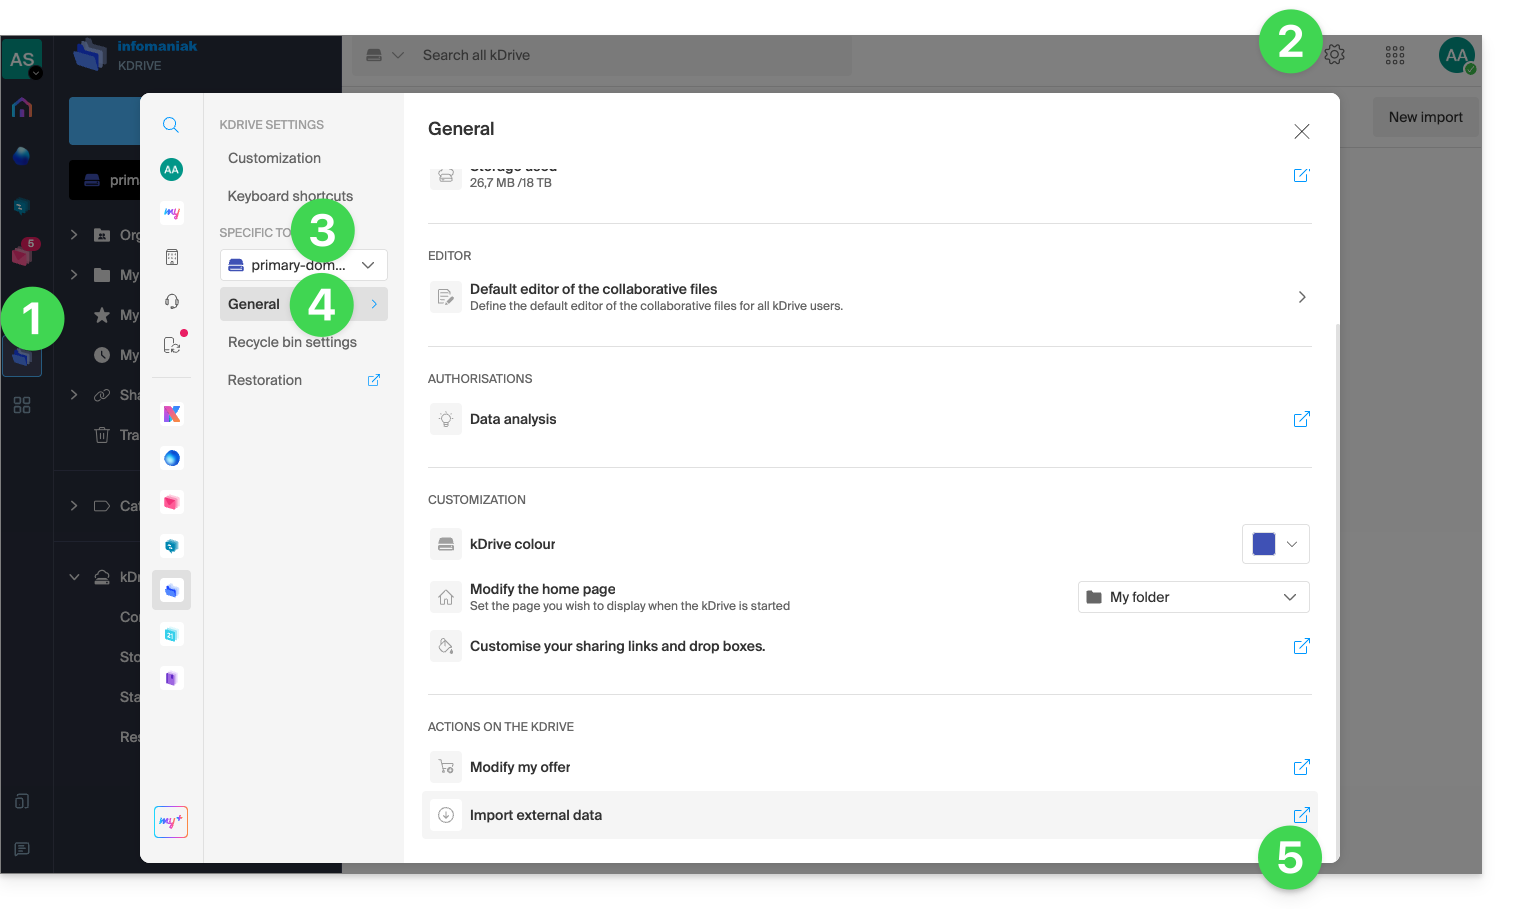
- Click here to access the Infomaniak kDrive web app (online service ksuite.infomaniak.com/kdrive).
- Click on the Settings icon in the top right corner.
- Check or select the relevant kDrive from the dropdown menu in the left-hand sidebar.
- Click on General in the left-hand sidebar.
- Click on Import external data:
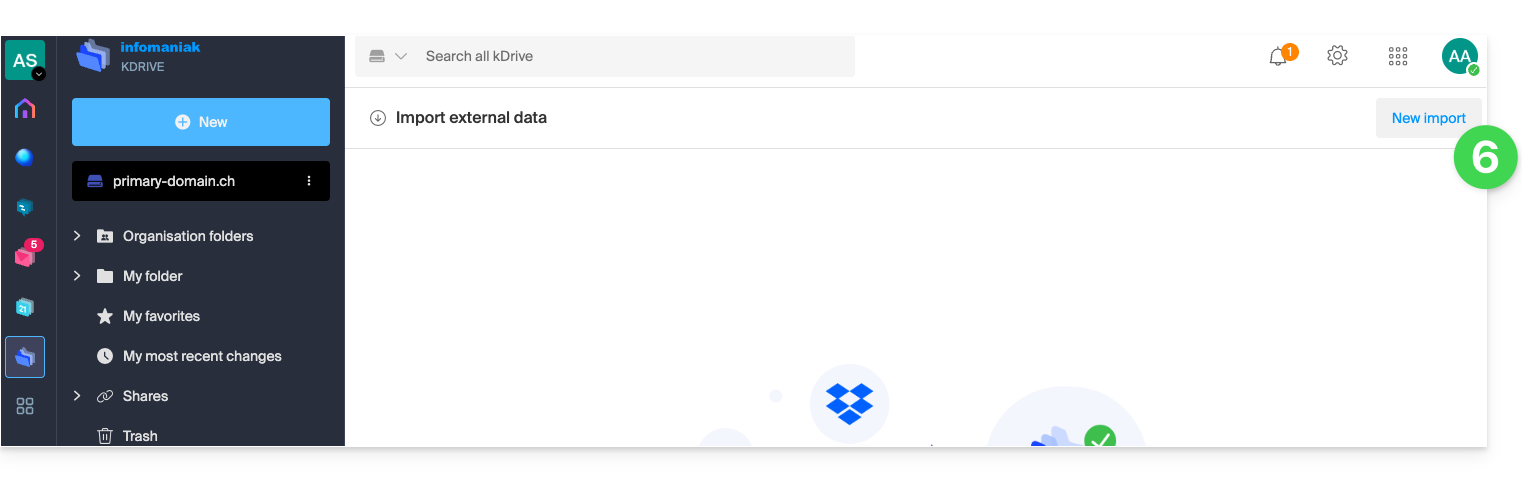
- Click on Start or New import at the top:
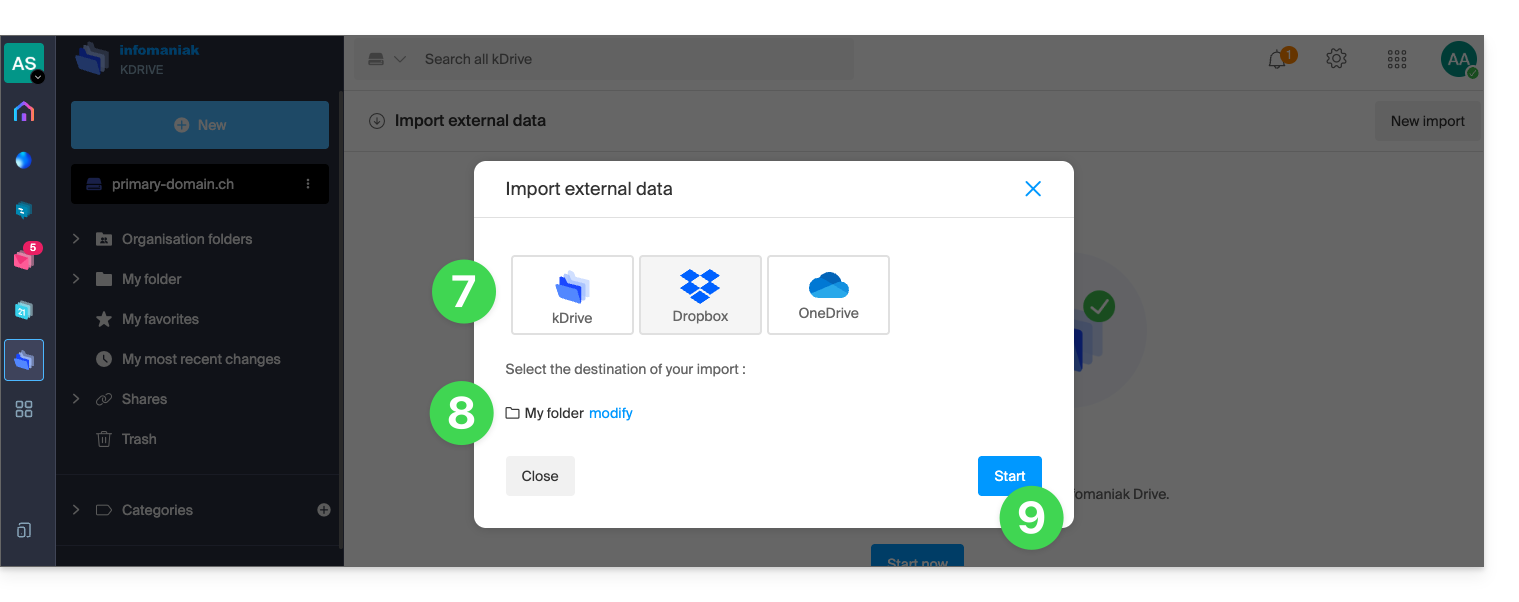
- Choose the service in question.
- Choose the location where the imported files will be stored.
- Click on the Start button:
- Complete the requested information (a new window may open in the background) and click on the blue Continue button.
- Complete the wizard.
- Wait for the data to be imported.
Manage ongoing imports
To monitor ongoing imports, return to the page mentioned in point 6 above at any time.
To stop an import in progress, click on the action menu to the right of the import listed on the page and choose to cancel it (in the event of a voluntary interruption, a report is sent to the administrator by email).
A second consecutive import would re-import all the data (to another directory in kDrive); this is not a differential synchronization, and there is no duplicate management.
Be sure to check your imported data immediately after the operation.
Link to this FAQ: https://faq.infomaniak.com/2406
Has this FAQ been helpful?