Knowledge base
1000 FAQs, 500 tutorials and instructional videos. Here, there are only solutions!
Record a live video stream
This guide explains how to record or archive all of your video streams, which can be useful for creating TV replays or reviewing videos recorded by surveillance cameras, for example.
Manage automatic recording of live streams
To enable this option:
- Click here to access the management interface for your product in the Infomaniak Manager (need help?).
- Click directly on the name assigned to the product in question:
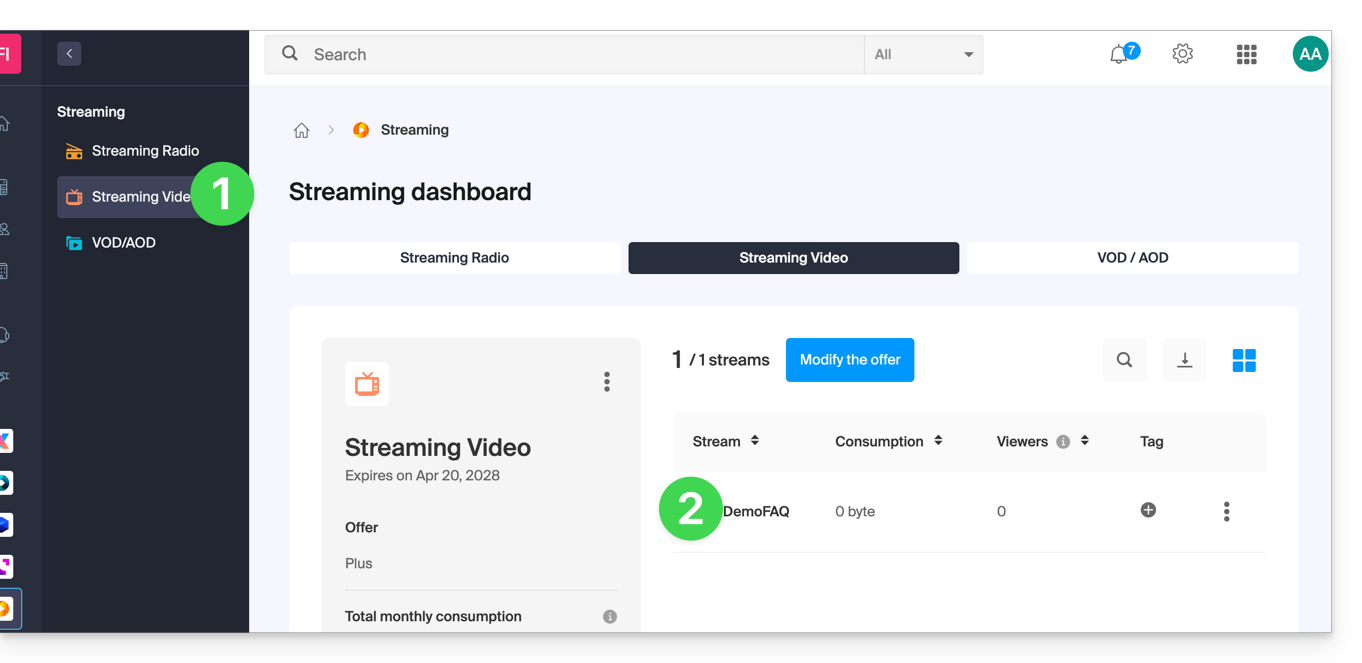
- Enable recording of live streams by using the toggle switch from the stream dashboard:
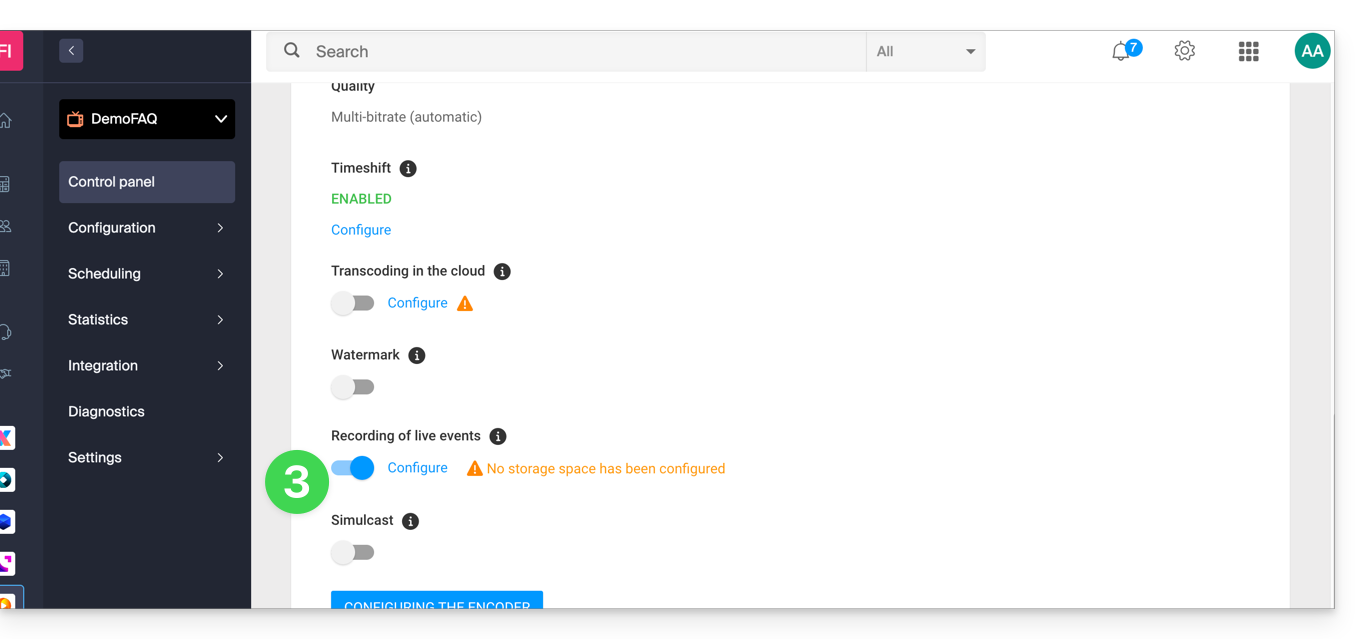
Once this feature is enabled and its FTP connection is configured, the stream will be automatically and continuously recorded from the moment it is sent to (or pulled by) the Infomaniak platform.
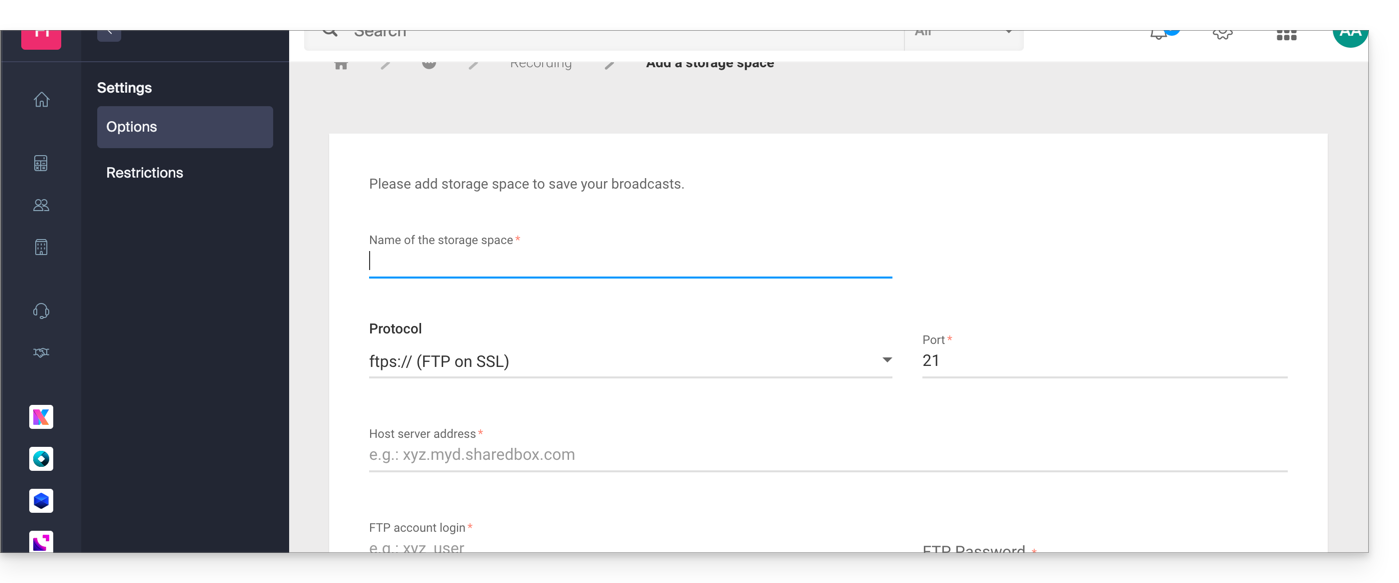
Be mindful of your FTP space, which could quickly become saturated.
If needed, you can also manually schedule recordings from the scheduling tool.
How automatic recordings work
Once this option is enabled, an mp4 file will be automatically generated after each broadcast, and then transferred to the FTP or VOD space that you have configured.
Important notes:
- A broadcast is defined as the time between connection and disconnection to the video encoder.
- Recording quality: in the case of a multi-bitrate stream, the maximum source quality will be retained.
- File size limitation: when streaming, you can define the maximum duration for each mp4 file; this option allows you to avoid generating excessively large files and ensures that your archives are saved to the FTP or VOD space of your choice (and once the duration is reached, recording is automatically stopped, then sent via FTP, and a new recording is started).
Customization of recording names
To help you easily identify and categorize your archives, the record names can be customized dynamically using parameters specified within curly braces.
Example:
template_{stream_id}_{date|format:YYYY-MM-dd_hh:mm:ss}_{fragment_id|from:1|prefix:fragment_(|suffix:)}.{extension}stream_id= represents the stream identifier as a string.date|format: ISO 8601 = date of the recording.time|format: ISO 8601 = record time.datetime|format: ISO 8601 = record date and time.fragment_id|from:number|prefix:string|suffix:string: = fragment number in the case where a record is split, with the possibility of adding a prefix and/or suffix.- Each fragment will be incremented, with "
from" indicating which will be the first reference fragment.
- Each fragment will be incremented, with "
extension= final file extension.
These parameters and their options are optional, and their order is completely free. They can be used as many times as desired. If you provide the same option multiple times, only the last one will be taken into account. Any unrecognized option will simply be ignored.
Example 1
Scenario: You have two daily schedules, the first starting at 10:00 AM and the second at 8:05 PM. By configuring the file naming in this way template_{date|format:hh:mm:ss}, you will obtain the following file names:
For December 5, 2019:
- The first recording at 10:00 AM will be named:
template-10:00:00.mp4 - The second recording at 8:05 PM will be named:
template-20:05:00.mp4
For December 6, 2019:
- The first recording at 10:00 AM will be named:
template-10:00:00.mp4
The recording from the previous day with the same name will be overwritten and replaced with this one. - The second recording at 8:05 PM will be named:
template-20:05:00.mp4
The previous day's recording with the same name will be overwritten and replaced with this one. - etc.
This approach can be particularly useful for setting up a loop recording system, for example for video surveillance. The user will only retrieve the video when needed, which avoids archiving a potentially infinite number of videos and risking saturating the FTP space.
Example 2
Scenario: this time, you have continuous recording, 24/7, with a file duration limit set to 360 minutes. By configuring the file naming in this way template_{date|format:YYYY-MM-dd}_{fragment_id|from:1|prefix:fragment_(|suffix:)}.{extension}, you will obtain the following file names:
- The first file of the day, at 0:00, will be named:
template_2019-02-05.mp4 - The second file of the day, at 6:00 AM, will be named:
template_2019-02-05_fragment(1).mp4 - The third file of the day, at 12:00 PM, will be named:
template_2019-02-05_fragment(2).mp4 - The fourth file of the day, at 6:00 PM, will be named:
template_2019-02-05_fragment(3).mp4
By configuring the file naming in this way template_{date|format:YYYY-MM-dd}_{fragment_id|from:0|prefix:fragment_(|suffix:)}.{extension}, you will obtain the following names:
- The first file of the day, at 0:00, will be named:
template_2019-02-05_fragment(0).mp4 - The second file of the day, at 6:00, will be named:
template_2019-02-05_fragment(1).mp4 - The third file of the day, at 12:00 PM, will be named:
template_2019-02-05_fragment(2).mp4 - The fourth file of the day, at 6:00 PM, will be named:
template_2019-02-05_fragment(3).mp4
Link to this FAQ: https://faq.infomaniak.com/2270
Has this FAQ been helpful?