Knowledge base
1000 FAQs, 500 tutorials and instructional videos. Here, there are only solutions!
Create a Newsletter Signup Form
This guide explains how to create a signup form for Infomaniak's Newsletter tool, how to embed it on a web page, and how to manage subscriber sends and unsubscriptions.
Introduction
- The management page lists the forms that have already been created and indicates the number of views and conversions for each.
- A conversion is a form submission, even if the person hasn't confirmed their email address, for example.
Create a signup form
Prerequisites
- You must have created at least one group.
A signup form allows visitors to a website to subscribe to a newsletter and enrich one or more contact lists/groups (see prerequisites). To access form management:
- Click here to access the management of your product on the Infomaniak Manager (need help?).
- Click directly on the domain name of the Newsletter.
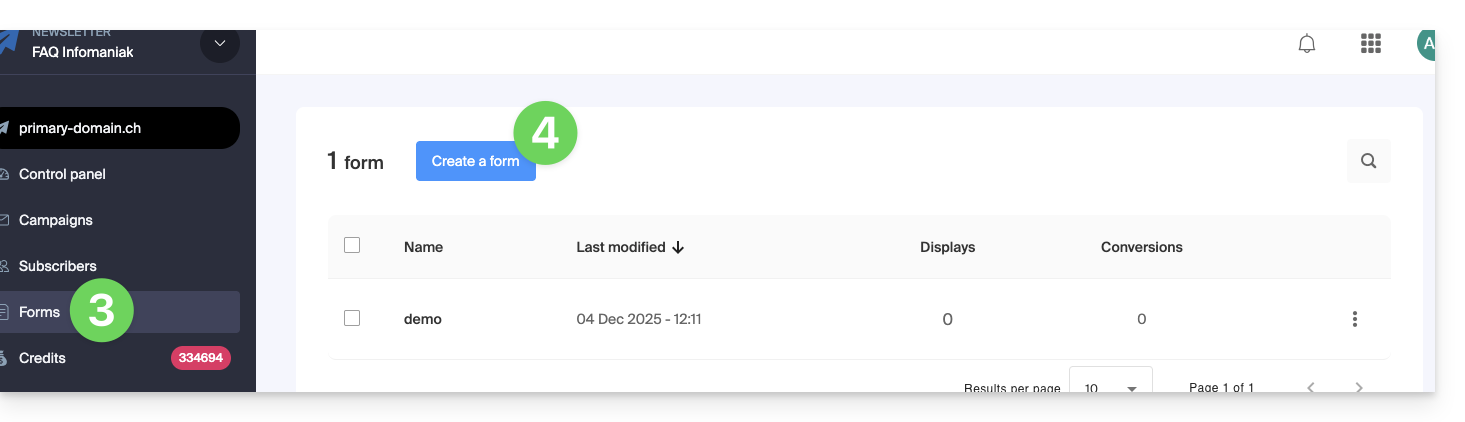
- Click on Forms in the left-hand menu.
- Click on the blue Create a form button:
- Give your form a name.
- Indicate the contact group that should be incremented by the subscriptions made on this form.
- Click the button to continue:
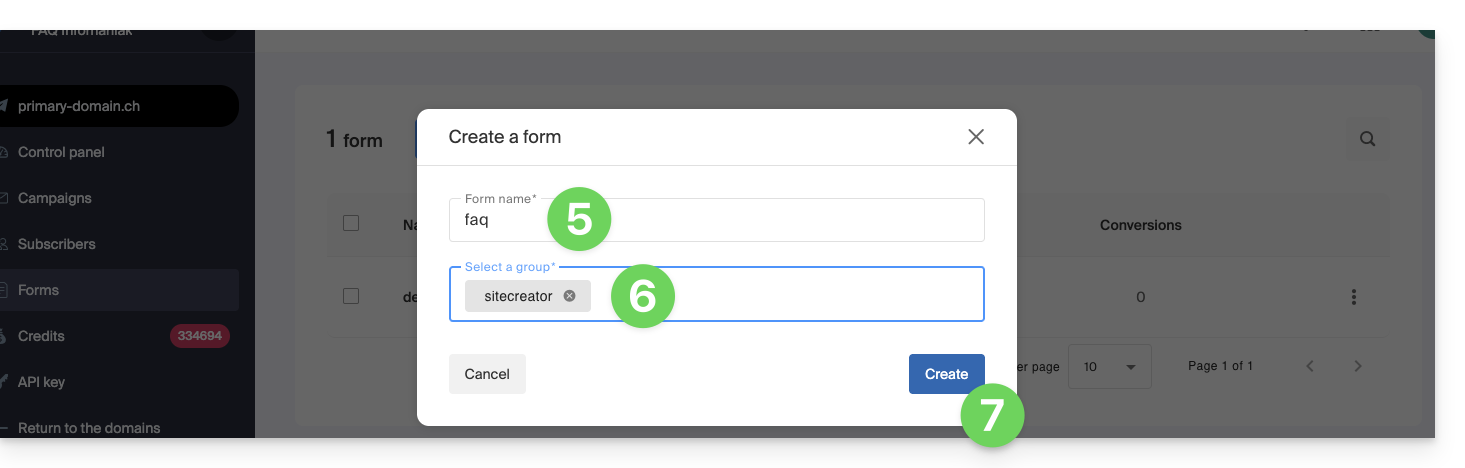
You will then be taken to the form customization area.
A. Customize the content and generate an HTML / javascript code
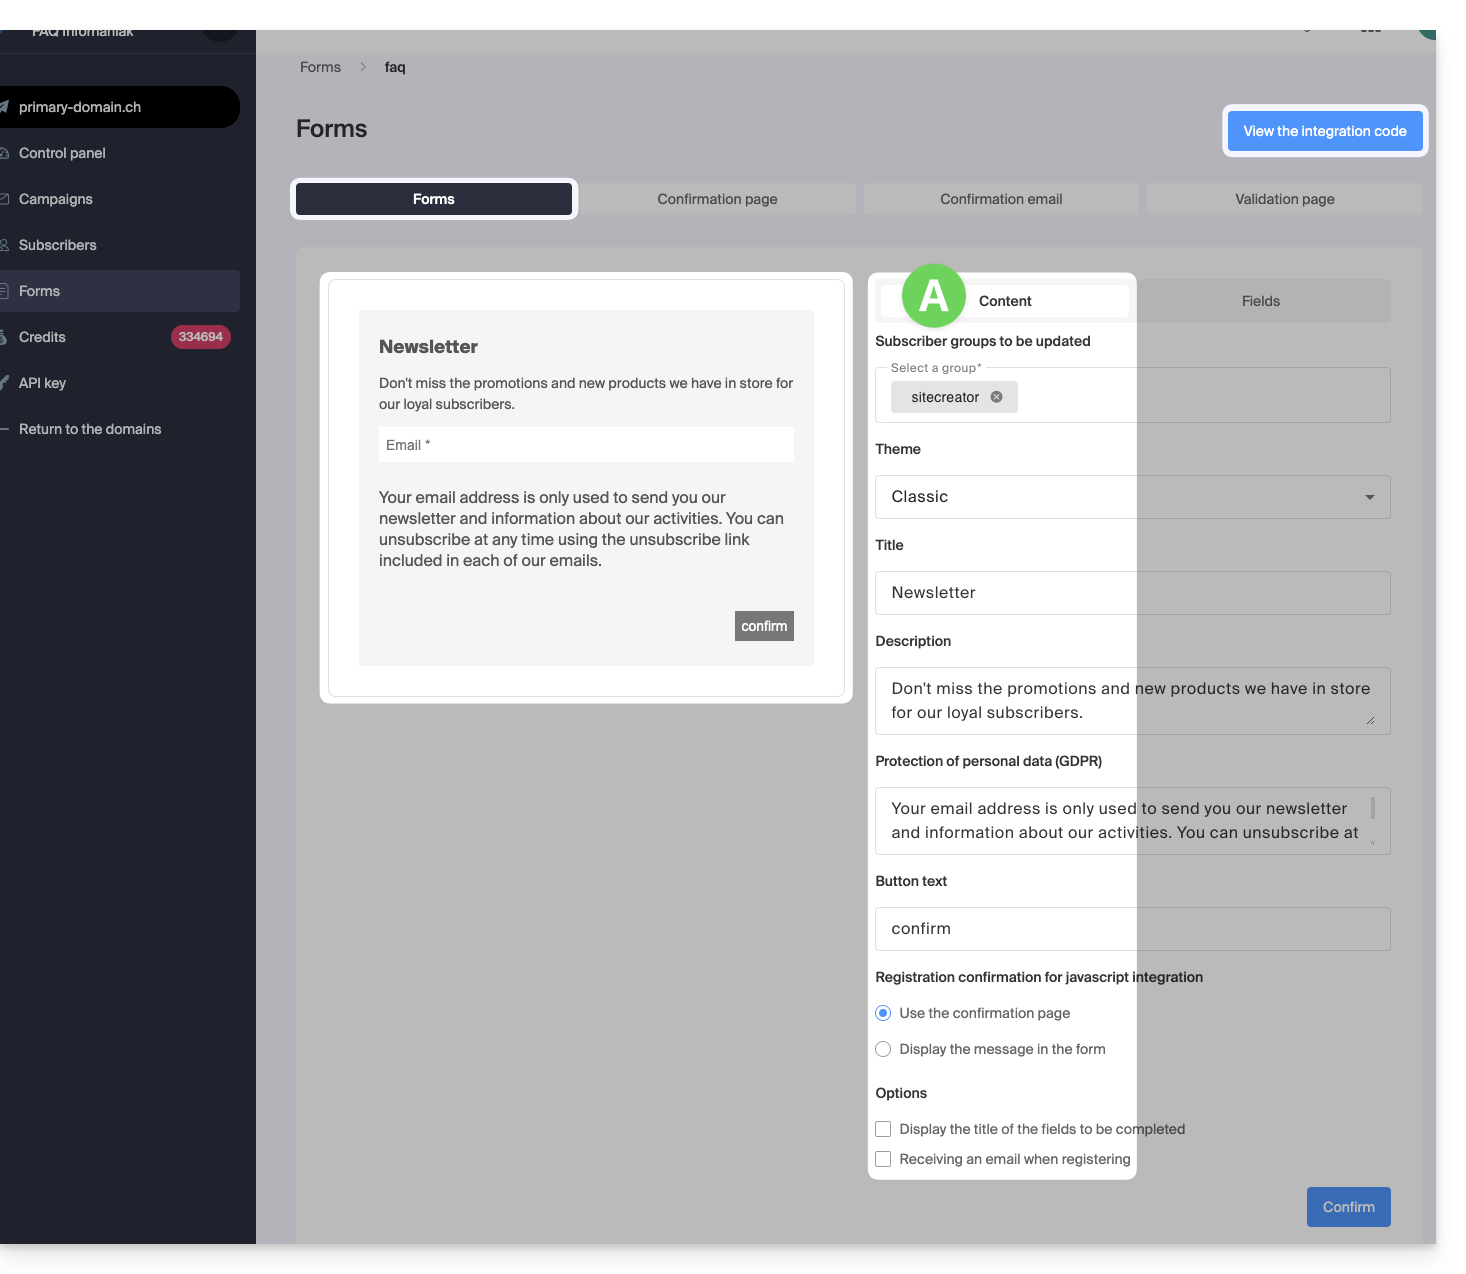
- The left-hand side previews your form.
- Specify which of your groups should contain the future subscribers of this form.
- This allows you, for example, to have a form in a location corresponding to filling out a specific contact list, and then another form elsewhere corresponding to a different list, in order to subsequently send an even more personalized Newsletter.
- The Theme menu allows you to choose the color palette that best suits your form so that it integrates as well as possible with the rest of the content next to which your form will be inserted.
- All elements of the form can be customized, including the text of the button that visitors will click to subscribe and the confirmation text that will be displayed after this click (integration with the javascript code only).
- The boxes at the bottom under Options allow you to
- display the title above the fields instead of displaying it inside them
- receive an email (as the Newsletter manager) when someone uses the form to subscribe
- Click on the blue button at the bottom of the page to save your changes as you go.
- Click on the blue button at the top of the page to display the JavaScript code and HTML code to be integrated into your pages (refer to this other guide for more information) if you have finished or continue to customize your form before copying the code.
B. Manage the information collected from the subscriber (configure the fields)
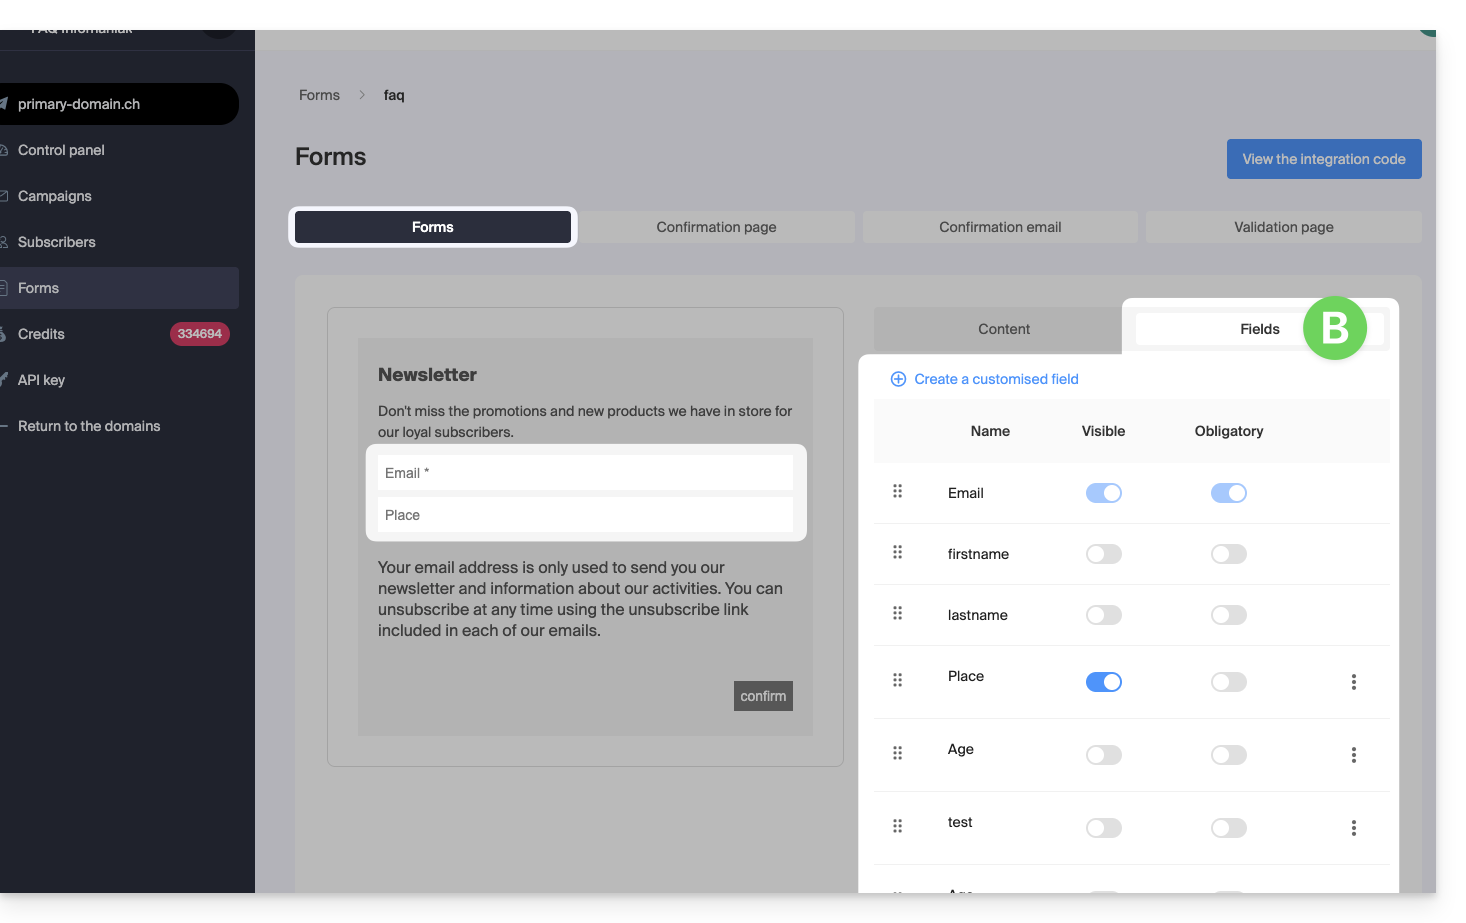
The Fields tab displays any fields that have already been configured and allows you to configure new ones (click the Create button at the top of the tab):
- These fields can be text-based, of the "date" type, or can force the insertion of numbers only.
- The "Required" column allows you to activate the required status of the field, which forces the subscriber to complete the required information; otherwise, the subscription will not be allowed.
- The information collected by these different fields will be stored in the subscriber's profile and can be used as a variable in your Newsletter and inserted into the body of the Newsletter when writing it.
- Click the blue button at the bottom of the page to save your changes as you go.
- You can delete fields from the Subscribers section.
C. Continuing the subscription configuration
The following tabs allow you to manage the rest of the subscriber's journey: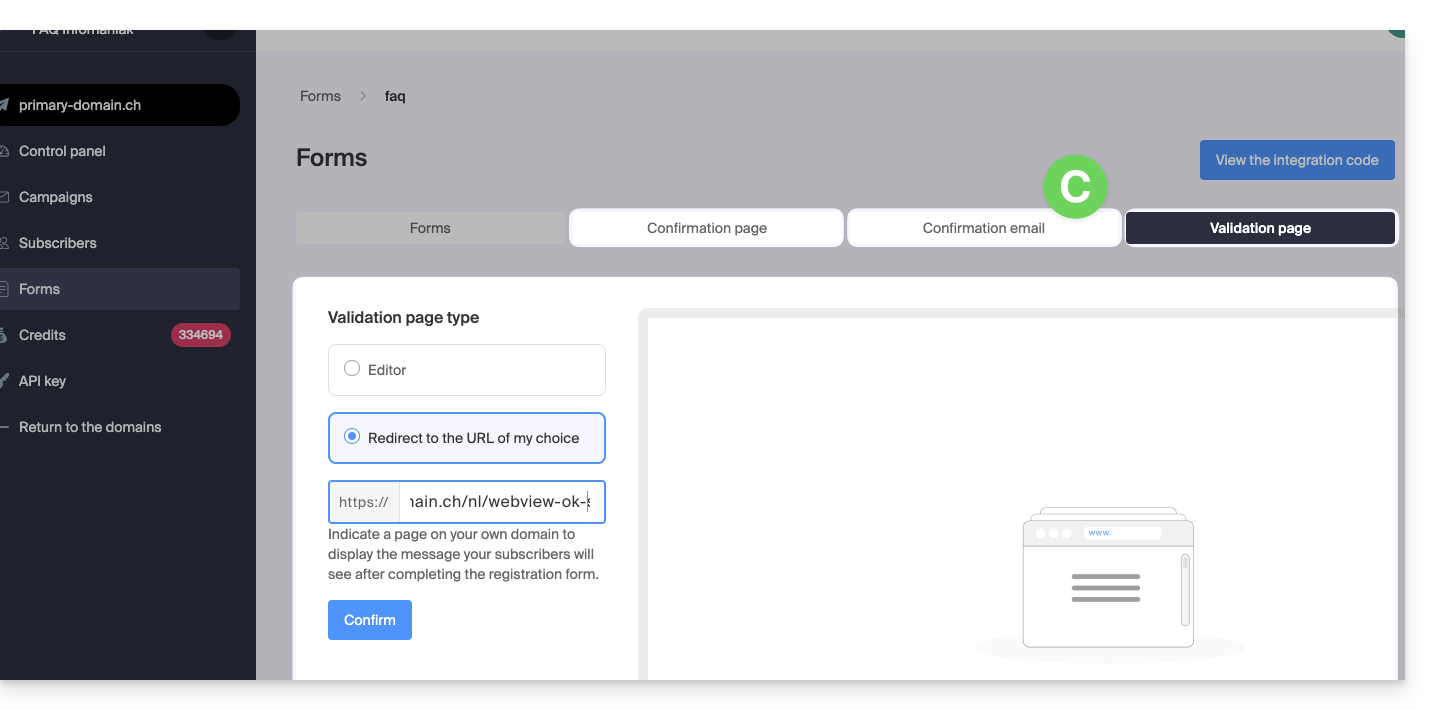
Indeed, a visitor's registration via the form works according to the double opt-in principle: a first message is sent to the address of the person who registered, who must manually and voluntarily validate their registration by clicking on a unique link contained in the email received.
Only then will the person be definitively registered in your database as a subscriber, until they eventually unsubscribe.
You can then customize the following in the remaining three tabs:
- the page or text that should be displayed during the first registration phase (which informs the user that an email is being sent to them)
- the email that is sent to the user who wished to register (content, sender, title, etc.)
- the page or text that should be displayed when the user confirms their registration by clicking on the link in the email body
Link to this FAQ: https://faq.infomaniak.com/2167
Has this FAQ been helpful?