Knowledge base
1000 FAQs, 500 tutorials and instructional videos. Here, there are only solutions!
Manage Newsletter Subscribers
This guide shows you how to create, import, and manage contacts within Infomaniak Newsletter subscriber lists.
Introduction
- You must obtain the explicit consent of your recipients via the double opt-in process:
- Sending spam and using purchased/rented address lists is prohibited.
- Importing does not send any messages to the added contacts (therefore, read and accept the points above).
- Duplicates will be automatically deleted.
- If you re-import an address that is already subscribed, the different custom fields will be updated.
Create a subscriber list
To access the newsletter subscriber management:
- Click here to access the management of your product in the Infomaniak Manager (need help?).
- Click on the domain name in question in the table that appears:
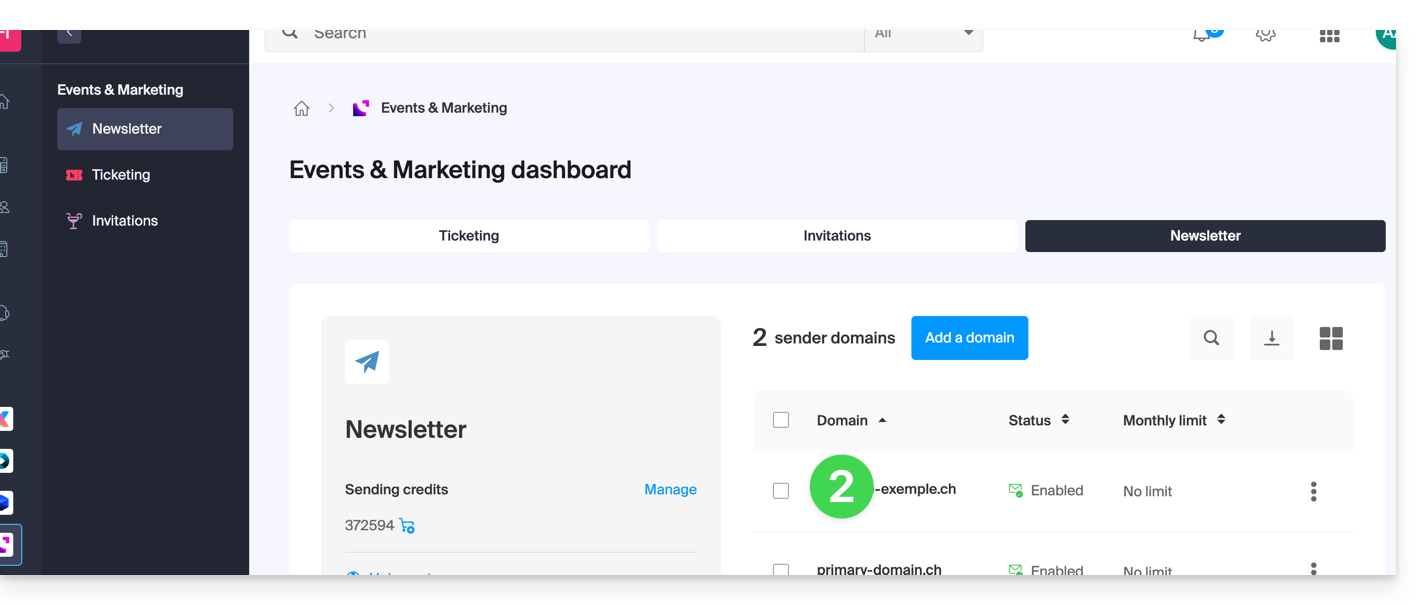
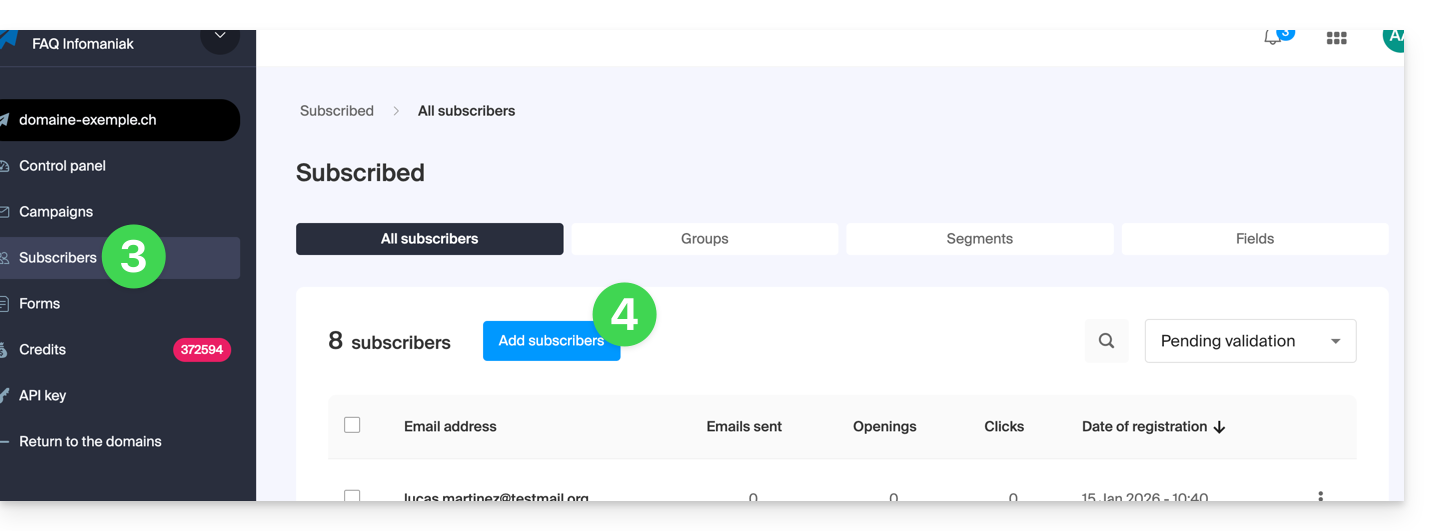
- Click on Subscribers in the left-hand menu.
- Click on the blue Add contacts button:
- Read and accept the Terms of Service.
- Choose from the different methods available to create a subscriber list:

A. Import a CSV file (format .csv) or a .txt file (predefined format)
- The format must be respected (a template to download is available as an example on the page). Maximum size: 300 MB
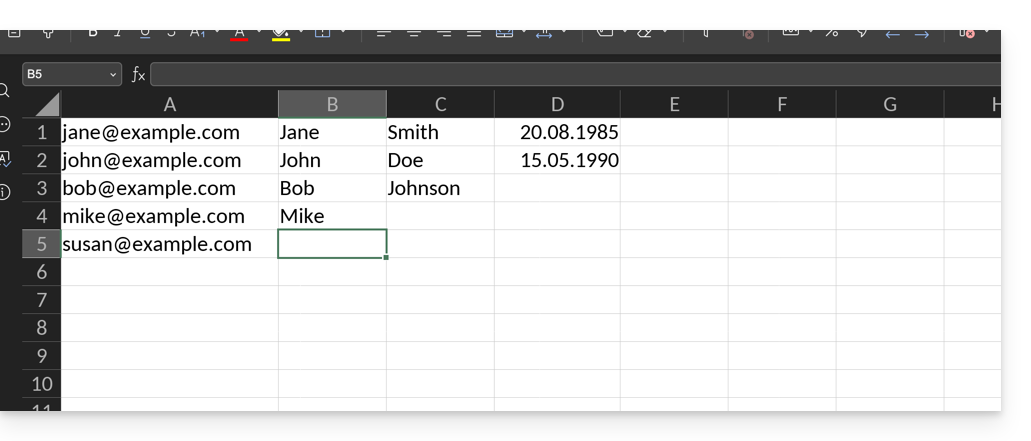
- Once the spreadsheet document is created, export it in
.csvformat, which will create a text document with a separator between each piece of information in the different cells: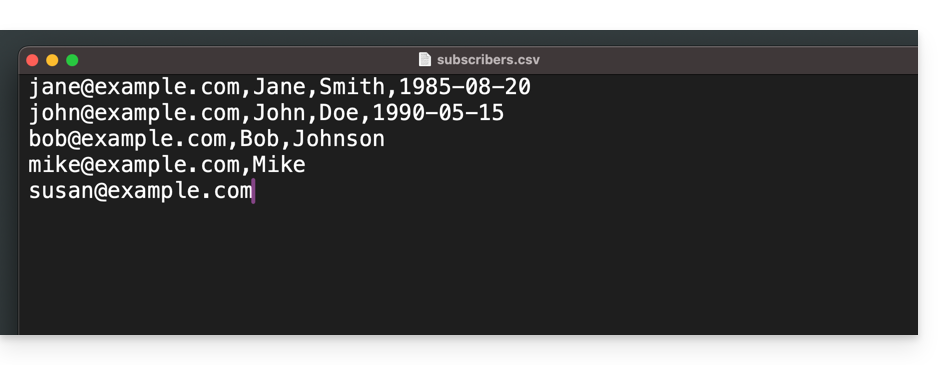
- Select the
.csvfile from the import interface and click the blue Import button: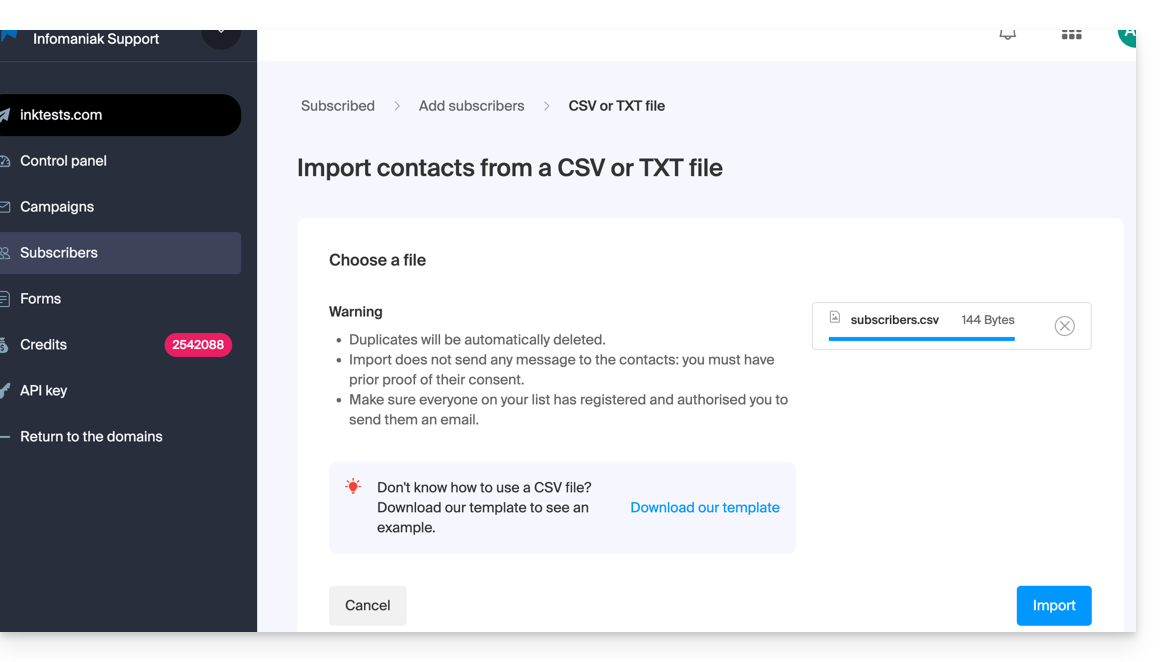
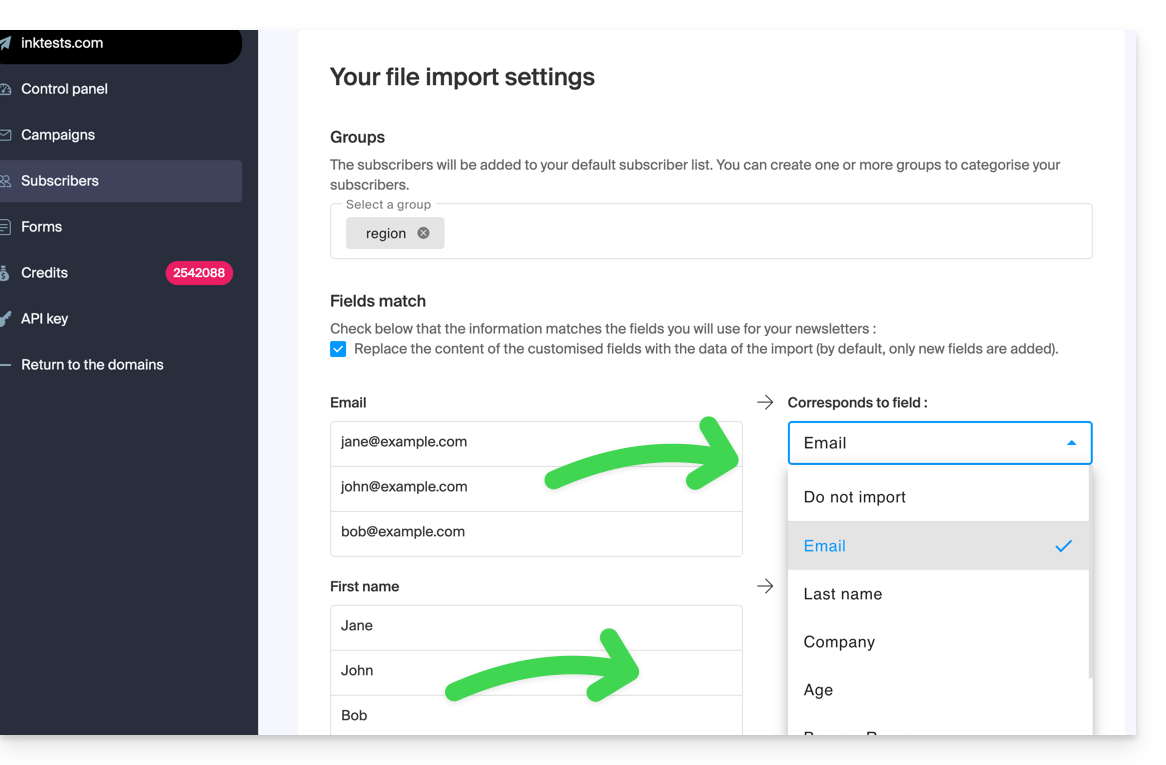
- You must assign the desired field to the desired information (the information is grouped according to the original columns).
- At the bottom of the drop-down menu, it is possible to create fields that do not yet exist (the field type can be forced to be numbers or a date, boolean, etc.).
- Choose a group from your created groups to place the imported contacts in:
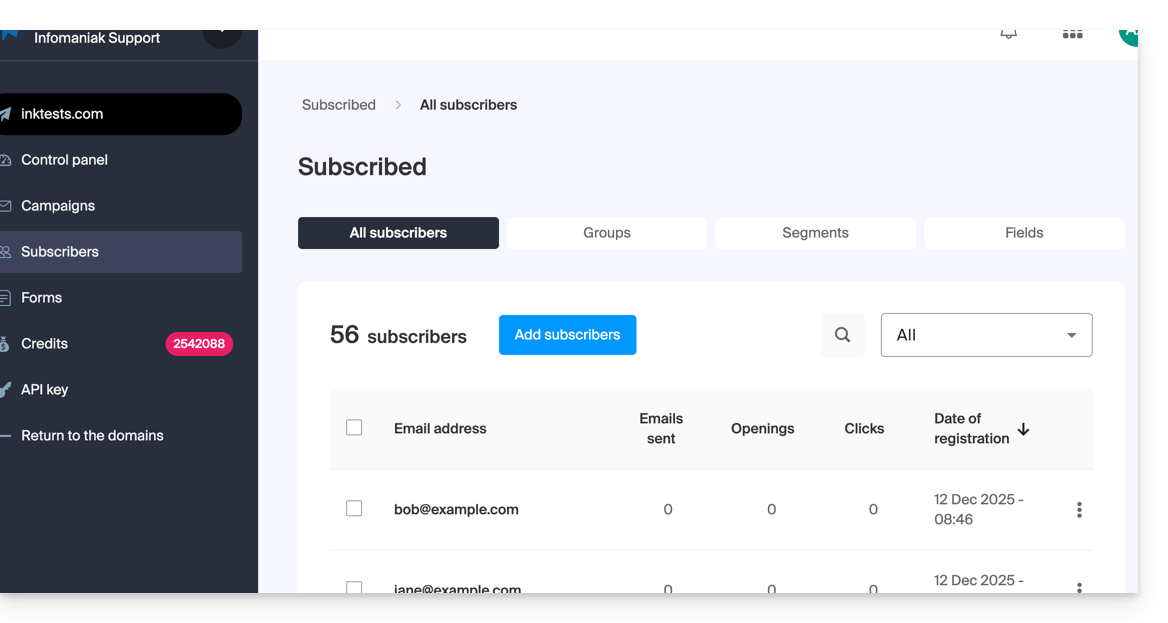
- There you go, your import is visible either under Groups or under Subscribers.
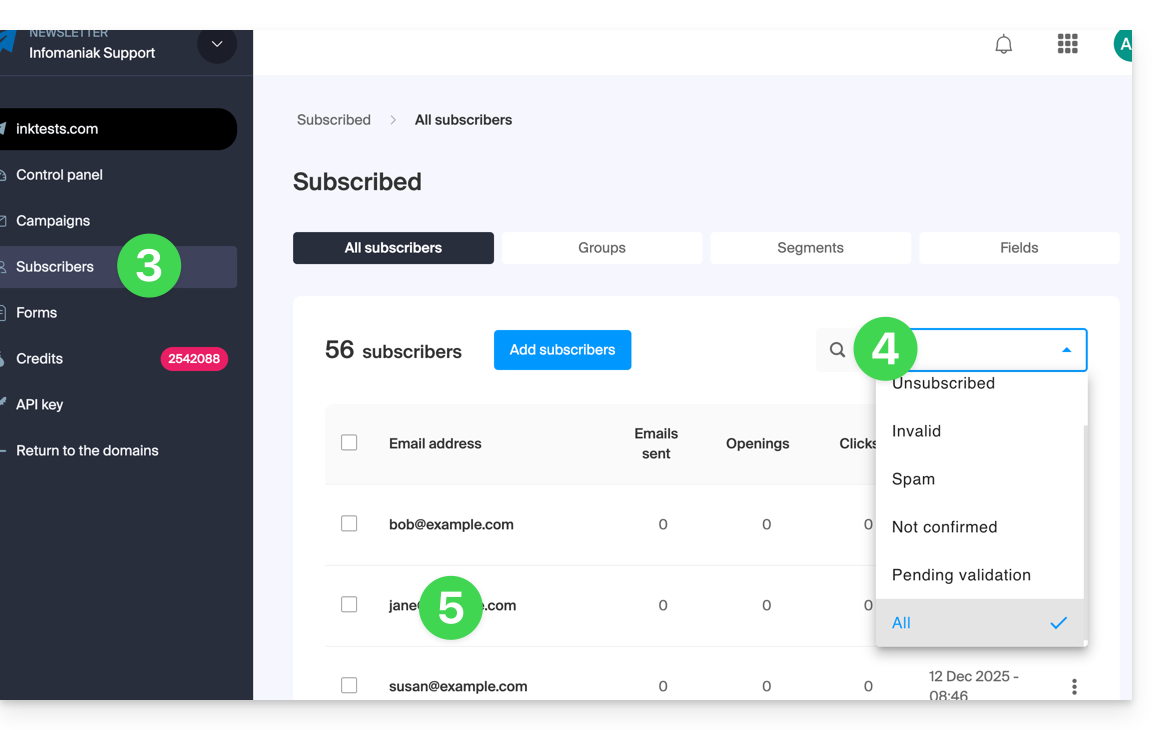
- If this is not the case, check if they are visible with the "All" display filter:
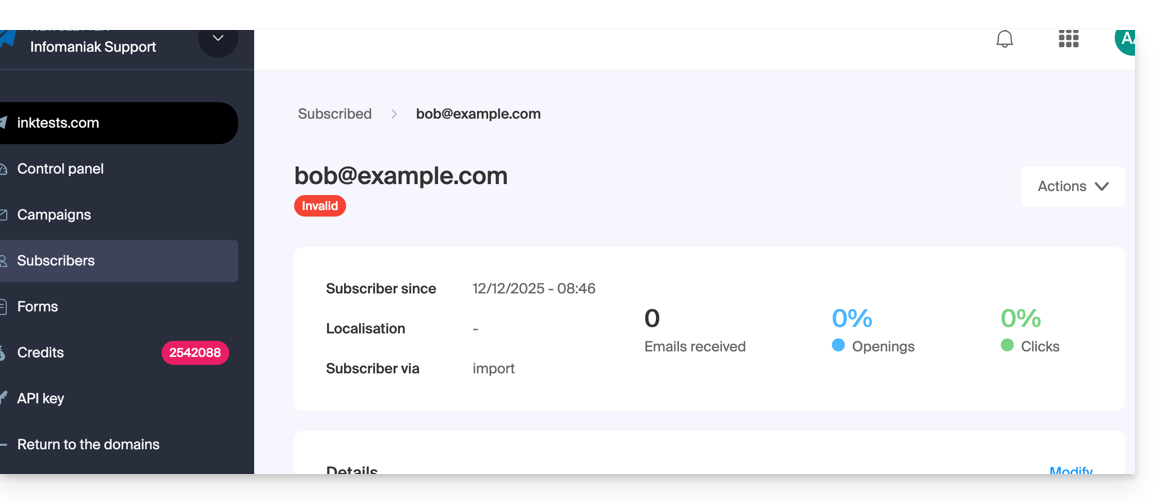
- It may be that, following an email verification, the status of the imported subscriber is invalid, and you will not be able to write to them:
- If this is not the case, check if they are visible with the "All" display filter:
B. Copy and paste the equivalent of a .csv or .txt file (predefined format)
- The format must be respected, as in the file to be downloaded (see above), for example:
anna.a@domain.xyz,Anna,Alpha,1985-08-20
alfred.a@domain.xyz,Alfred,Alpha
contact@domain.xyz,Support
mail@domain.xyz
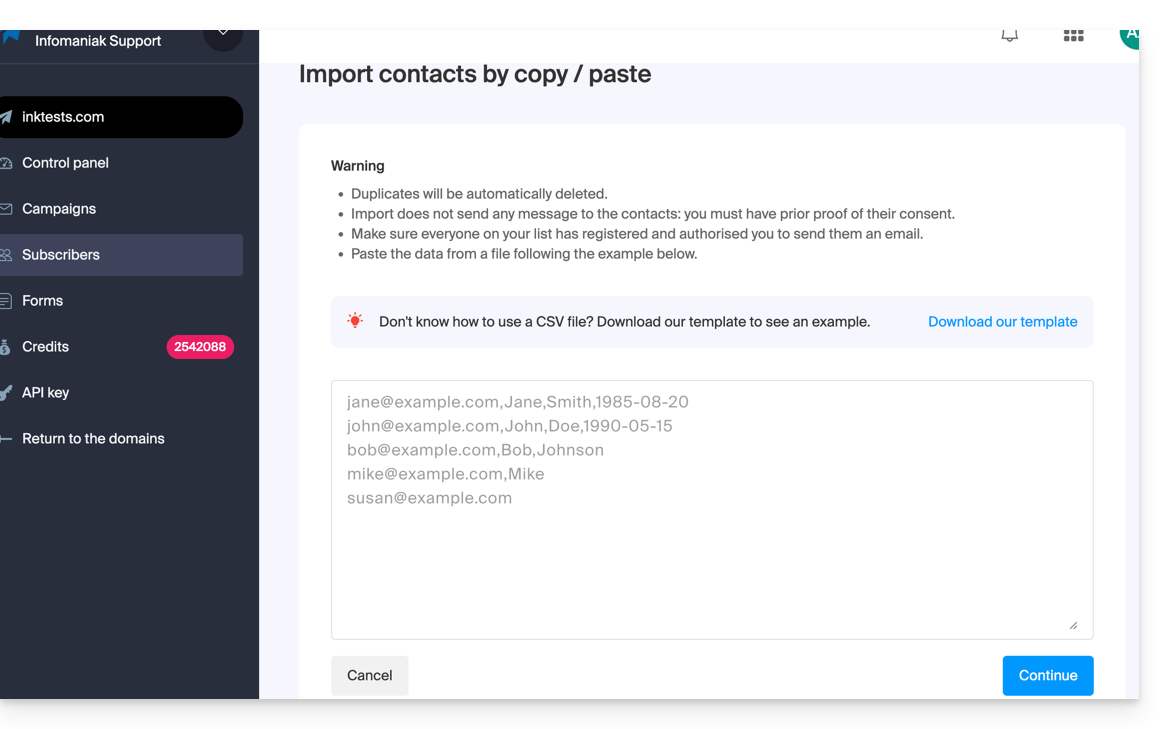
- Une fois ces informations collées dans le champ dédié à cet effet, cliquez sur le bouton bleu Continuer:
- The rest of the import process is identical to step A above.
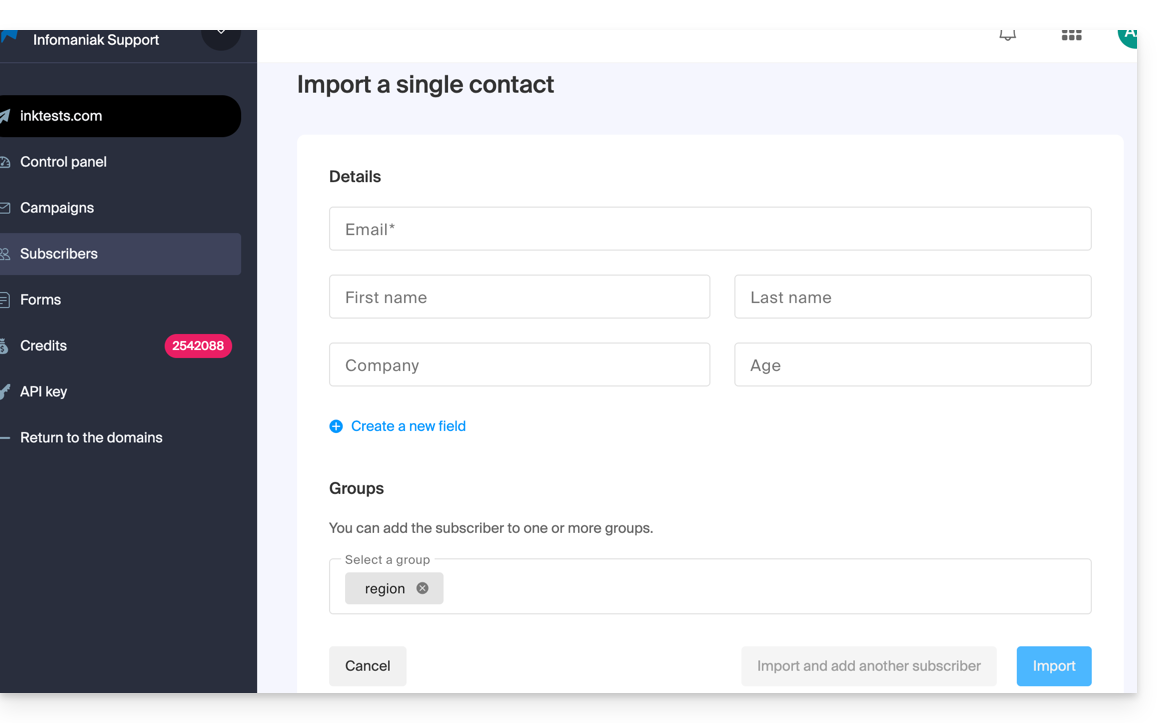
C. Filling in an individual contact form
- Import contacts one by one using the provided form.
- If necessary, add custom fields (the field type can be restricted to numbers or a date, boolean, etc.).
- Specify the existing group, if applicable:
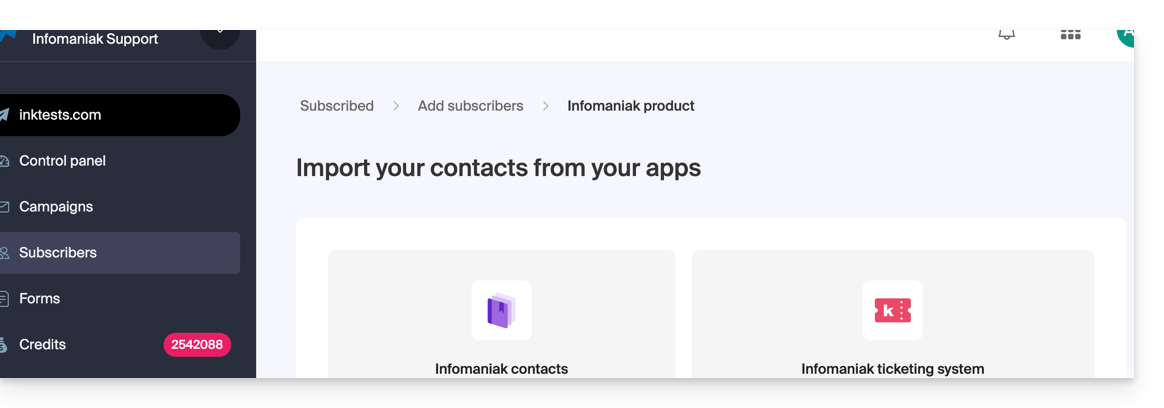
D. Automatic import from other Infomaniak tools
- Import contacts from your Infomaniak address books and from the Infomaniak ticketing tool, if available (with the option to import only users who have indicated that they wish to receive a newsletter):
Edit a subscriber's profile
To edit the information related to your subscribers:
- Click here to access the management of your product on the Infomaniak Manager (need help?).
- Click on the domain name in question in the table that appears.
- Click on Subscribers in the left-hand menu.
- Search for or filter the display type if necessary.
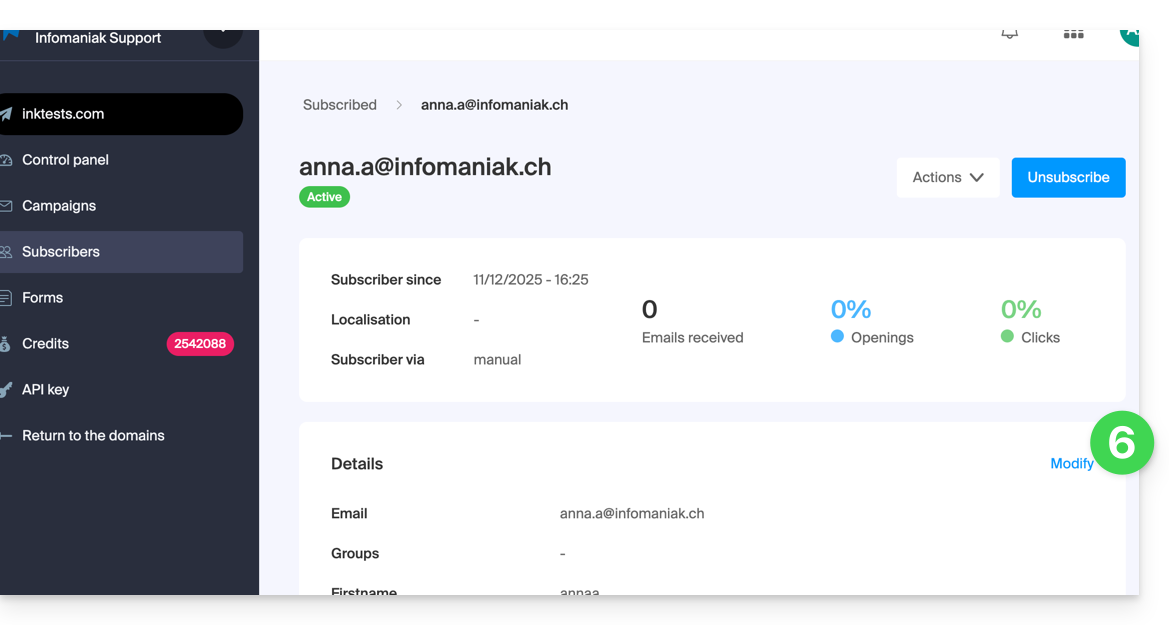
- Click on the subscriber whose details you want to edit:
- Click on Edit:
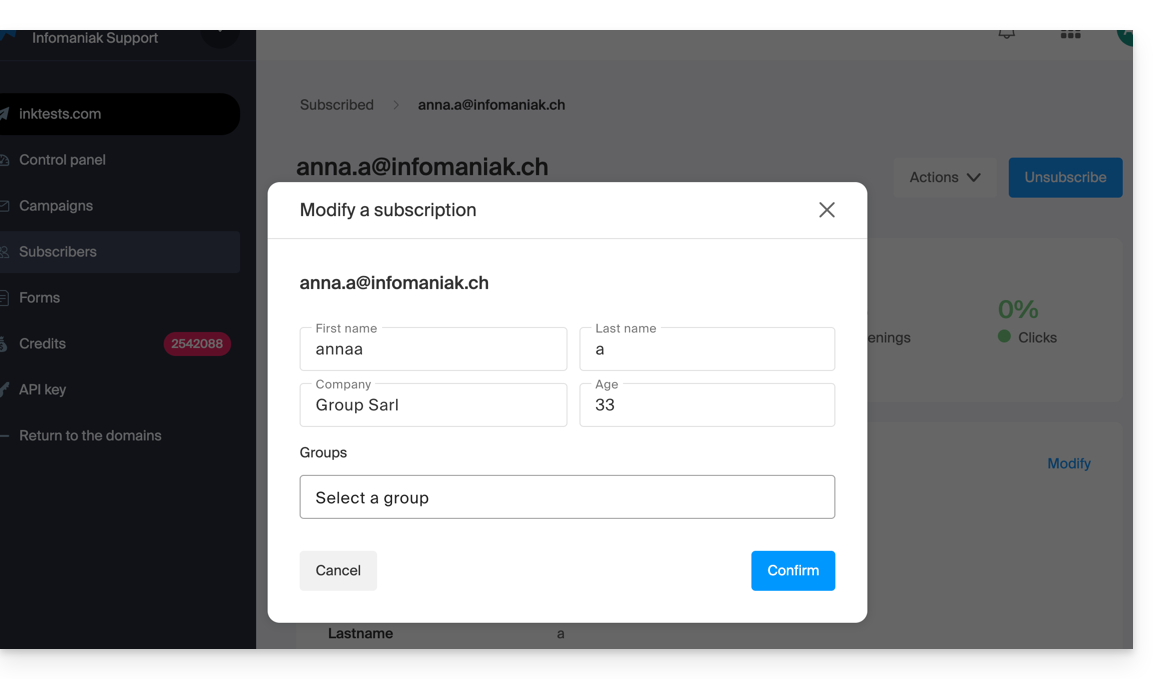
- Edit the information (only the email address cannot be changed):
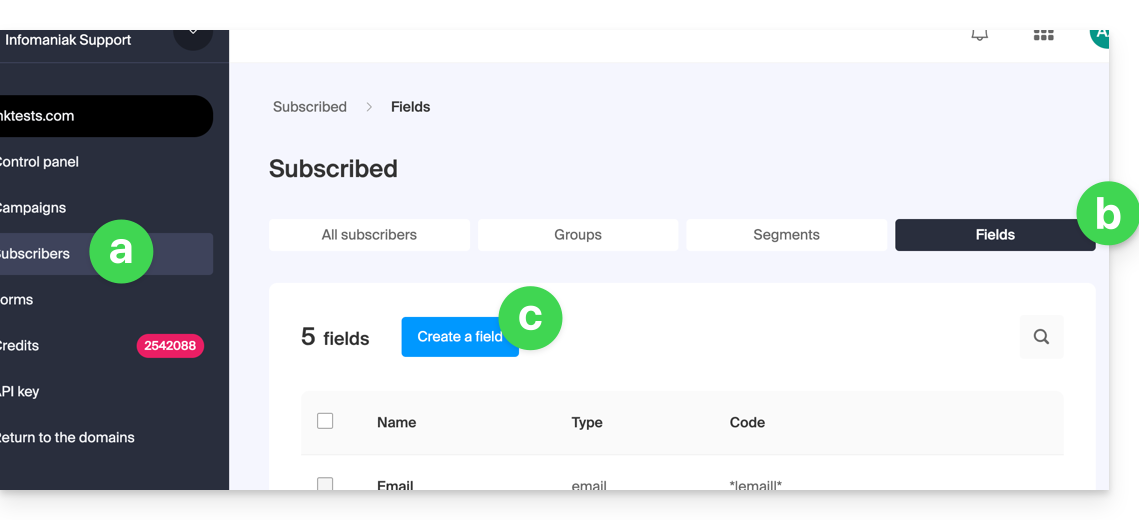
- If you want to add a new field, you must add it globally by going back to the Subscribers menu.
- Click on the Fields tab.
- Click on Create a field.
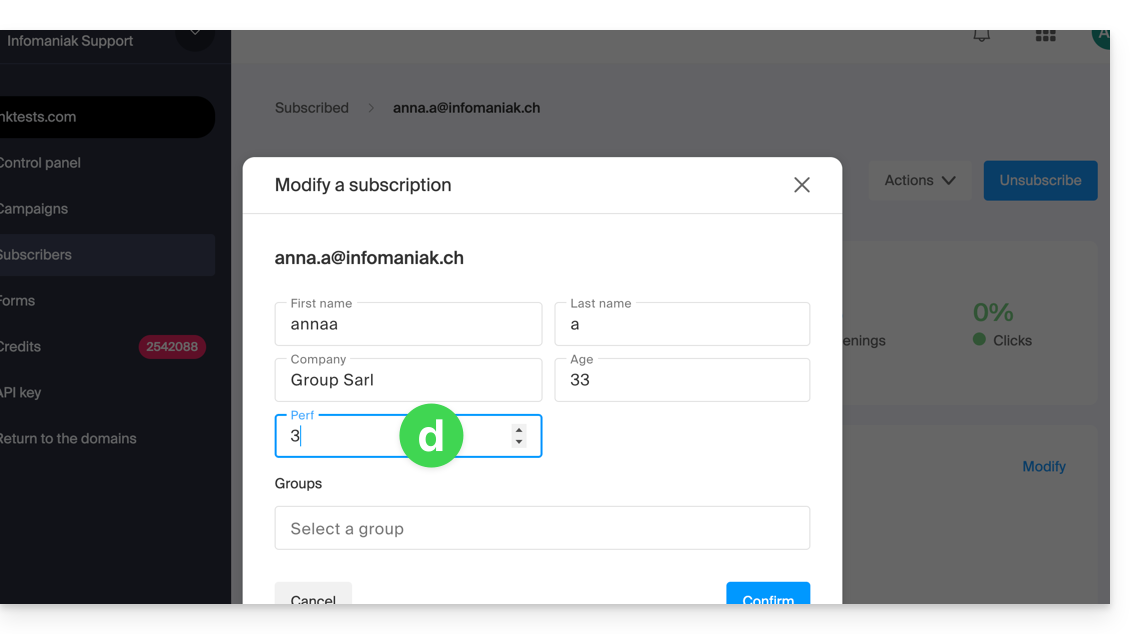
- The subscriber's profile can now be edited at the level of this new field:
Delete subscribers
To delete subscribers from the Newsletter:
- Click here to access the management of your product in the Infomaniak Manager (need help?).
- Click on the domain name in question in the table that appears.
- Click on Subscribers in the left-hand menu.
- Search for or filter the display type if necessary.
- Click the checkbox to select one or more subscribers.
- Click Delete:
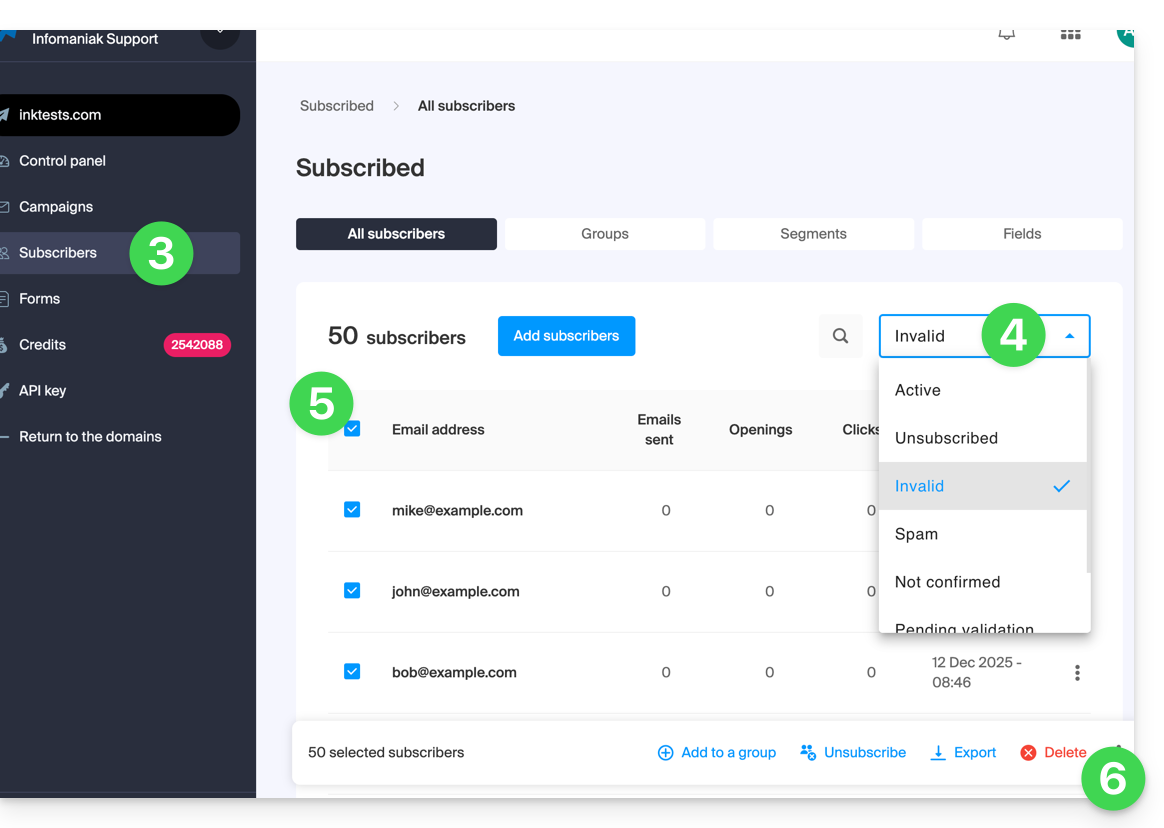
- Confirm deletion
You can also click on Unsubscribe instead of Delete so that the contacts remain in the list: see this other guide.
Export Subscribers
To export the list of newsletter subscribers in .csv format, according to selected criteria:
- Click here to access the management of your product in the Infomaniak Manager (need help?).
- Click on the domain name in question in the table that appears.
- Click on Subscribers in the left-hand menu.
- Search for or filter the display type if necessary.
- Click the checkbox to select one or more subscribers.
- Click Export:
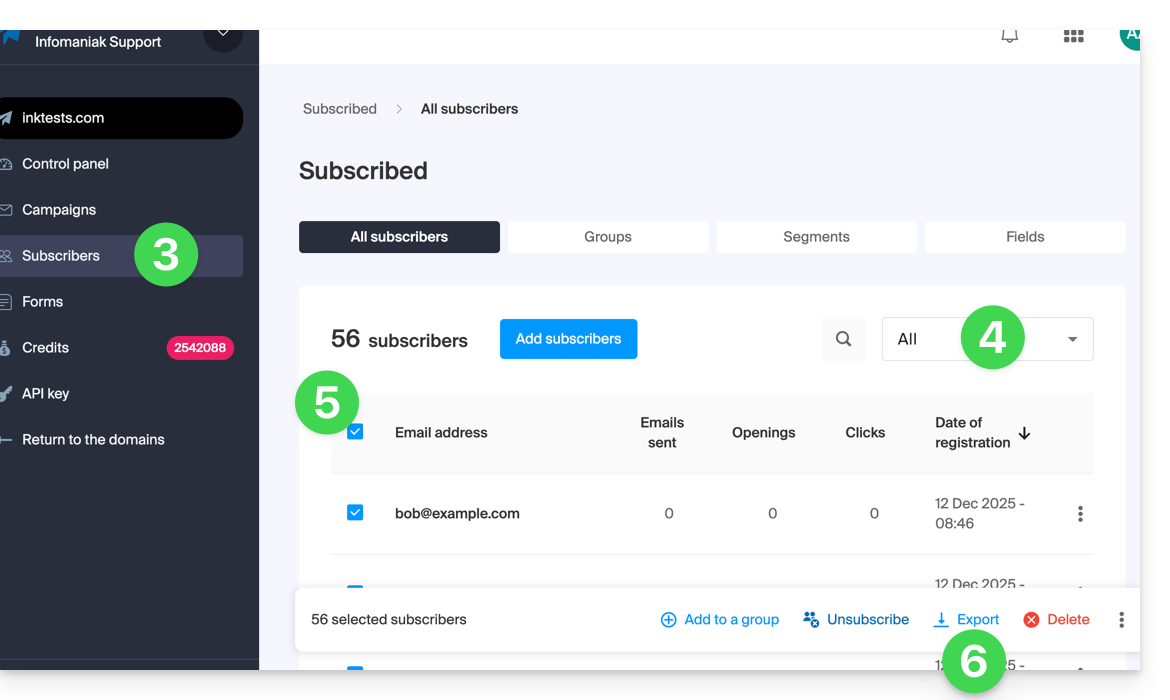
- Click the blue button once the export is prepared to download the data into a CSV file (
.csvformat).
The resulting file contains the following columns: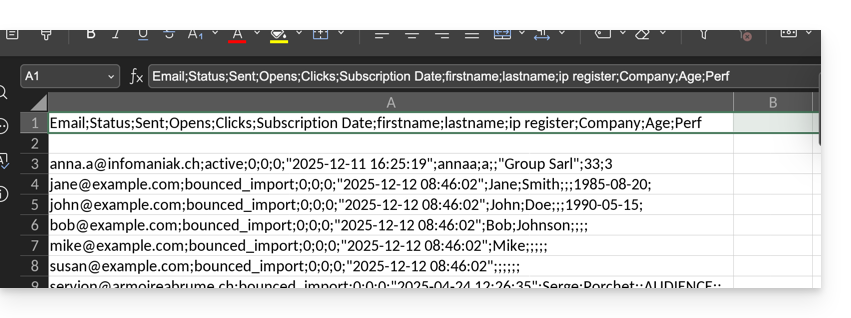
- Status
- Sent
- Opens
- Clicks
- Subscription Date
- first name
- last name
- IP register
- then the custom fields (text, number, date, etc.) created manually…
Link to this FAQ: https://faq.infomaniak.com/2165
Has this FAQ been helpful?