Knowledge base
1000 FAQs, 500 tutorials and instructional videos. Here, there are only solutions!
Manage variables in a newsletter
This guide explains how to add tags (codes and variables) to the body of your text to personalize your mailings with Newsletter Infomaniak.
Introduction
- A subscriber exists in the form of an email address, but not only that:
- You may have additional details about them, which must be included in the file you import so that you can define a custom field associated with each of these additional pieces of information.
- Many other pieces of information can be collected during the registration of a subscriber via a form.
- You can add many other pieces of information manually at any time.
- The information associated with each subscriber can be used to segment your audience, send targeted messages, and improve engagement.
- By leveraging these additional details, you increase the chances of conversion and customer retention, thereby creating a stronger and more personalized relationship with each subscriber.
Manage custom fields
To view the content of each field for each subscriber, please refer to this other guide (under Edit a subscriber's details).
To manage the names of these fields, or simply to delete or add them, go to the Subscribers section:
- Click here to access your product management interface on the Infomaniak Manager (need help?).
- Click on the domain name in question in the table that appears:
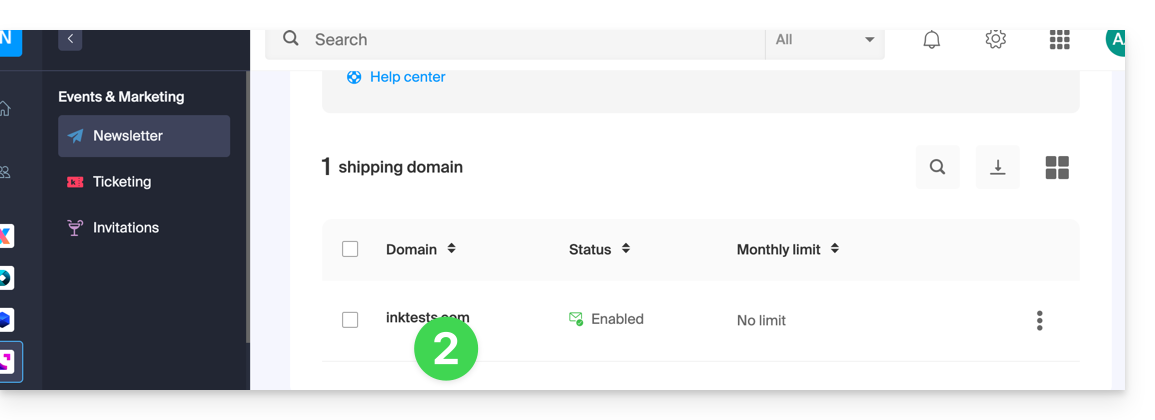
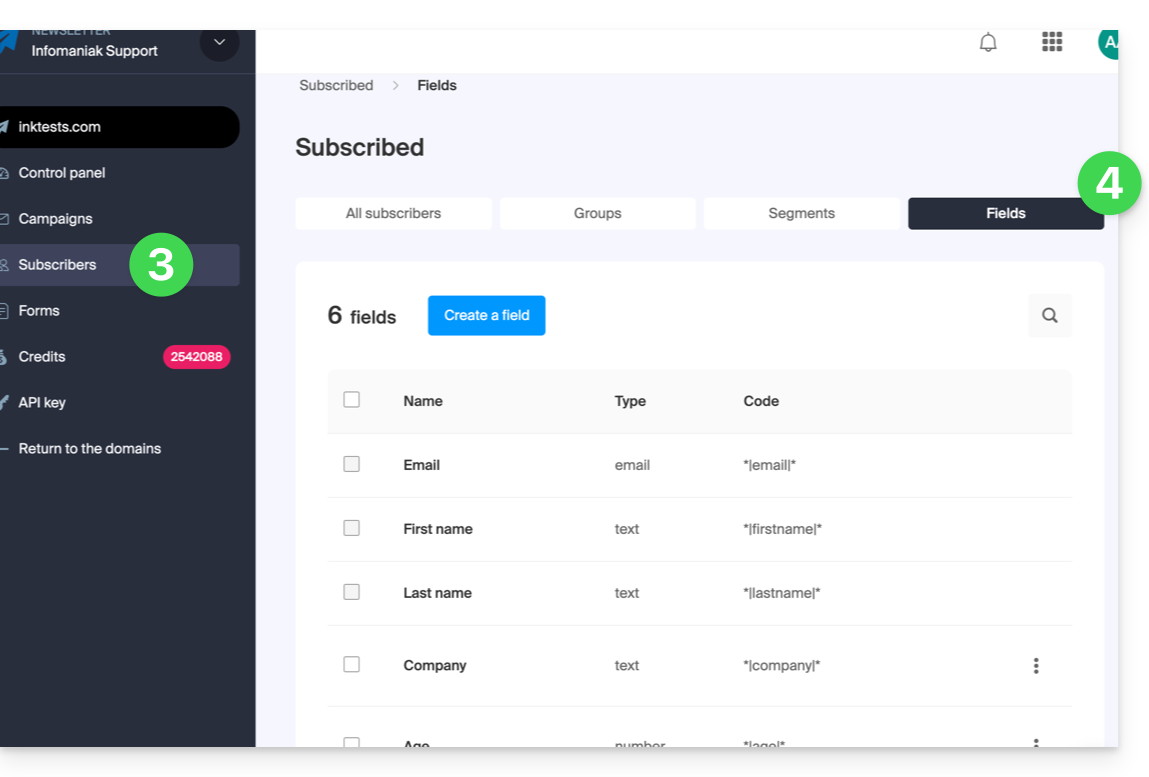
- Click on Subscribers in the left-hand menu.
- Click on the Fields tab:
Insert a variable…
… in the Newsletter title
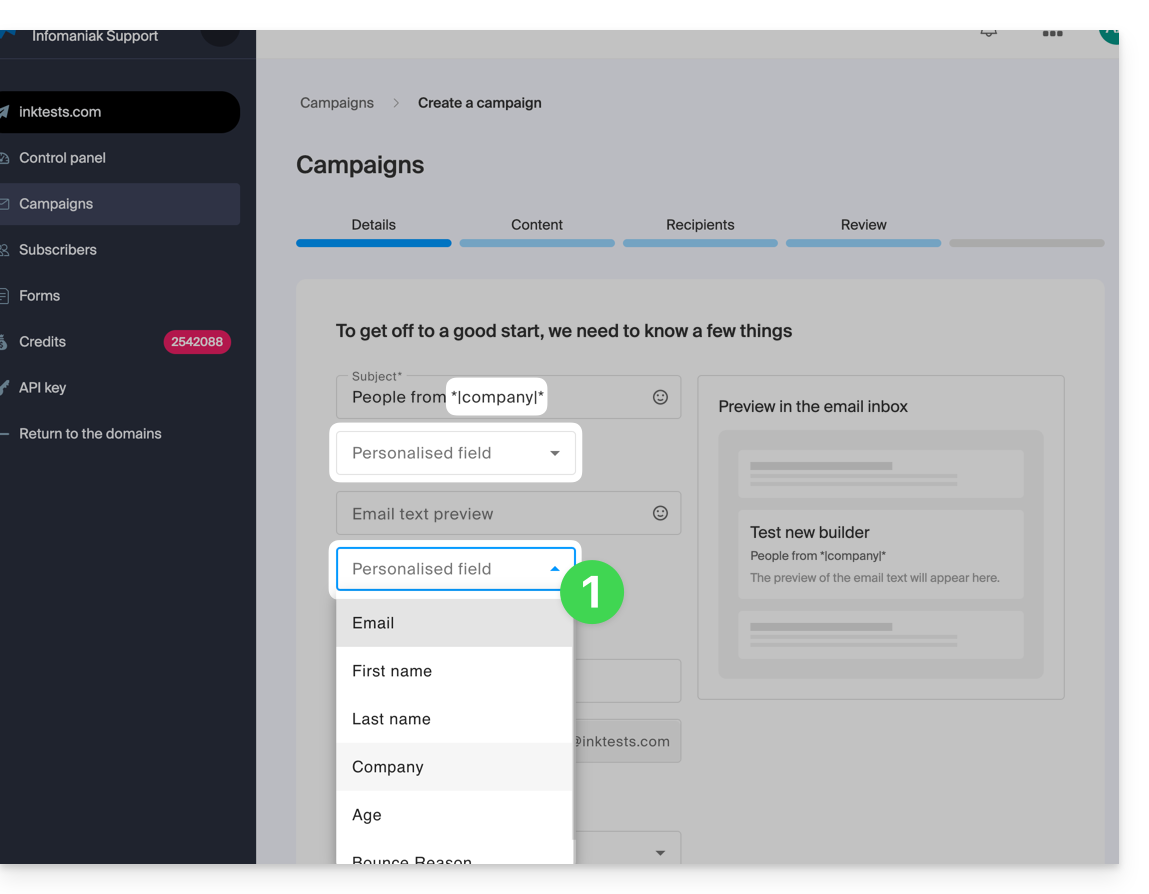
When creating a new Newsletter, insert the custom fields into the subject and the preview text:
- In the very first step of the creation process, click on the drop-down menus dedicated to this purpose:
… in the email body
When you create your Newsletter using the block editor:
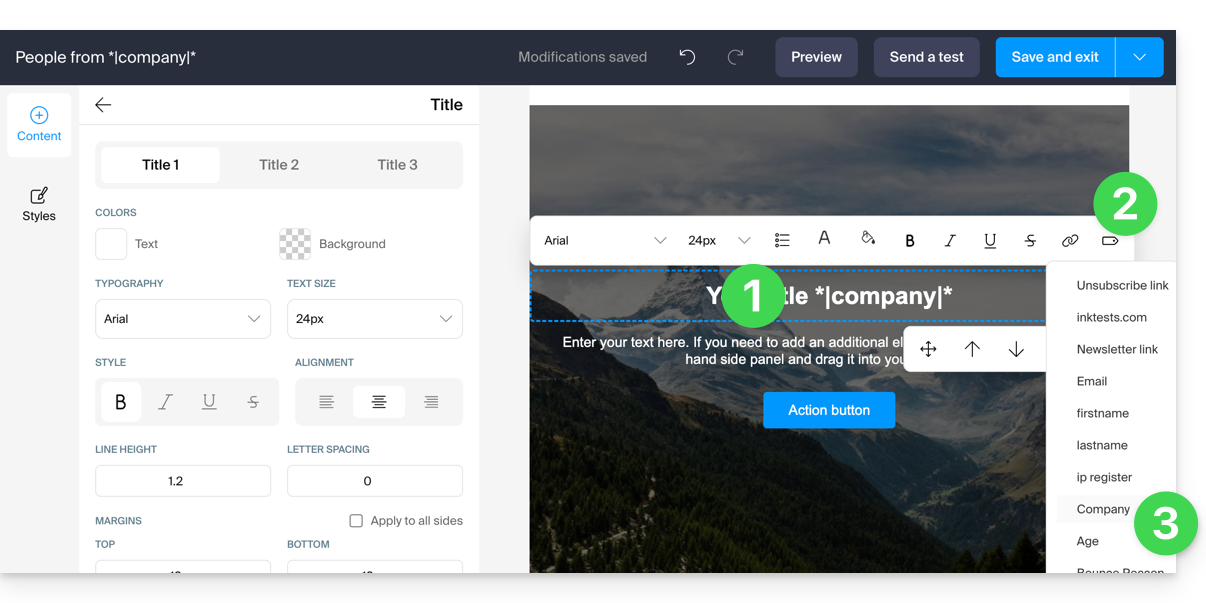
- Click on the location in the text where you want to insert your variable.
- Click on the Tag icon in the toolbar.
- Choose the variable to insert:
You can also simply insert the variable name enclosed in asterisks and separators: *|VARIABLE|*
List of basic variables
*|FIRSTNAME|* | first name |
*|LASTNAME|* | name: this variable can also be integrated into an href link, for example https://domain.xyz?name=*|LASTNAME|* |
*|EMAIL|* | email address |
*|DOMAIN_NAME|* | Newsletter domain name |
*|IP-REGISTER|* | User's IP address at the time of registration |
Unsubscribe link | To place an unsubscribe link ("unsubscribe") in the desired location without any action on your part, this link is automatically inserted at the bottom of your newsletter. |
Newsletter link | To manually add a link to an online version of your Newsletter without any action required from you, this link will be automatically inserted at the top of your Newsletter. |
Link to this FAQ: https://faq.infomaniak.com/2137
Has this FAQ been helpful?