Knowledge base
1000 FAQs, 500 tutorials and instructional videos. Here, there are only solutions!
Create and send a Newsletter
This guide covers the use of the Newsletter tool offered by Infomaniak and details the various options for creating and writing targeted email campaigns to subscribers on the contact lists within the tool.
Create and send a newsletter
You can manage your newsletters from the left-hand menu item labeled "Campaigns," which allows you to view your previous sends and create new ones:
- Click here to access the management interface for your product in the Infomaniak Manager (need help?).
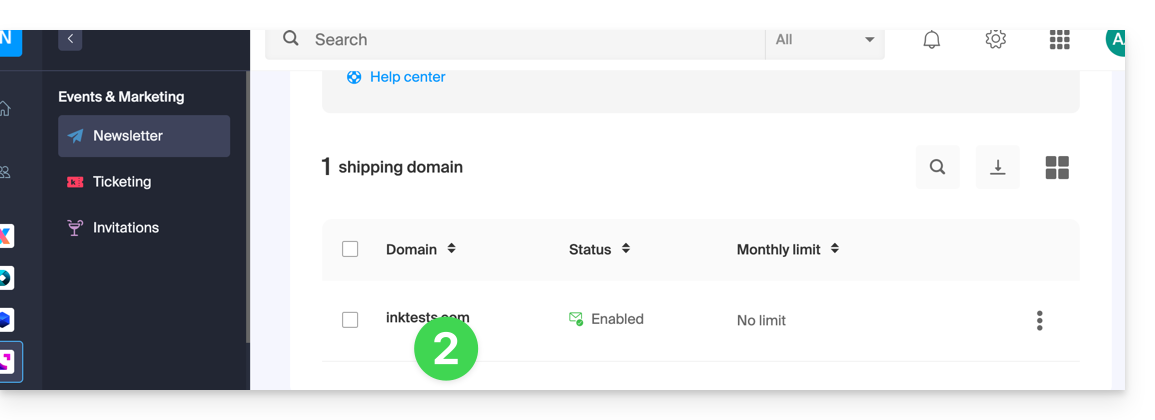
- Click on the domain name in question in the table that appears:
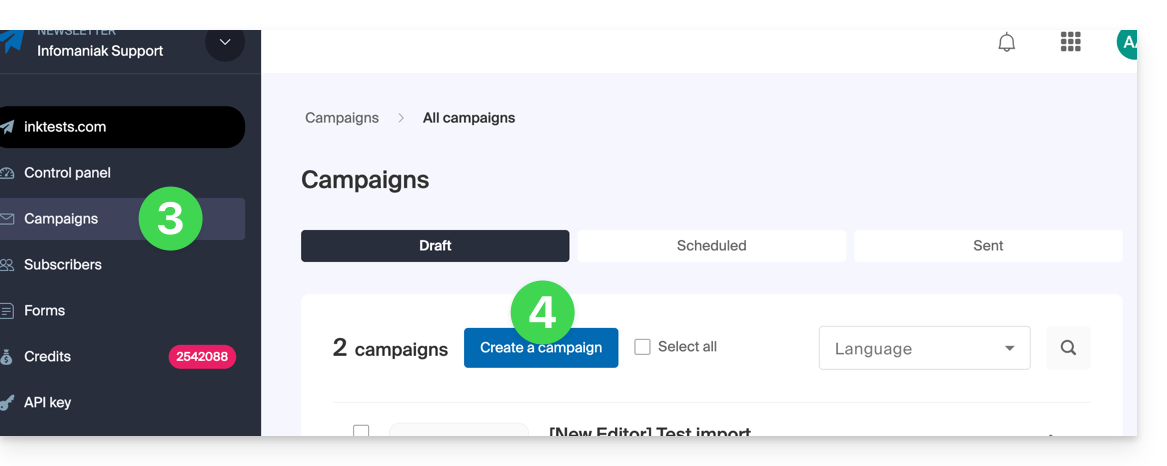
- Click on Campaigns in the left-hand menu.
- Click on Create a campaign:
1. Details: configure the sending
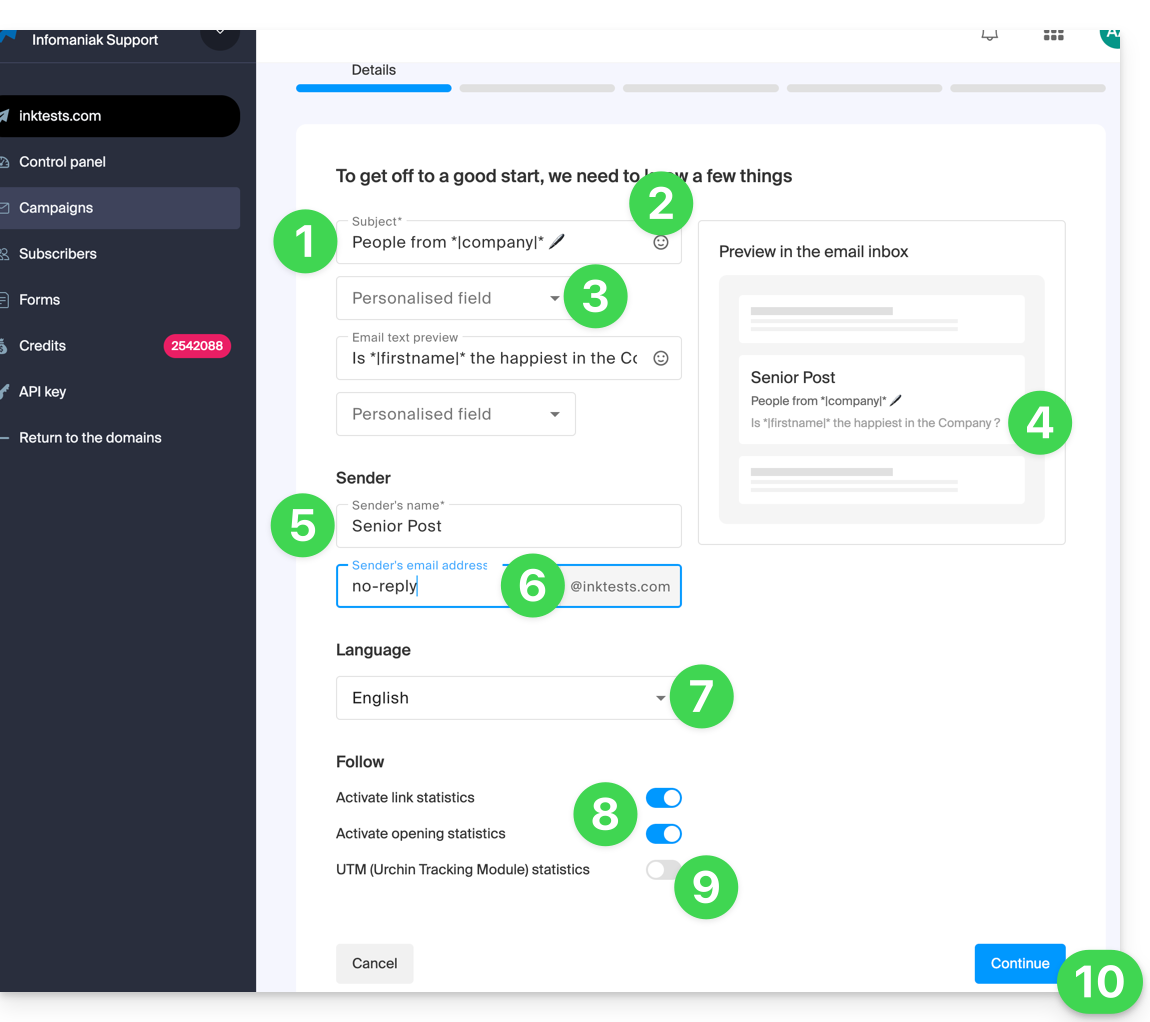
To start writing your Newsletter, complete the required information:
- Enter a subject for the email (visible to the recipient and in the list of your sent emails).
- Insert an emoticon if needed.
- Insert variables (custom fields) if needed.
- This is exactly the same principle for the preview message (which you can preview along with the rest of the subject on the right side of the window).
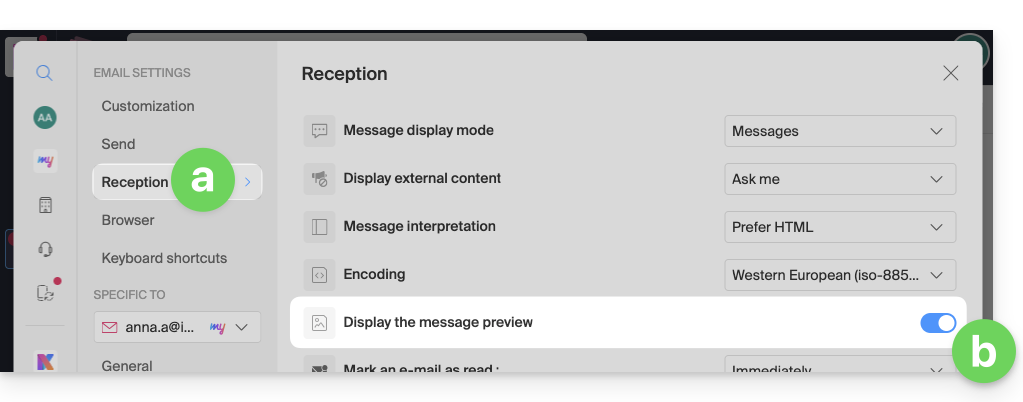
- Then, for this excerpt to be visible once your Newsletter arrives at a user's device on the Infomaniak Mail web app, the user must have enabled this setting:
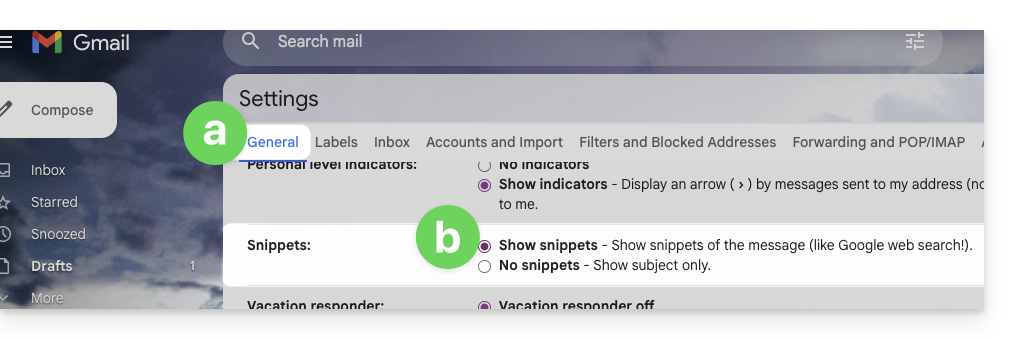
- On Gmail, this is the setting that needs to be enabled:
- The result once the option is enabled:

- By default, the first lines of the message will appear if nothing is specified, as these two fields are optional.
- Then, for this excerpt to be visible once your Newsletter arrives at a user's device on the Infomaniak Mail web app, the user must have enabled this setting:
- Enter a name corresponding to the sender (visible to the recipient).
- Enter the sender's email address (from among those existing for the domain corresponding to the newsletter; the email address must exist and be valid).
- Choose the language (for the language used in attachments, such as the unsubscribe email).
- Enable or disable tracking.
- Enable or disable the UTM section.
- Click on Continue to proceed to the next step (your Newsletter is now saved as a draft):
2. Choose the Newsletter theme
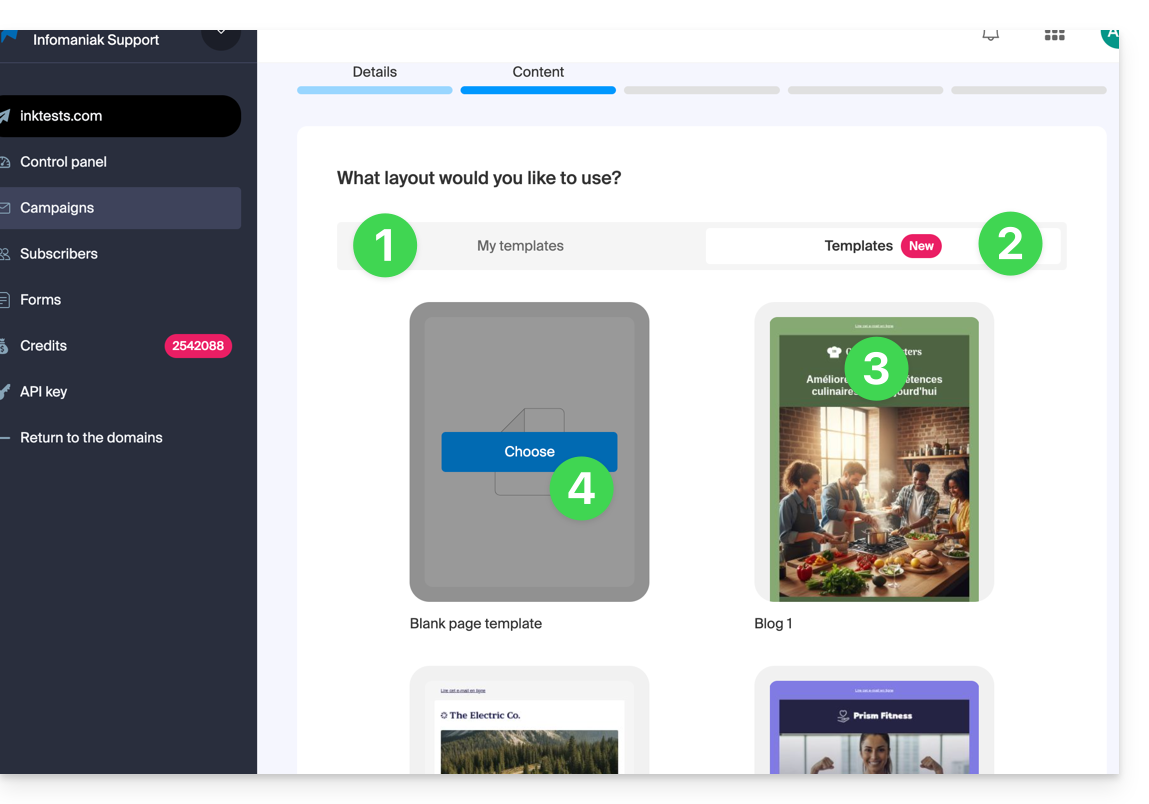
- If you have previously saved writing templates (blocks and designs configured to your liking), you can find them under the “My templates” tab to reuse them.
- Otherwise, click on the templates tab.
- Hover over a pre-configured design to start editing from that template or preview it.
- Click on the blank template to start a brand new creation from the block editor:
3. Write and edit the content
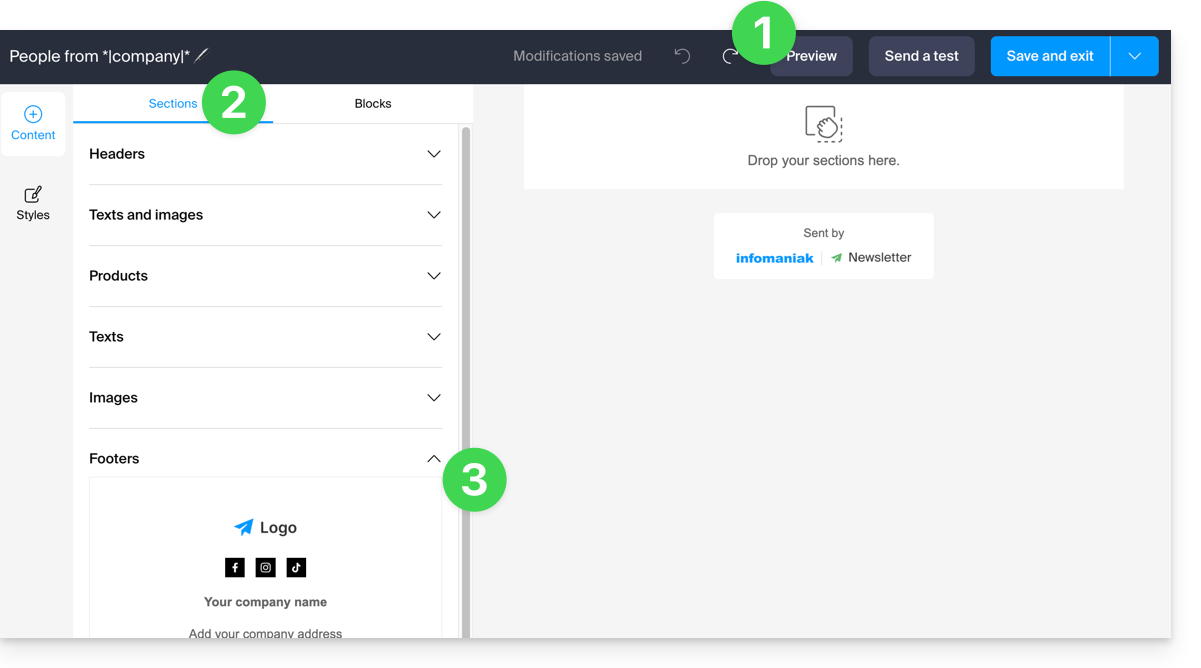
- Your changes are saved at all times and can be undone; you can also preview the appearance of your Newsletter (desktop / mobile) and send a test.
- The Sections tab groups together various pre-built elements, such as blocks intended for the top (header) or bottom (footer) sections, etc.
- Click on the chevron to expand the content and select an element:
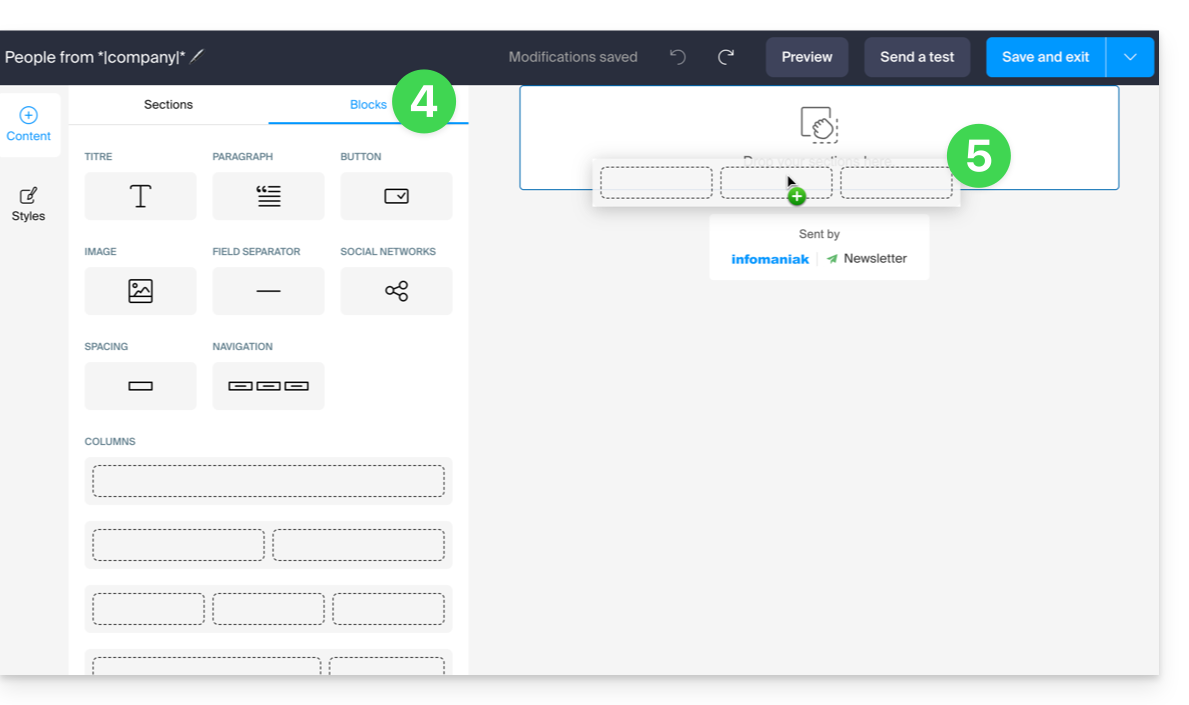
- Click on the Blocks tab to access simpler elements that you can use to create your layout.
- Drag the selected elements into the right sidebar to the desired location:
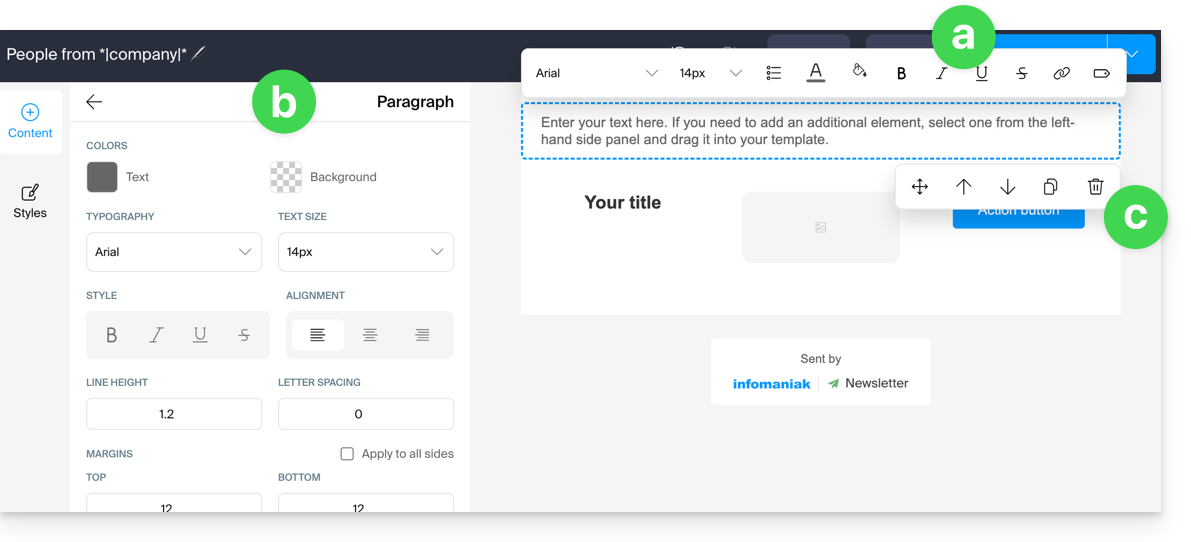
- Each element can be further adjusted when you click on it:
- The text can be formatted using the toolbar that appears above ( variables can also be inserted).
- More comprehensive editing of the element can always be found in the left sidebar (background color, file selection (5 MB max.) for image blocks, etc.).
- The block itself can be moved on the page, duplicated, or deleted:
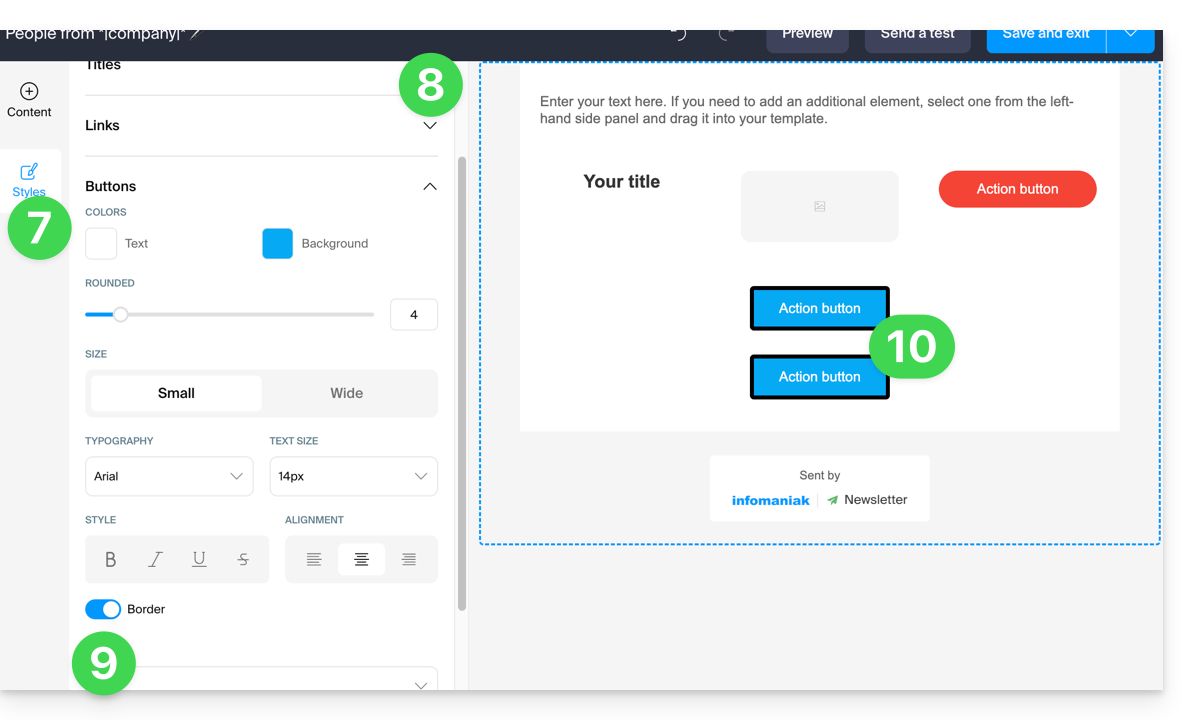
- Click on Styles to manage the characteristics that make up your different elements.
- Choose the elements you want to customize.
- For example, add a border to the button style.
- All new button insertions and all existing buttons without customization will be affected by the change:
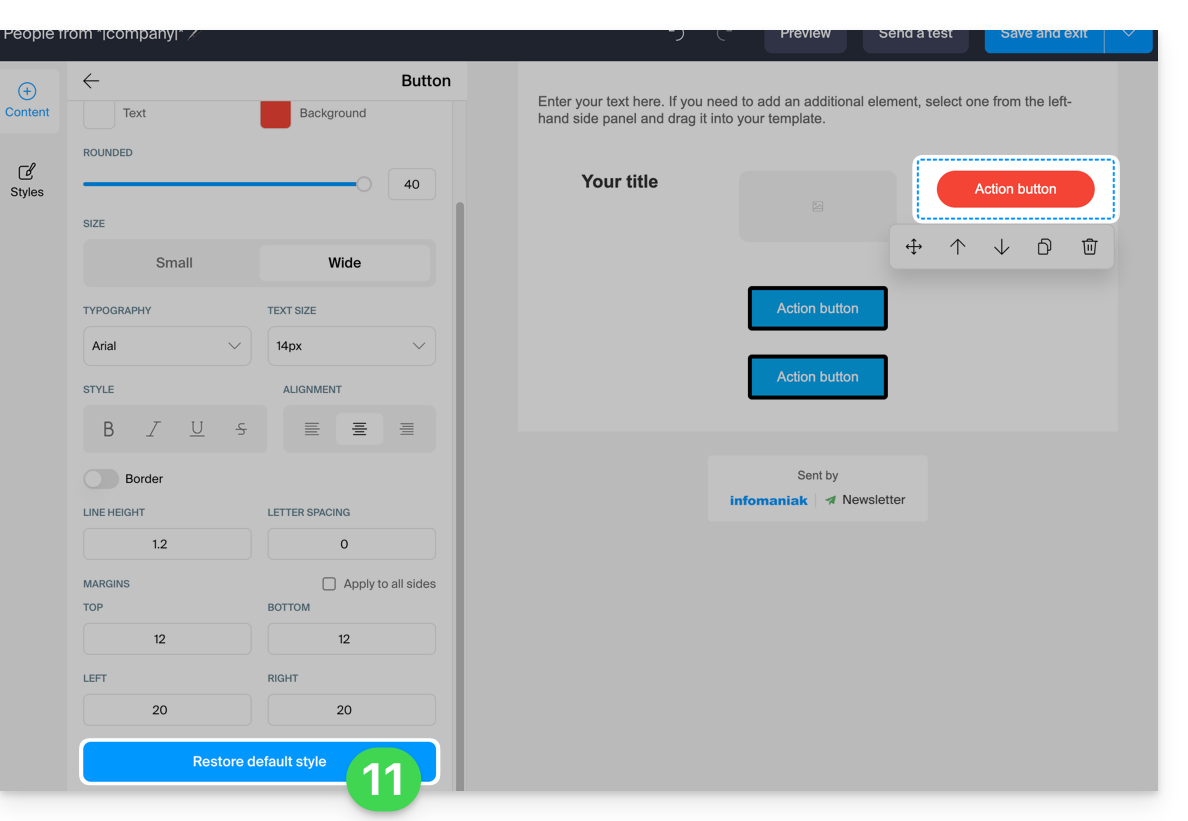
- At any time, it is possible to assign the style that has been decided for the different elements (point 8 above) by applying the default style to elements that have been customized previously:
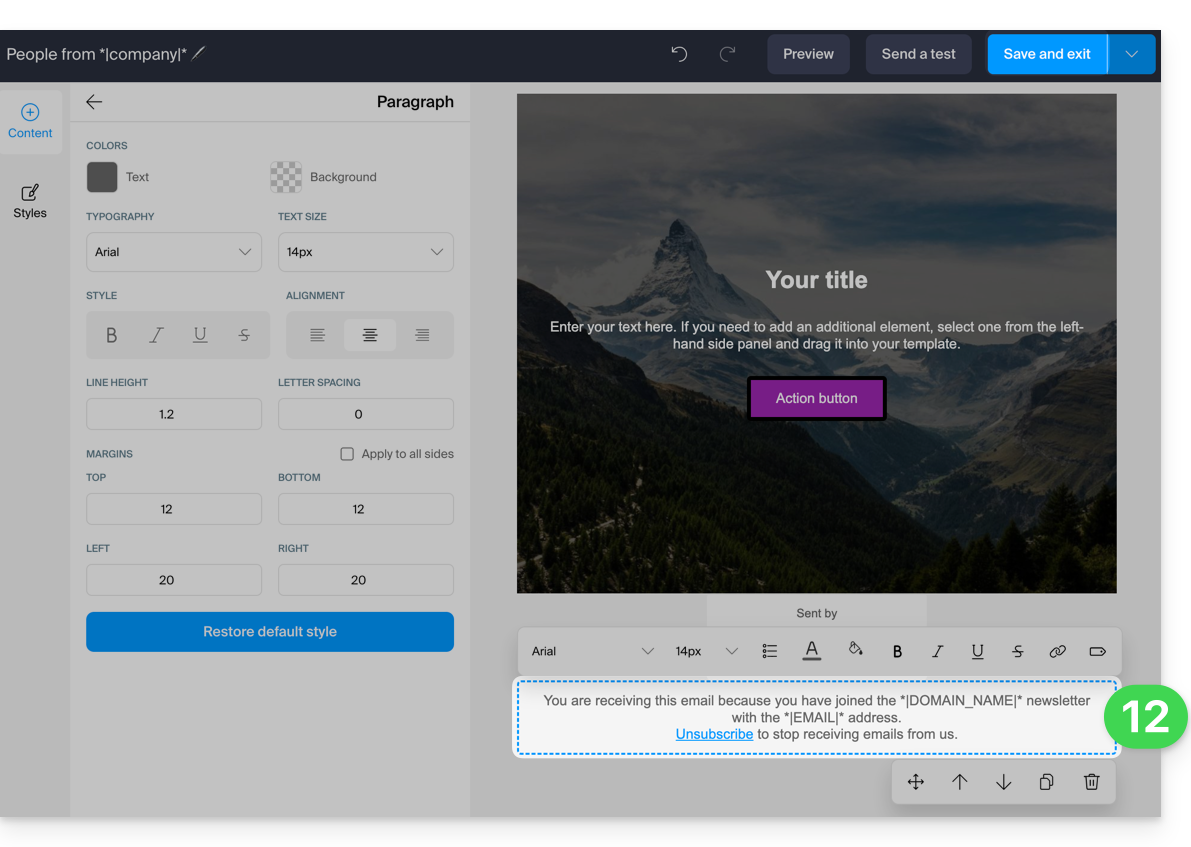
- When saving, if any mandatory information regarding user unsubscription is missing, it will be added to your content:
- You can save your template to reuse it when creating other newsletters (the template will be visible in the dedicated tab, see point 2.1 above) by clicking on the down arrow to the right of the save button:
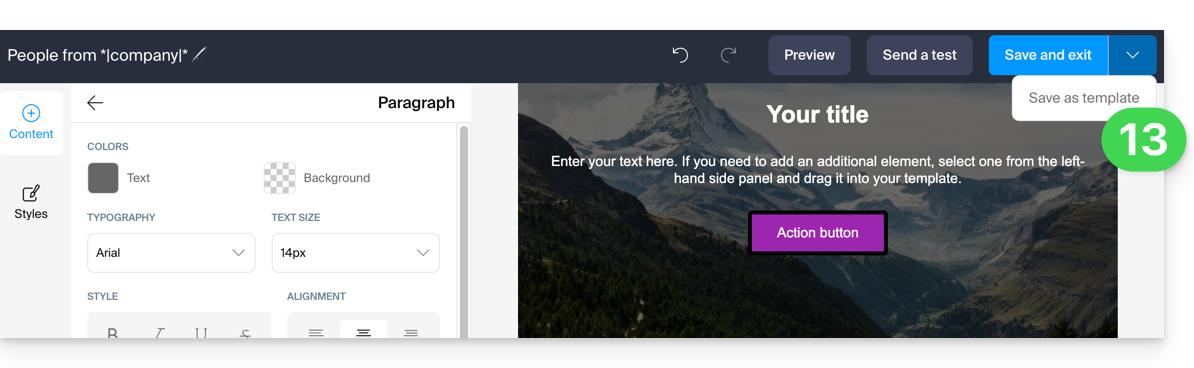
- Click the Save button in the top right corner when you have finished writing your Newsletter.
4. Choosing recipients
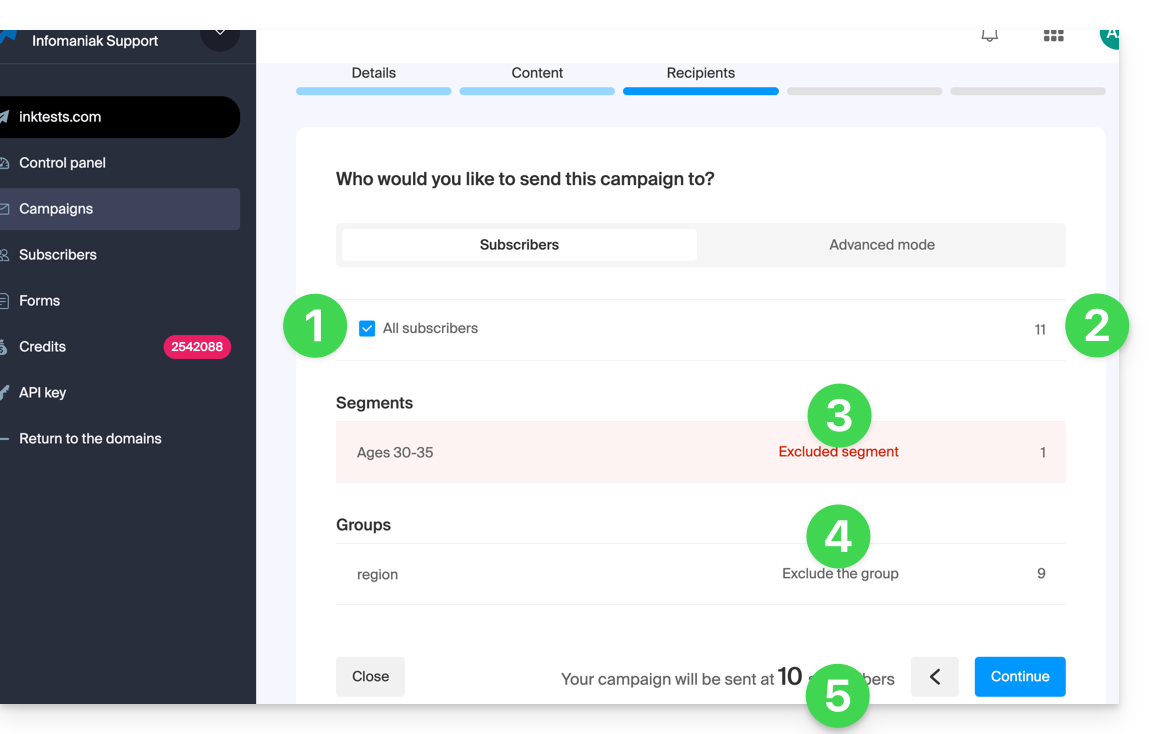
To select your subscribers (simple mode):
- Select all subscribers by checking the box.
- The total number of subscribers represented by this item is displayed on the right (the same applies to the items listed below).
- You can subtract from the total number of recipients the subscribers automatically selected based on criteria you have pre-defined at the segmentation level; you could also select only this segmentation.
- You can subtract the number of subscribers in grouped lists from the total number of recipients; you can also select only this group.
- The total number of subscribers to whom the newsletter will be sent is automatically updated based on your choices:
To select recipients based on specific criteria (refer to this other guide):
- Click on the Advanced tab:
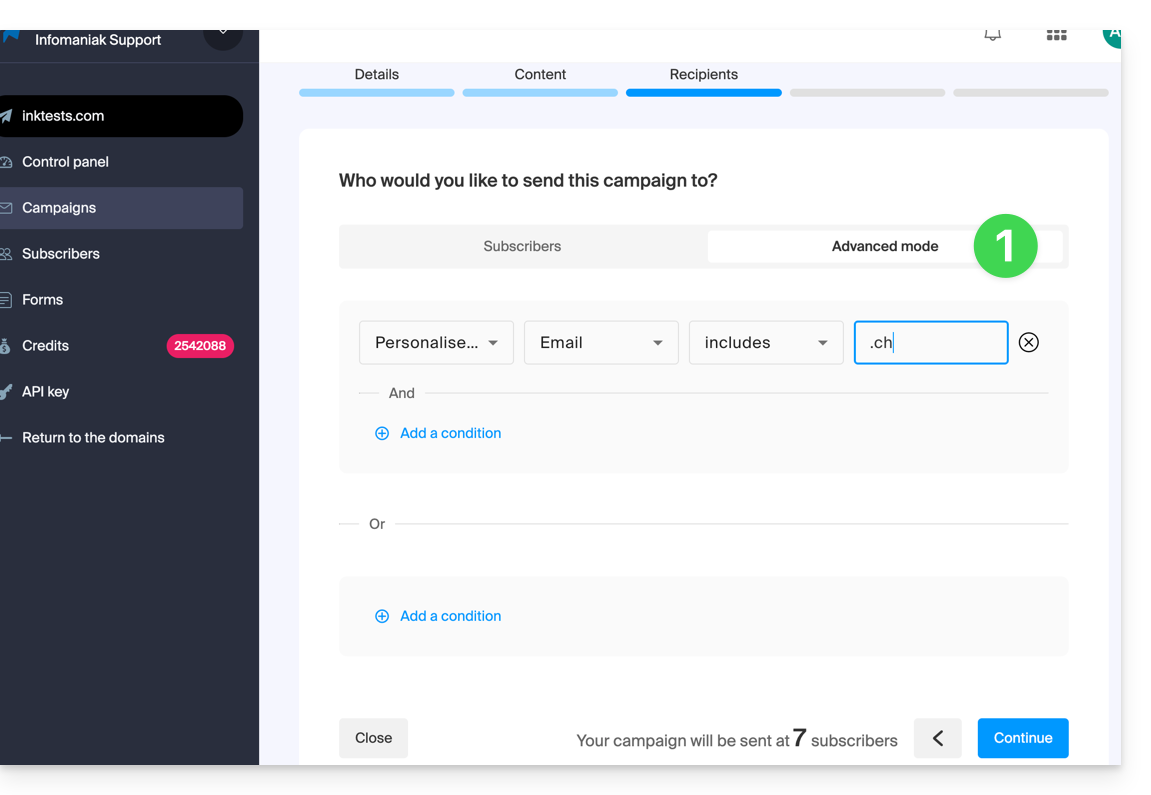
This allows you to add criteria (note that if you add several, the additional condition may be linked with “AND” but also with “OR”, which may include or exclude a large number of subscribers depending on your criteria).
As with the previous tab, the total number of recipients is updated dynamically at the bottom of the page based on your choices.
5. Preview and test the sending
This penultimate step is a summary: it allows you to check the main characteristics of your sending and to modify any information at the last minute.
When you are ready, click on the blue button in the bottom right corner to proceed to the final step.
6. Trigger an immediate or delayed sending
The final step allows you to choose when to send your Newsletter:
- The sending can be scheduled for the desired time, or triggered immediately:
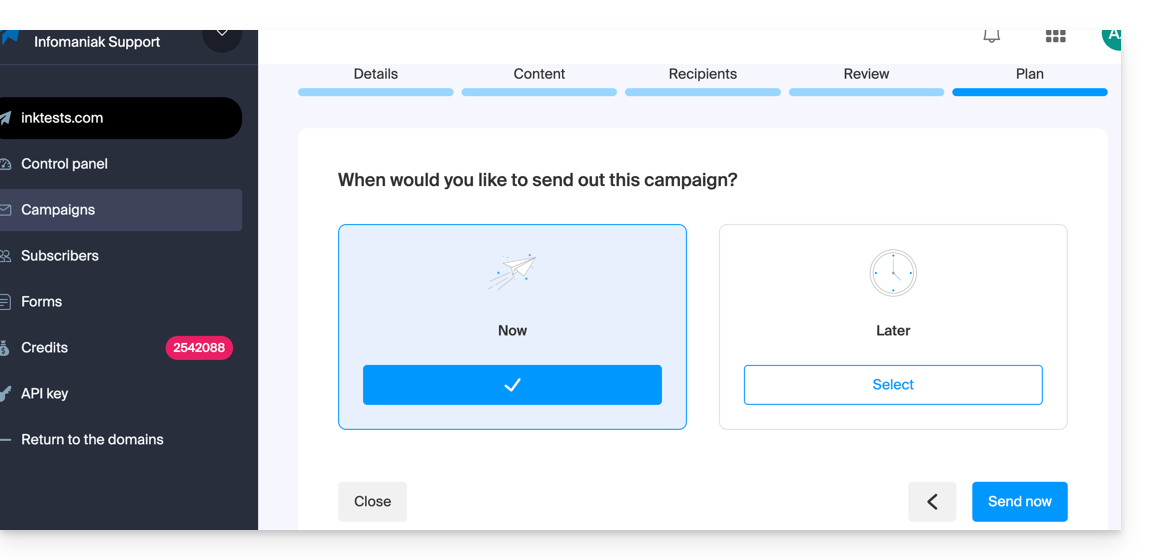
- The sending will then take several hours, depending on the total volume of newsletters being sent, the number of your recipients, and the hourly quota allowed for your account. You will be informed of the progress of your sending.
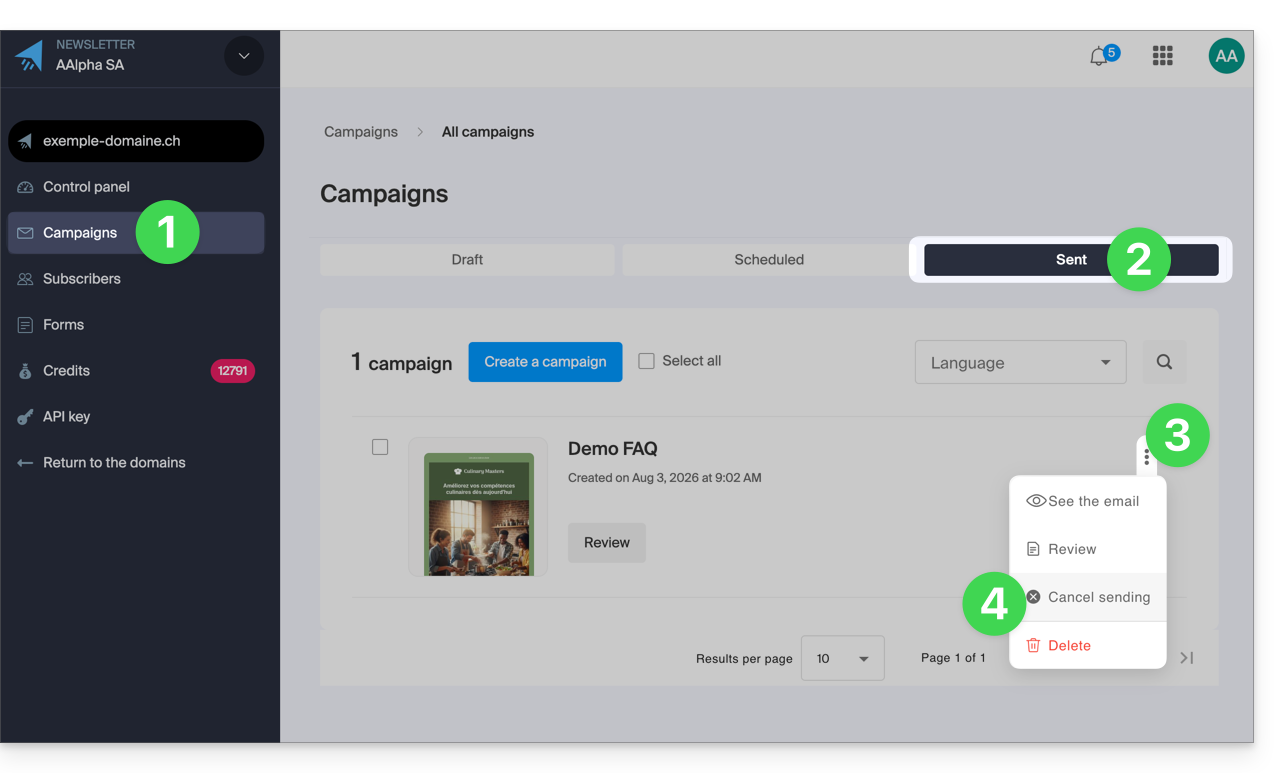
7. Cancel an ongoing sending
It is possible to cancel an email, whether it is scheduled for a few minutes from now or has already started:
- Click on Campaigns in the left-hand menu.
- Click on the Sent tab (if the sending has already started, otherwise click on Scheduled).
- Click on the action menu ⋮ located to the right of the item in question.
- Choose to cancel the sending and confirm the action:
Link to this FAQ: https://faq.infomaniak.com/2114
Has this FAQ been helpful?