Knowledge base
1000 FAQs, 500 tutorials and instructional videos. Here, there are only solutions!
Use authenticated email sending from a website
This guide details sending authenticated emails from a website/CMShosted by Infomaniak.
Introduction
- Configuring your website to send emails via an authenticated SMTP server improves the reliability and security of email sending compared to using the PHP
mail()function without authentication:- improved email delivery reliability,
- enhanced security,
- more accurate error detection,
- better compatibility with email services,
- and improved email tracking.
SMTP configuration examples
Prerequisites
- You must have an email service.
- You can use the Mail Service offered by Infomaniak or any other email service of your choice.
- Create a device password (❓: my kSuite | Mail/kSuite Service).
- Use the recommended settings:
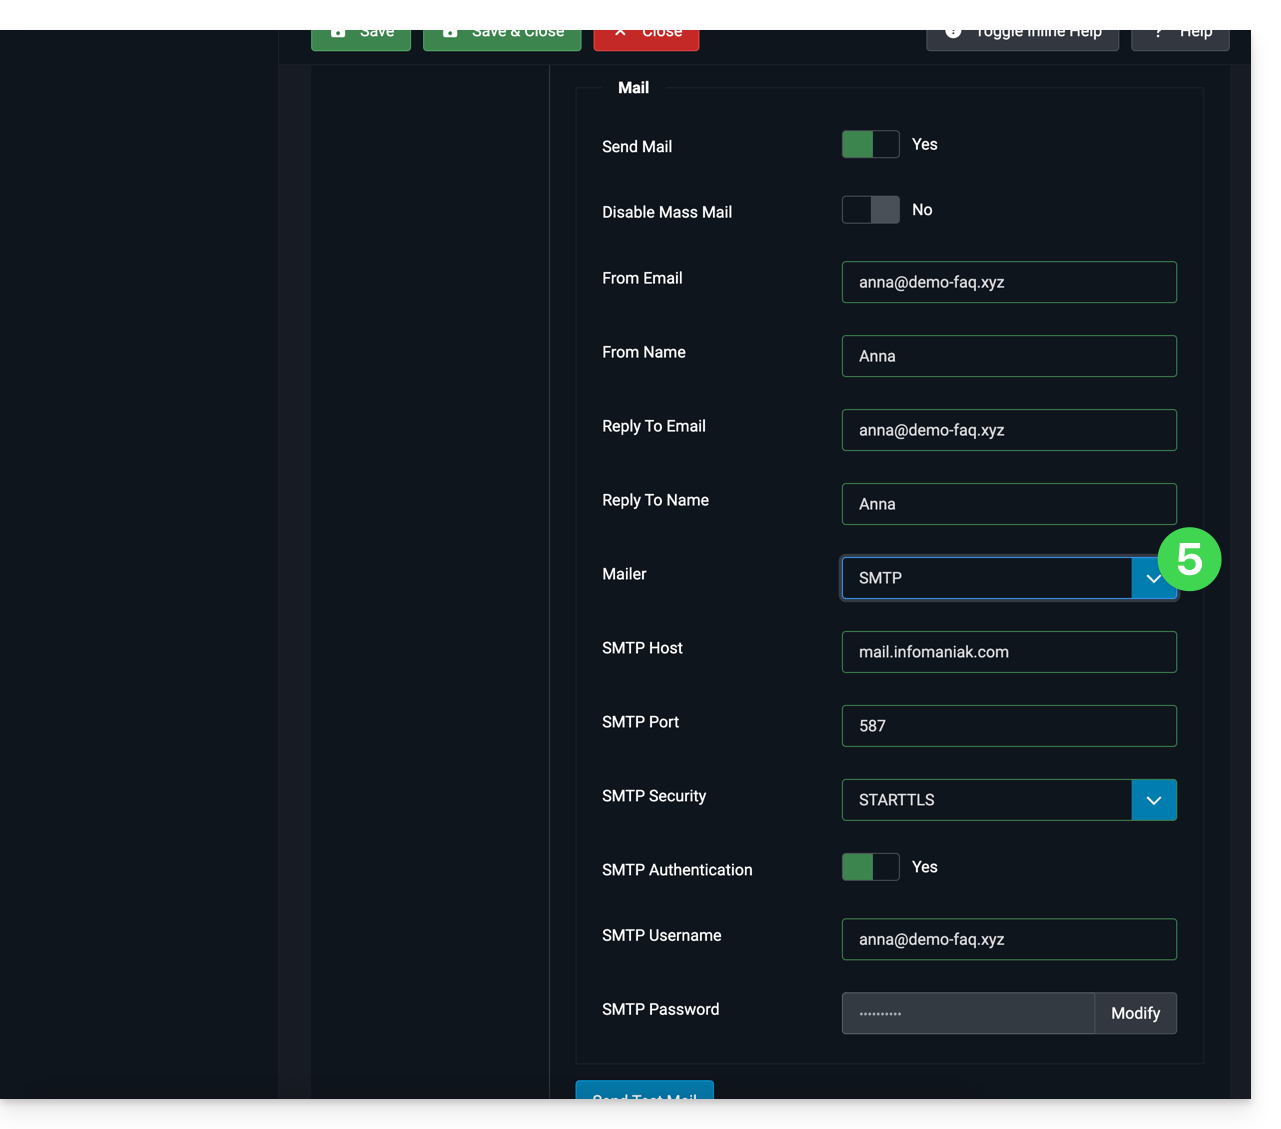
- Outgoing SMTP server =
mail.infomaniak.com - SMTP port & encryption protocol and command/method to activate this protocol:
587+ STARTTLS - Username = the complete and full email address (need help?)
- Password = the one generated for the email address you want to use
- Authentication is mandatory for sending emails:
- It is activated in the SMTP settings of your CMS.
- Check "use the same settings as the incoming server" or, depending on the CMS, enter a username (= complete and full email address) and the generated password.
- Outgoing SMTP server =
WordPress
To enable your site to send emails, use an email address from its domain (e.g. email@domain-site.xyz) and enter the SMTP settings (see prerequisites):
- Log in to the WordPress administration panel.
- Install an SMTP plugin (e.g. WP Mail SMTP).
- Configure the extension, for example:
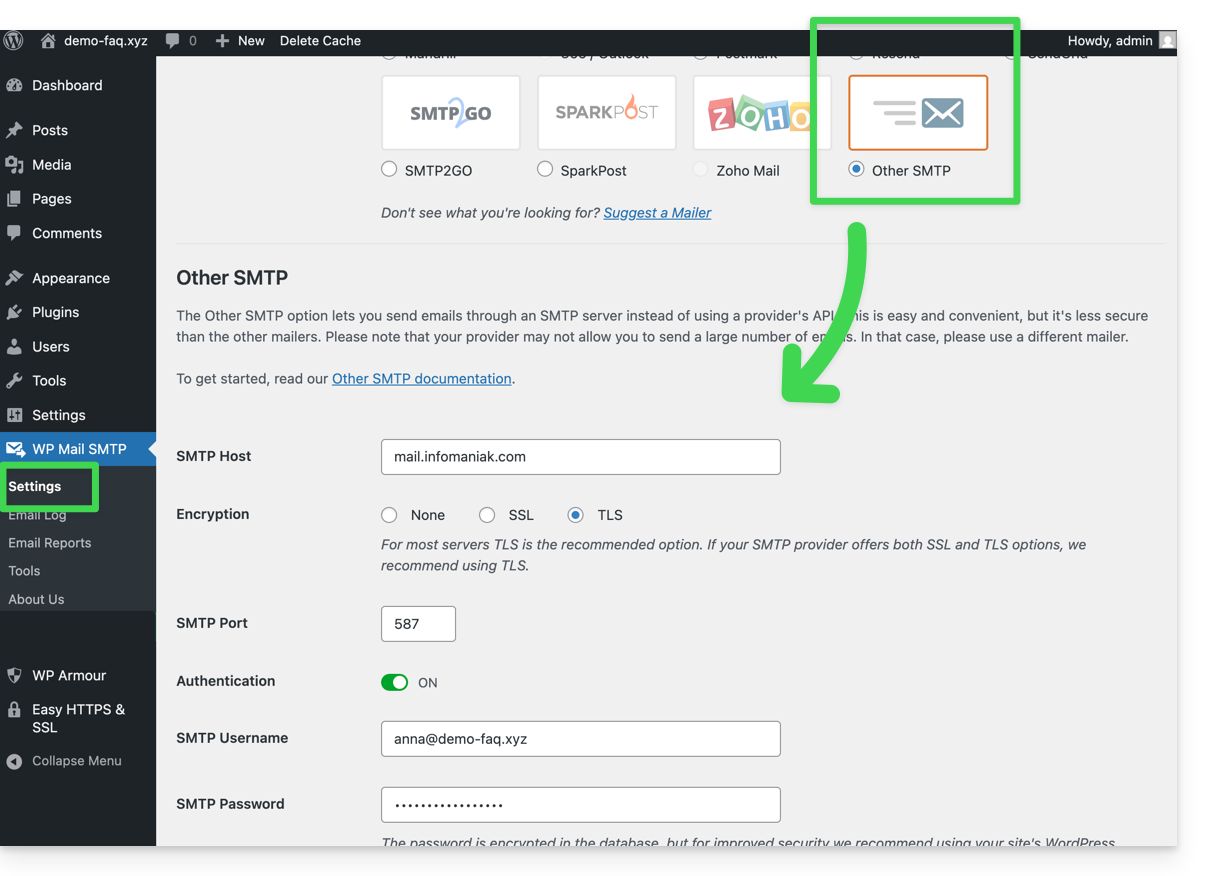
From then on, an email sent from a contact form on the website (e.g., the default Divi form) will be sent using the SMTP method.
To verify this, simply examine the headers of a message received through this method, particularly the x-mailer line, which may indicate, for example, WPMailSMTP/Mailer/smtp instead of PHPMailer.
Note: the x-mailer can be any indication and may not necessarily reflect the actual sending method!
Prestashop
To enable your site to send emails, use an email address from its domain (e.g., email@domain-site.xyz) and enter the SMTP settings (see prerequisites):
- Log in to the PrestaShop administration panel.
- Go to Advanced Parameters then E-mail.
- Configure sending via SMTP:
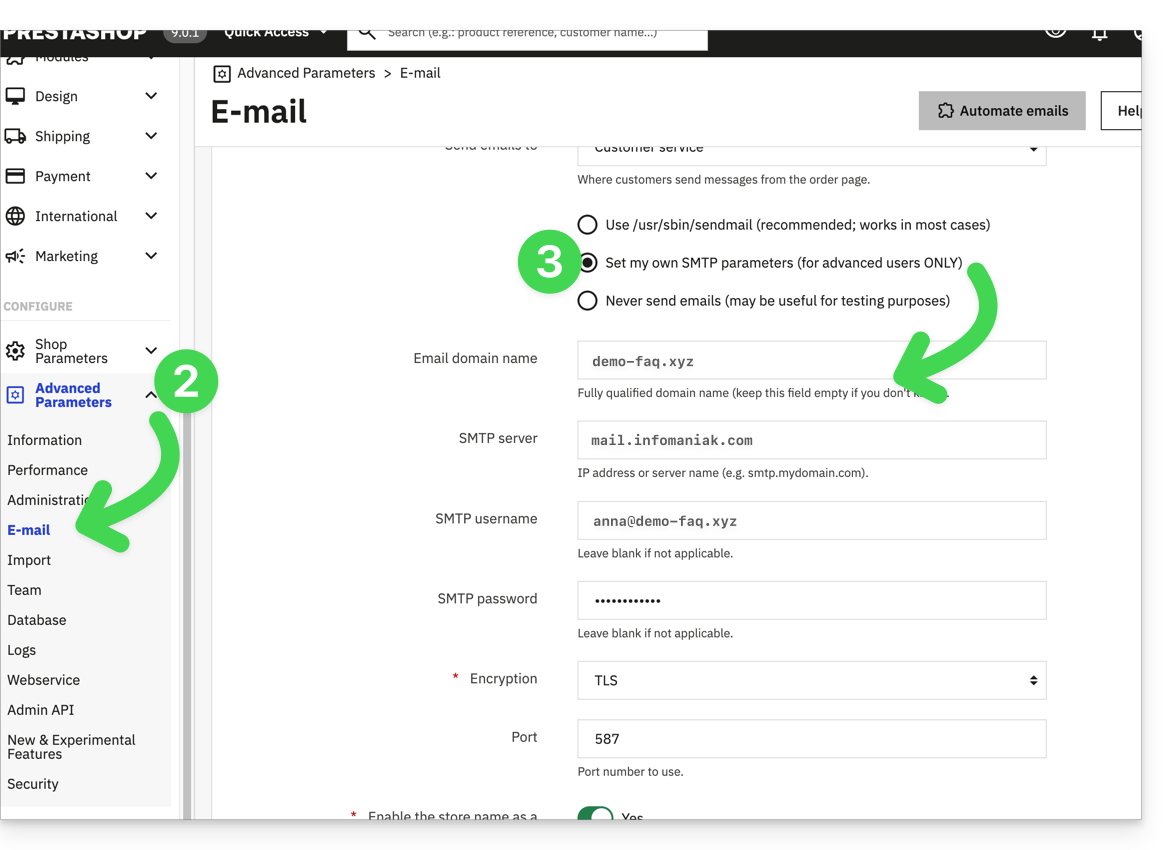
Then, check (to avoid errors such as Could not instantiate mail function or sender mismatch) that the address you configured in these advanced settings matches the address that Prestashop uses when sending emails. To do this:
- Log in to the Prestashop administration panel.
- Go to Shop Parameters.
- Click on Contact in the left-hand menu.
- On the Contacts tab, verify that the email address mentioned is the same as the one configured previously.
- Edit the email addresses if necessary:
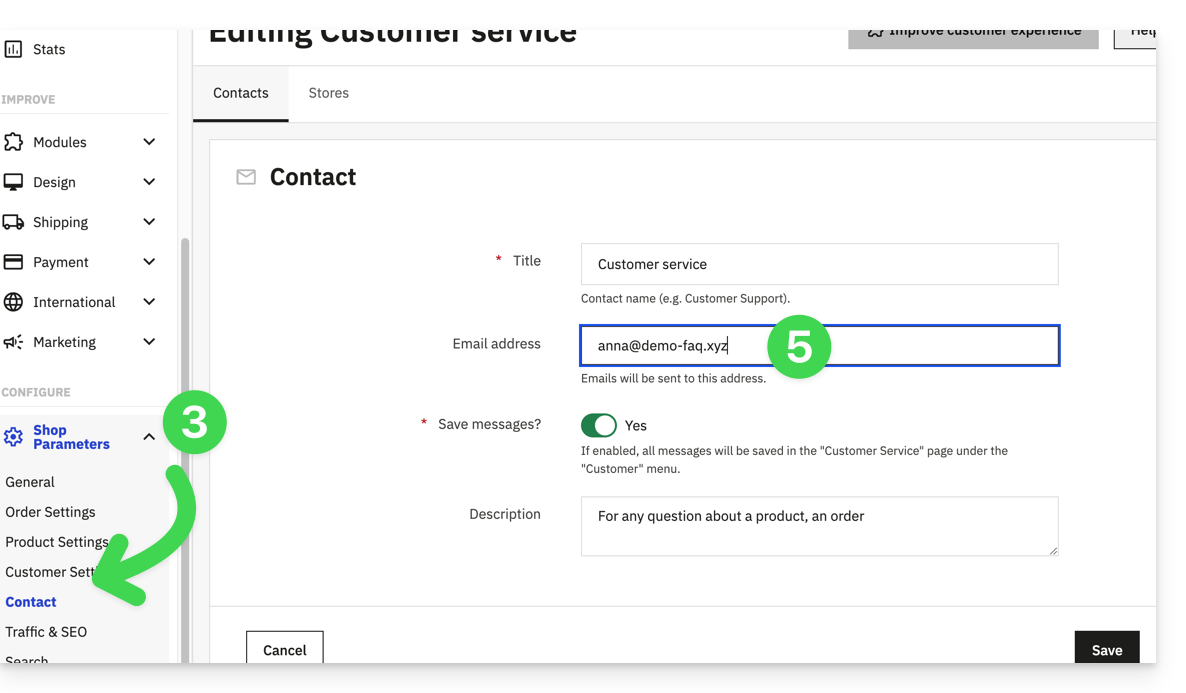
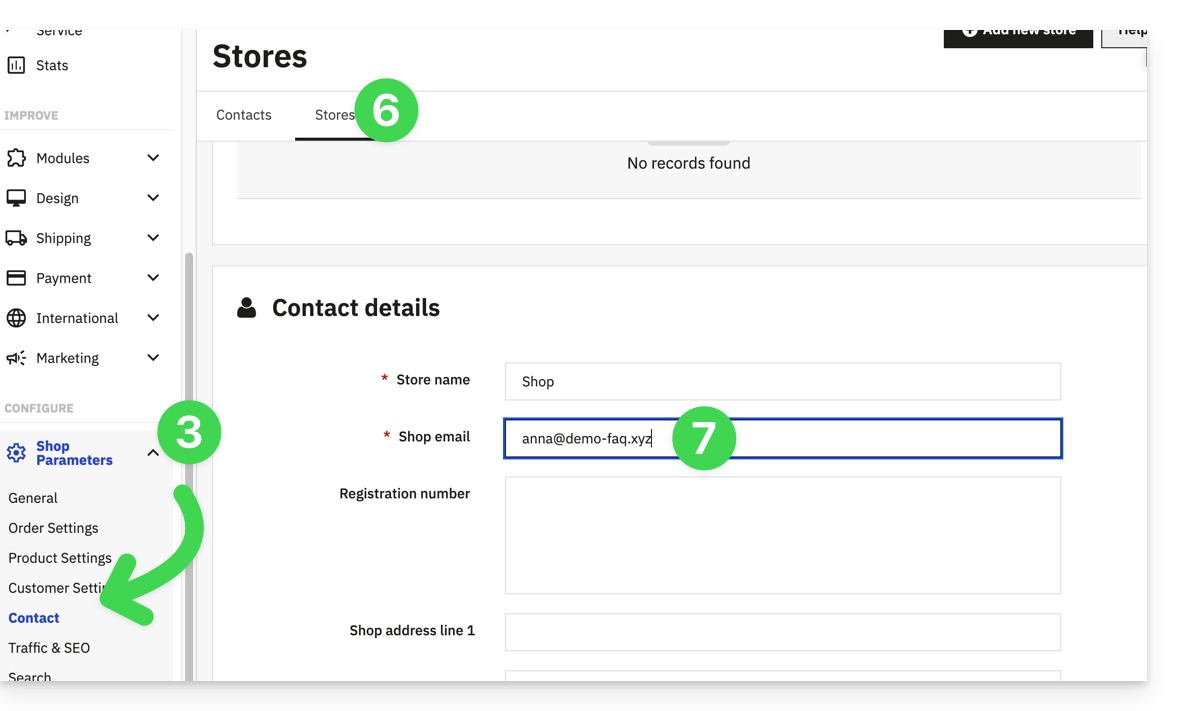
- Click on the Shops tab.
- Check (and correct if necessary) that the email address mentioned is the same as the one configured previously:
Joomla
To enable your website to send emails, use an email address from its domain (e.g., email@domain-site.xyz) and enter the SMTP settings (see prerequisites):
- Log in to the Joomla administration panel.
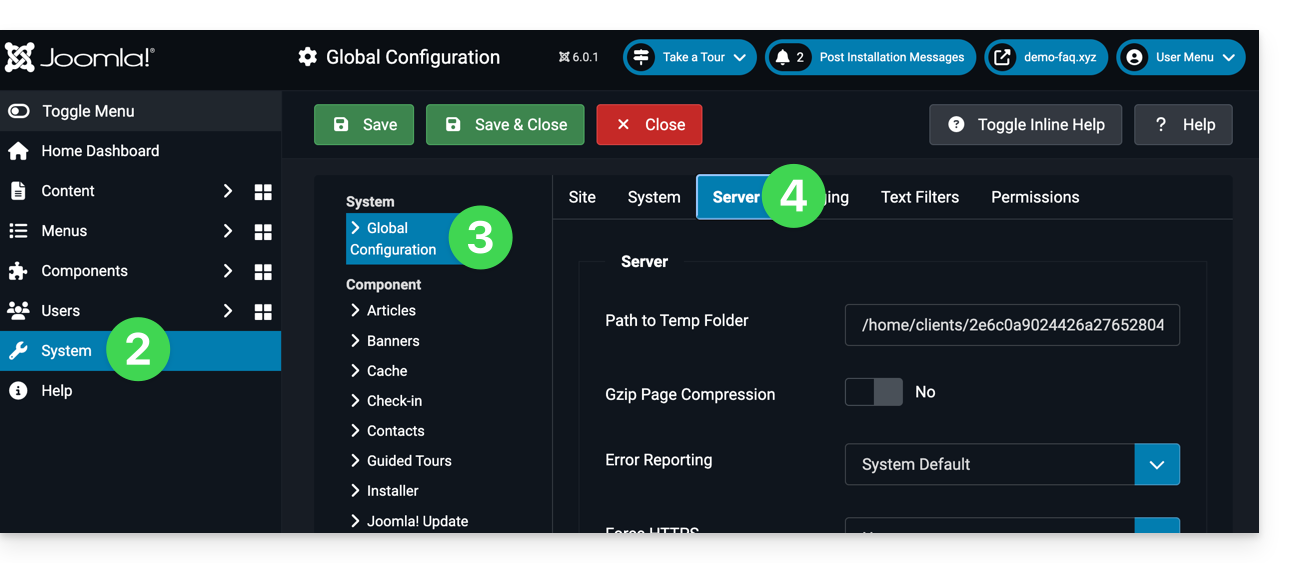
- Click on System in the left-hand menu.
- Click on General Settings.
- Click on the Server tab:
- Configure sending via the SMTP method:
Link to this FAQ: https://faq.infomaniak.com/2023
Has this FAQ been helpful?