Knowledge base
1000 FAQs, 500 tutorials and instructional videos. Here, there are only solutions!
This guide explains how to duplicate an event from one ticketing system to another within the Infomaniak ticketing system.
Introduction
- The duplicated event will include all information and settings from the original event, except for information related to the general settings for ticketing and dates.
- Please carefully check all information that requires manual updating.
- If necessary, consult this other guide about duplication (one-time or recurring) of an event within the same ticketing system.
Duplicate an event
Prerequisites
To duplicate an event from one of your ticketing systems to another, go to the ticketing system from which you want to duplicate the events, season, or previous edition:
- Click here to access the management of your product on the Infomaniak Manager (need help?).
- Click directly on the name assigned to the ticketing system where the event to be duplicated is located:
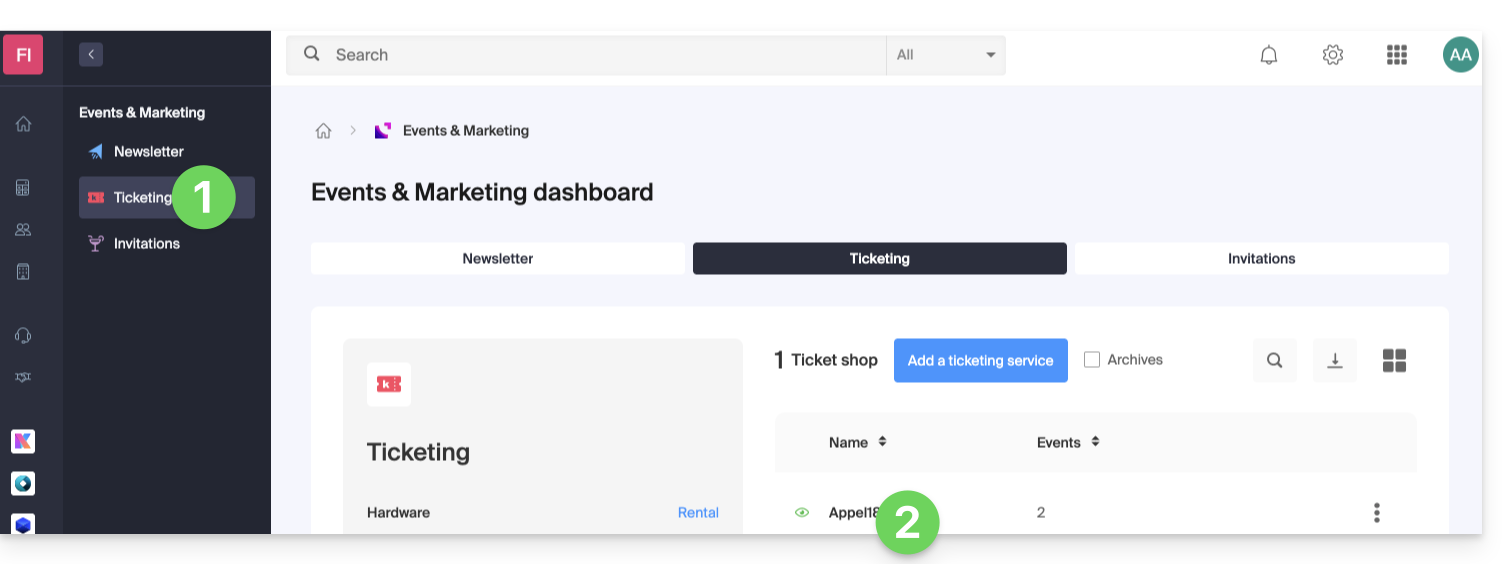
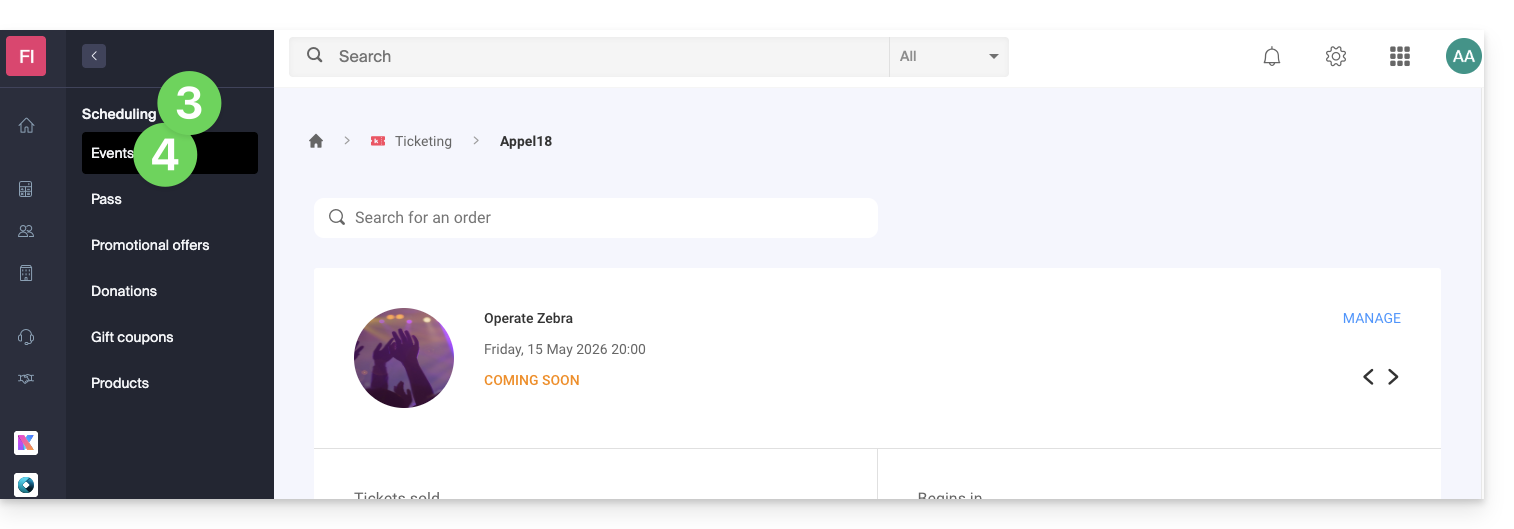
- Click on Schedule in the left-hand menu.
- Click on Events in the left-hand menu:
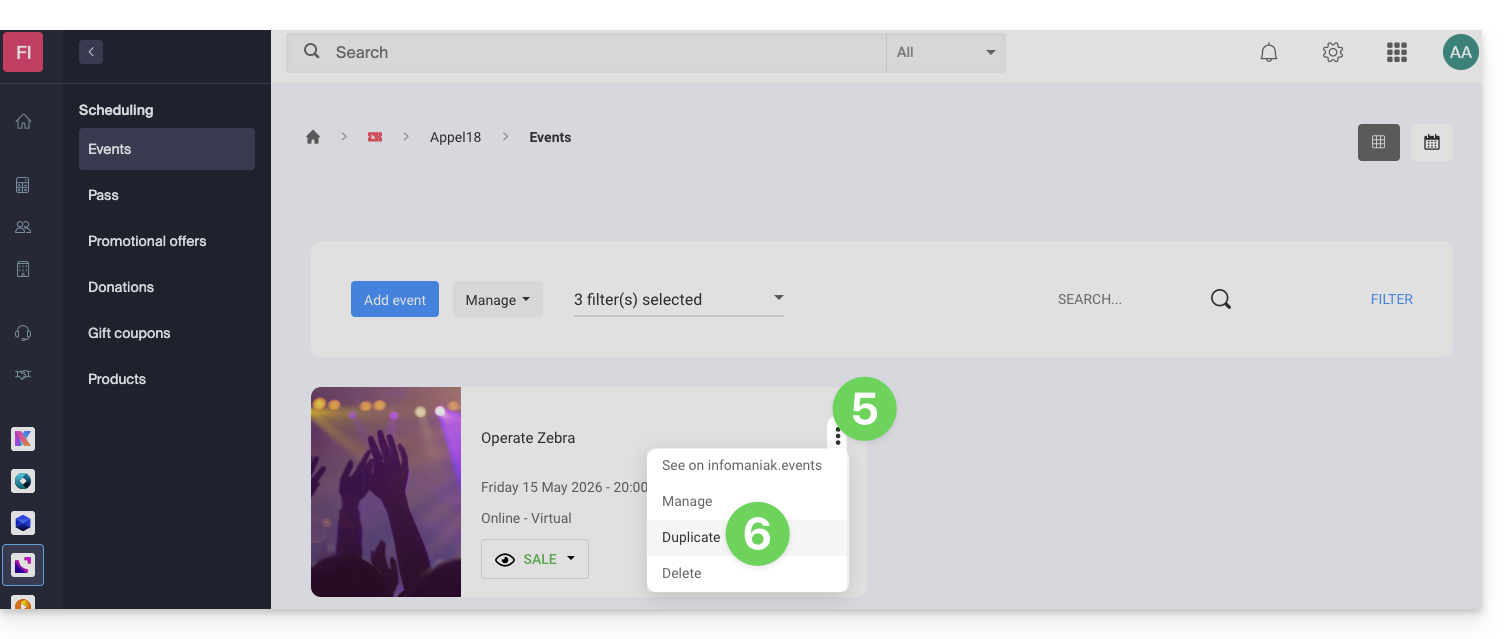
- Click on the action menu ⋮ located to the right of the event to be duplicated.
- Click on Duplicate:
- In the window that appears, enable the Duplicate to another ticketing system option and choose which one:
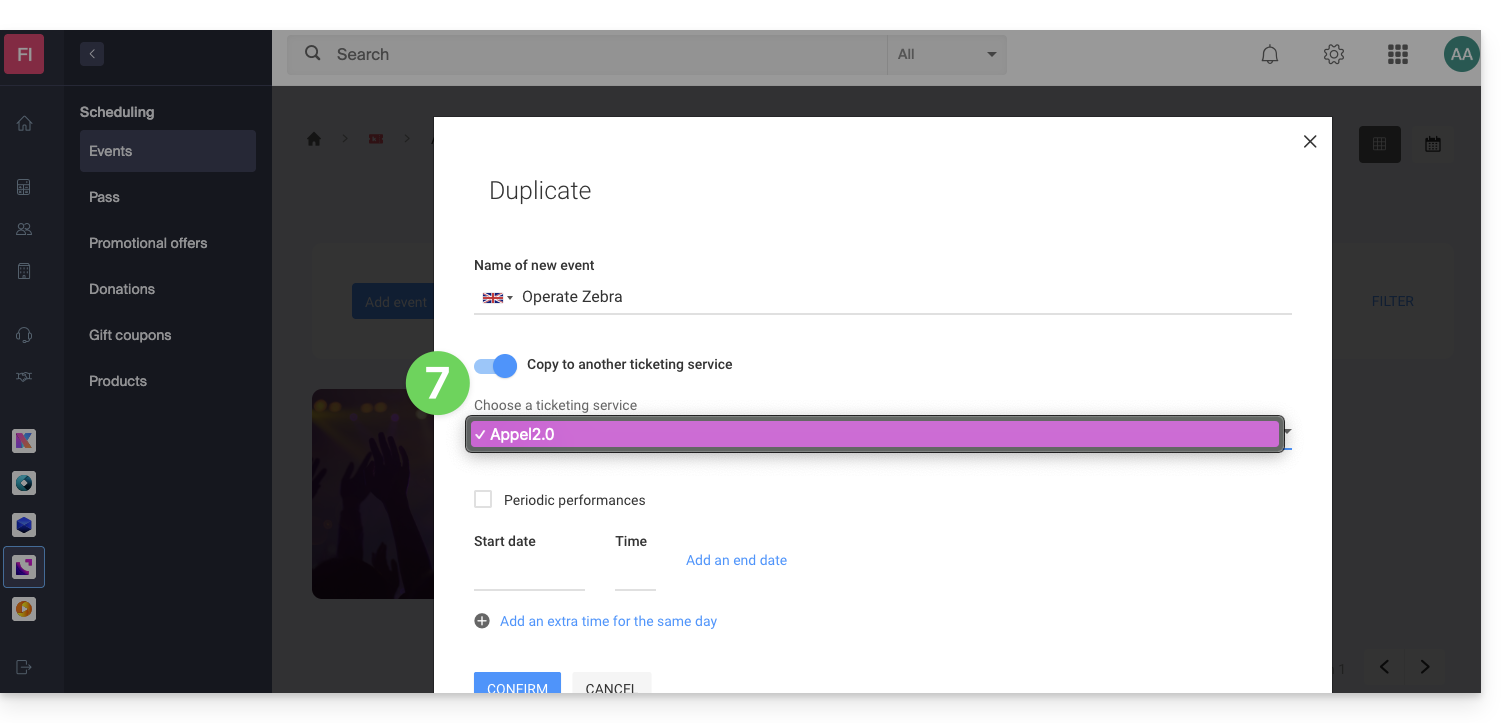
- If necessary, specify the new name of the event, the new dates, and other display settings for your event.
- Click Confirm to start the duplication.
Link to this FAQ: https://faq.infomaniak.com/2883
Has this FAQ been helpful?
This guide explains how to set up an on-site payment method (within the Infomaniak ticketing system).
Introduction
- This payment method will allow your customers to pay for their order on-site.
- Regardless of the payment method, you will be the one to receive the money.You will therefore need to manually approve the order.
Enable the payment method in the Ticketing system
To do this:
- Click here to access the management interface for your product in the Infomaniak Manager (need help?).
- Click directly on the name assigned to the ticketing system for the event.
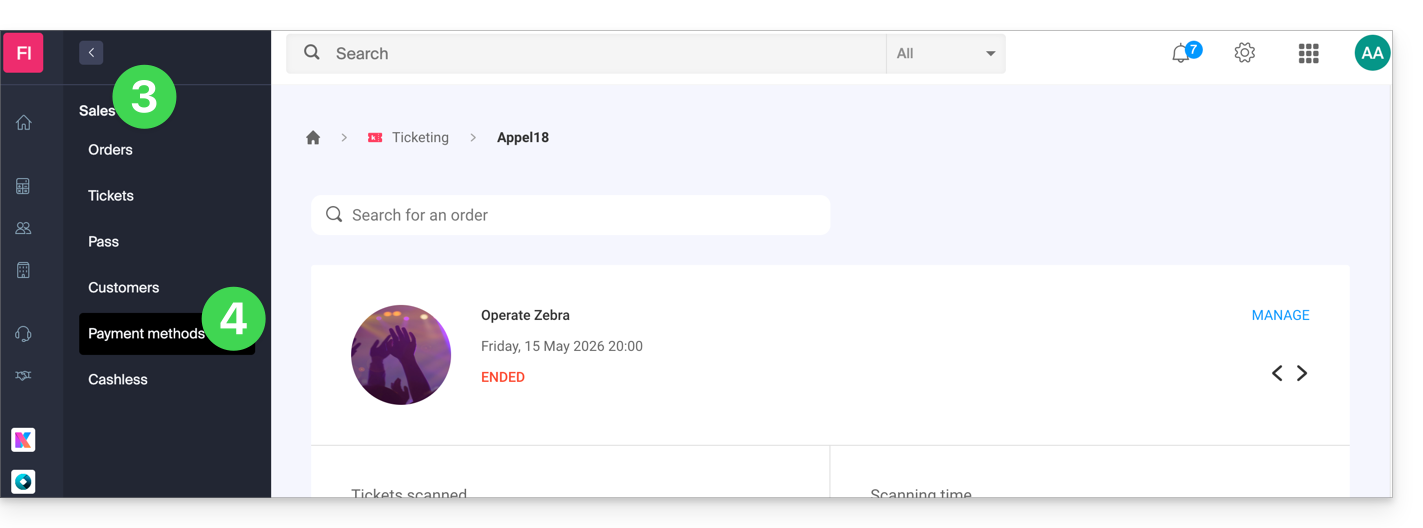
- Click on Sales in the left-hand menu.
- Click on Payment methods in the left-hand menu:
- Toggle the switch to ON to the right of the On-site item:

Configure the method
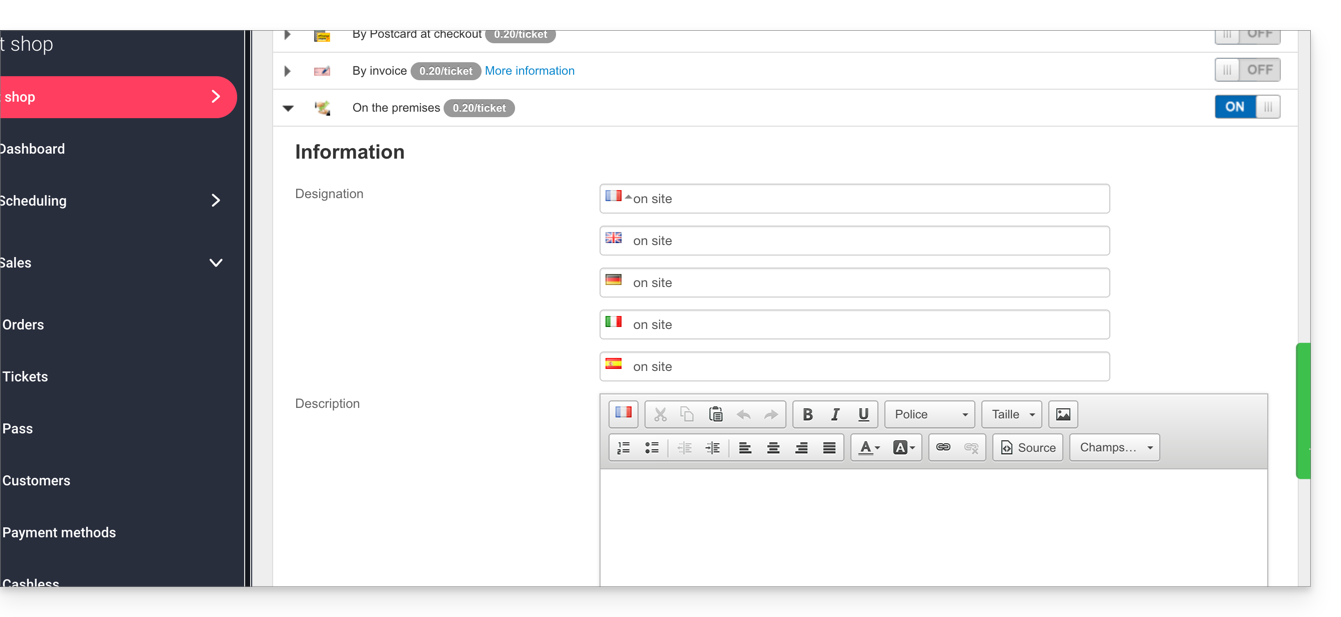
Click on the arrow to the left of the On-site mode:
- The first section allows you to define the name of this payment method, add a description, and add a message to the end of the generated document:
Customize the payment method on site
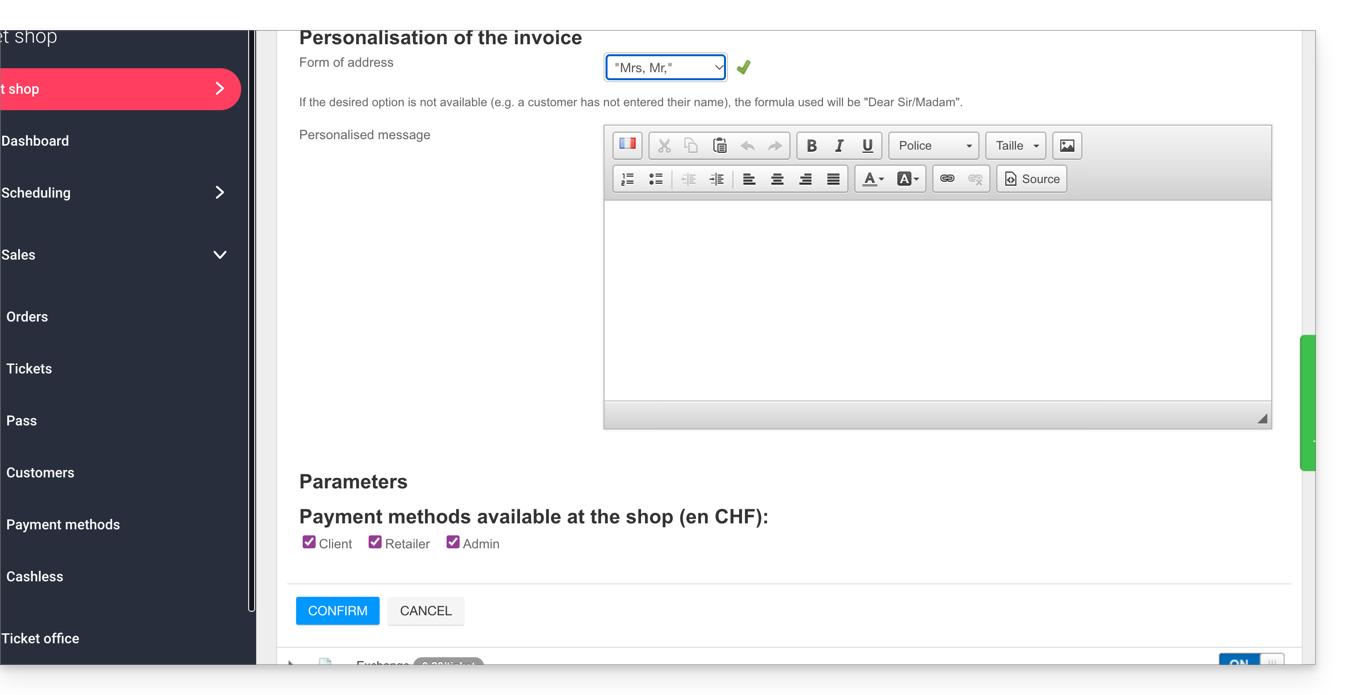
You can customize the invoice to address it to the customer and include a personalized message:
- If you want to address the invoice directly to the customer, in the form Mr. Smith, please ensure that the customer records have the Title and Name fields filled in.
The following settings allow you to manage the option to enable this payment method:
- customer: for online orders placed by visitors
- reseller and administrator: for the web and mobile interface:
Validating an order awaiting payment
There are several ways to validate a payment method:
From the Infomaniak Manager
- Click here to access the management of your product in the Infomaniak Manager (need help?).
- Click directly on the name assigned to the ticketing system for the event.
- Click on Sales in the left-hand menu.
- Click on Orders in the left-hand menu.
- Click on an order awaiting payment.
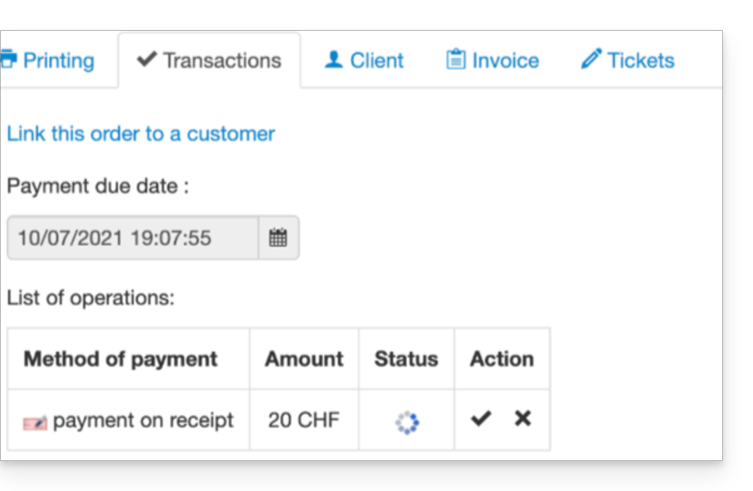
- Click on the Transactions tab, hover over the unpaid invoice payment, and click on the Validate icon.
Via the Web Control Panel
- Log in to the Web Control Panel.
- Start a search for pending payment orders by:
- Order number
- Customer name
- Click on the pending payment order.
- Go to the Transaction tab and click on the Validate icon:
From the Mobile App
- Log in to the Mobile Portal.
- Start a search for pending payment orders.
- From the list of payment methods, choose the one to validate and select Confirm.
Link to this FAQ: https://faq.infomaniak.com/2911
Has this FAQ been helpful?