Knowledge base
1000 FAQs, 500 tutorials and instructional videos. Here, there are only solutions!
Manage DKIM records
This guide explains how to add or modify a DKIM record in a DNS zone (domain name/subdomain) managed in the Infomaniak Manager.
Introduction
- The DKIM (Domain Keys Identified Mail) protocol authenticates your emails with a unique digital signature.
- It guarantees that your messages have not been modified during their transmission and certifies the identity of the sender, thus preventing spoofing by spammers.
- DKIM isenabled by default for all Mail Services whose DNS zone is managed with Infomaniak.
- All your emails are automatically signed, whether they are sent from the Infomaniak Mail app or the email software/client of your choice.
Check DKIM registration
If you have a Mail service with Infomaniak, the easiest way is to go to the Global Security tool to easily check and correct certain problematic records.
And when your domain name is managed elsewhere, you will find the DKIM record to be added to the DNS zone: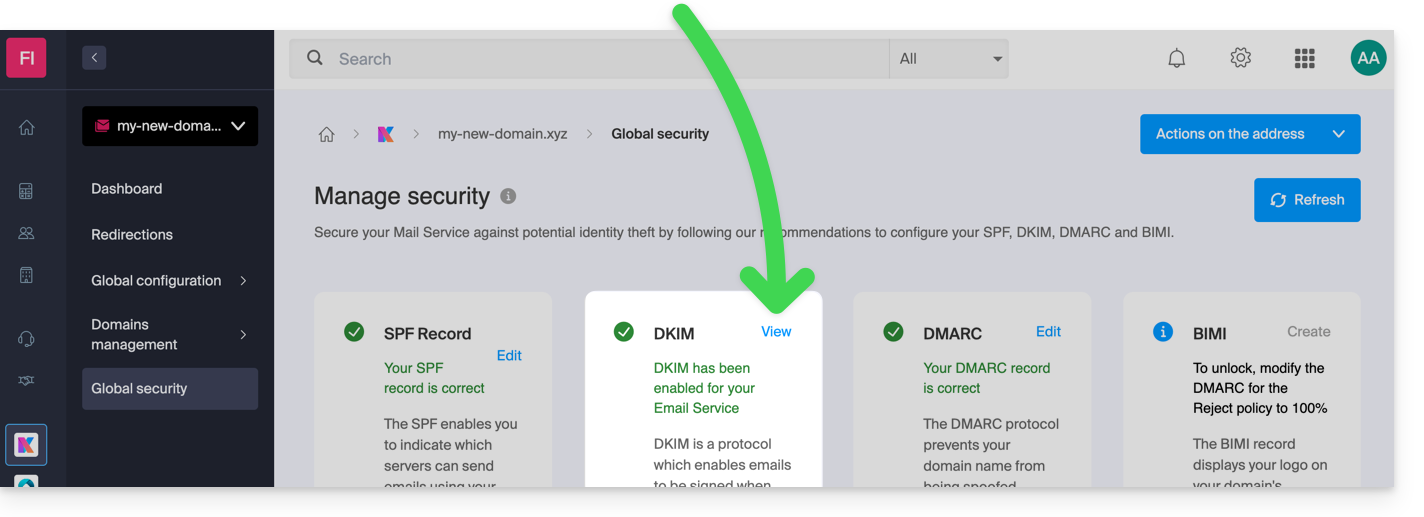
Manually modify the DNS zone (not recommended)
To manage this type of record in a DNS zone:
- Click here to access the domain management section in your Infomaniak Manager (❓: help).
- Click on the name of the domain in question.
- Click on DNS Zone in the left-hand menu.
- Click the button to add a record:
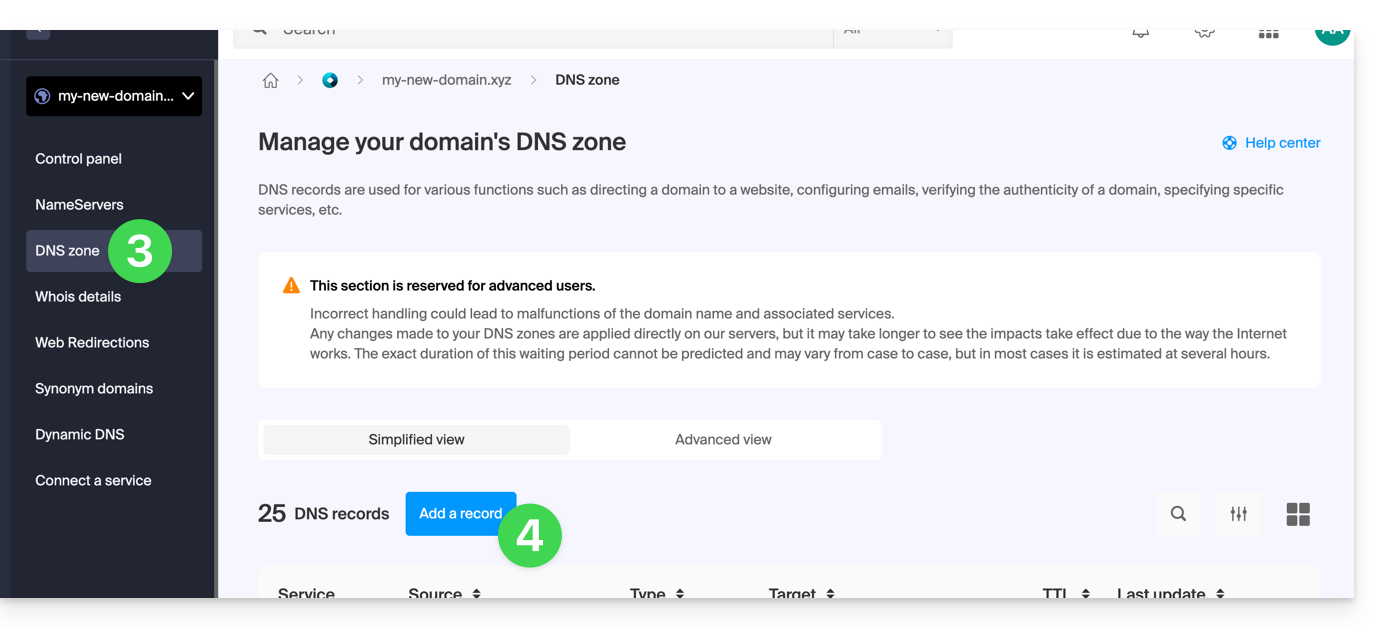
- Click the DKIM radio button to add a record.
- Click the Next button:
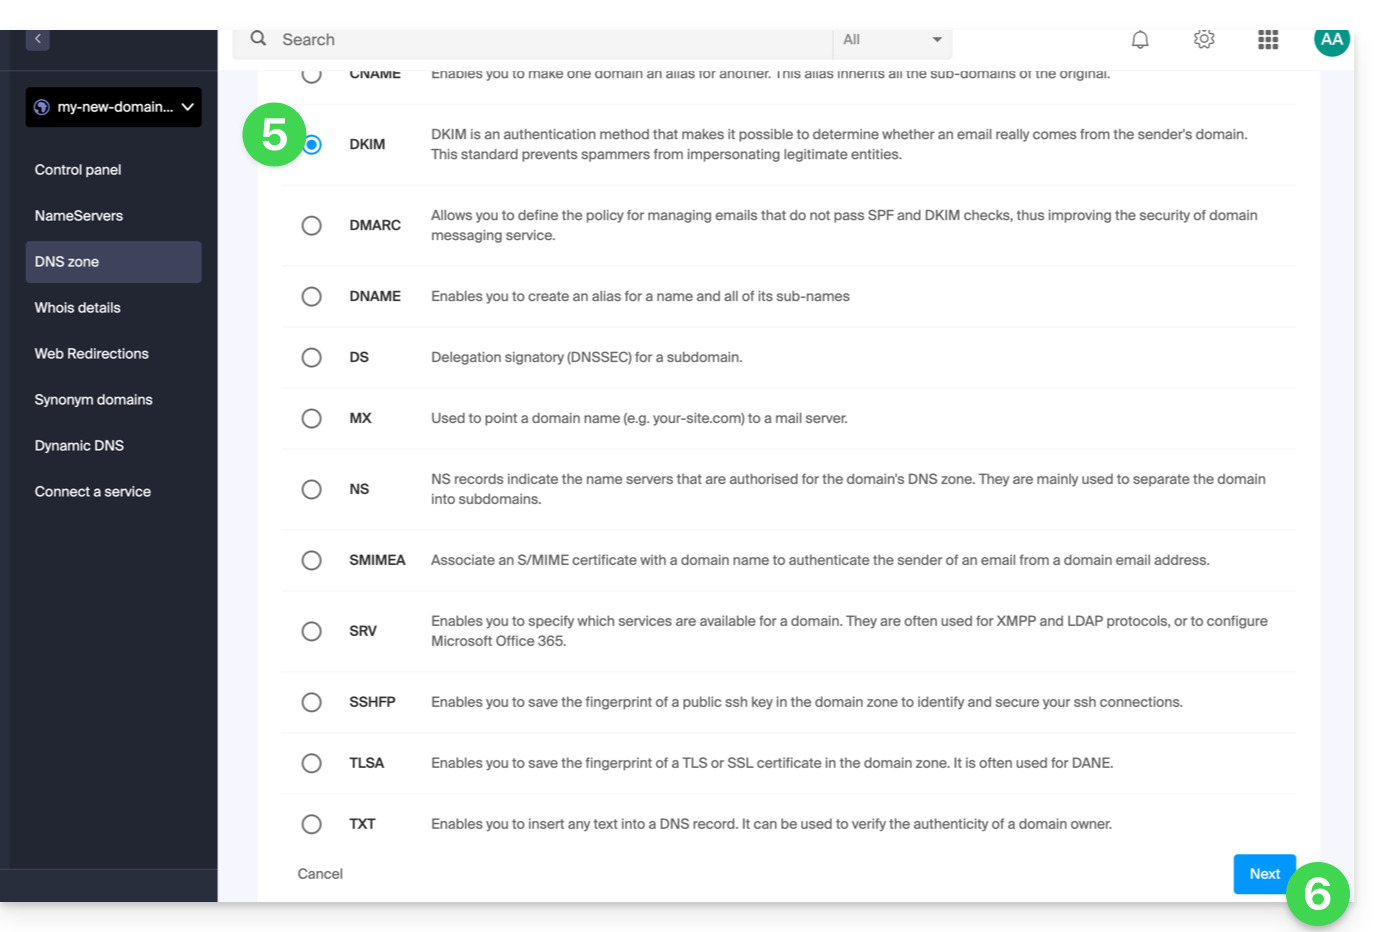
- Enter the DKIM values required for your DNS zone.
- Leave the default value for the TTL.
- Click on the Save button:
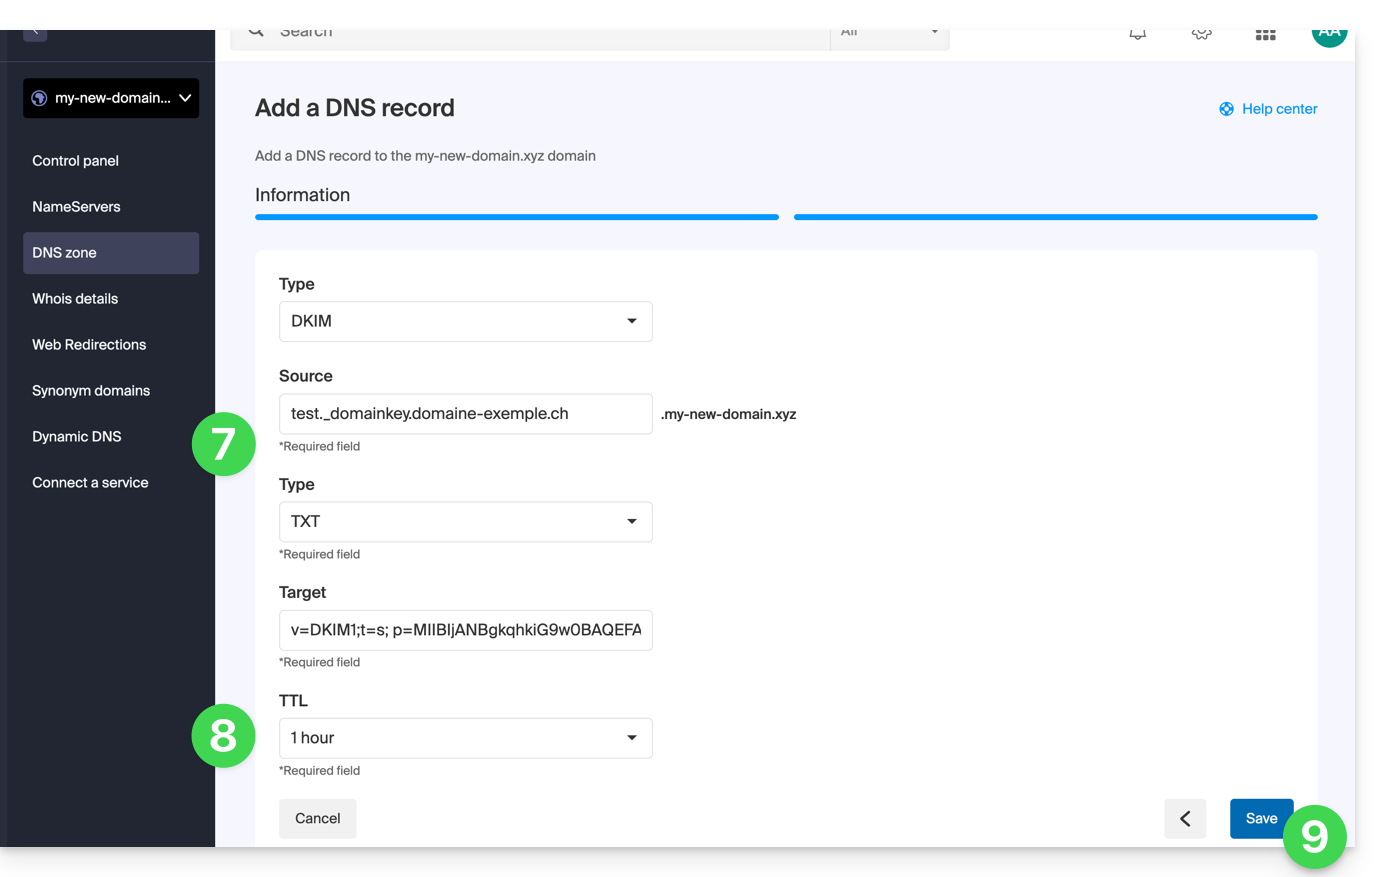
Add multiple DKIM records
You can have multiple DKIM records on your domain/subdomainwithout any limit, unlike DMARC or SPF, as long as your DNS host allows it.
If you use multiple third-party email providers, such as the Odoo ERP, it is necessary to add a DKIM for Odoo in addition to the one for Infomaniak.
Use unique DKIM selectors to avoid conflicts with existing records.
Link to this FAQ: https://faq.infomaniak.com/841
Has this FAQ been helpful?