Knowledge base
1000 FAQs, 500 tutorials and instructional videos. Here, there are only solutions!
Force kDrive to exclude files and folders from synchronization
Update 09/22/2026
This guide explains how to exclude files and folders from a kDrive synchronization on your computer, and which file types are already excluded by default.
Introduction
- The files that are excluded by default (items in the list that cannot be deleted) vary depending on the operating system and are excluded because they pose a risk of synchronization errors.
Manage files excluded from kDrive
Desktop app v4.x
The kDrive v4.x app allows you to view existing automatic exclusions and create your own exclusion rules:
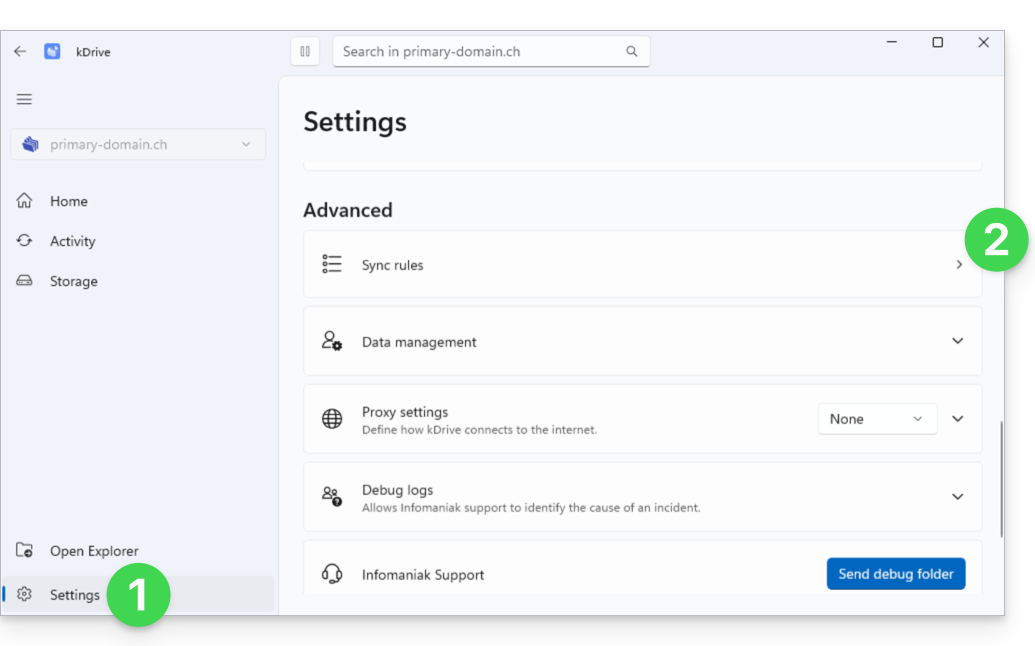
- Click on Settings.
- Click on Synchronization rules:
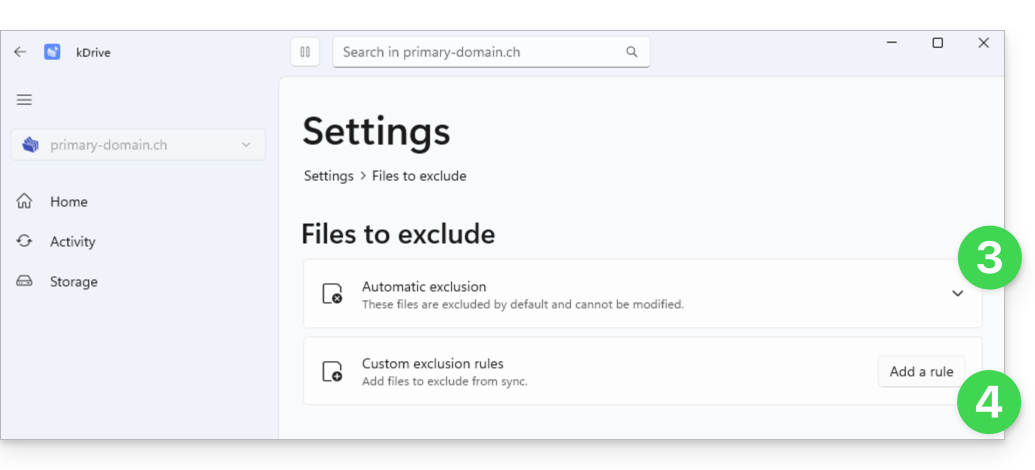
- The list that appears when you click on the chevron represents the files that are ignored by default by kDrive, and the corresponding rules cannot be modified.
- The files that are excluded by default (items in the list that cannot be deleted) vary depending on the operating system and are excluded because they pose a risk of synchronization errors.
- Custom exclusion rules: these allow you to specify which name (or which part of a name) should never be synchronized, including the file name extension (type) if necessary:
- To create a custom exclusion, click the Add rule button, then enter the term you want to exclude from all synchronization:
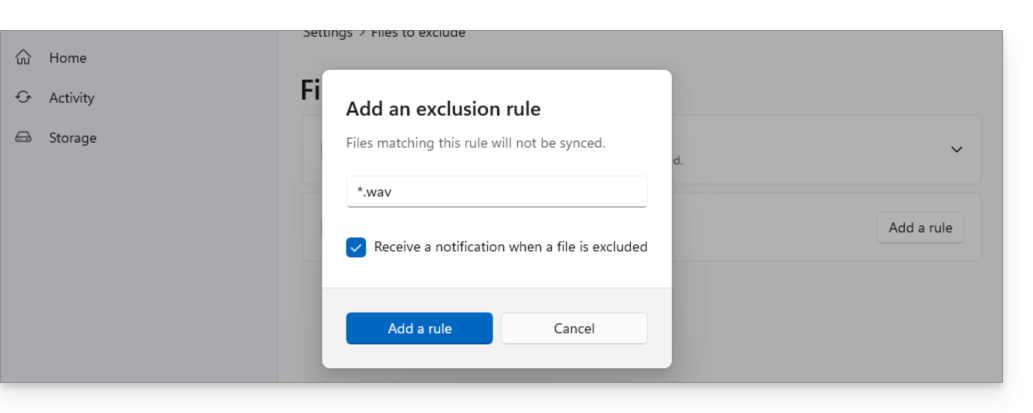
wavwill only exclude files that are named exactlywav(a filewav.txtwill not be excluded)..wavwill only exclude files that are named exactly.wav(a filetest.wavwill not be excluded).*.wavwill exclude all files that end with.wav. For example,test.wavwill be excluded, but nottest.wav.2.*wav*will exclude all files that containwav. For example,fichier-wav-audio.mp3will be excluded.
- Enable the checkbox if necessary to receive a notification when a synchronization excludes a file for the reason you have configured.
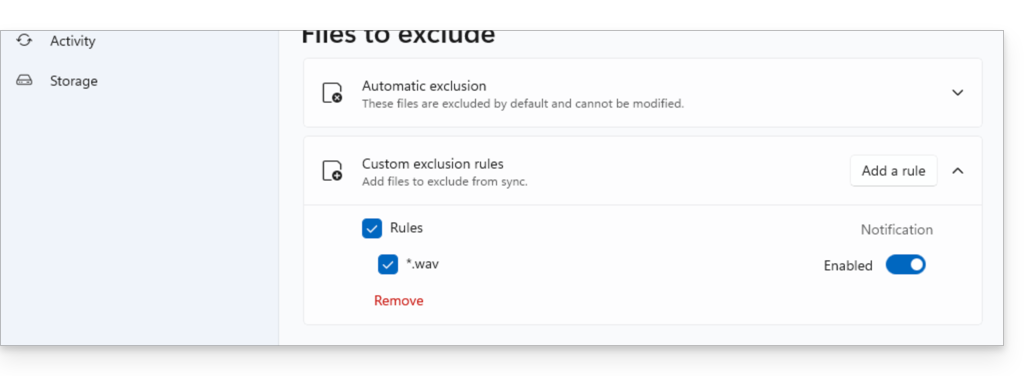
- The rule is displayed, and you can simply select it to delete it if needed. You can also click the toggle switch to enable or disable notifications when this type of exclusion occurs:
Desktop app v3.x
To do this:
- Left-click on the desktop app icon in the notification area of your computer (top right on macOS, bottom right on Windows, and double-left-click in the taskbar on Linux).
- Click on the action menu ⋮ in the top right corner of the application.
- Click on Preferences:
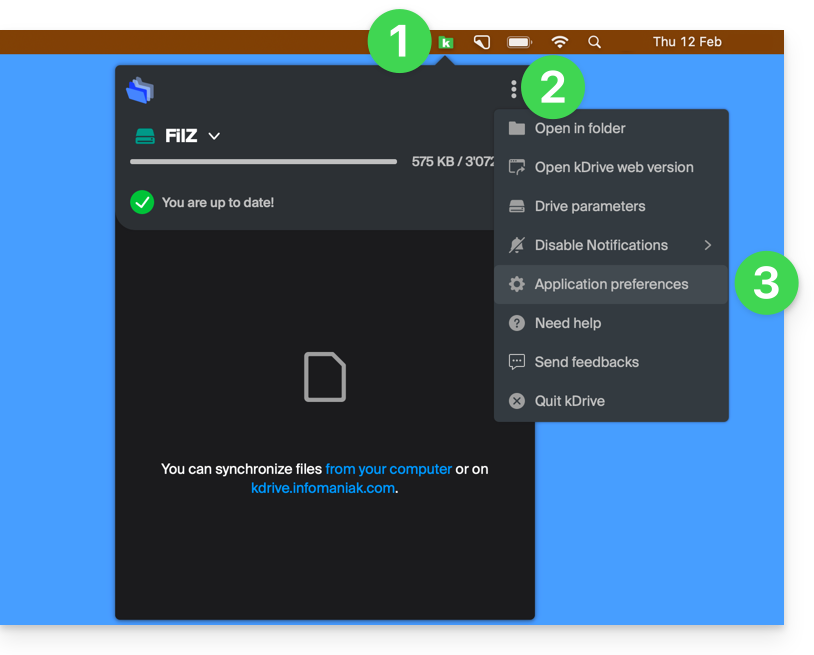
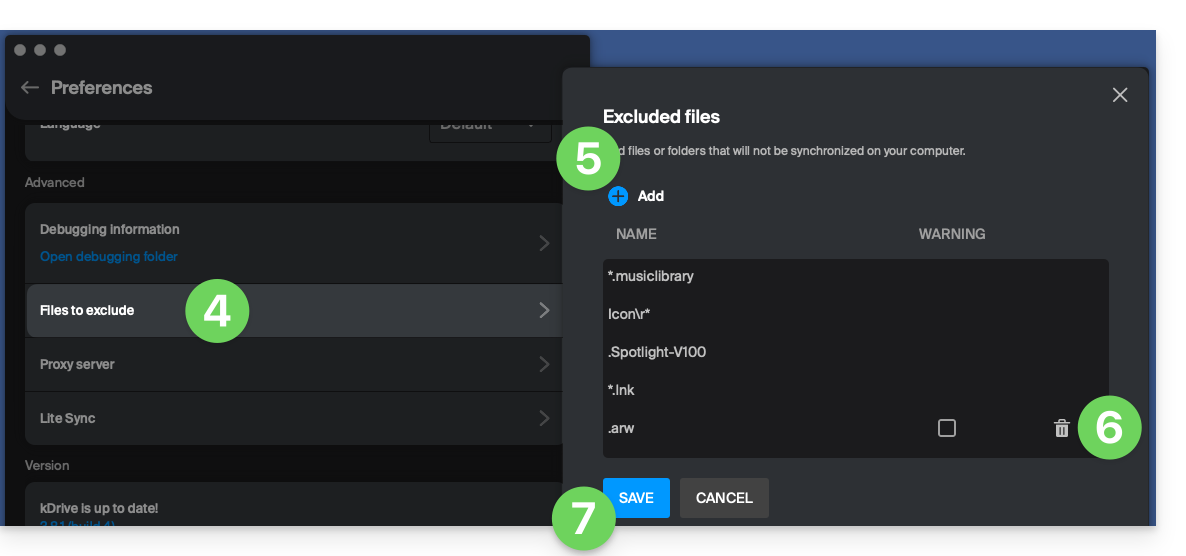
- Click on Files to exclude (in the Advanced section).
- To add files to exclude, click the Add icon and then enter the name.
- To exclude a collection of files, specify, for example,
*.bak(asterisk "wildcard" preceding the file extension in question). - If you add the name of a folder, it will no longer be synchronized, including its content, subfolders, etc.
- To exclude a collection of files, specify, for example,
- To remove files/folders that you added to exclude them from synchronization, click the trash can icon Delete at the far right of the line in question.
- It is possible to hide synchronization warning messages for excluded files by checking the box to the right of the excluded file.
- Click on the blue Save button:
Link to this FAQ: https://faq.infomaniak.com/2871
Has this FAQ been helpful?