Knowledge base
1000 FAQs, 500 tutorials and instructional videos. Here, there are only solutions!
Ticketing: manage an event
This guide explains how to manage an event (within the Infomaniak ticketing system).
Accessing the event page
To do this:
- Click here to access the management interface for your product on the Infomaniak Manager (need help?).
- Click directly on the name assigned to the ticketing system for the event.
- Click on Schedule in the left-hand menu.
- Click on Event in the left-hand menu.
- Click on the name of the event in question:

Overview
The overview provides a general view of your event: 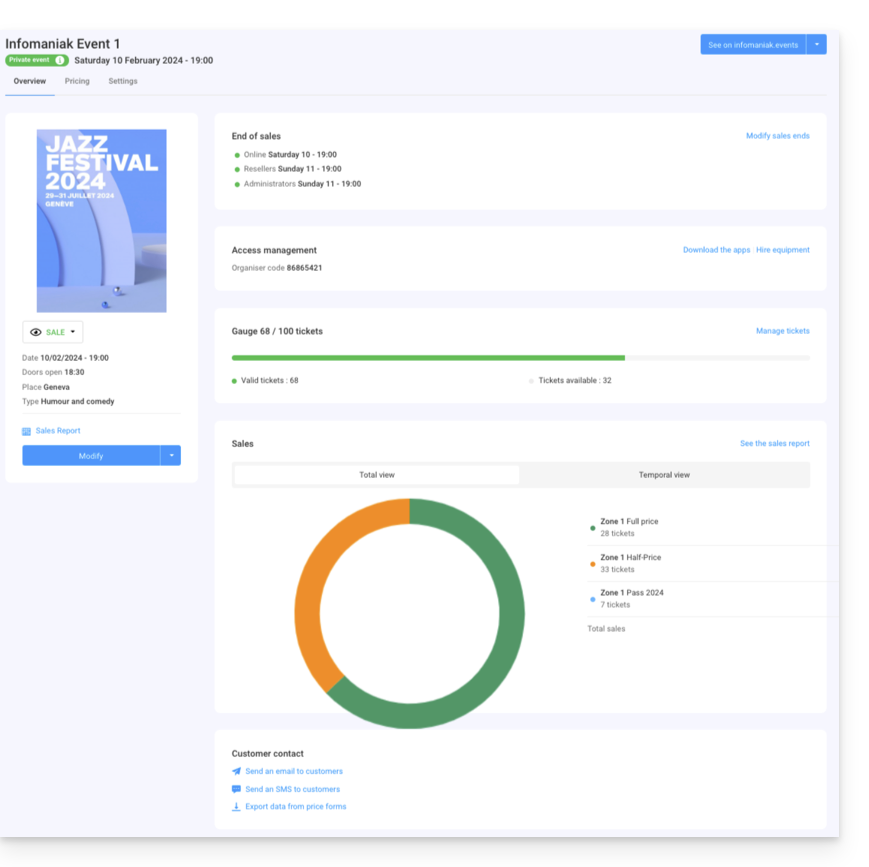
- On the left, you will find the event information and status. You can change the event's visibility, access the sales report, and make changes to the event:

- The end-of-sales information and access codes for ticket control are located at the top of the right column:

- A graph summarizing the number of tickets sold and revenue by price allows you to track your sales:

- The options concerning the event's attendees are located at the bottom of the page. These allow you to contact attendees who purchased tickets for this event and export the results from the forms they filled out:

- The button at the very top right allows you to view the online version of the event on your ticketing platform and, if you decide to embed the event on your website, access the embedding options:

Differences in the case of multi-date events
If your event has multiple performances, the information will be broken down according to the page you are viewing. You will find:
- On the main page, the information and general settings applicable to all dates.
- On each date or event page, you will find the information for that date or event.
Manage prices, ticket templates, and sales closing times
You can switch to these options in the tabs at the top of the event page:
Link to this FAQ: https://faq.infomaniak.com/2857
Has this FAQ been helpful?