Knowledge base
1000 FAQs, 500 tutorials and instructional videos. Here, there are only solutions!
Move the local kDrive location
Update 10/01/2026
This guide explains how to change the local location used by the desktop app kDrive (desktop application on macOS / Windows / Linux) in order to, for example, store the synchronized data on another hard drive when the first one chosen no longer has enough space.
Introduction
- Indeed, if the Lite Sync option is not enabled, all existing data on the kDrive web app (online service ksuite.infomaniak.com/kdrive) is also stored locally on the synchronized device and takes up storage space.
- Since the volume of data can be very large, you may need to store the data on a different hard drive than the one initially selected.
- Never move a folder used for kDrive synchronization(
/kdrive,/kdrive2, etc.) neither when the kDrive application is open nor when it is closed or uninstalled with the intention of being reinstalled.- If everything is synchronized, you must delete the folder and recreate it as explained below.
- If you proceed differently by using a folder that already contains your data, you risk encountering file conflicts.
Change the local directory used by kDrive
To define a new folder for kDrive synchronization when the first folder initially chosen should no longer be used, follow these steps:
- Make sure that all your data is synchronized and that it exists and is visible in the kDrive web app (online service ksuite.infomaniak.com/kdrive).
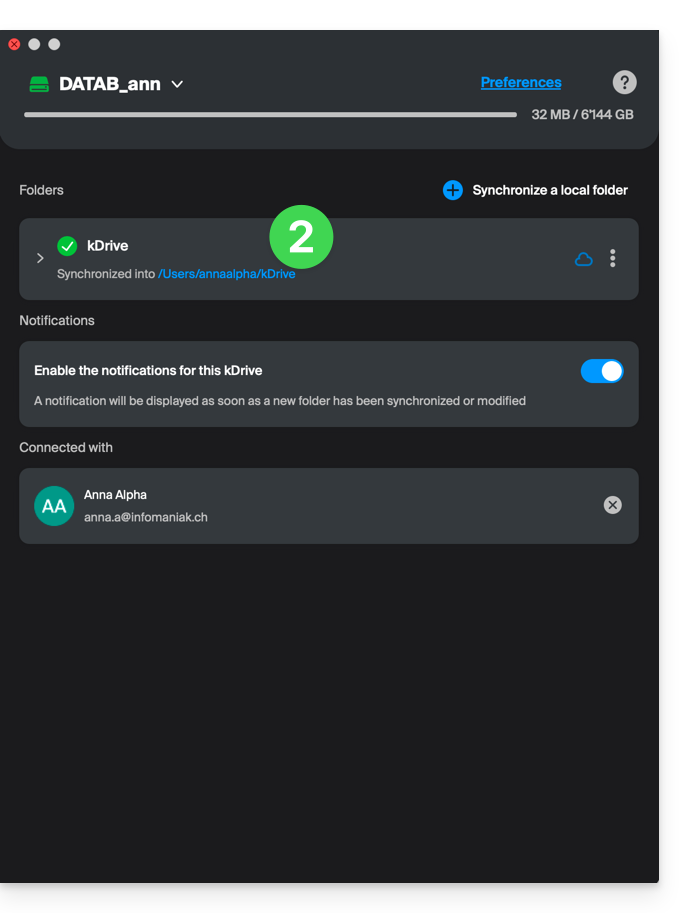
- If necessary, locate the folder currently used by the kDrive desktop app (click on Drive Settings from the application, then click on the blue URL displayed under Folders to open the local folder and identify its location):
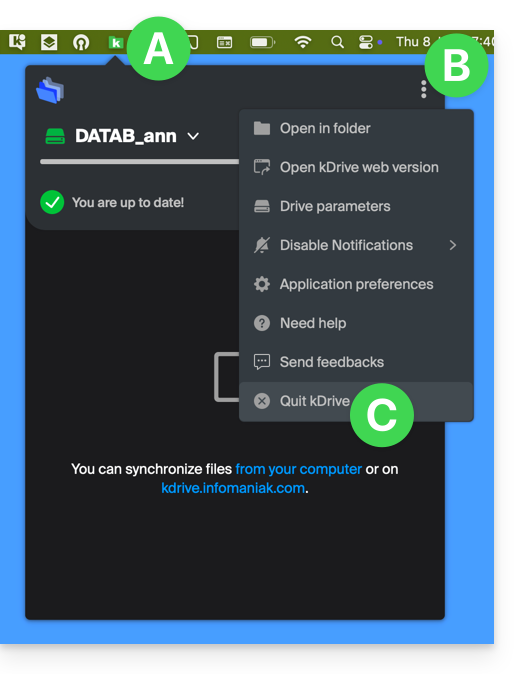
- Quit the kDrive desktop app on the device where you want to change the folder being used:
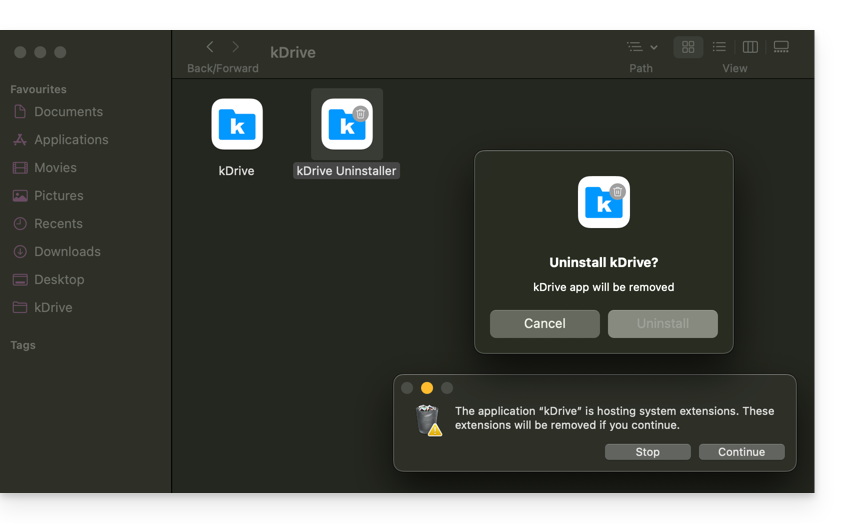
- Completely uninstall the kDrive desktop app by deleting all configuration/settings data, etc. — on macOS, use kDrive Uninstaller, which is located in the Applications/kDrive folder):
- Delete the
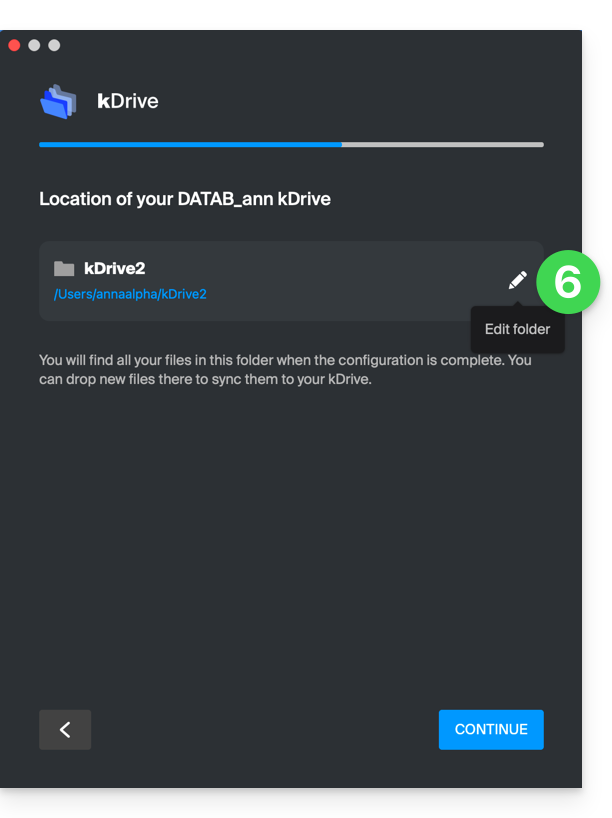
kDrivefolder (orkDrive2, etc., located in step 2). - Reinstall the kDrive desktop app, and when connected to your Infomaniak account, click the pencil ✎ icon at the folder selection step:
- Choose the new hard drive as the location for the new folder (name it as you wish):
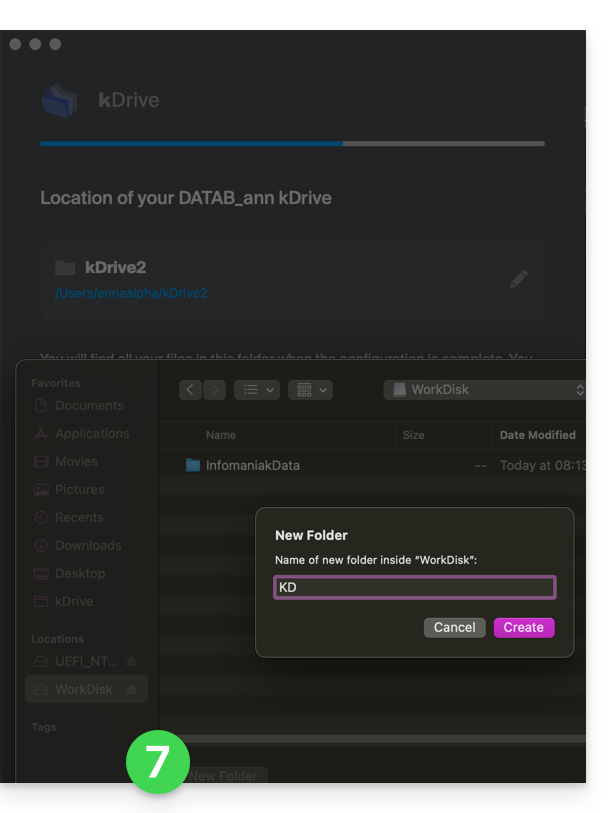
- Complete the configuration:
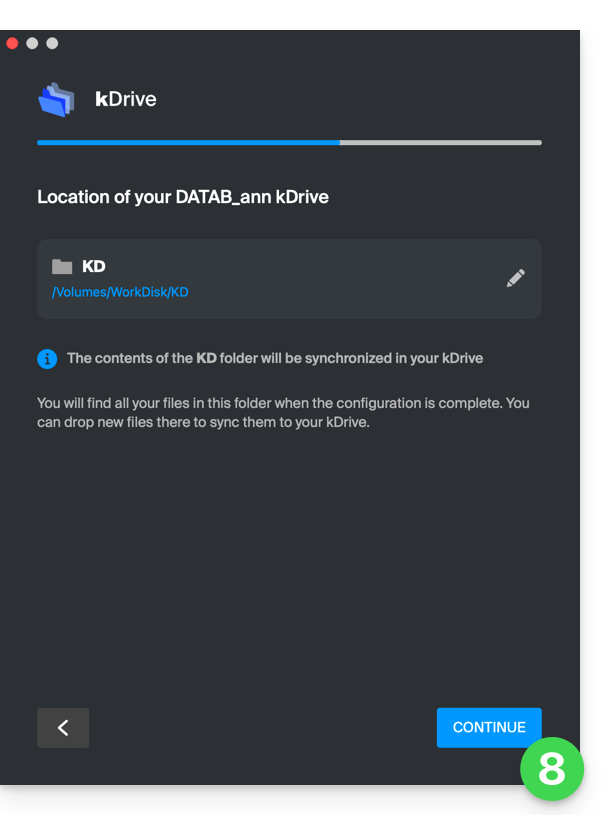
- The download of kDrive data stored on Infomaniak servers will begin and continue entirely in the background.
- Refer to this other guide to download only specific folders.
Link to this FAQ: https://faq.infomaniak.com/2856
Has this FAQ been helpful?