Knowledge base
1000 FAQs, 500 tutorials and instructional videos. Here, there are only solutions!
Change the kDrive storage folder for local data on your computer
Update 11/12/2026
This guide explains how to change the local location used by the desktop appkDrive v4.x (desktop application for macOS / Windows / Linux) to, for example, store synchronized data on another hard drive when the first drive chosen no longer has enough space.
Introduction
- Never move the folder used for kDrive synchronization (
/kdrive,/kdrive2, etc.)!- You risk data loss or file conflicts.
- If you are considering such a change to free up disk space, you could simply reduce the size of your downloaded data using Online mode (❓: help).
Change the local directory used by kDrive v4.x
To define a new folder for kDrive synchronization when the first folder initially chosen should no longer be used:
1. Synchronization steps and preliminary checks
- Launch kDrive on your device: the app icon should be visible in the top right corner on macOS/Linux, and in the bottom right corner on Windows (❓: help).
- If a synchronization is currently in progress, you must allow it to complete:
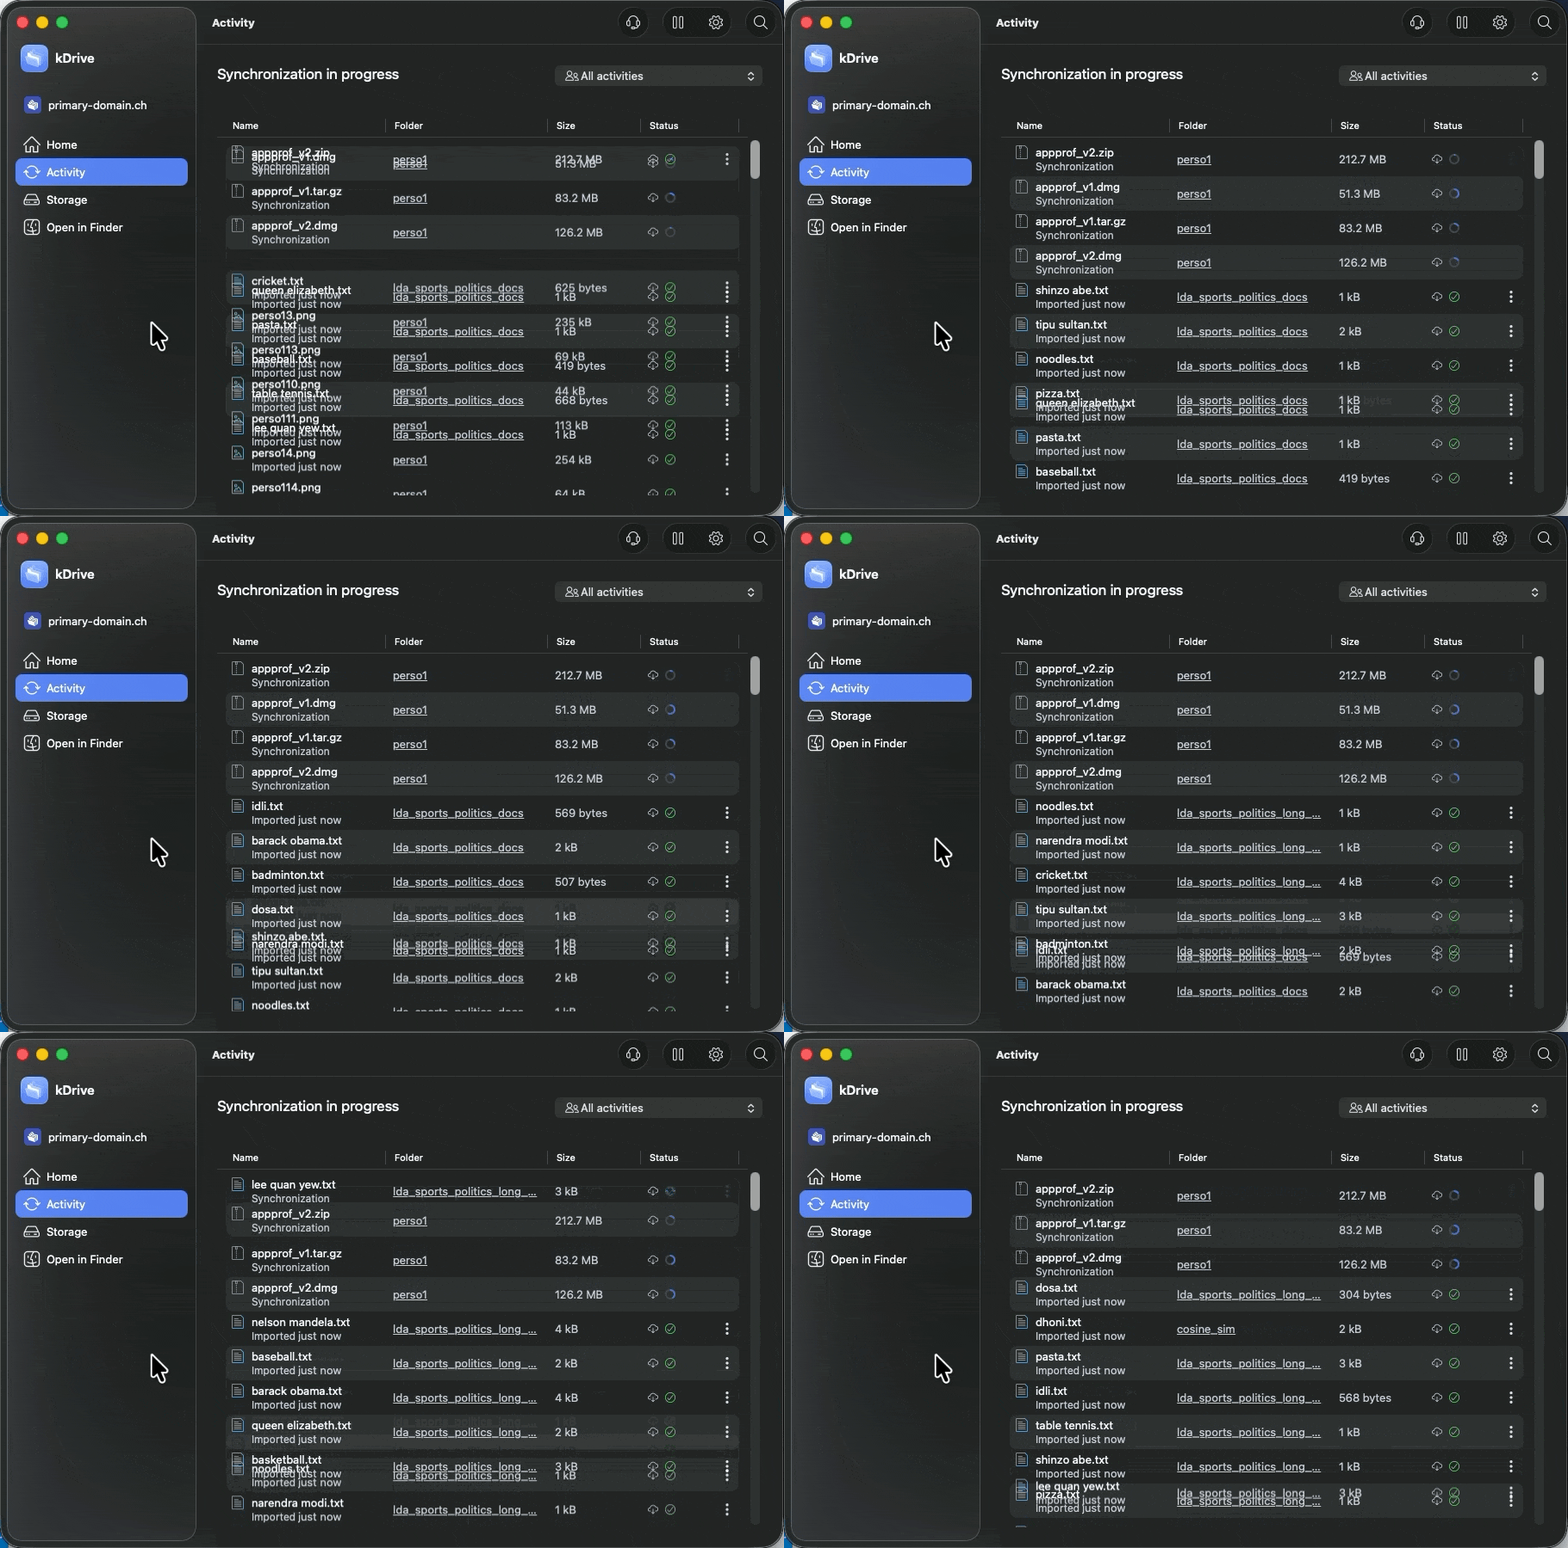
- Make sure that the synchronization status is indicated as complete & finished in the kDrive application:
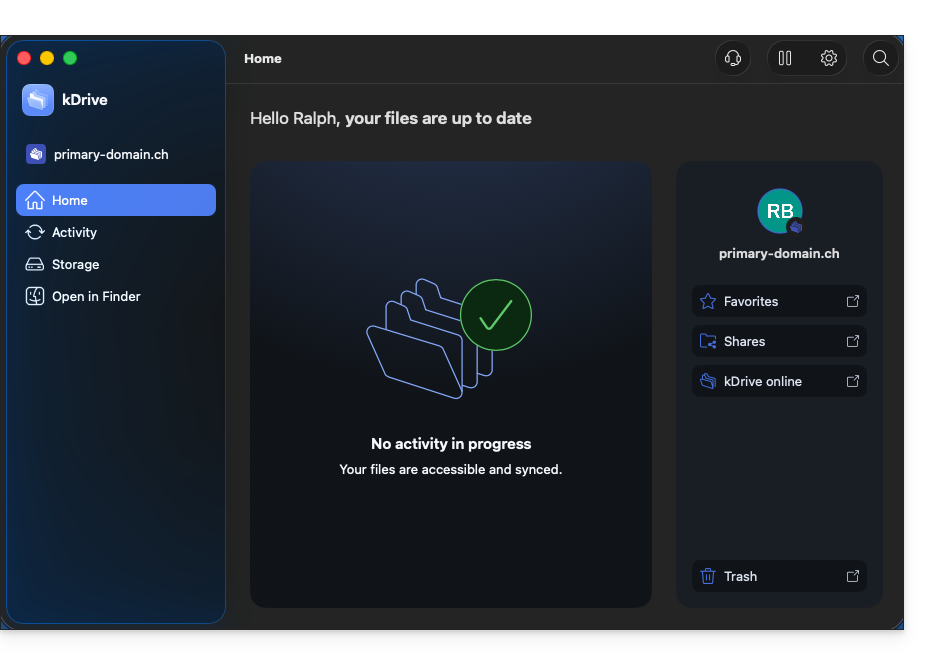
- If not, you must resolve any issues mentioned before proceeding, otherwise it means that some data may not be synchronized and will not be sent to the new storage folder you want to define...
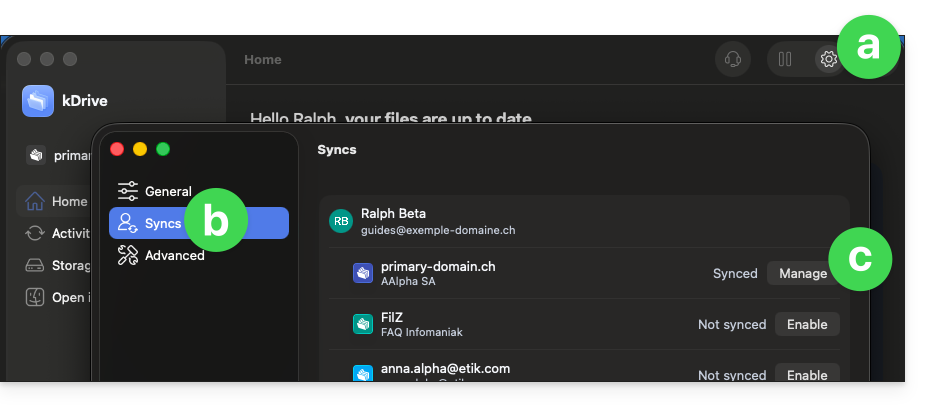
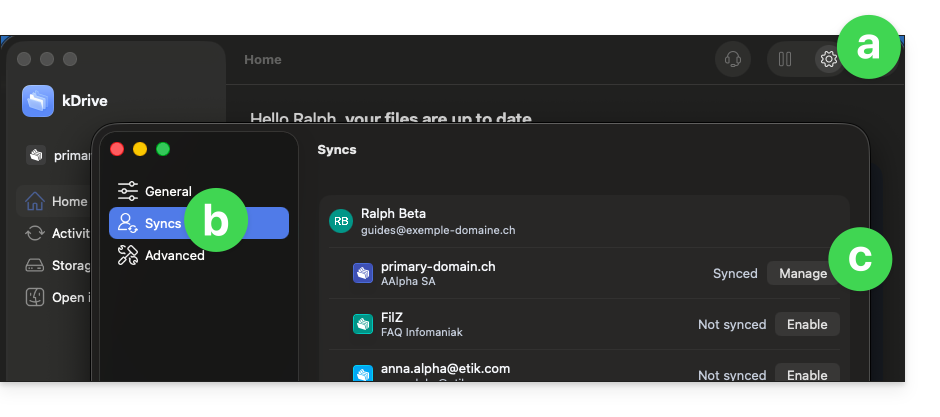
- Go to the settings of your current synchronization in the kDrive application:
- Make sure you have accurately noted the name and path displayed for the directory currently used on your computer to store your data, here
kDrive primary-domain.ch 2: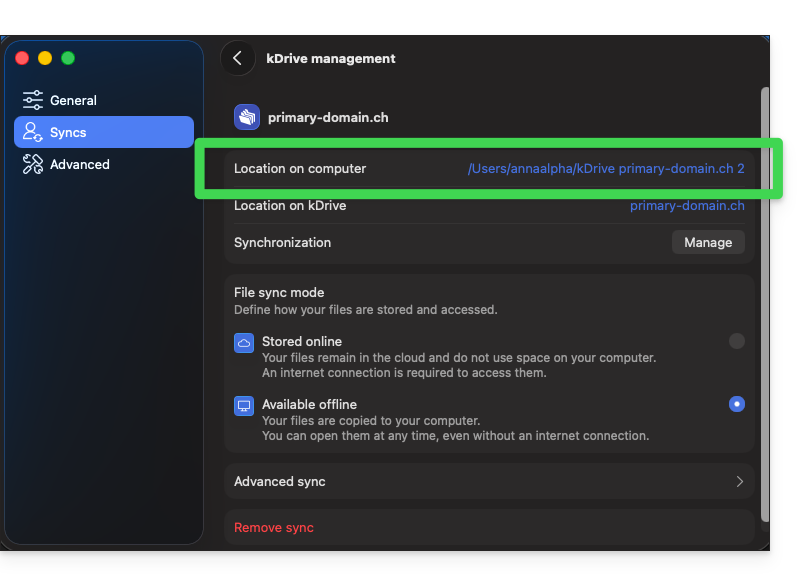
- Click here to access kDrive on your Infomaniak kSuite (❓: help) and make sure that all your data from the folder located in step 5 above is synchronized as you wish.
- If some data is missing on the web app side, it may be because you had excluded certain file types (❓: help) and these were not sent from your computer to the cloud... You should therefore remove the exclusions if necessary and then restart the procedures from step 3 above.
- At this point, if you have followed all the steps above, your entire kDrive is synchronized, so by definition, everything is present on Infomaniak's servers:
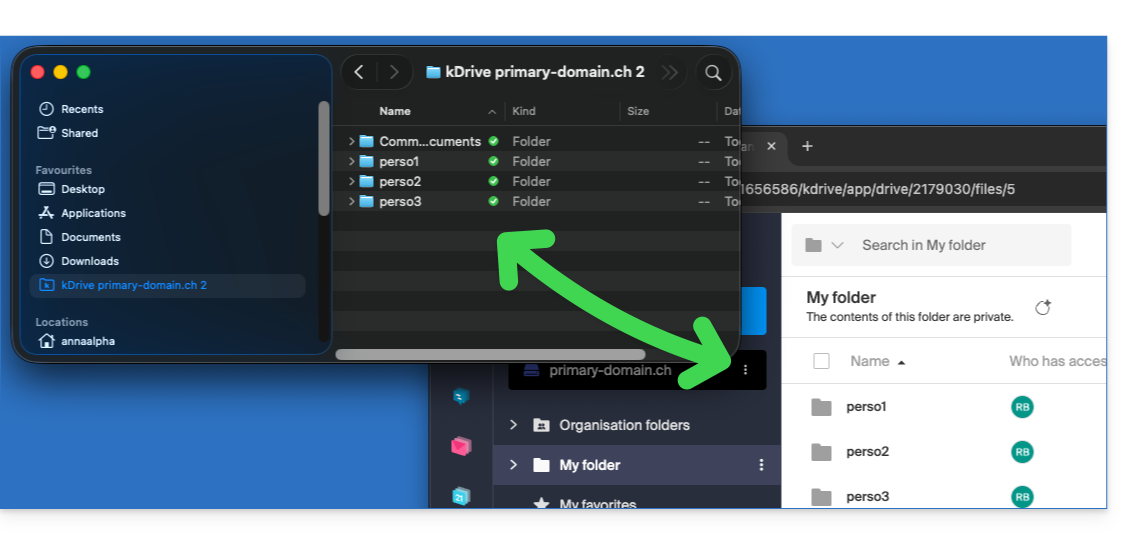
2. Steps for switching to the new local storage folder
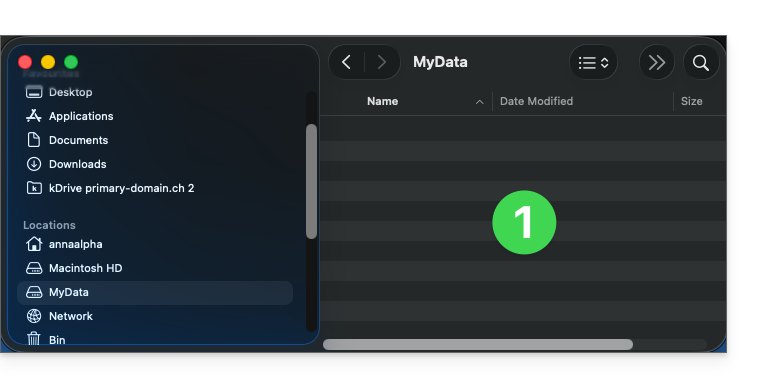
- The new disk on your computer is ready to store your data:
- Go back to the settings of your synchronization in the kDrive application:
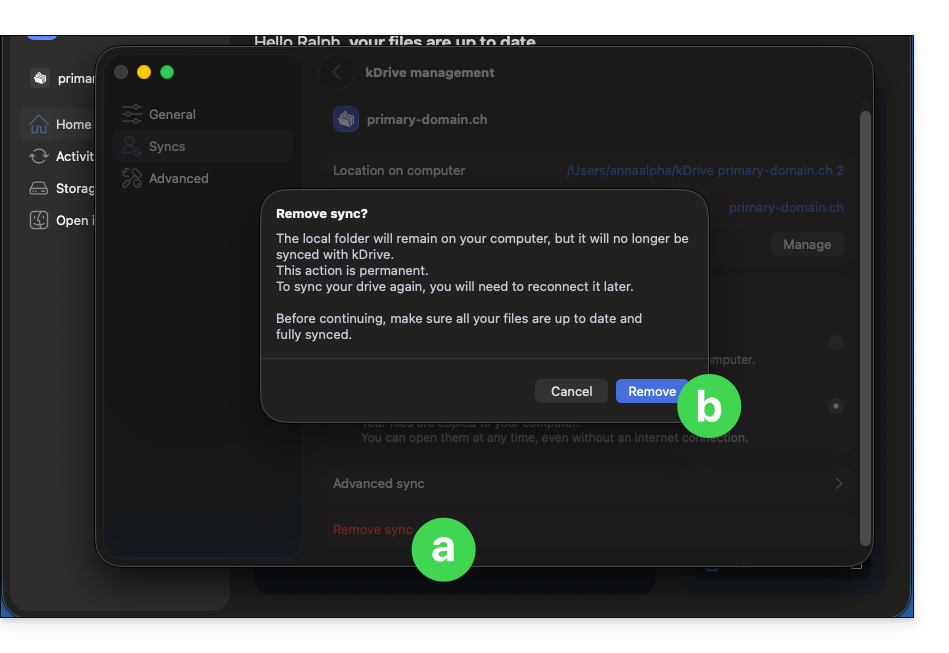
- Click on the red indicator to remove the synchronization and confirm:
- Click to restart synchronization with your kDrive:
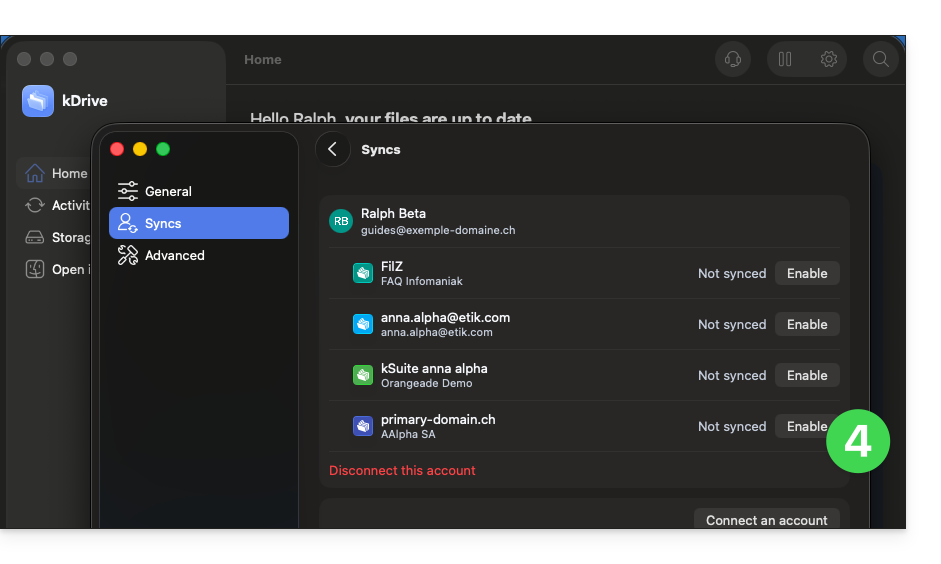
- By default, a new folder in the same location as the old one would be created without any action on your part.
- Click the button to change the folder and choose a different location:
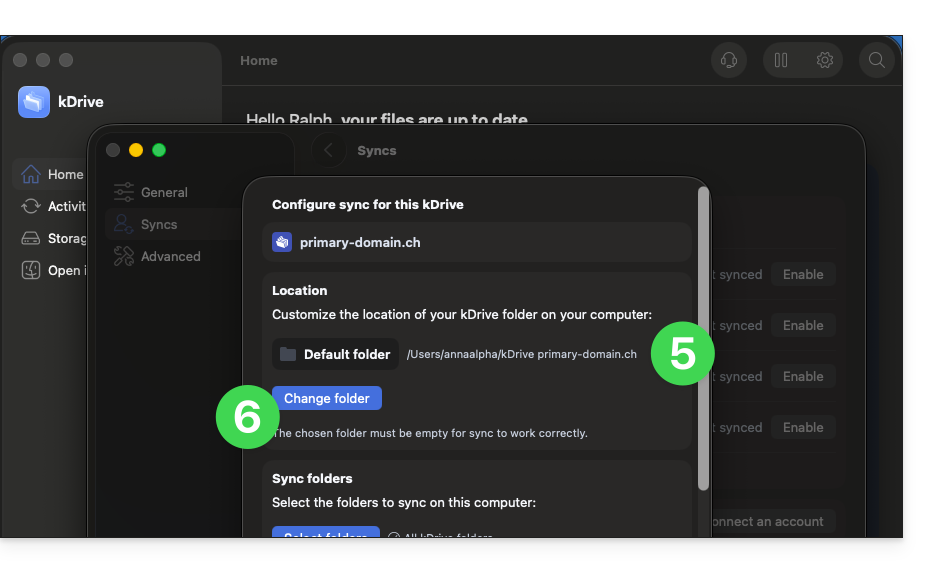
- Select the new location, for example, the desired hard drive, create a new “root” folder there to store your data, and click the button to open it:
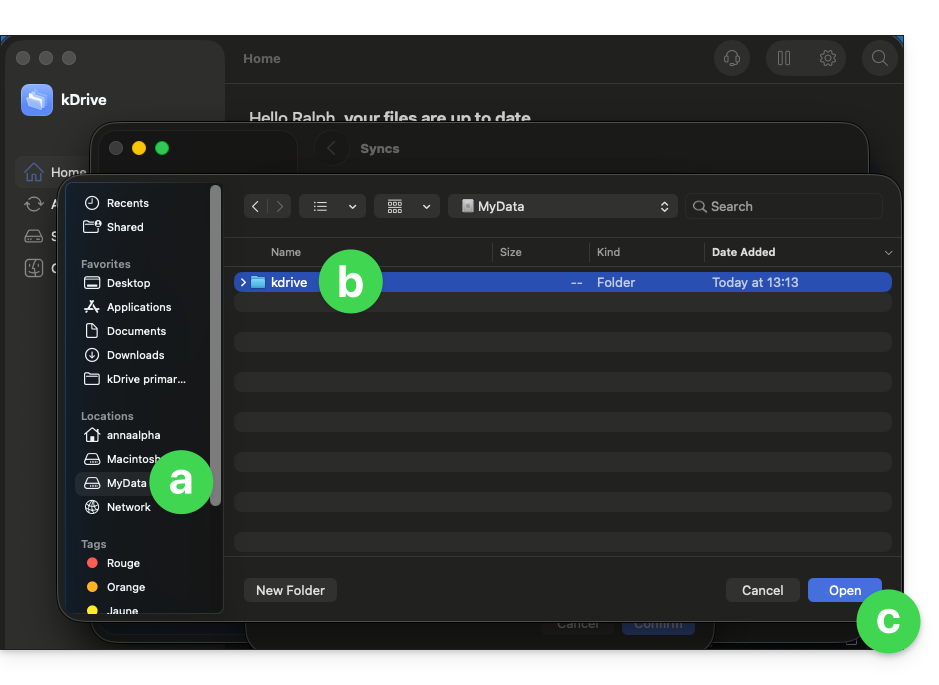
- You cannot simply choose the hard drive and select it without first creating a “root” folder.
- You also cannot select a folder that is not empty.
- The path to the new location is displayed; you can return to the default location if needed:
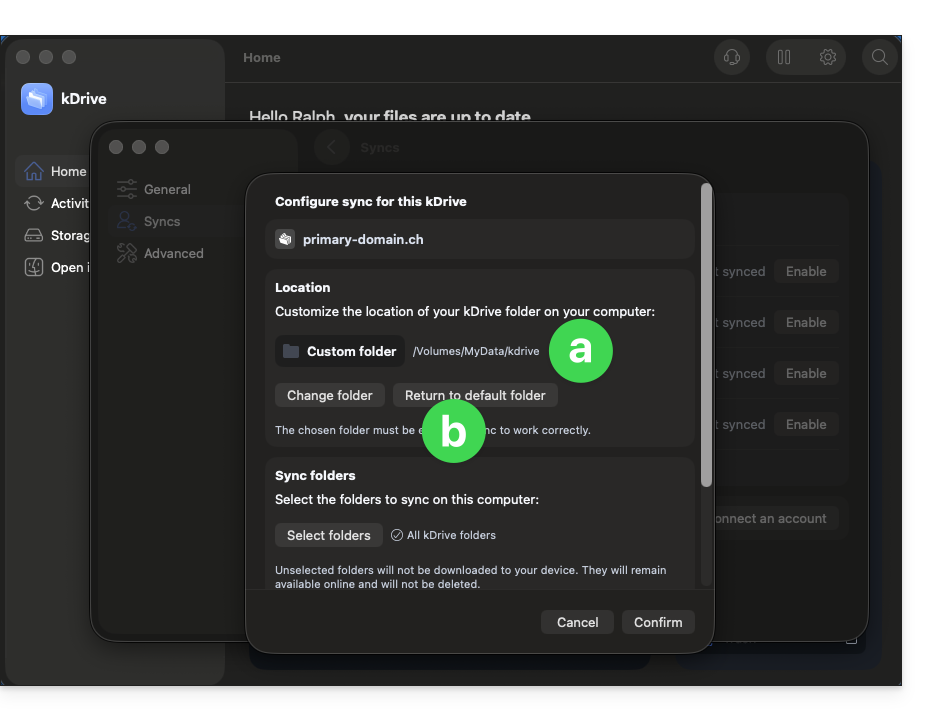
- Scroll down the window and disable Online mode to store your data locally on your computer (❓: help).
- Apply your choices by clicking Confirm:
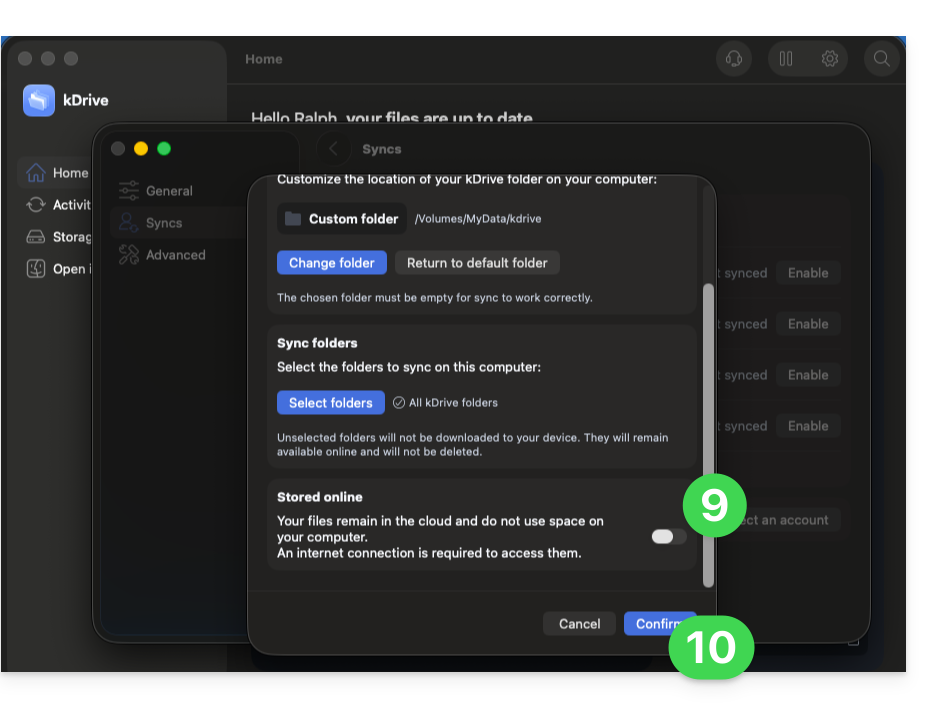
- The download of the kDrive data located on Infomaniak's servers will begin and continue entirely in the background to the folder named
kdrive: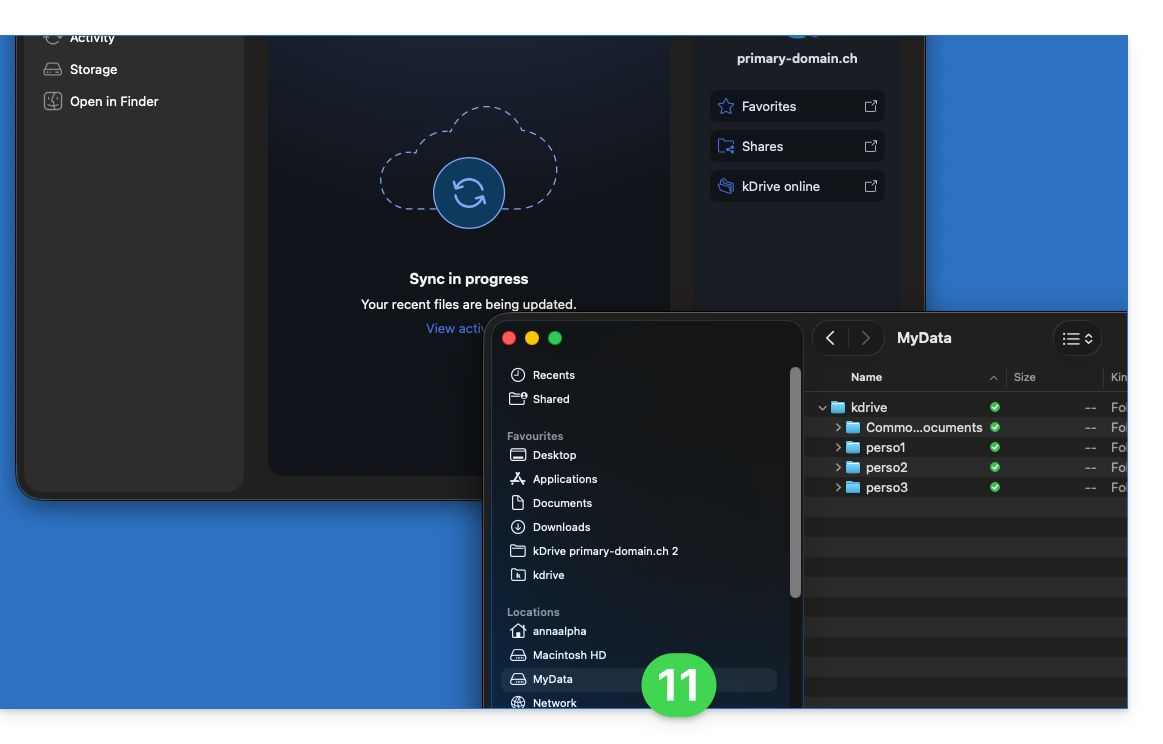
- Refer to this other guide to download only specific folders.
- The old folder
kDrive primary-domain.ch 2can now be deleted from the hard drive, as it is no longer used (but it is recommended to keep it for a while to ensure that the migration has been completed).
Link to this FAQ: https://faq.infomaniak.com/2856
Has this FAQ been helpful?