Knowledge base
1000 FAQs, 500 tutorials and instructional videos. Here, there are only solutions!
Configure your Site Creator store
This guide explains how to customize and configure the online store module in Site Creator.
Setting up a store in Site Creator
Prerequisites
- Access Site Creator:
- Click here to access the management interface for your product on the Infomaniak Manager (need help?).
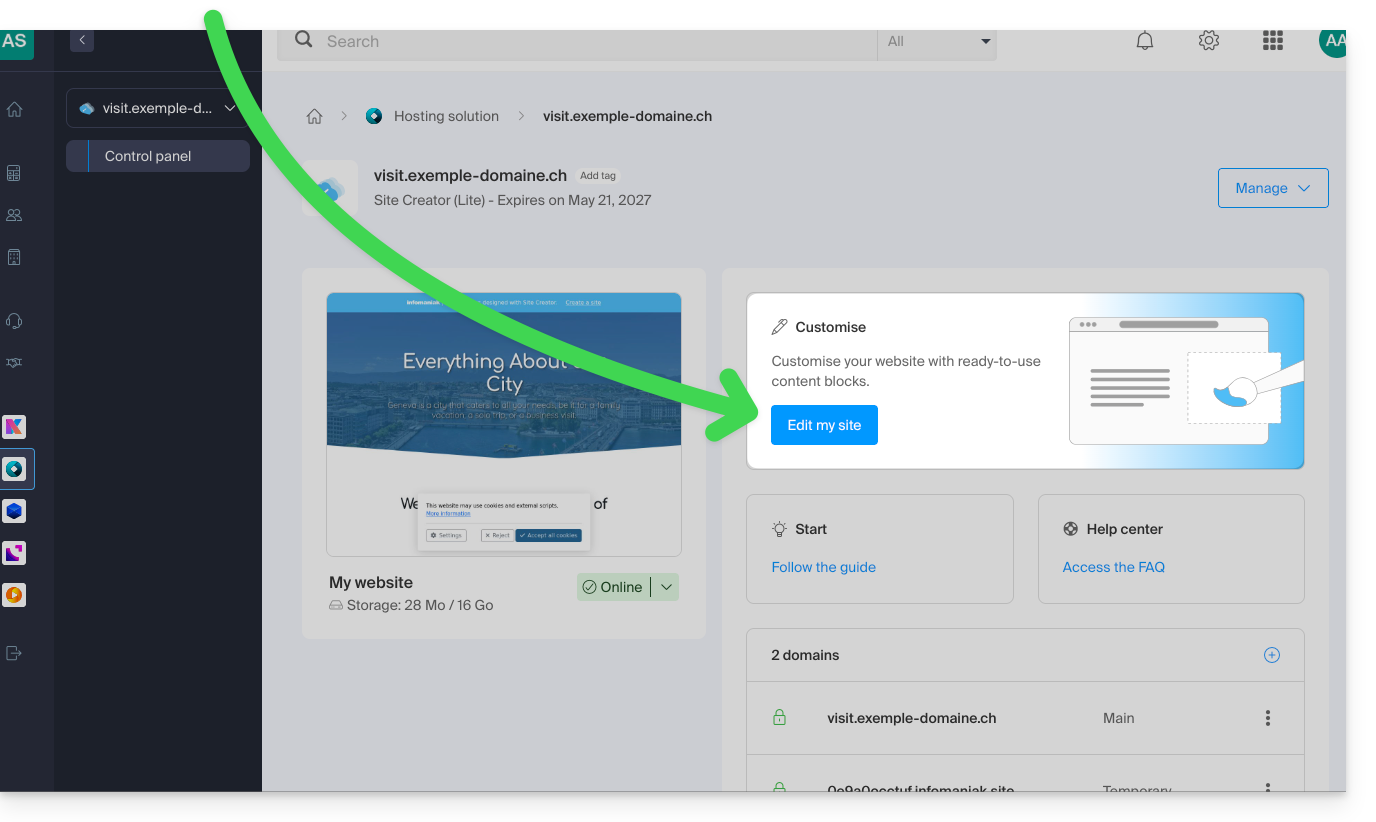
- Click directly on the name assigned to the Site Creator in question.
- Click on the Edit my site button to launch the editor:
To manage the general settings of the e-commerce system (currency, taxes, etc.) after adding the module:
- Hover over the added store module on your page.
- Click on Settings.
Once you are in Settings, several sub-menus appear on the left, allowing you to configure other parameters:
⚠️ All amounts entered must be in US format, using a period for decimals, i.e., XX.XX
Payment methods
Stripe and Mollie are external payment providers, and they charge fees for each purchase. These fees are independent of Infomaniak's services. For more information on the associated fees, please refer to the respective pricing policies of these providers.
To use the services of Stripe and Mollie, you must have a SIRET number in France or an IDE in Switzerland. In addition, you must have a valid company registered in the commercial register of your country to use the services of Stripe and Mollie.
Delivery Methods
You can create multiple delivery methods:
These will then be offered during the checkout process:
Among the parameters for creating a shipping method:
- pricing (including free shipping from a certain amount)
- eligible countries
- shipping costs based on weight
- delivery times

Four email templates are predefined and cannot be deleted. They cover all email communication related to an order, both for the customer and for the store manager.
You can customize existing messages and add new ones (and then delete these additional messages if necessary):
- Choose when the email should be sent (or simply disable the message to keep it without using it):
- new order email (to notify you)
- order processed email (customizable)
- delivery note in PDF format (customizable)
- invoice also generated and available in PDF format on your Stripe/Paypal/Mollie account
- Variables can be inserted into each field to maximize text customization using the elements contained in the command and the information provided by the buyer:
Store homepage
- Display of product categories, if any
- Presentation of random products
- etc.
Product Management
To manage products, add new ones, or delete existing ones:
- Hover over the module in the upper left corner.
- Click on Products.
You will find the first 3 example products:
Rearrange your products by dragging and dropping them.
Click on a product to adjust its details and the category it should be in (see below). You can, for example:
- create attributes (e.g., color) to offer the same product in multiple versions/price points
- define whether the product should be digital (virtual), for example a PDF, ZIP, or MP3 file, and therefore downloadable after purchase
At the bottom of the product sheet editor, find other products from your list to link them and offer them to the visitor.
At the very bottom of the product editor window, choose to hide the product from your visitors if necessary.
To finish and return to the product list, save the changes using the button at the bottom.
Delete or duplicate a product
On the product editing page, click at the bottom on the action menu next to the save button to choose whether to delete the product or duplicate it.
Stock / inventory management
In the same action menu, manage inventory directly on the list of your products (to edit inventory in bulk).
However, each product page allows you to edit the inventory and also enter the SKU (stock keeping unit) and its barcode (ISBN).
Product Categories
Your products can be organized within Categories and sub-categories, which will then be displayed according to the design of your website.
Click on Categories in the sub-menu on the left-hand side of the store administration panel, under Products.
Define an image to illustrate your category.
Hide a category if needed (this does not hide the products it contains).
Promo code
A promo code allows you to apply a discount (in % or currency) to an order.
Click on the Promo Code submenu on the left side of the store administration panel, under Products.
You can specify:
- its expiration date
- its possible minimum amount
- its name (e.g., "Special Christmas Discount")
- its format ("JOYEUXNOEL")
Export the list of your products
Export your product list to a CSV file (.csv format) using the action menu located in the top right corner of your product list.
Order Management
To manage placed and pending orders:
- Hover over the module in the top left corner.
- Click on Settings.
- Click in the Orders submenu on the left side of the store's administration panel.
Export your order list
Export your order list to a CSV file (.csv format) using the Download button located to the right of the order search bar.
Customer Management
To manage customers (a customer provides personal information when placing an order):
- Hover over the module in the upper left corner.
- Click on Settings.
- In the left-hand panel of the store's administration area, click on Customers in the submenu.
Export your customer list
Export your customer list to a CSV file (.csv format) using the Download button located to the right of the customer search bar.
Link to this FAQ: https://faq.infomaniak.com/2842
Has this FAQ been helpful?