Knowledge base
1000 FAQs, 500 tutorials and instructional videos. Here, there are only solutions!
Manage the anti-spam filter
This guide explains how to activate the Infomaniak anti-spam filter, which helps to significantly reduce the number of unsolicited messages that may arrive in your Infomaniak email address if you share it with third parties.
Introduction
- Spam is an unsolicited message, often of an advertising or fraudulent nature, with the aim of promoting products, services, or carrying out online scams; fortunately, Infomaniak has implemented strategies to combat this form of digital pollution.
- Thanks to the anti-spam filter, the messages you actually want to see quickly will no longer be buried among dozens of other unwanted messages, as the latter will be automatically placed in a special folder, the
Spamfolder (or in the spam destination folder - read more below) and then automatically deleted after 30 days. - Moreover, the filter is automatically activated (❓: help) when creating a mail address within an Infomaniak Mail Service or when subscribing to a my kSuite / my kSuite+ offer.
Activate the option from the Infomaniak Web Mail app
Prerequisites
- You must have permission to manage the filter: it is possible that the Mail Service administrator has removed this right from your account (❓: help).
To access your Infomaniak email settings:
- Click here to access the Mail Infomaniak web app (online service ksuite.infomaniak.com/mail).
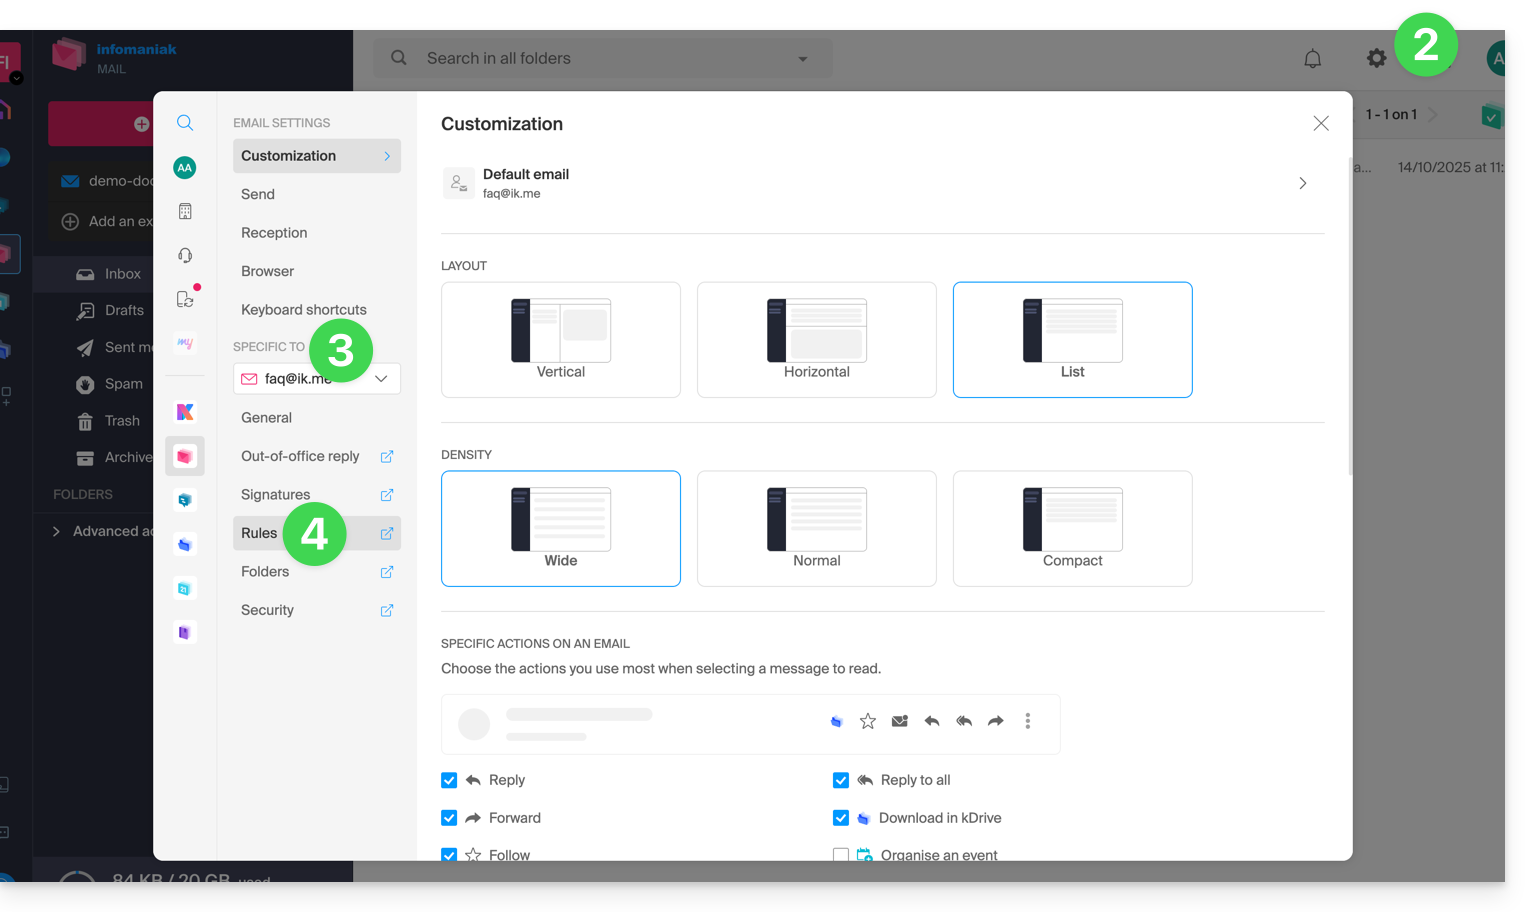
- Click on the Settings icon in the top right corner.
- Check or select the relevant email address from the drop-down menu in the left-hand menu.
- Click on Filters and rules:
- Enable the spam filter option; the effect is immediate (wait for the confirmation message to appear on the screen). In this case, all future messages with a header indicating a high spam score, and senders who have been blocked (❓: help), will go to the Spam folder:
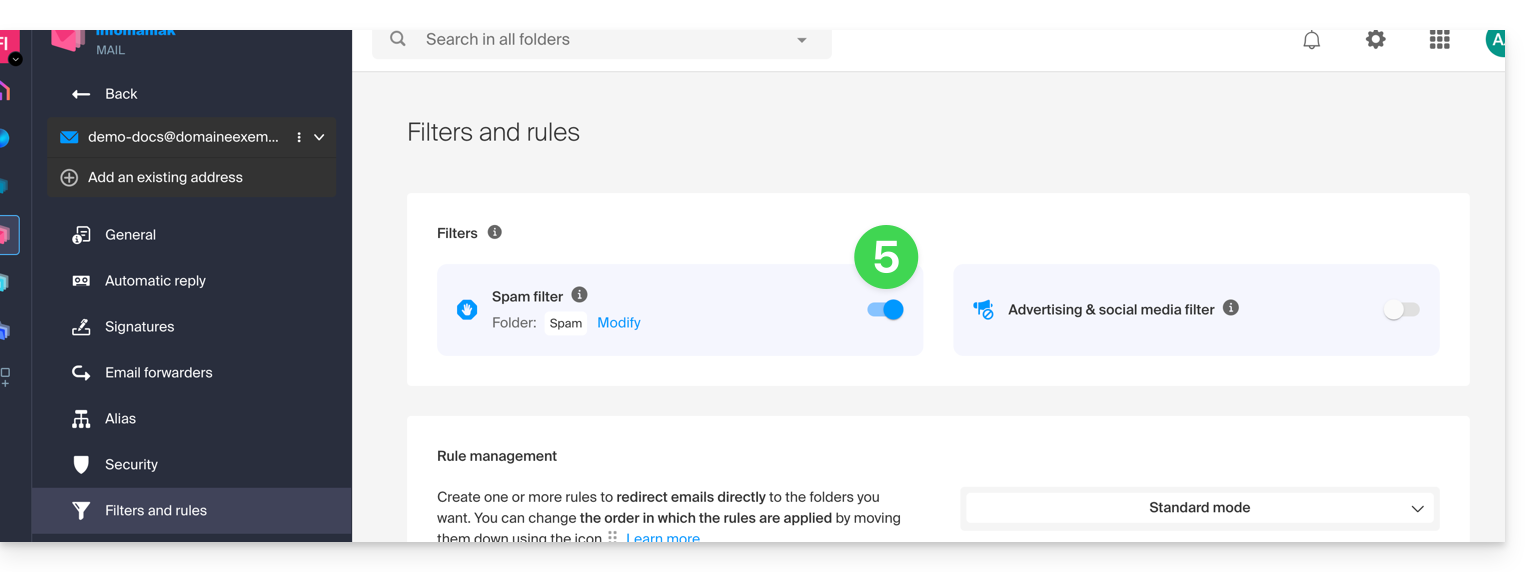
- Simply click the toggle switch again to disable the filter; in this case, all future messages will go to the inbox, including messages with a header indicating a high spam score.
Enable the option from a Mail Service
To access your Infomaniak email settings:
- Click here to access your product management on the Infomaniak Manager (❓: help).
- Click directly on the name assigned to the product in question.
- Click on the email address in question in the table that appears.
- Click on Filters in the left-hand menu.
- Enable the spam filter option; the effect is immediate:
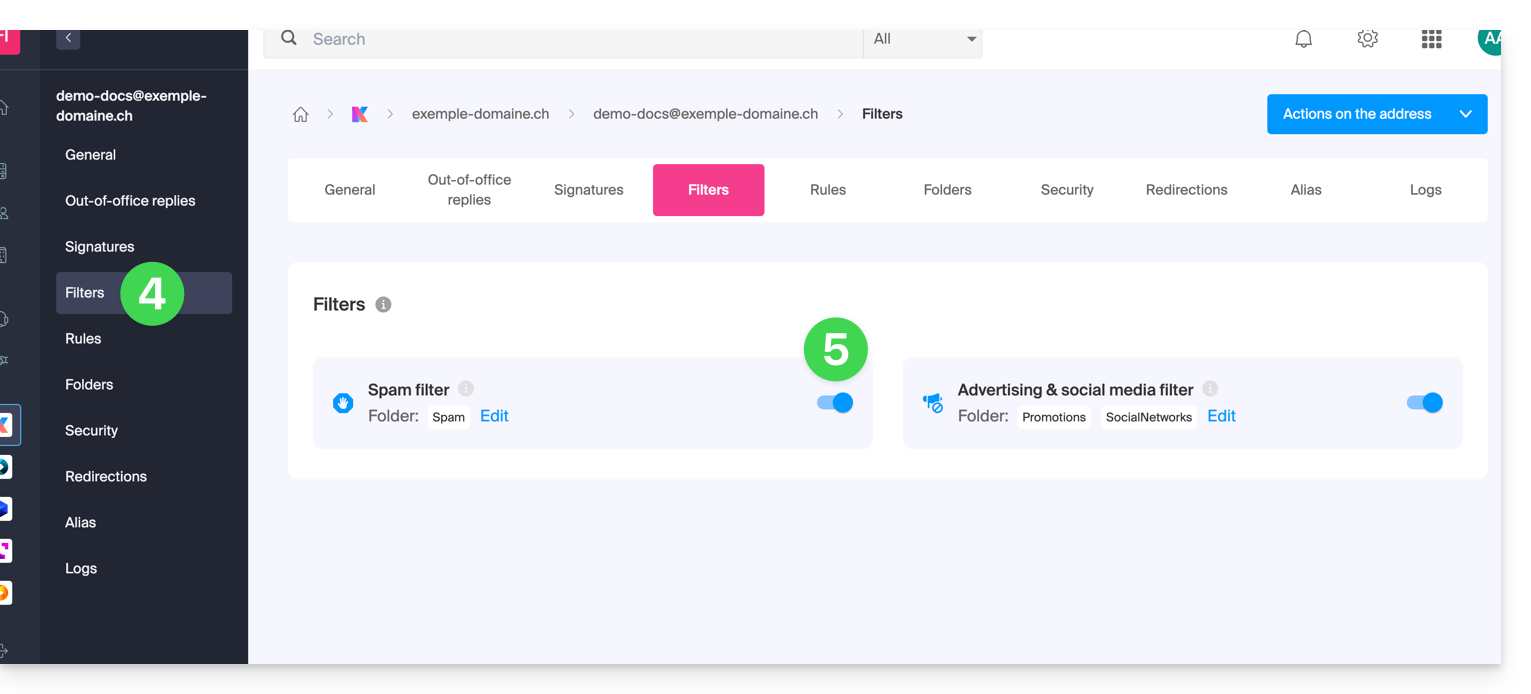
- Simply click the toggle switch again to disable the filter; in this case, all future messages will go to the inbox, including messages with a header indicating a high spam score (they can then be processed by your email software/client if it supports reading this type of header).
Note that you can enable it in bulk for multiple addresses at once (❓: help).
Customize the anti-spam filter
Change the location for spam
You can choose the default location for the folder where messages identified as spam will be automatically placed, similar to special IMAP folders (❓: help).
This setting is available where you have enabled the spam filter:
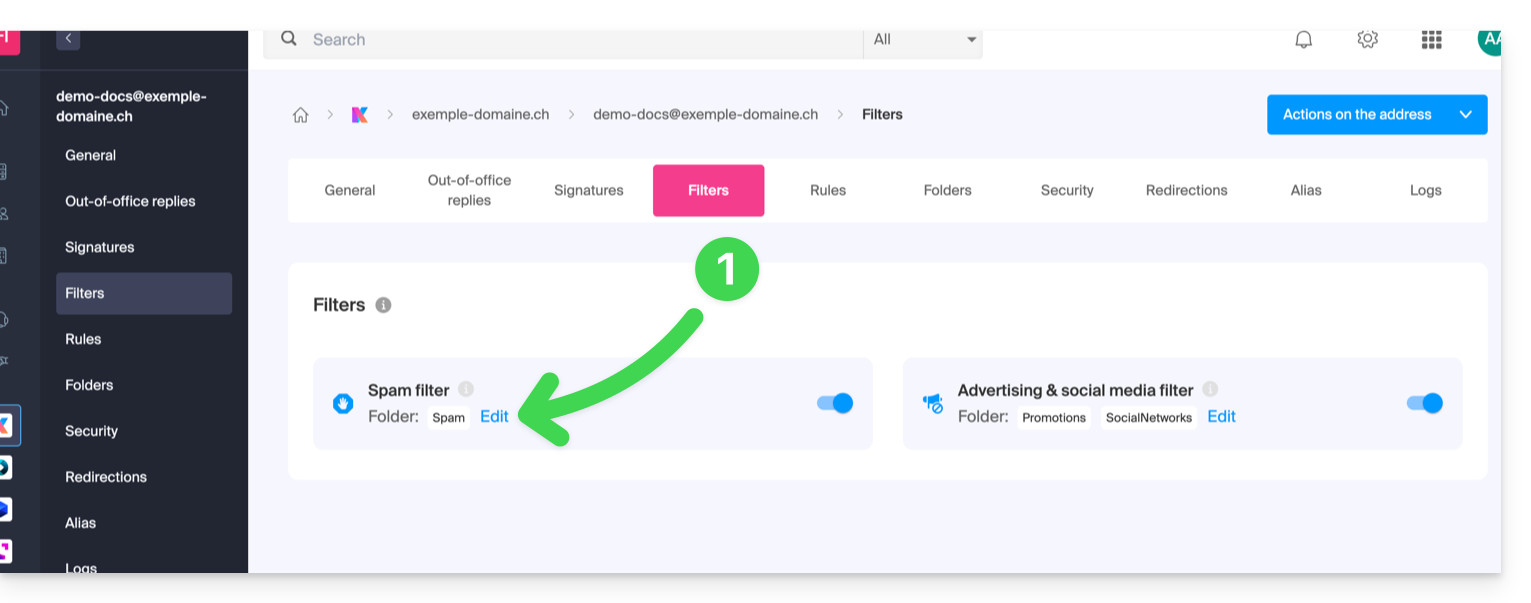
- Click on Edit:
- Click on the folder name to choose a different one (create a new one beforehand if necessary):
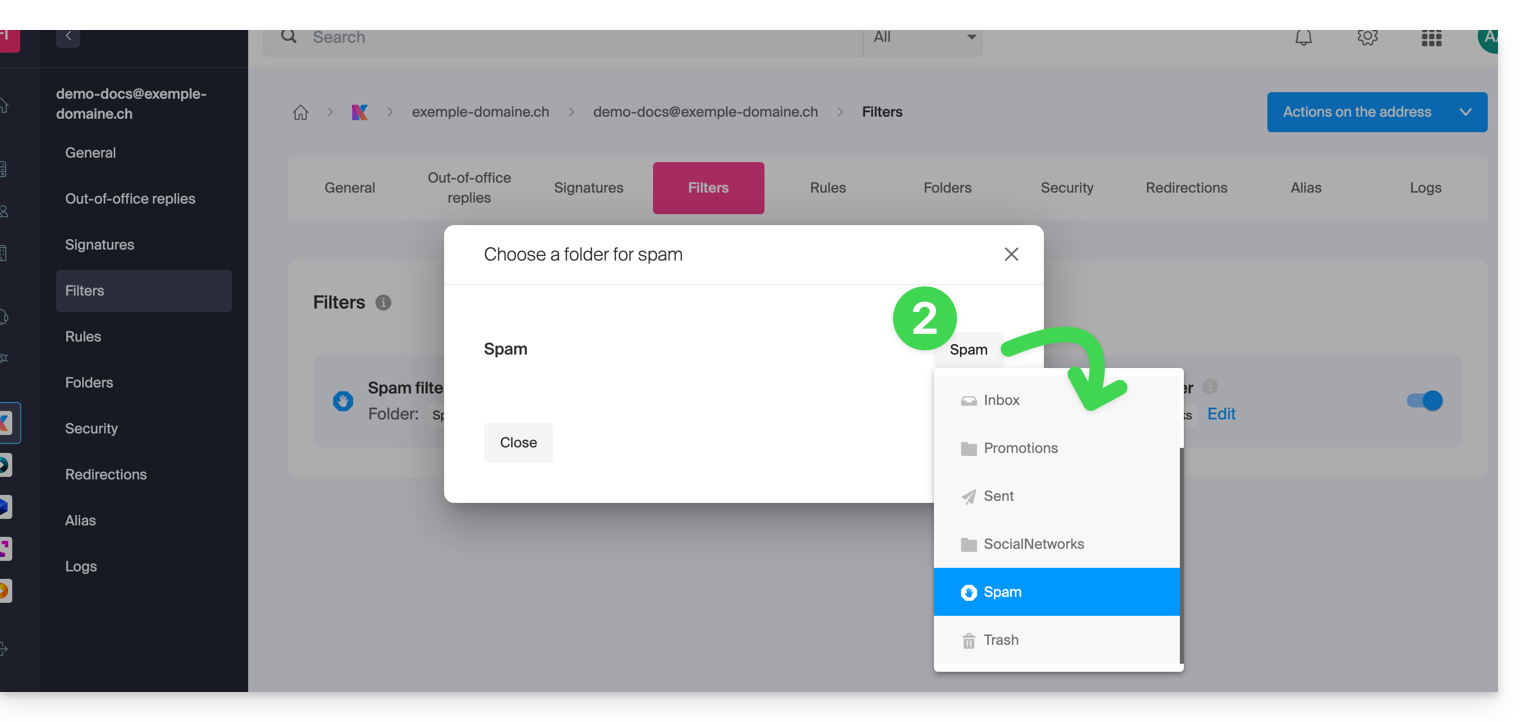
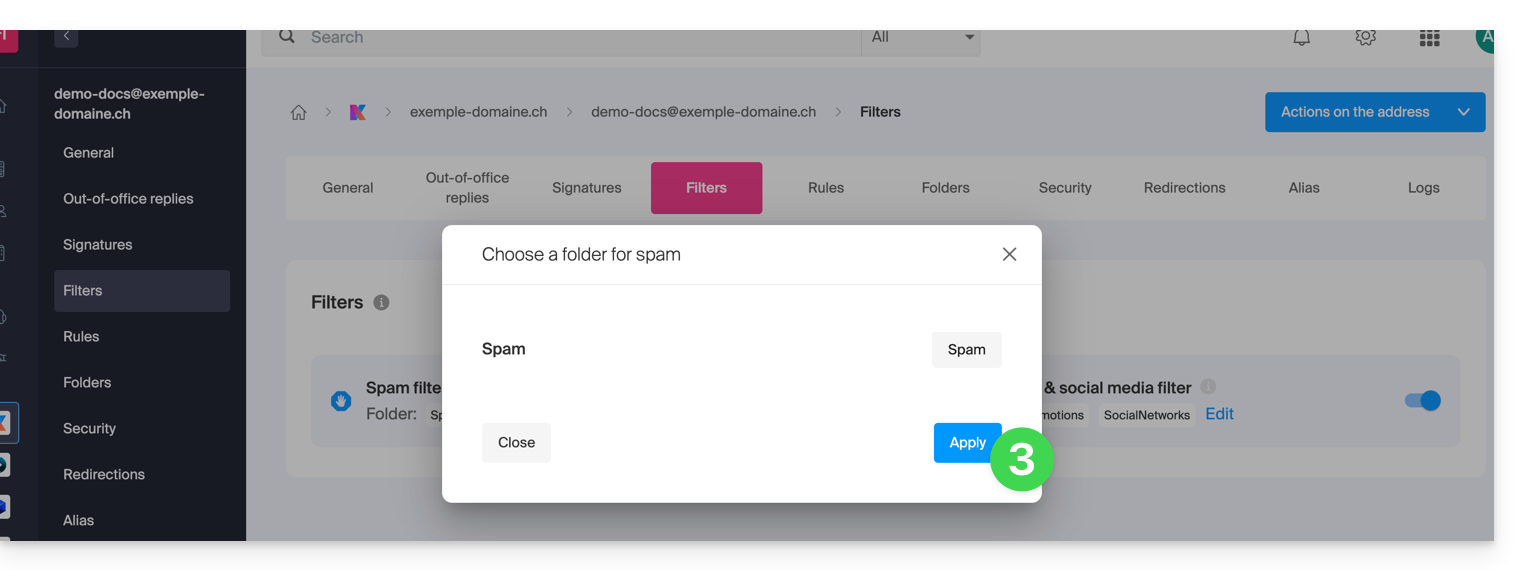
- Click the Confirm button:
Report a filtering issue or manually block senders
To report unfiltered spam or an email that was incorrectly filtered as spam (false positive), please refer to this other guide.
You can also specify in advance which senders should always go to the Spam folder or, conversely, if they should not be filtered (❓: help).
For enhanced security, enable the external email disclaimer (❓: help).
Link to this FAQ: https://faq.infomaniak.com/2838
Has this FAQ been helpful?