Knowledge base
1000 FAQs, 500 tutorials and instructional videos. Here, there are only solutions!
Ticketing: Customize the appearance of the pass
This guide explains how to configure the appearance of a pass (within the Infomaniak ticketing system). These settings will be available once step 1 is completed:
- Define the type during creation (subscription, ticket pack, etc.) as well as the basic information and settings
- Associate events with passes
- Configure the visual appearance and information related to the pass (below)
- Define and collect the information of subscribers who will be linked to the passes
3. Set up a visual for the passes
To do this:
- Click here to access the management interface for your product in the Infomaniak Manager (need help?).
- Click directly on the name assigned to the ticket office for the event.
- Click on Program in the left-hand menu.
- Click on Pass in the left-hand menu.
- Click on the name of the pass in question.
- Click on the Pass Appearance tab:

For PVC passes
PVC passes are available in a format that allows visitors to use them digitally on their phone, and allows the organizer to print them on a PVC card using a printer available for rent: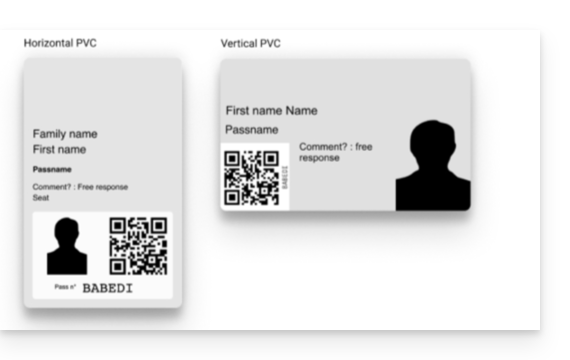
When selecting the design, you will need to choose between vertical and horizontal mode. You will then be able to choose the elements to display on the pass, as well as a background image:
For phone/paper passes
For phone/paper formats, the visitor can directly use the digital version on their phone or choose to download the PDF version to print it on an A4 sheet: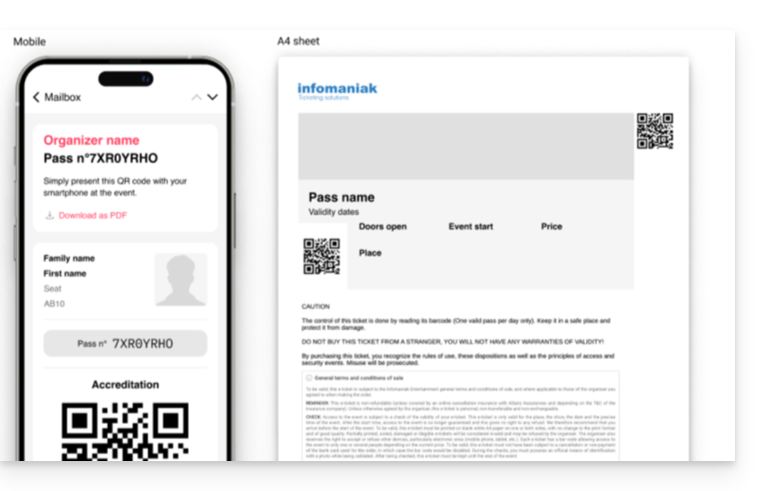
No configuration is required for the digital version, but you can assign a ticket template. To configure a ticket visual, please refer to this other guide.

The next step is todefine and collect subscriber information that will be linked to the passes.
Link to this FAQ: https://faq.infomaniak.com/2830
Has this FAQ been helpful?