Knowledge base
1000 FAQs, 500 tutorials and instructional videos. Here, there are only solutions!
Ticketing: Configure password request validation
This guide explains how to set up a validation system for passes or subscriptions (as part of the Infomaniak ticketing system).
Introduction
- This option allows you to create passes for which visitors must register, and you can validate their registration before they can use the pass.
- This feature will be useful for any restricted access or when the organizer needs to validate the request.
- This can include requests for accreditations, registrations for specialized courses requiring verification of certain documents, access to certain areas or events, etc.
Setting up the pass to be validated
To do this:
- Click here to access the management of your product in the Infomaniak Manager (need help?).
- Click directly on the name assigned to the ticketing system for the event.
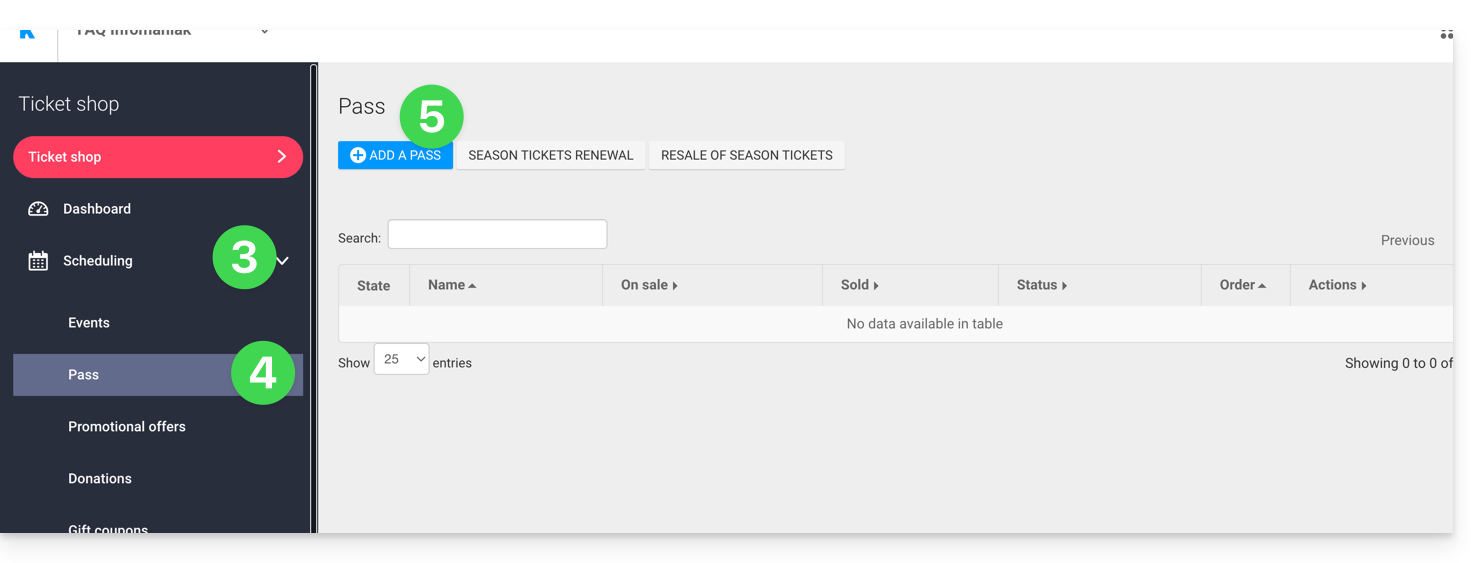
- Click on Scheduling in the left-hand menu.
- Click on Pass in the left-hand menu.
- Click on Add a pass:
- During the pass creation process, enable Pass validity by setting it to Yes:
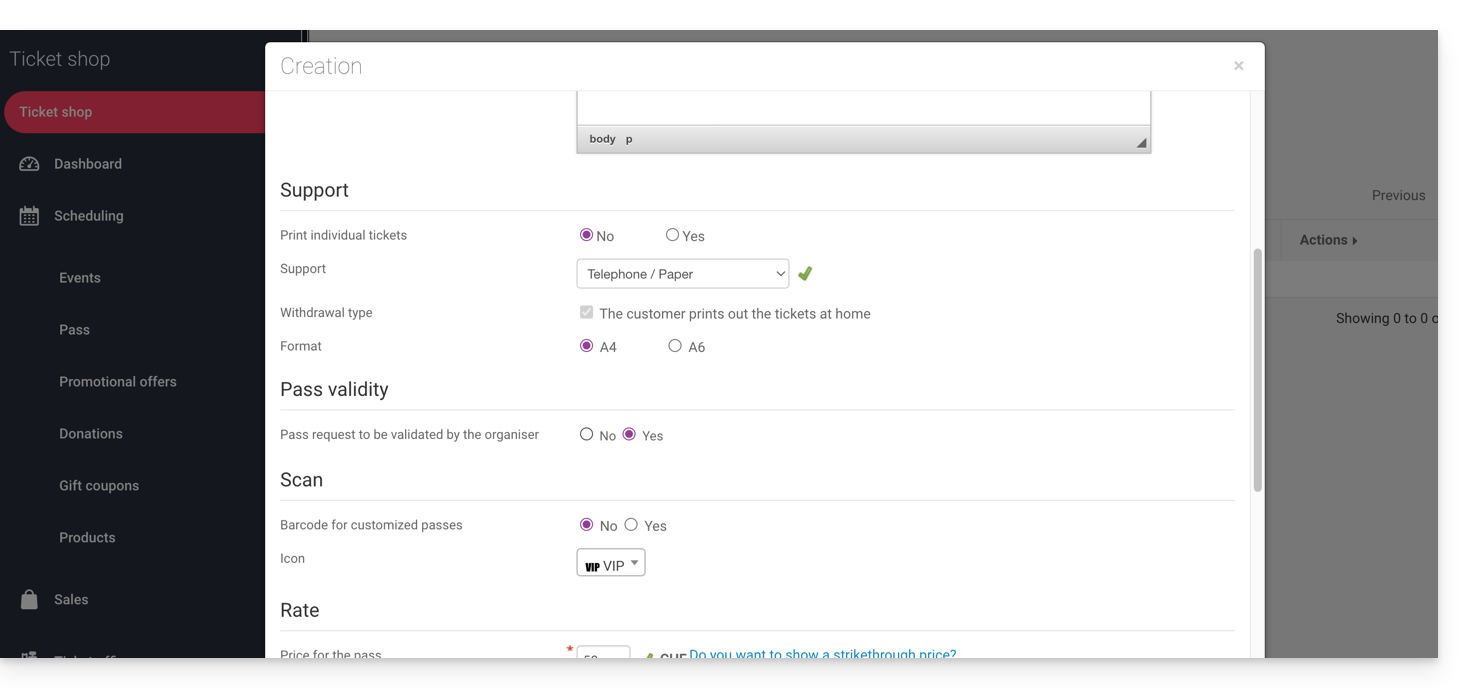
- This action will automatically enable the options required for this feature, namely a free, custom pass with a minimum of 0 tickets.
Once the pass has been created, click on it to configure the information requested from the visitor: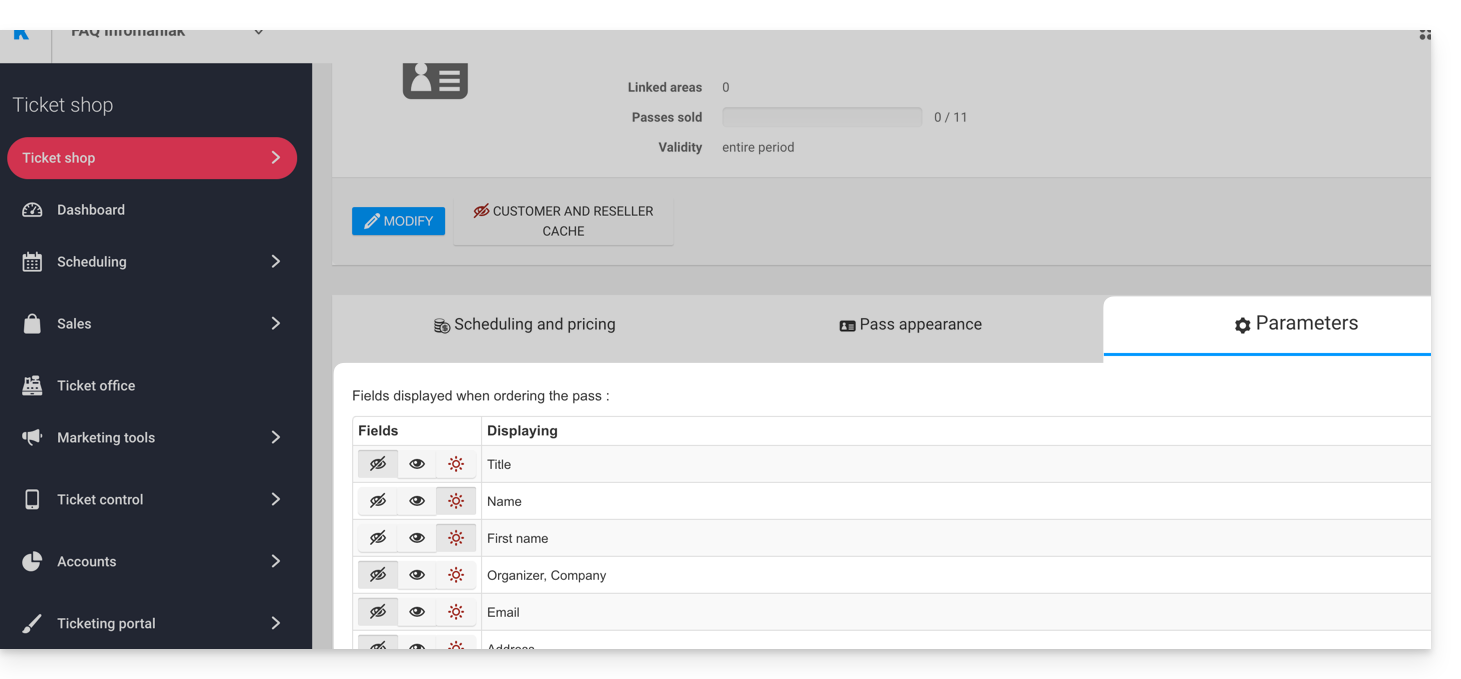
This allows you to make each field hidden , visible
, or required
…
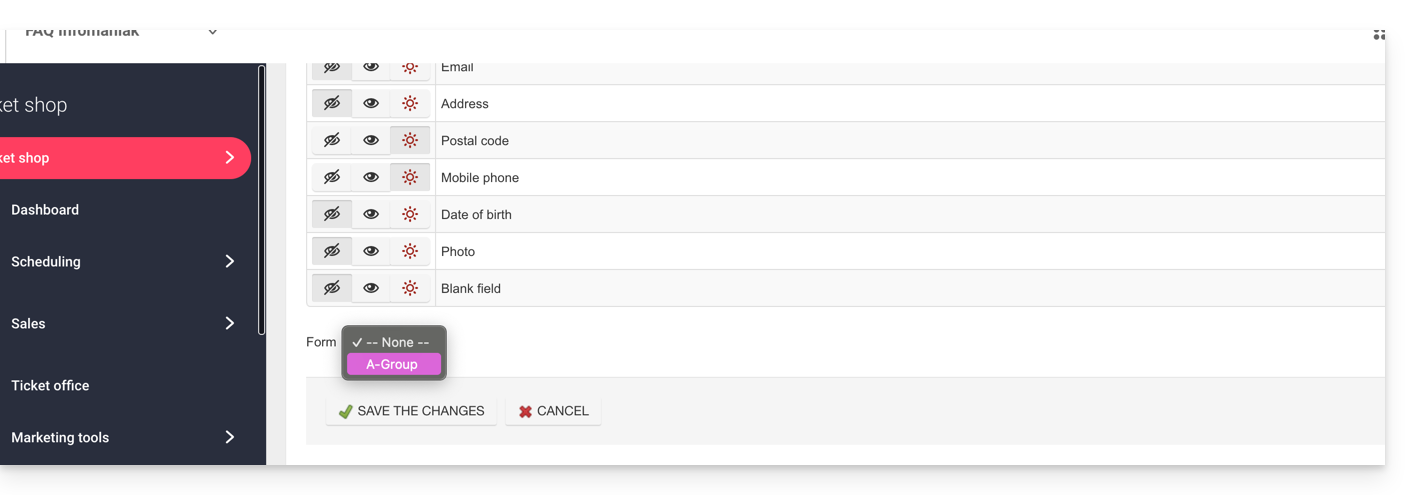
If you need to request additional information or supporting documents, you can add them using the form feature:
- Create a form for each pricing plan with the information you need from the visitor.
- Associate the form with the pass by price:
Procedure for requesting a pass to be validated
The visitor can order the pass just like any other order process. However, there are a few differences to note:
- The terms used during the online process will refer to validation requests instead of orders.
- The visitor will receive an initial email confirming that their request has been received and that they will be notified when the request is approved.
- The visitor will receive the pass in a confirmation email when the pass is approved.
Procedure for validating a request
To validate a pass validation request from a visitor, go to the list of passes:
- Click here to access the management of your product in the Infomaniak Manager (need help?).
- Click directly on the name assigned to the ticketing system for the event.
- Click on Sales in the left-hand menu.
- Click on Pass in the left-hand menu.
If needed, use the filter to display only the passes that need to be validated and select the desired pass category: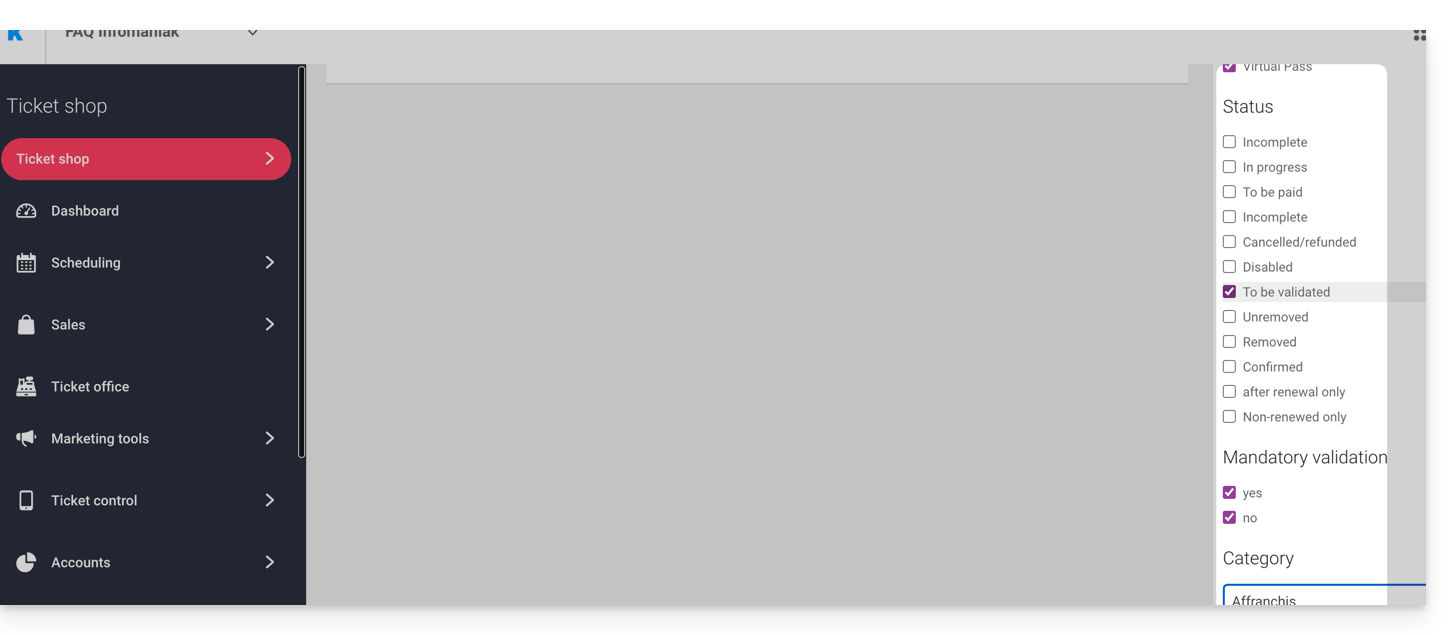
Verification before validation
Click on the passes to be checked. All the information can be found on the pass page.
If additional fields have been added via a form, they will be located in the Edit information section: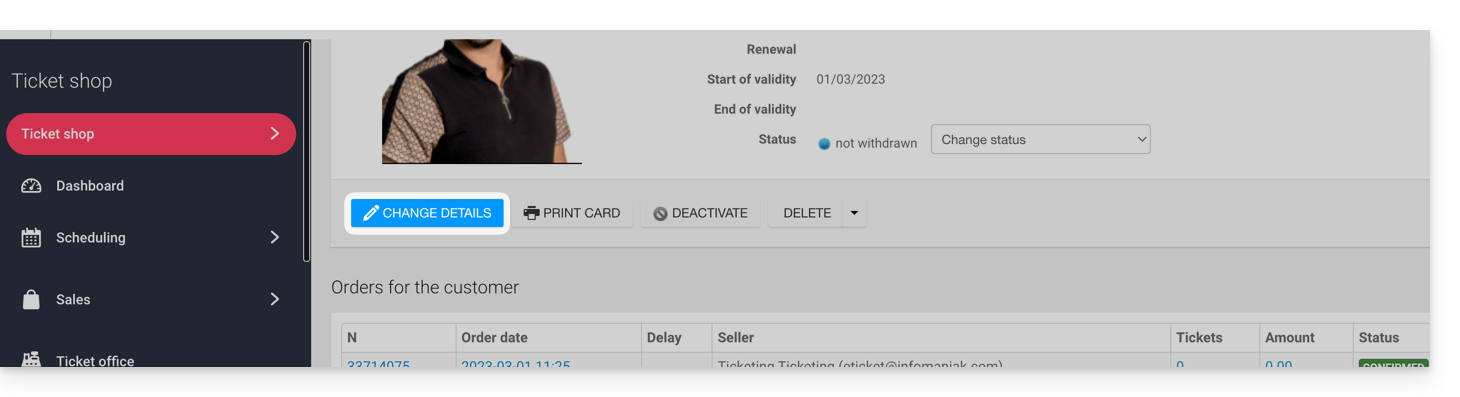
Example with files that the user has uploaded: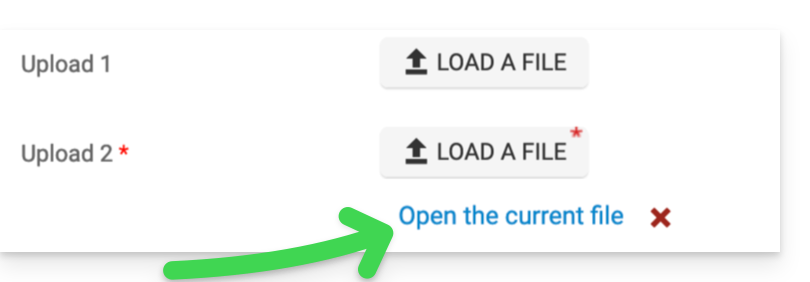
Modify the status
Change the status to Valid or Removed, or not, so that the pass is valid:
An email will be automatically sent to the visitor with the information needed to complete their pass and add the tickets.
In the event of a refusal, it is possible to send an email to the visitor inviting them to change the information.
It is also possible to do this on the previous page using multiple selections, for example: 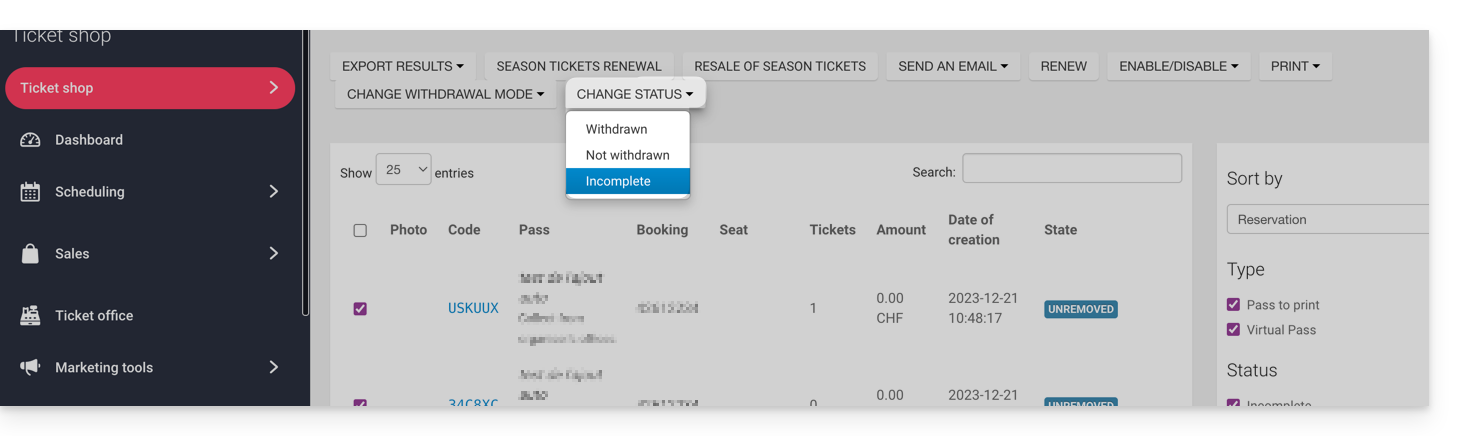
Link to this FAQ: https://faq.infomaniak.com/2829
Has this FAQ been helpful?