Knowledge base
1000 FAQs, 500 tutorials and instructional videos. Here, there are only solutions!
Back up Google Workspace with Acronis on Swiss Backup
This guide details how to back up a Google Workspace account (Gmail, Google Drive, Google Calendar, …)using Acronis on Swiss Backup, the backup solution in a Swiss independent cloud.
It is also possible to back up other types of data.
Prerequisites
- Have an Swiss Backup Infomaniak account with an available device quota (minimum 1) for a Google Workspace backup (1 license per Workspace user to be backed up):
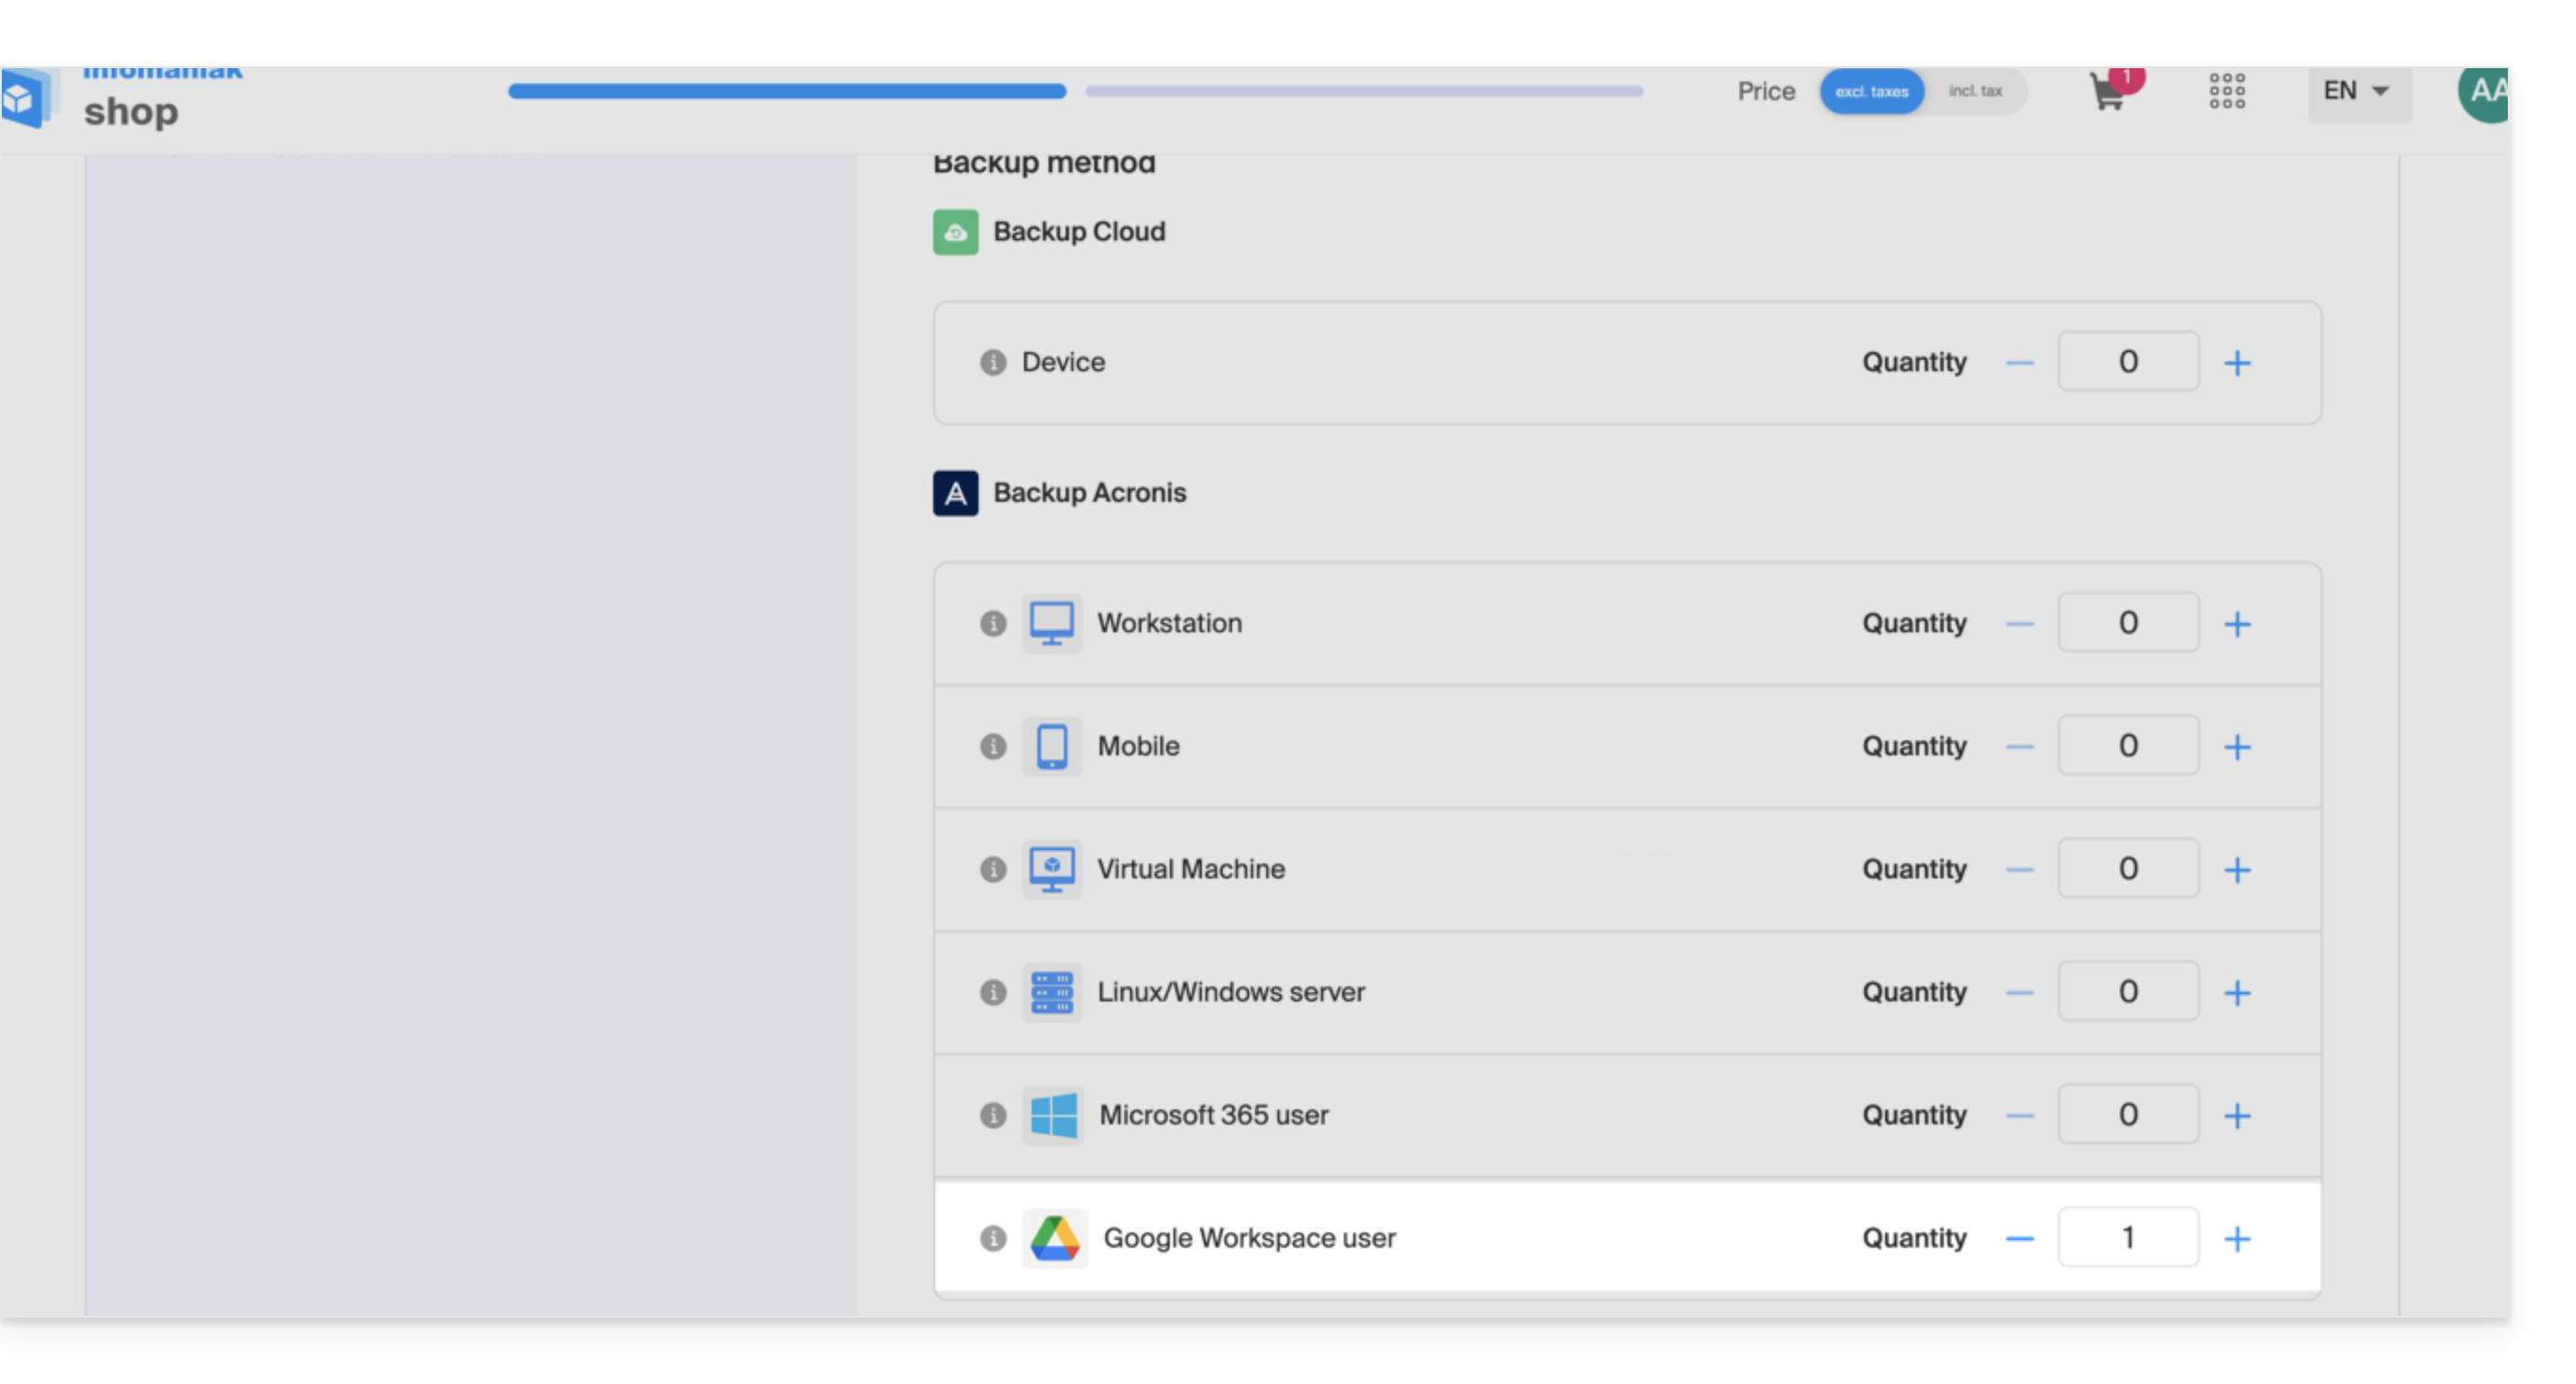
- If necessary, increase the device quota according to your needs.
- Add the device to the Infomaniak Manager to receive the login credentials.
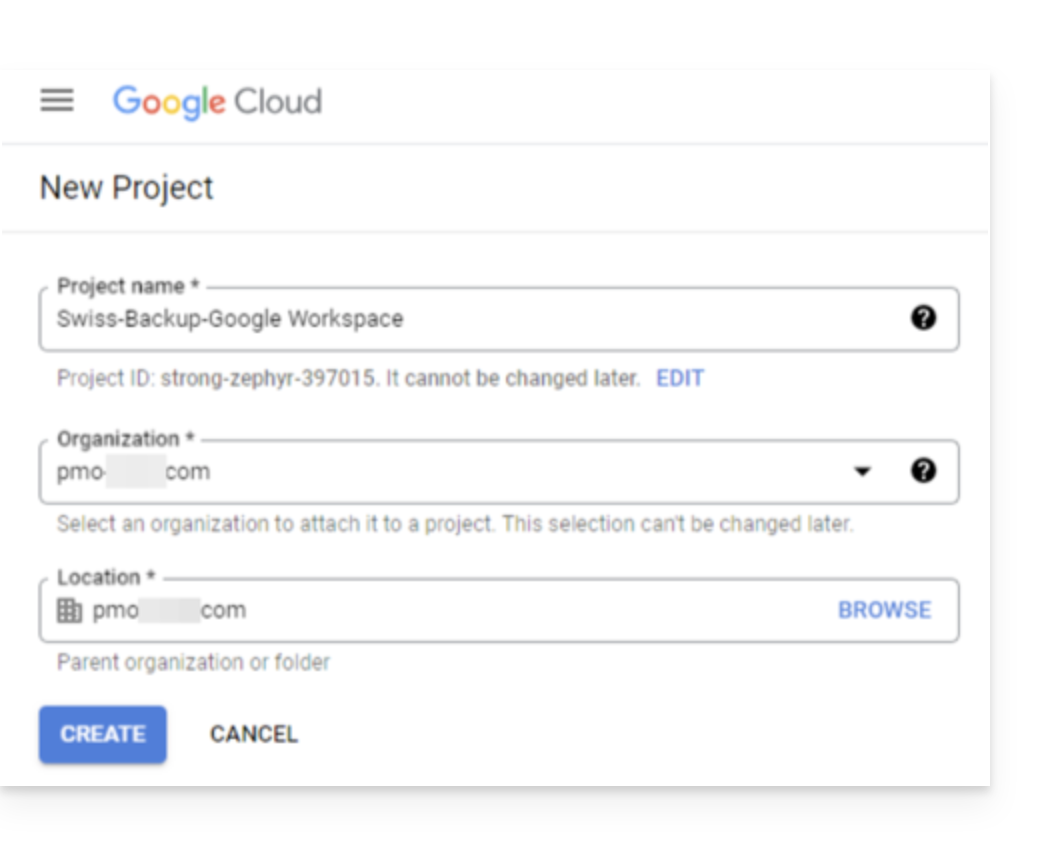
- Create a new project on Google Cloud Platform (console.cloud.google.com) as a super administrator:
- Consult the Acronis documentation on this topic:
- Allow 20 to 30 minutes to configure everything.
Allow Acronis to access Google Cloud Platform
In the Google Cloud Platform console:
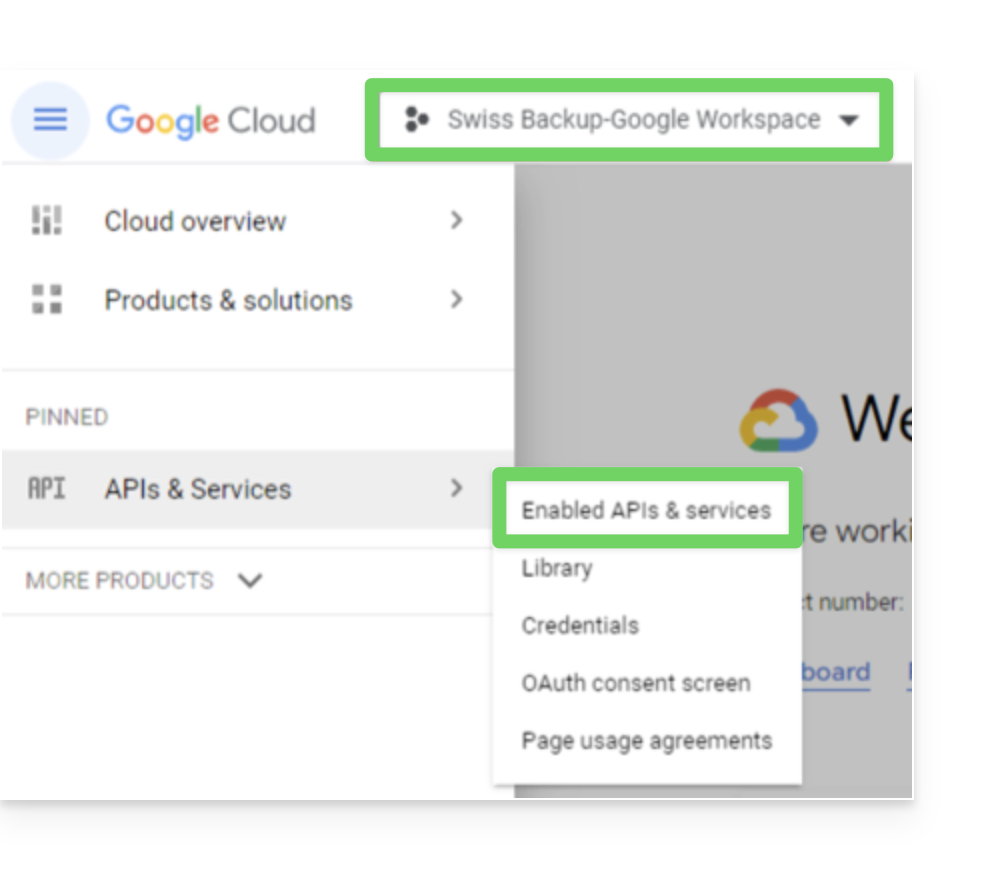
- Select your new project.
- In the navigation menu, select APIs & Services > Enabled APIs & Services:
- Disable all APIs that are enabled by default in this project, one by one:
- Scroll down to the Enabled APIs and services page.
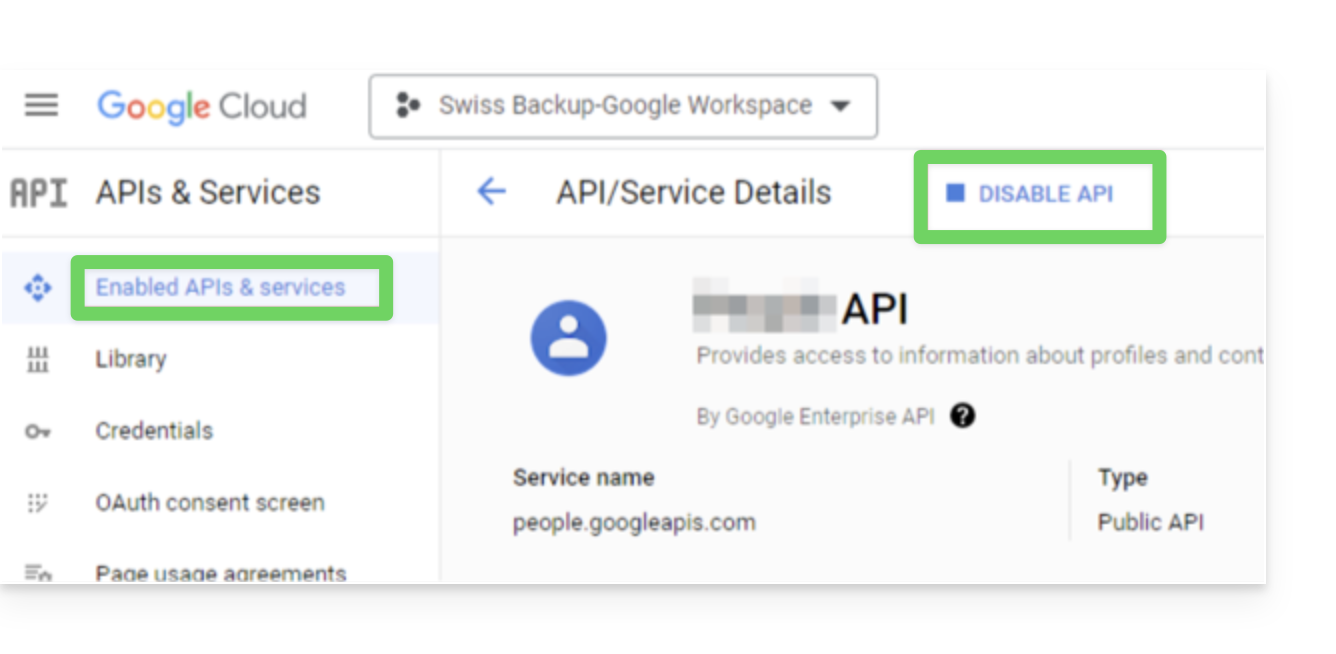
- Click on the name of an enabled API.
- On the API/Service details page that opens, click on Disable and confirm:
- Go back to the previous page and repeat the process for the next API.
- From the navigation menu, select APIs and services > Library.
- In the API library, enable the following APIs one by one, using the search bar to find the required APIs:
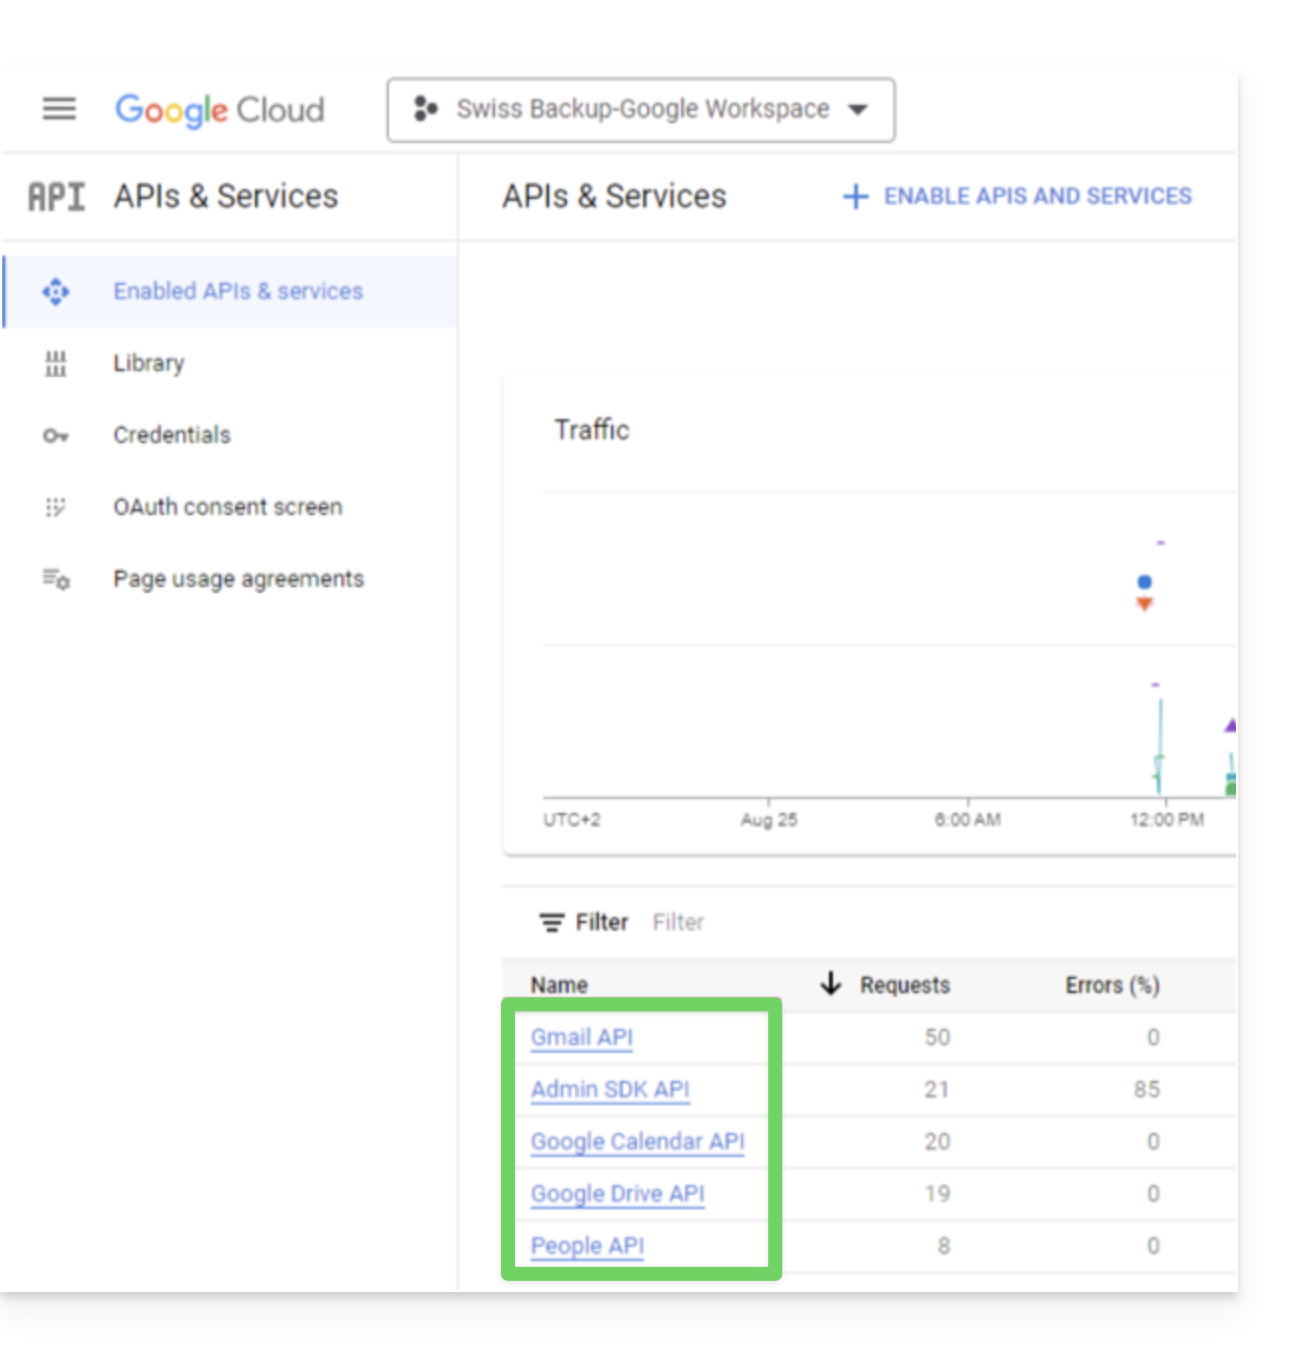
- Gmail API
- Google Drive API
- Admin SDK
- Google Calendar API
- Google People API
- Click on its name then click on Enable.
- To search for the next API, go back to step 5.
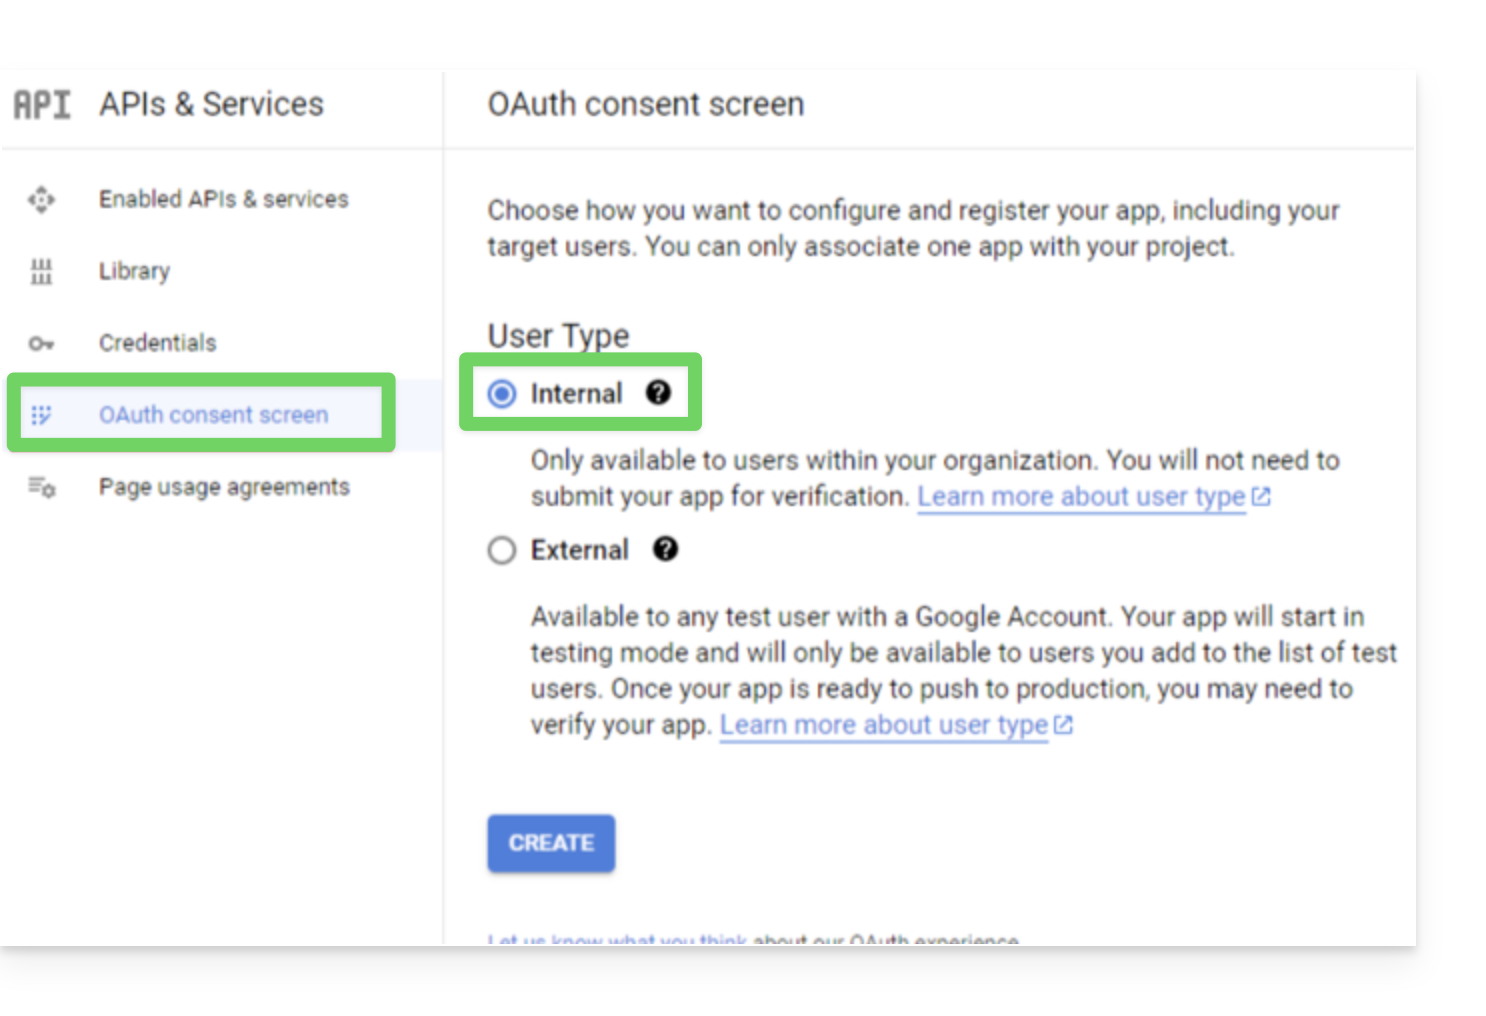
- From the Google Cloud Platform navigation menu, select APIs & Services > OAuth consent screen.
- In the window that opens, select Internal for the user type, then click Create:
- In the Name field for the application, enter a name for your application.
- In the User support email field, enter the super administrator's email address.
- In the Developer contact information field, enter the super administrator's email address.
- Leave all other fields blank, then click Save and continue.
- On the Scopes page, click Save and continue without making any changes.
- On the Summary page, check your settings and then click Back to Dashboard.
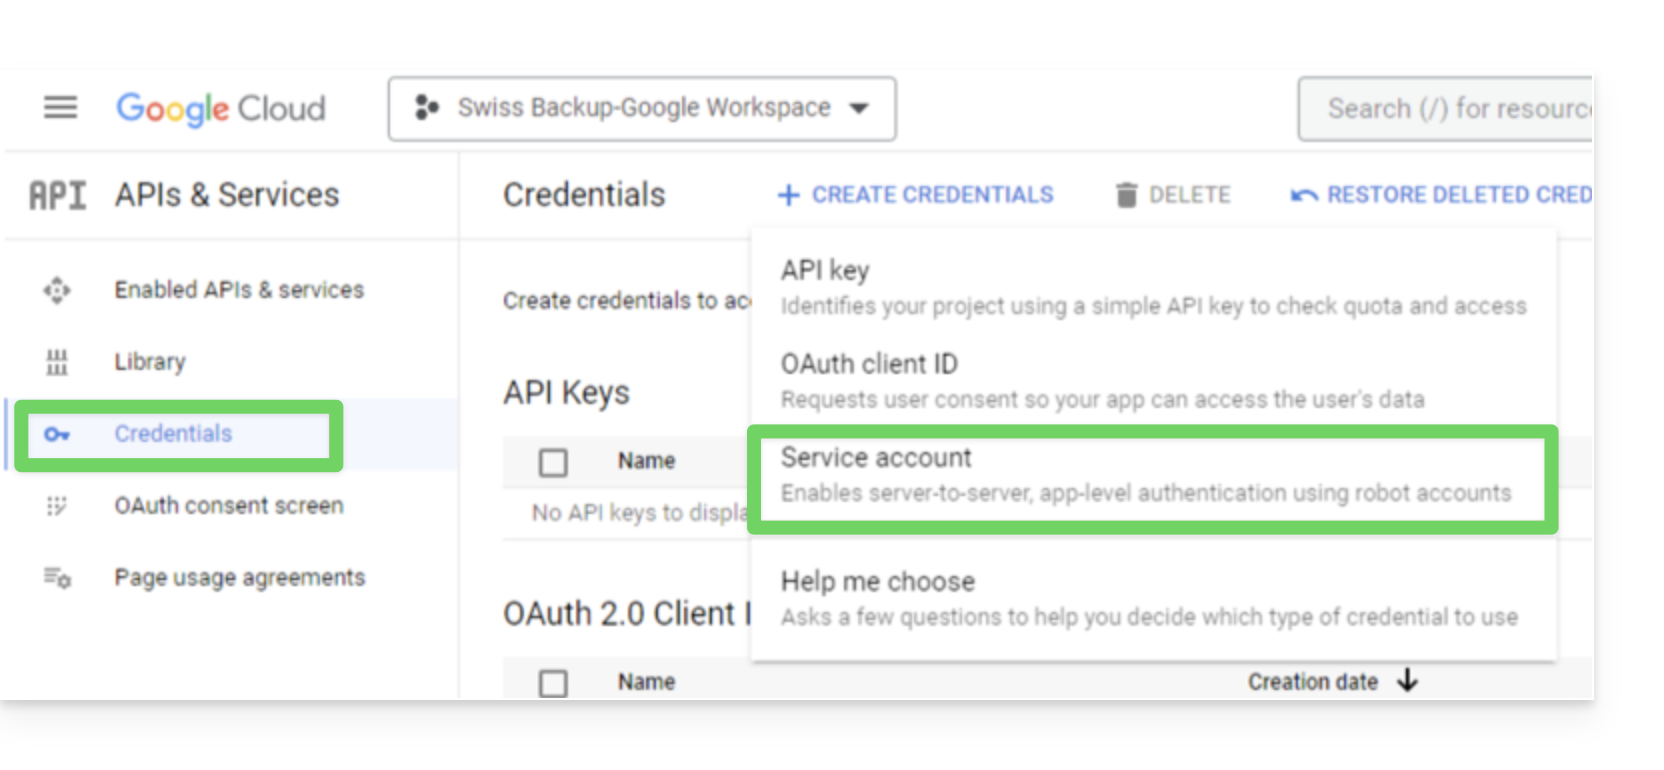
- In the Google Cloud Platform navigation menu, select Credentials > Service account.
- Click on Create a service account:
- Specify a name, a description, and click on Create and continue:
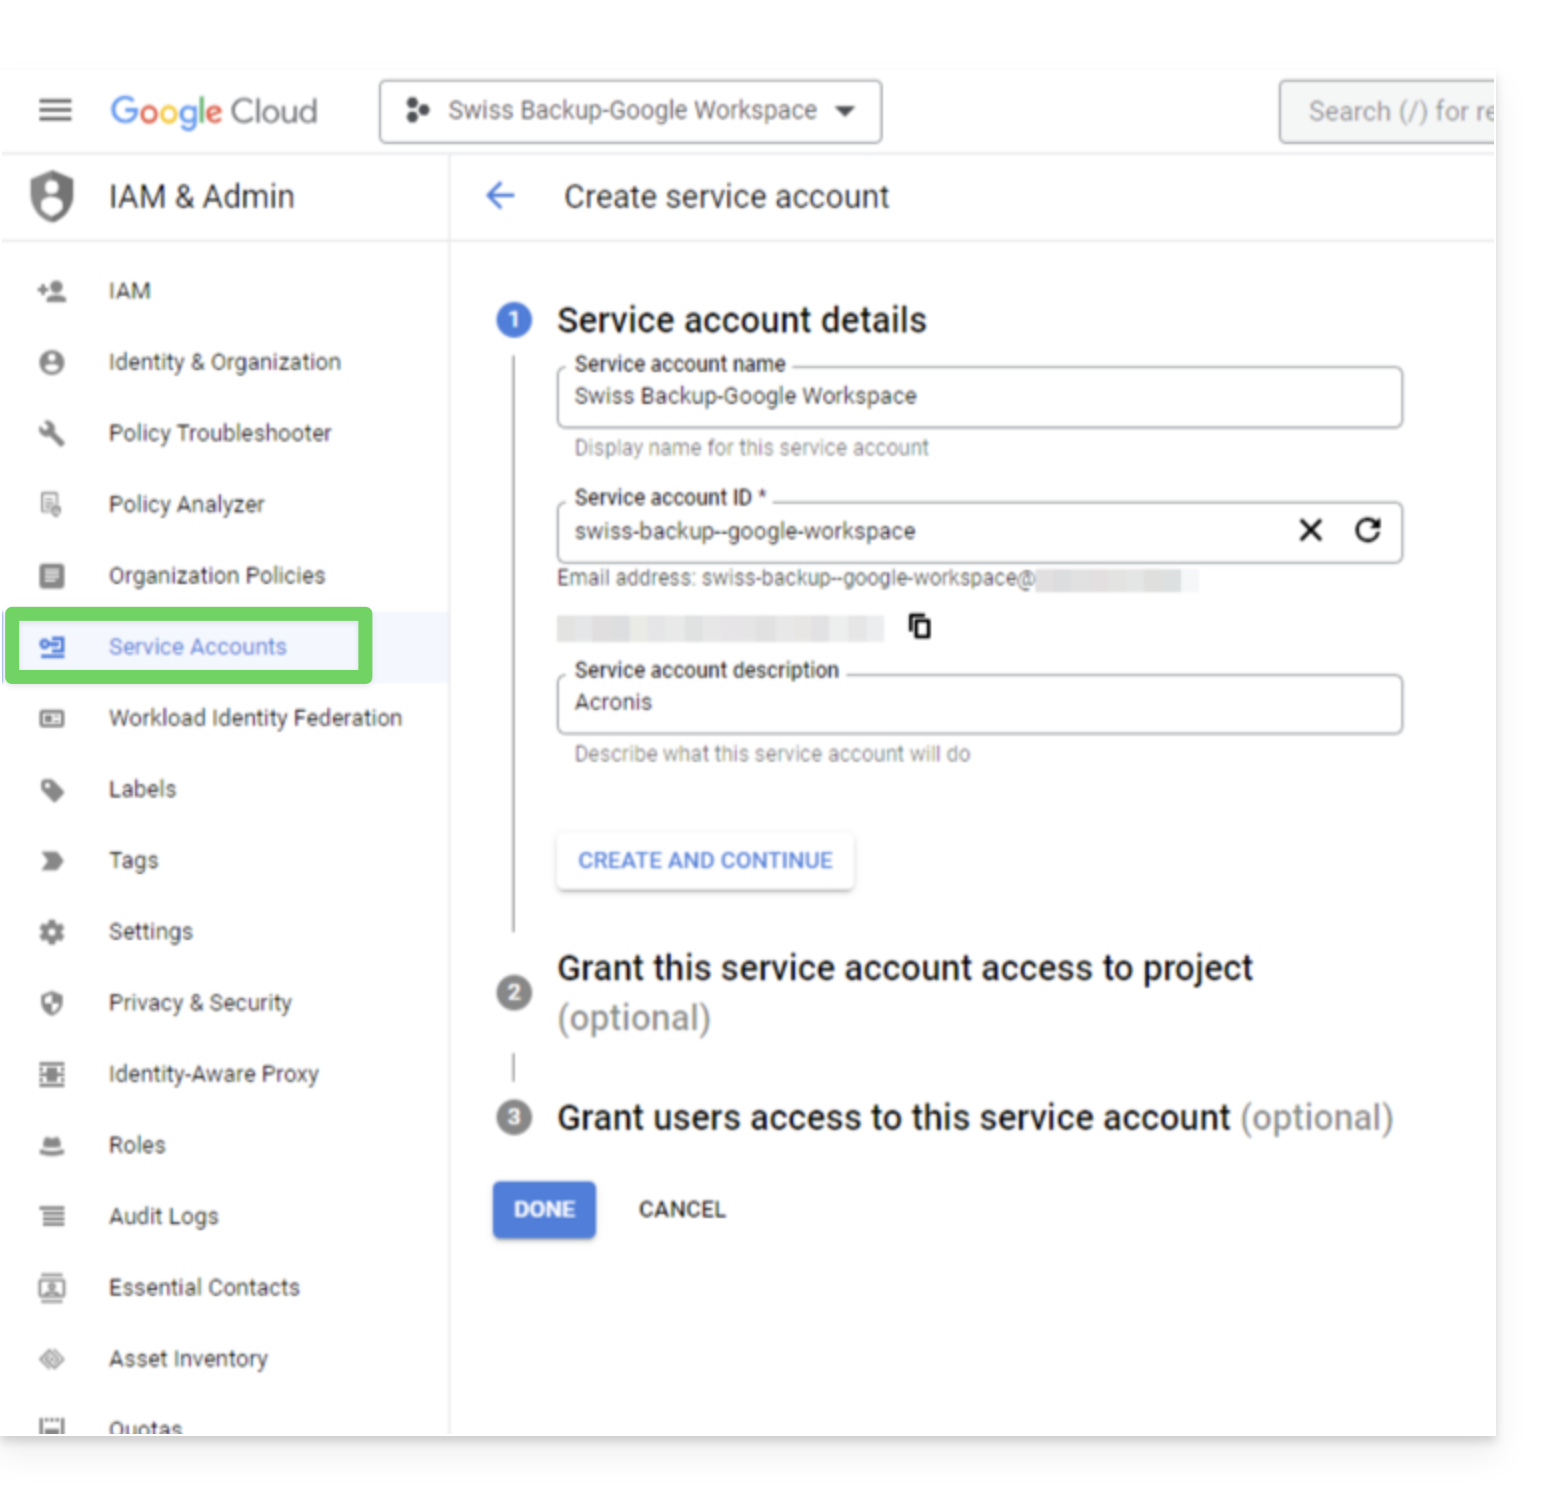
- Do not modify the steps Grant this service account access to the project and Grant users access to this service account.
- Click on Done; the Service accounts page will open.
- Select the new service account, then under Actions, click on Manage keys.
- Under Keys, click Add a key > Create a new key, then select the JSON key type:
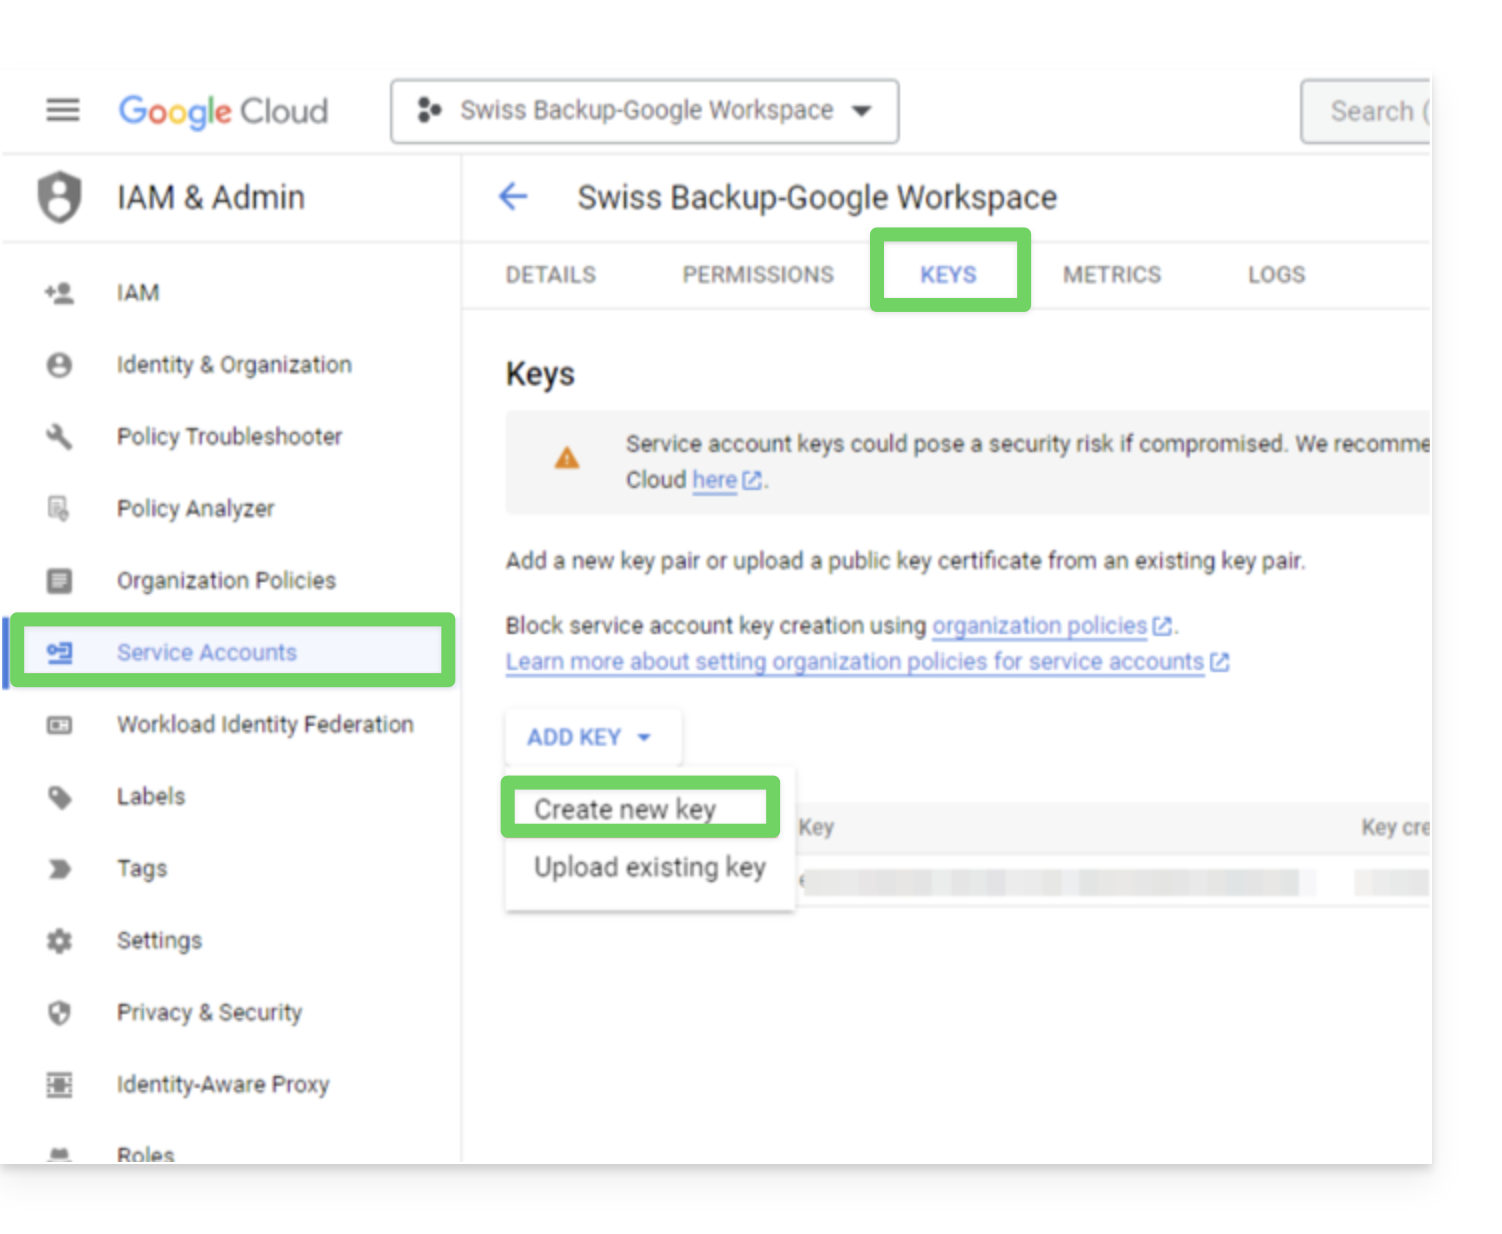
- Click Create; a JSON file containing the service account's private key is automatically downloaded to your computer: keep this file in a safe place as you will need it to add your Google Workspace organization to the Cyber Protection service as described below in this guide.
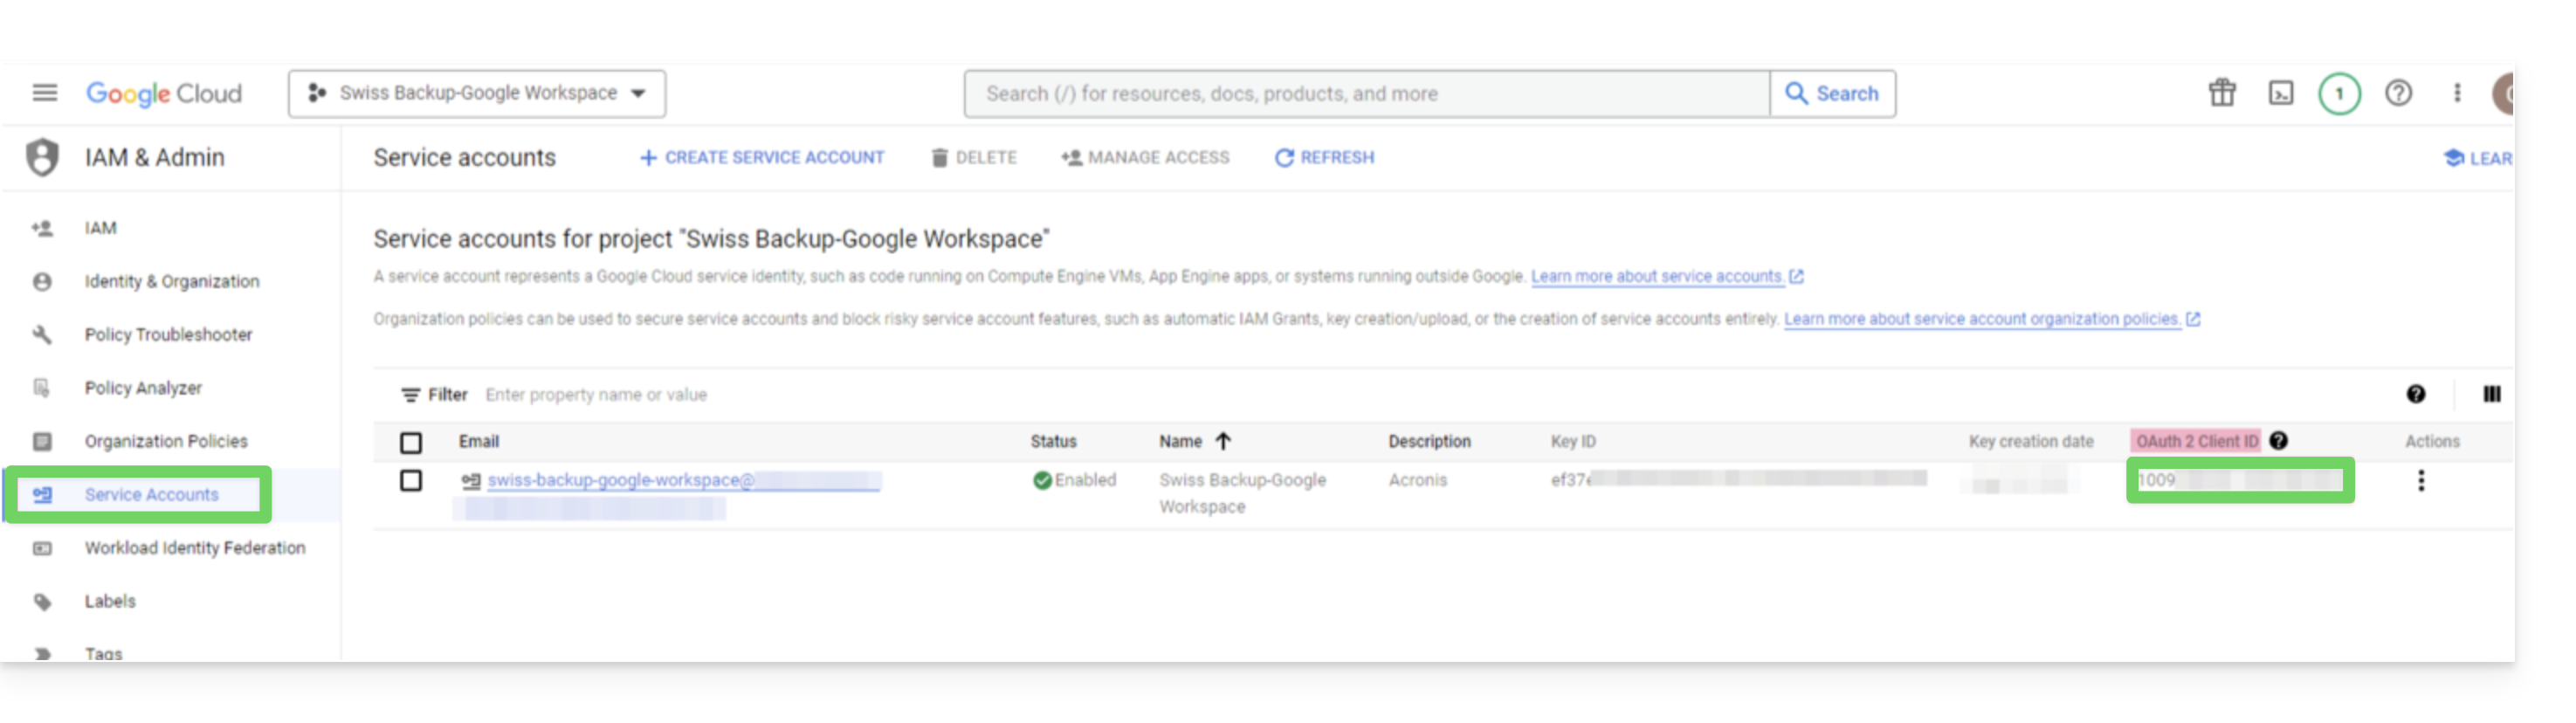
- In the Google Cloud Platform navigation menu, select Credentials > Service account.
- In the list, find the service account you created, then copy its client ID, which is displayed in the OAuth 2.0 Client ID column:
- Click here to access the Google admin interface as a super administrator.
- In the navigation menu, selectSecurity > Access and data control > API controls:
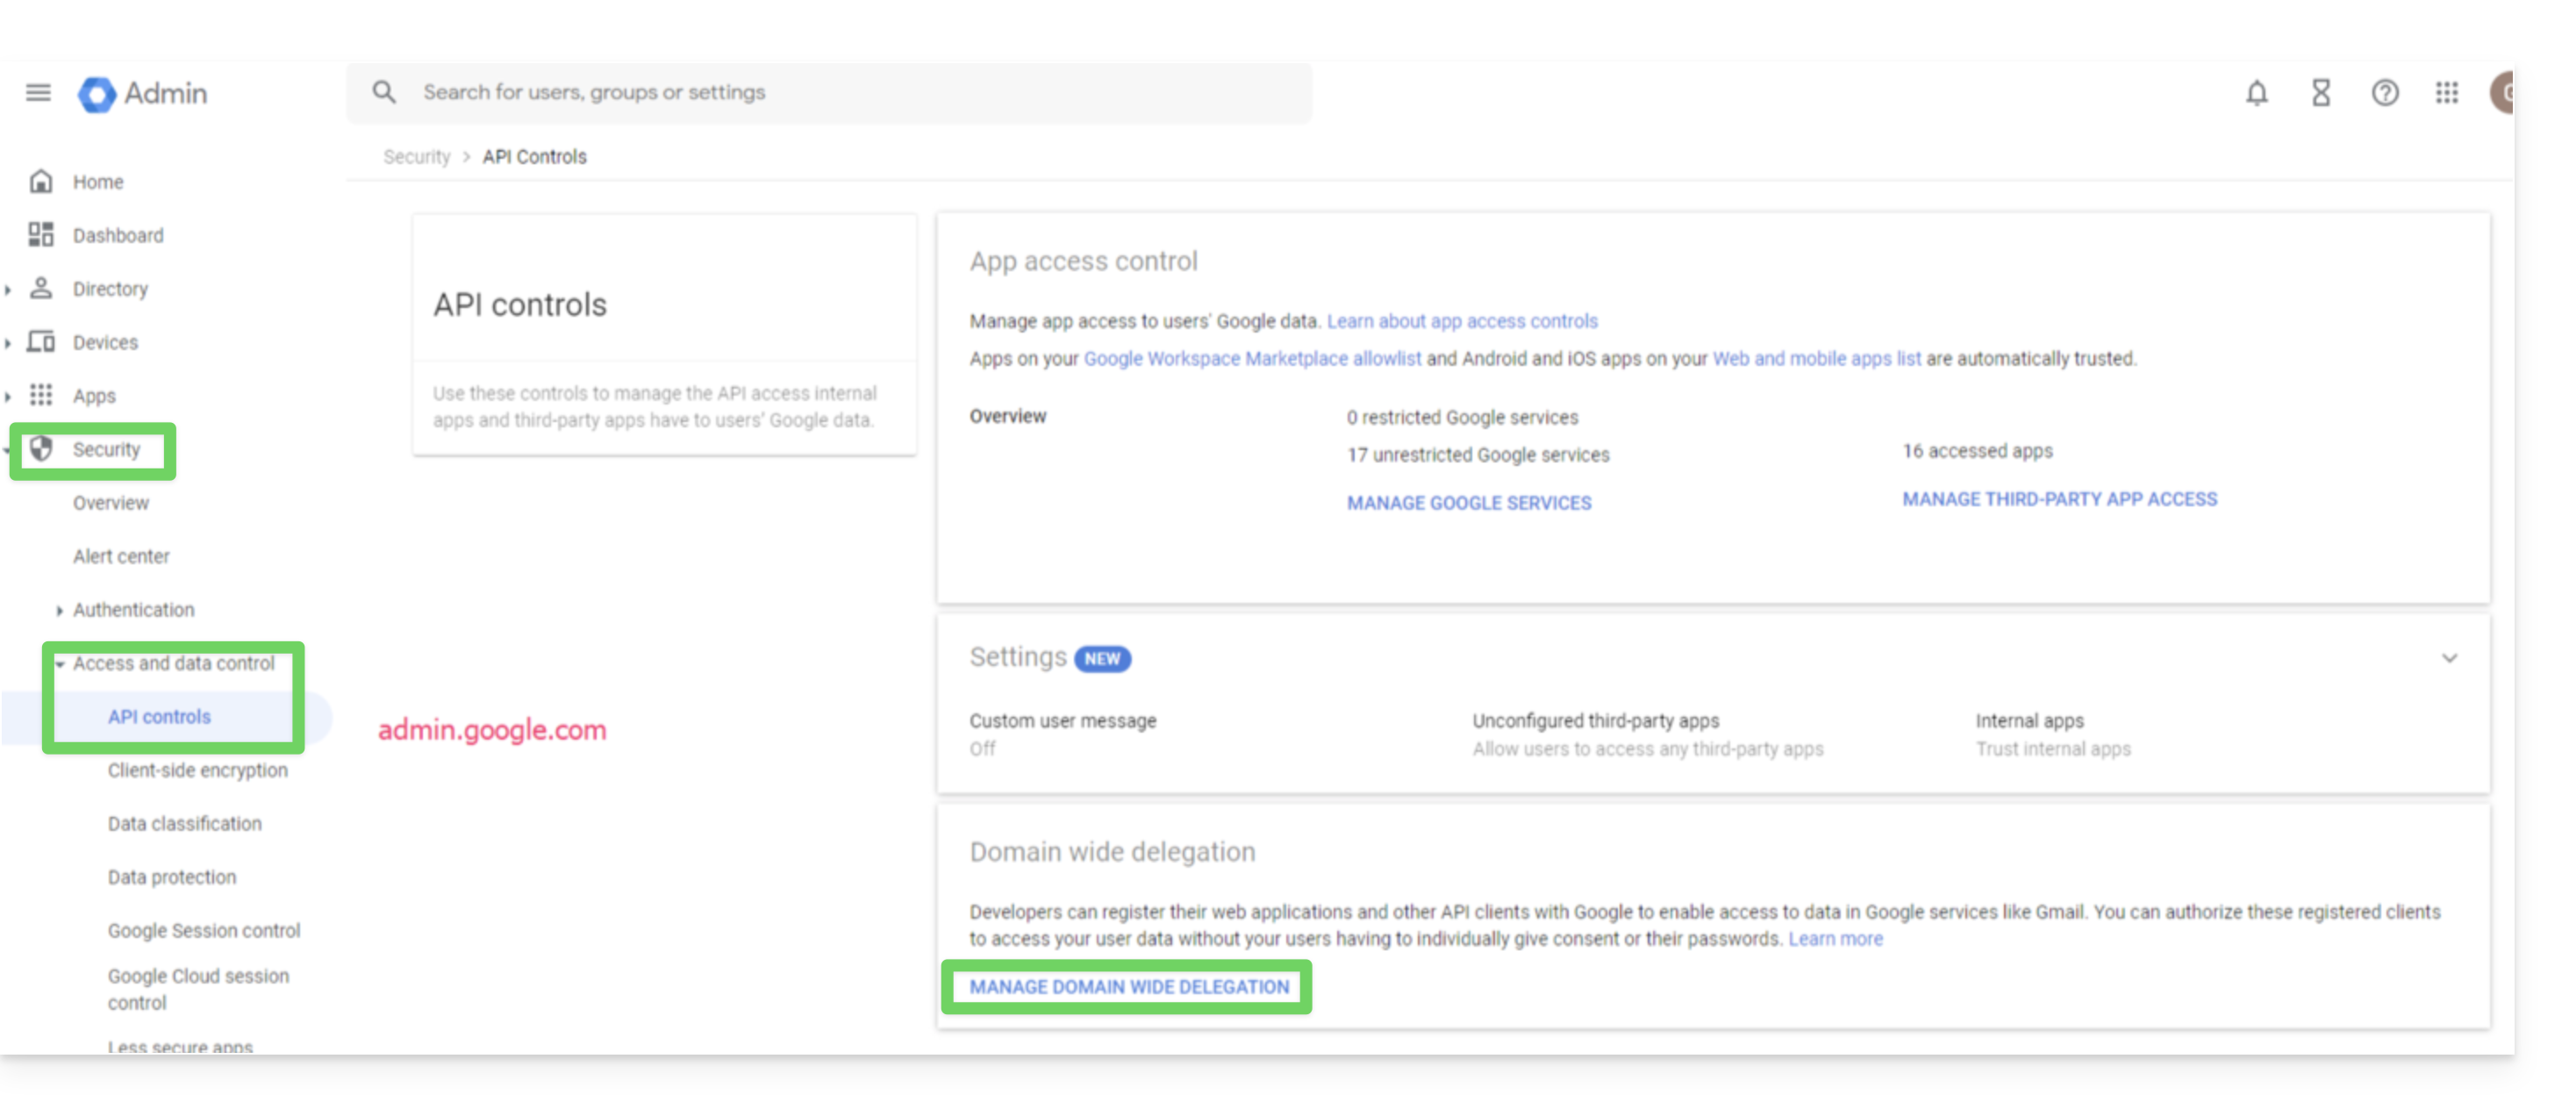
- Scroll down the API controls page, then under Domain-wide delegation, click on Manage domain-wide delegation; the Domain-wide delegation page will open.
- On this page, click on Add:
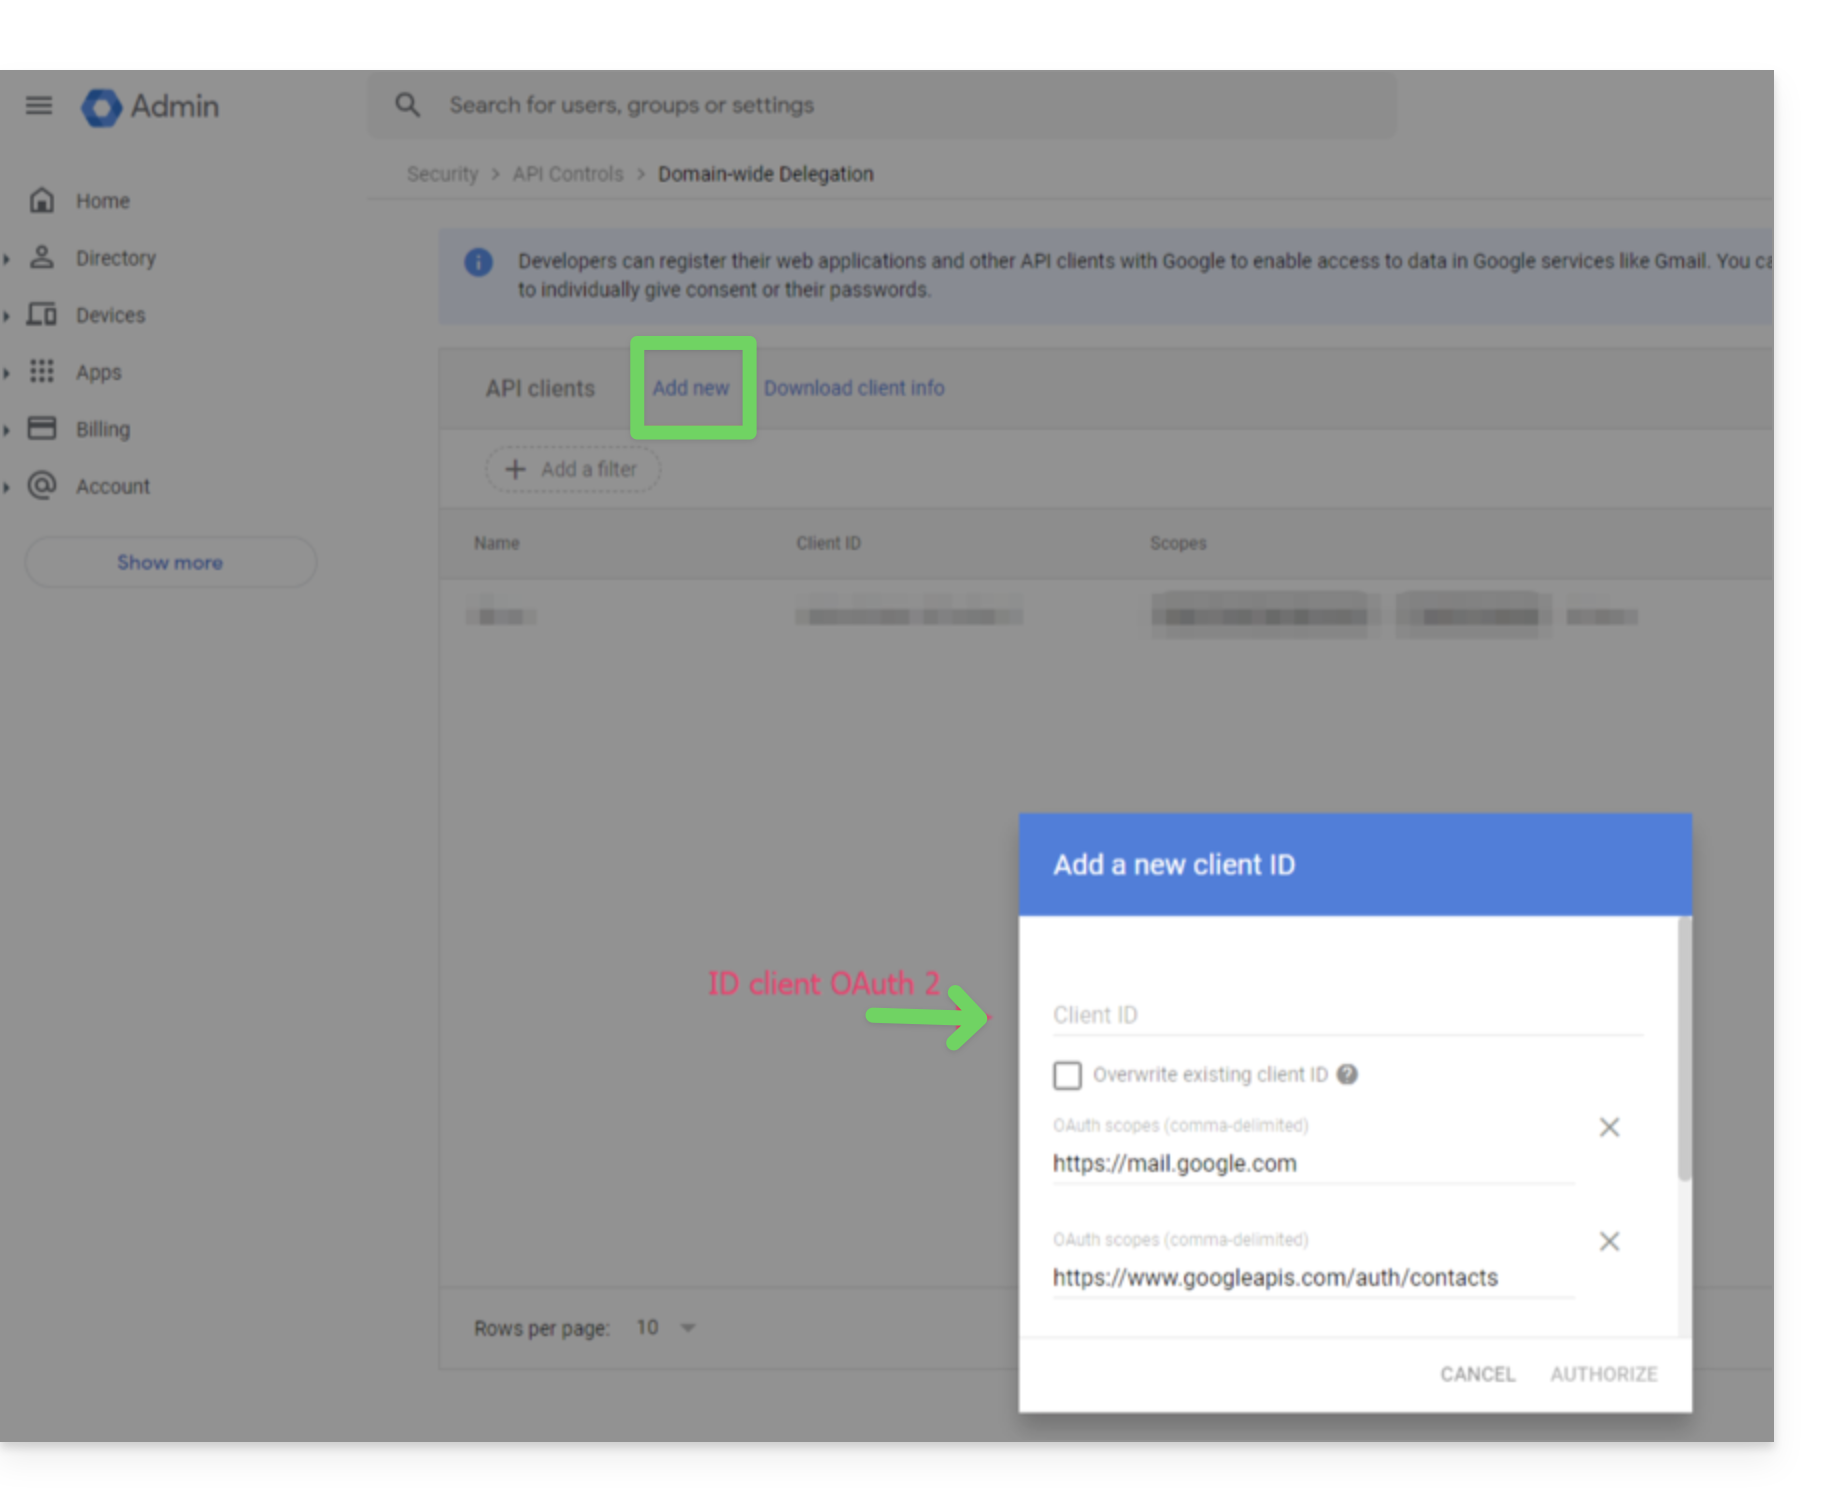
- The Add a new client ID window opens.
- In the Client ID field, enter the client ID for your service account.
- In the OAuth scopes field, add the following scopes:
- https://mail.google.com
- https://www.googleapis.com/auth/contacts
- https://www.googleapis.com/auth/calendar
- https://www.googleapis.com/auth/admin.directory.user.readonly
- https://www.googleapis.com/auth/admin.directory.domain.readonly
- https://www.googleapis.com/auth/drive
- https://www.googleapis.com/auth/gmail.modify
- Click on Allow.
Your new Google Cloud project can now access the data in your Google Workspace account.
Creating the backup space
To configure the backup of your Google Workspace with Acronis:
- Click here to access the Acronis Console using the credentials obtained after adding the device (need help?).
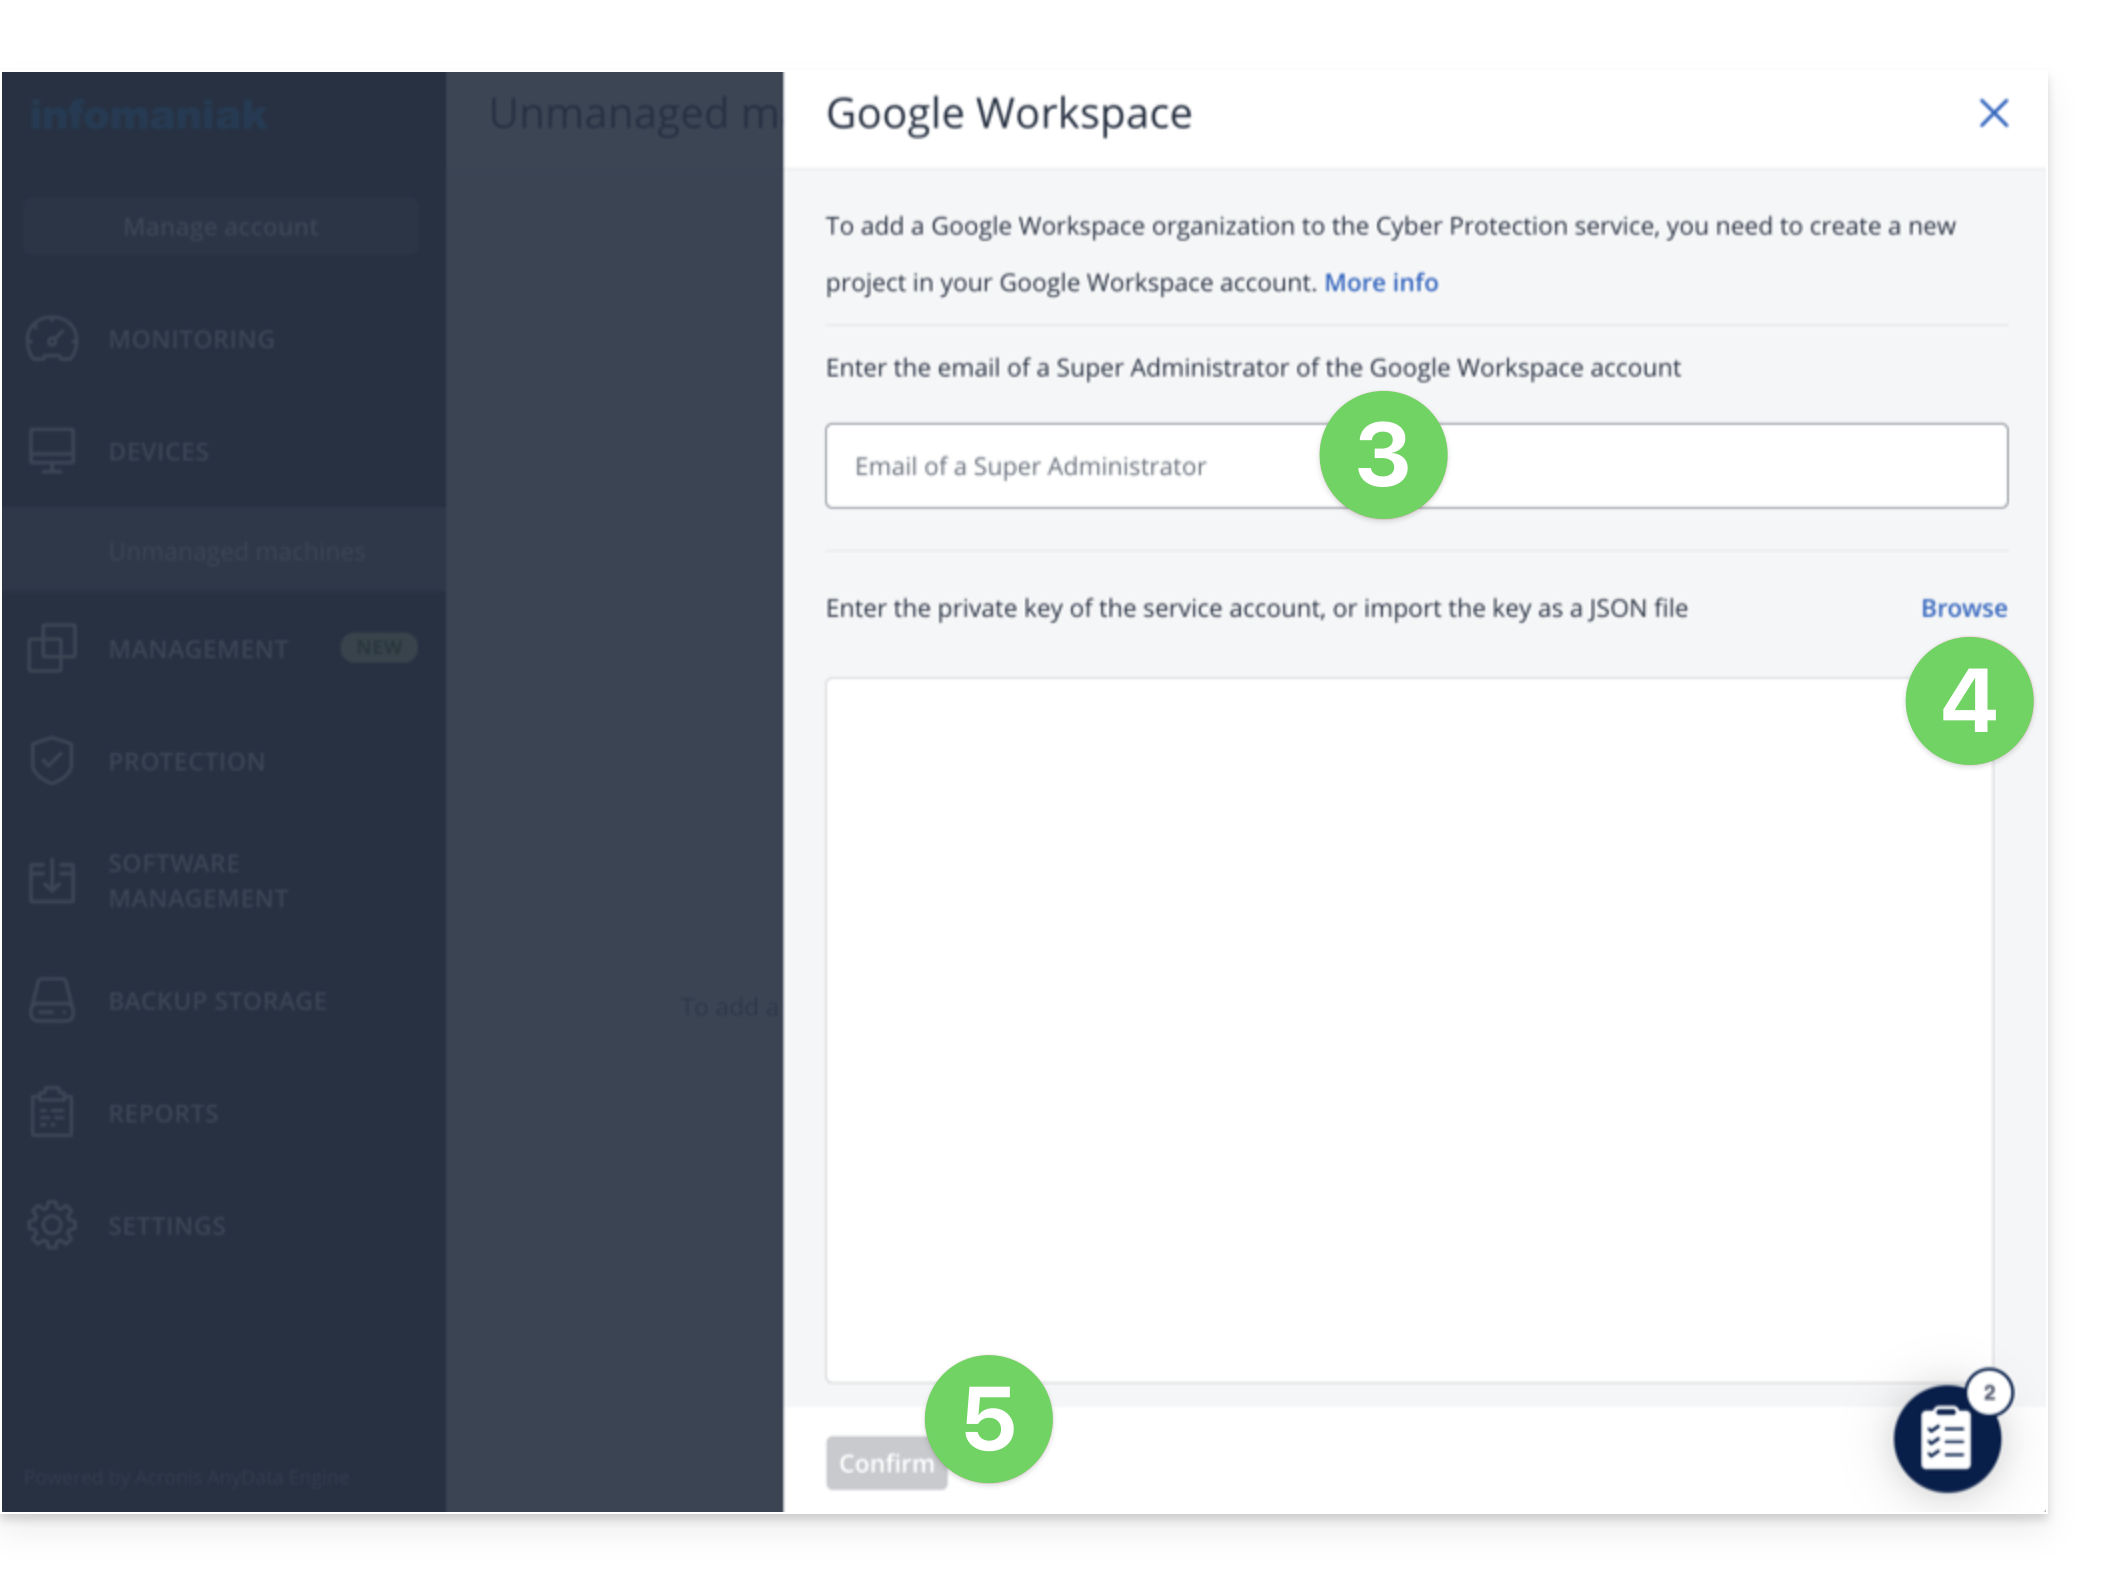
- Click the "Add device" button to add a Google Workspace device:
- Enter the address of a super administrator for your Google Workspace account (it doesn't matter if two-step verification is enabled for the super administrator's email account).
- Find the JSON file that contains the private key for the service account you created in your Google Cloud project (or paste the file's content as text).
- Click on Confirm:
Your Google Workspace organization will then appear under the Devices tab in the service console: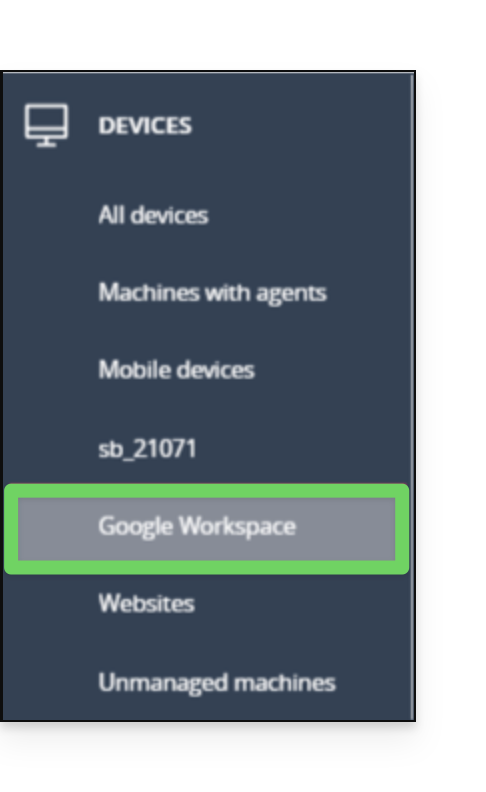
Link to this FAQ: https://faq.infomaniak.com/2805
Has this FAQ been helpful?