Knowledge base
1000 FAQs, 500 tutorials and instructional videos. Here, there are only solutions!
Manage Site Creator navigation menus
This tutorial explains how to create navigation menus for your website built with Site Creator from Infomaniak, as well as how to configure their content, styles, and settings.
Prerequisites
- Access Site Creator:
- Click here to access the management of your product on the Infomaniak Manager (need help?).
- Click directly on the name assigned to the Site Creator in question.
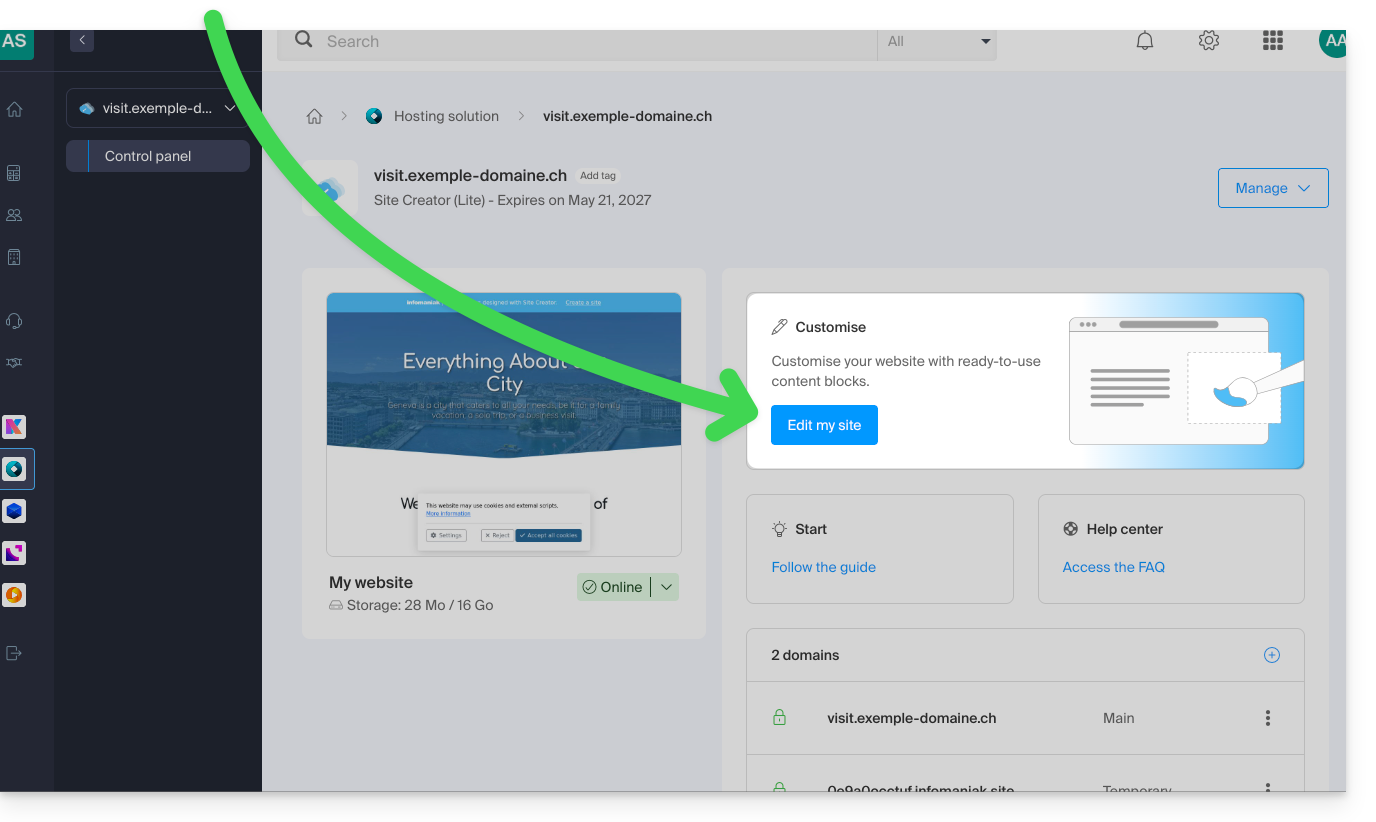
- Click on the Edit my site button to launch the editor:
The different navigation menus
The different pages that make up your site can be accessed within one or more navigation menus:
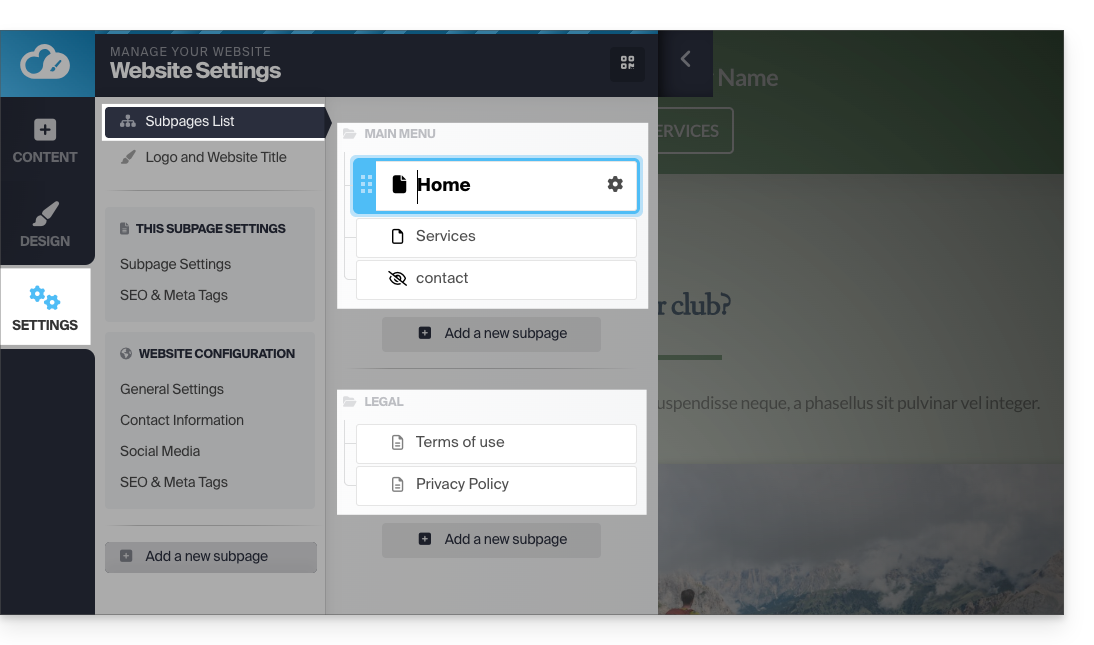
- Click on the Settings button in the left-hand menu.
- By default, the list of your pages appears, organized into 2 main categories: MAIN MENU and LEGAL:
But you can add more.
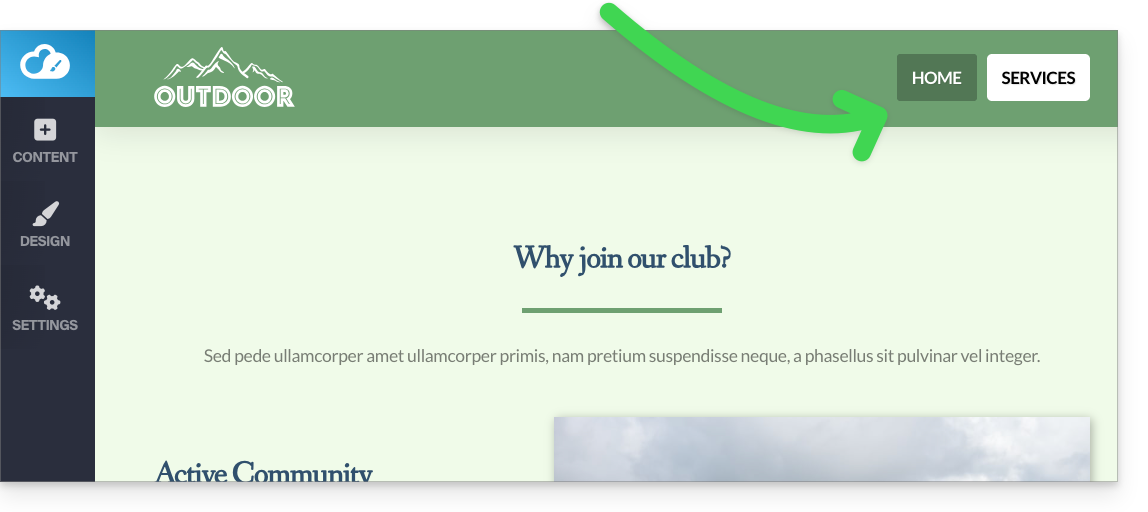
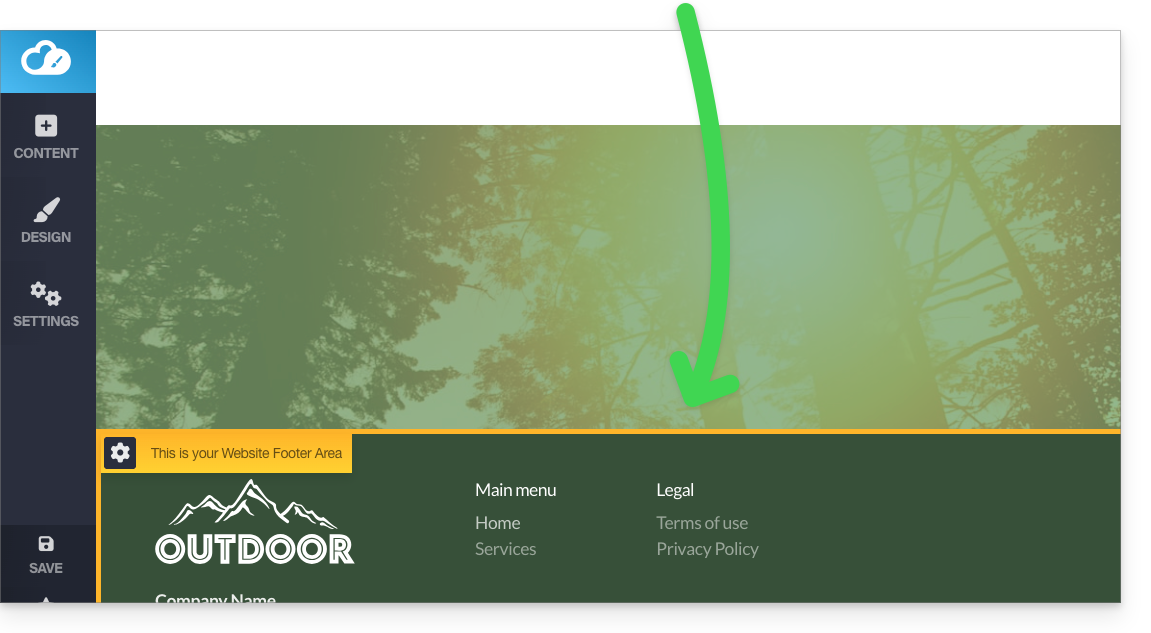
These menus, along with the pages they contain, are then used in different places on your site, depending on the theme chosen:
- You will often find the main menu placed at the top of the page:
- and the other menus will be automatically displayed in the footer:
Manage menus
Add a new menu
To do this:
- Click on the Settings button in the left-hand menu.
- Hover over a menu title in the existing tree.
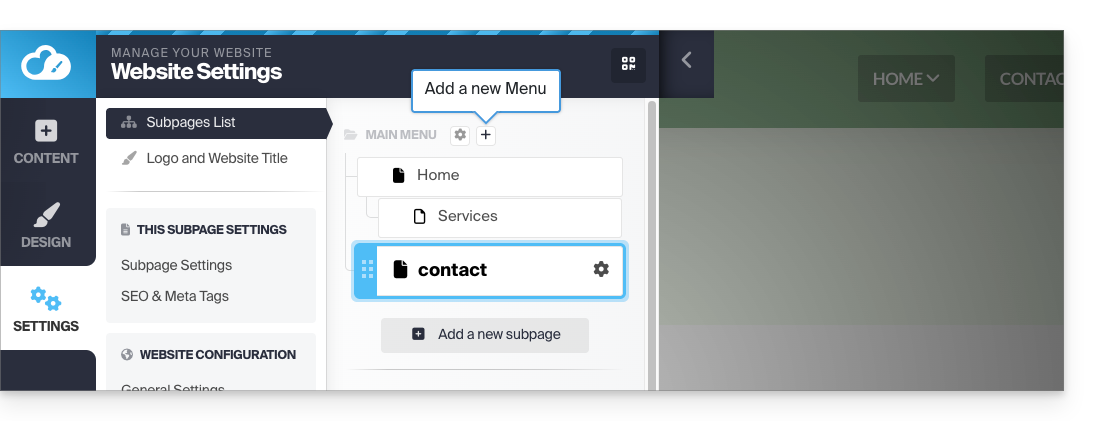
- Click on the "+" icon that appears when you hover:
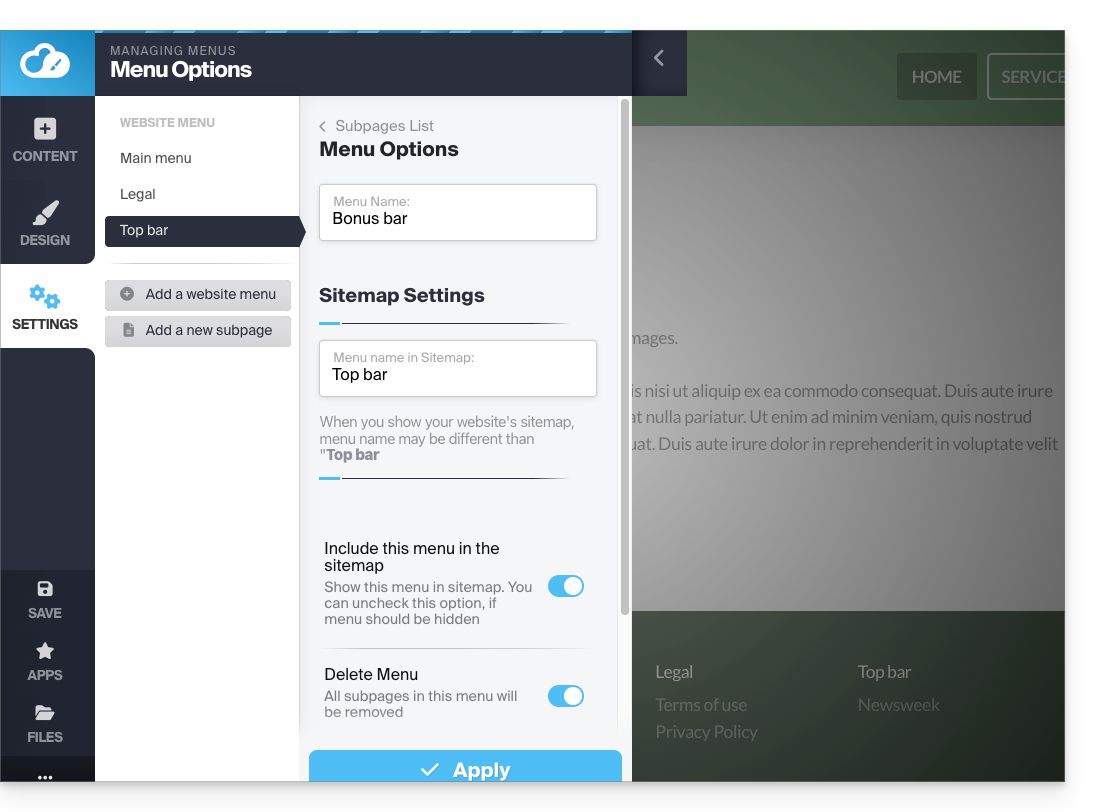
You can manage the presence of the menu in the sitemap or delete it (along with all its pages):
- Click on the Settings button in the left-hand menu.
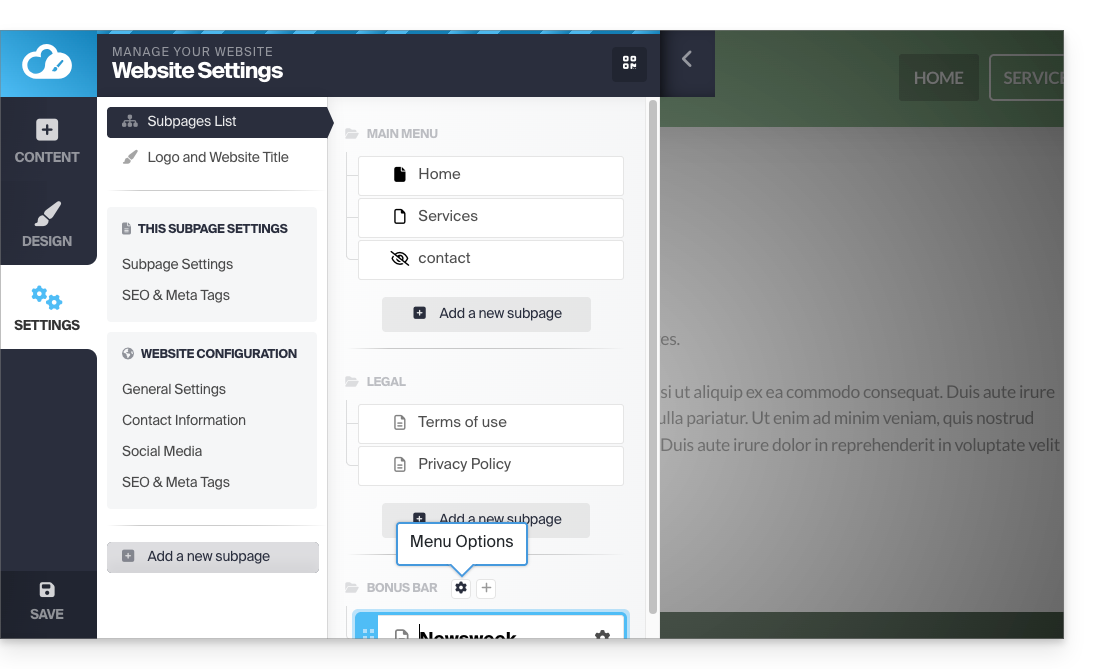
- Hover over a menu title in the existing tree and click on the gear icon that appears when you hover:
- Choose the desired settings and validate at the bottom of the page:
Refer to this other guide to prevent any menu from appearing at all.
Create a sub-item in a menu
To do this:
- Click on the Settings button in the left-hand menu.
- The list of your pages appears.
- Using your mouse, move a page slightly to the right, under another page:
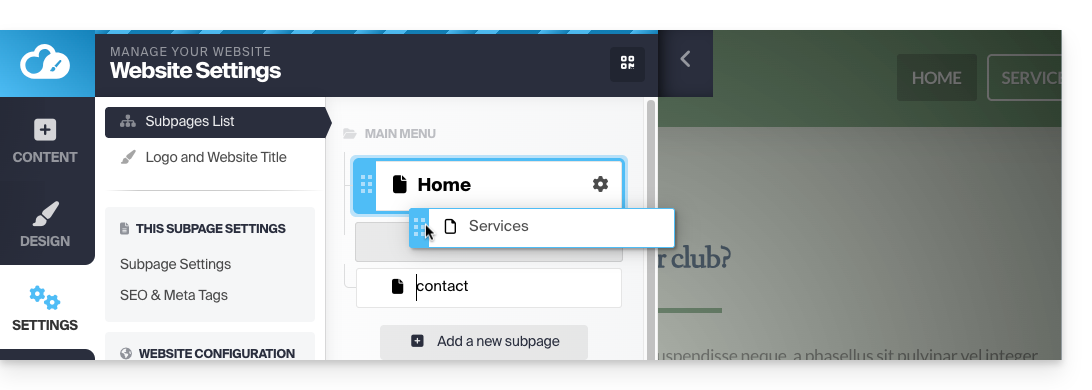
- It will become a sub-page, and your website menu will display the tree structure you have created:
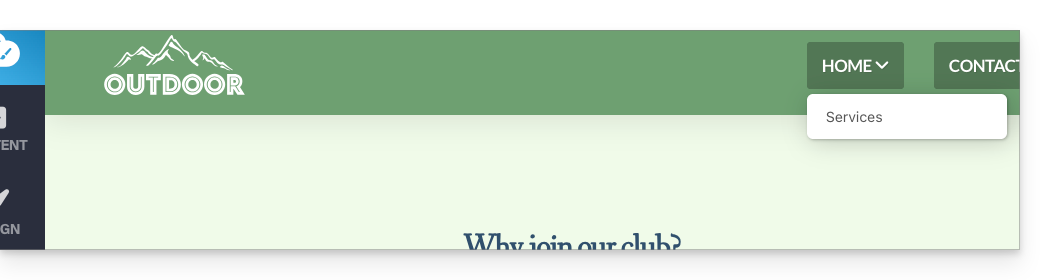
- Also, take note of the tip below…
- It will become a sub-page, and your website menu will display the tree structure you have created:
Menu title that is not clickable
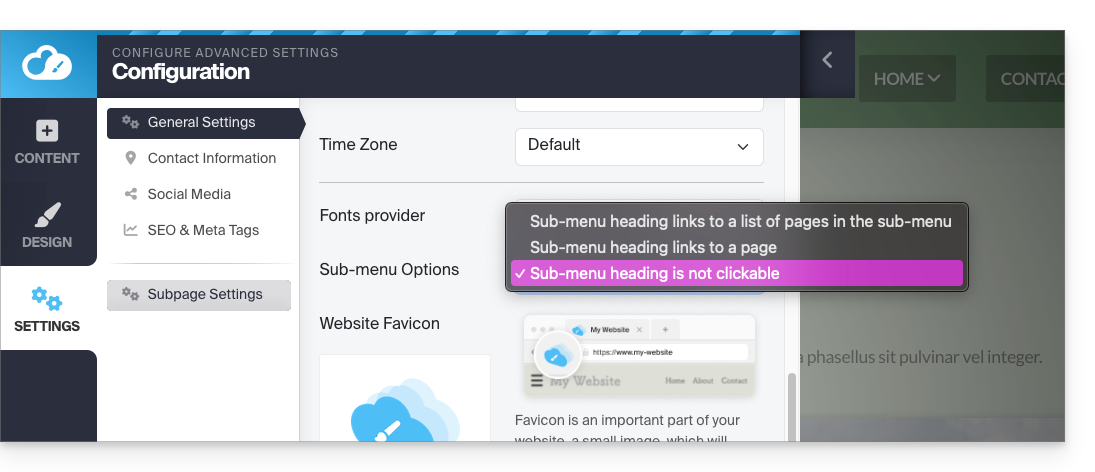
If necessary, choose to not make the very first item of a menu with sub-menu items clickable (as configured above):
Please note that changing this setting, while the Home item in your menu has a sub-menu, will disable the ability to edit the website from the home page when you view the page.
- Click on the Settings button in the left-hand menu.
- Click on General Settings to modify this setting under Sub-menu Options:
Menu item containing a link to another website
To do this:
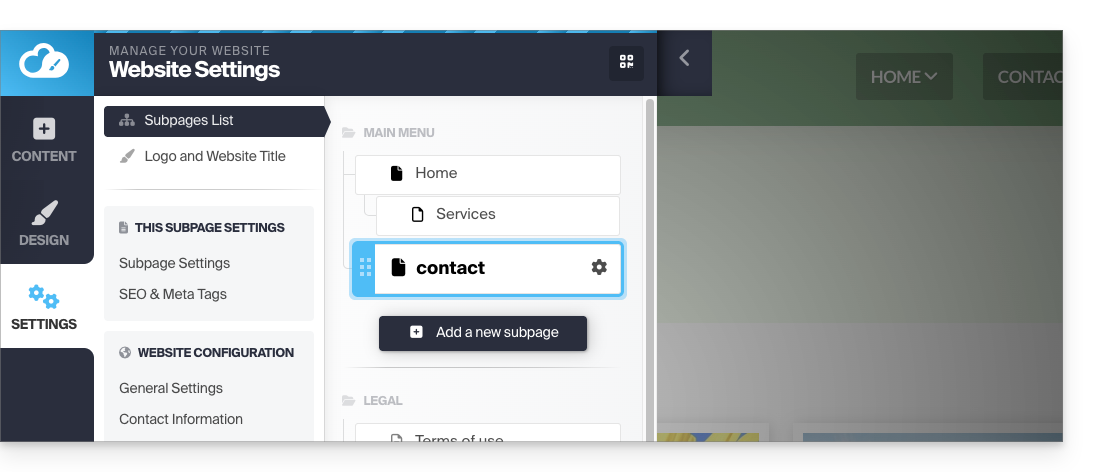
- Click on the Settings button in the left-hand menu.
- The list of your pages will appear.
- Click on the Add Page button below the existing tree:
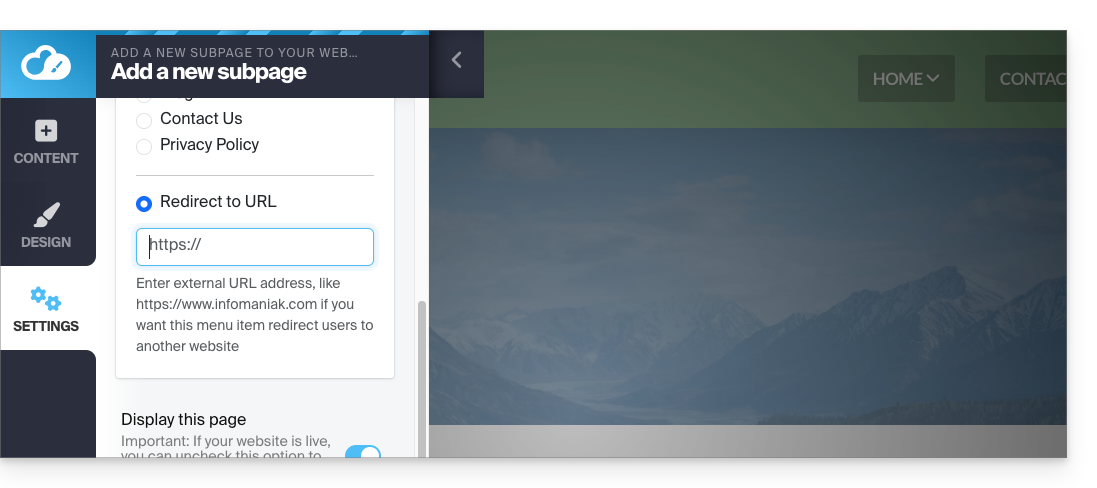
- Enter a page name and click on Show more options.
- Choose the URL redirection to specify the destination when clicked:
Additional top menu
To display a "menu bar" at the very top of your page:
- Click on the Design button in the left-hand menu.
- Click on More settings.
- Enable the Header menu bar:
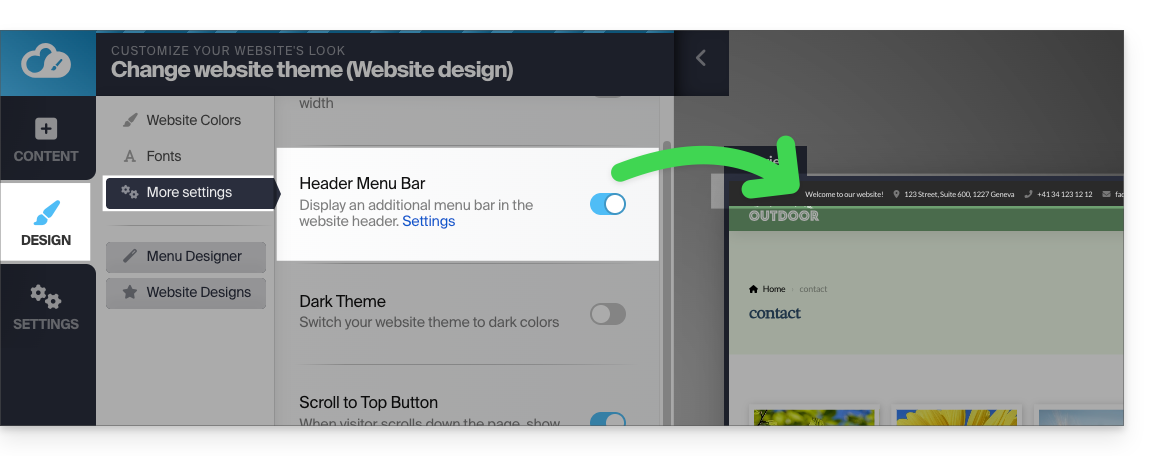
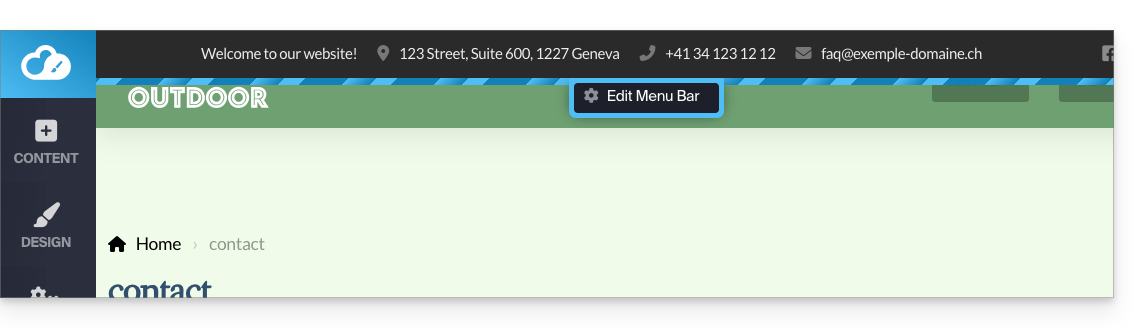
- Once enabled, you can customize it using the Settings link in the same place:
Menu styles
To manage the different menu styles:
- Click on the Design button in the left-hand menu.
- Click on Menu editor:
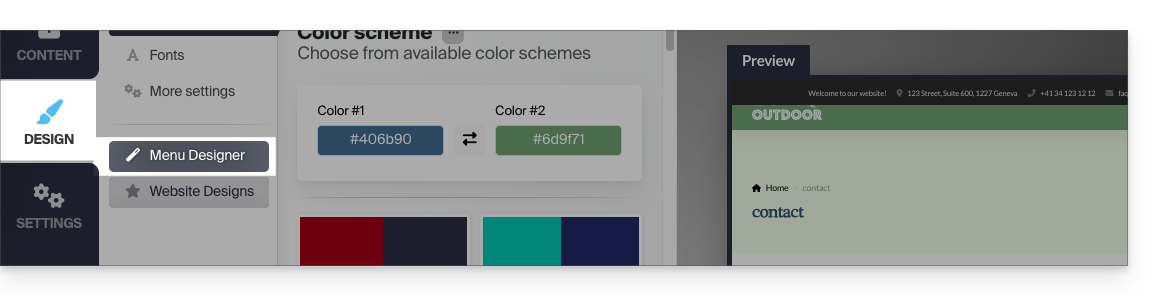
- Then click on Configuration:
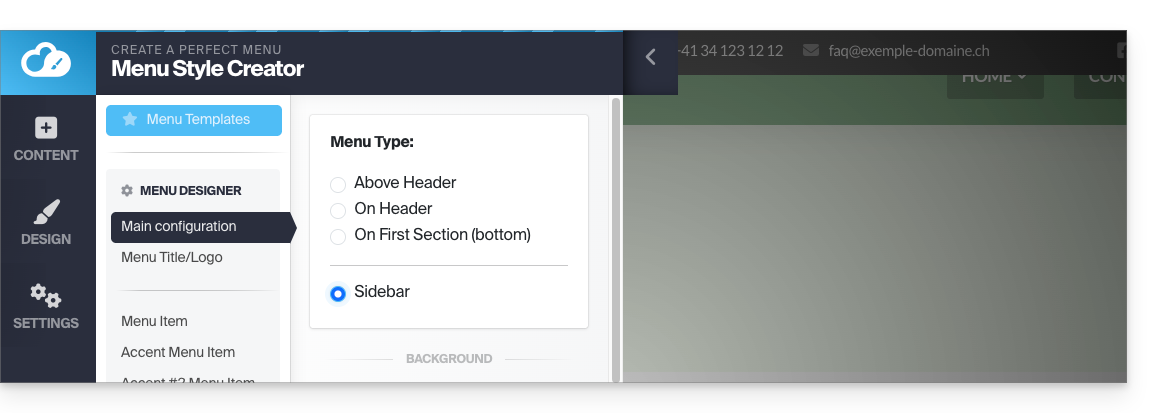
- You can then decide on the location of your menus (on the left of the page or at the top, fixed or mobile, "hamburger ☰" type menu on the right or normal, etc.):
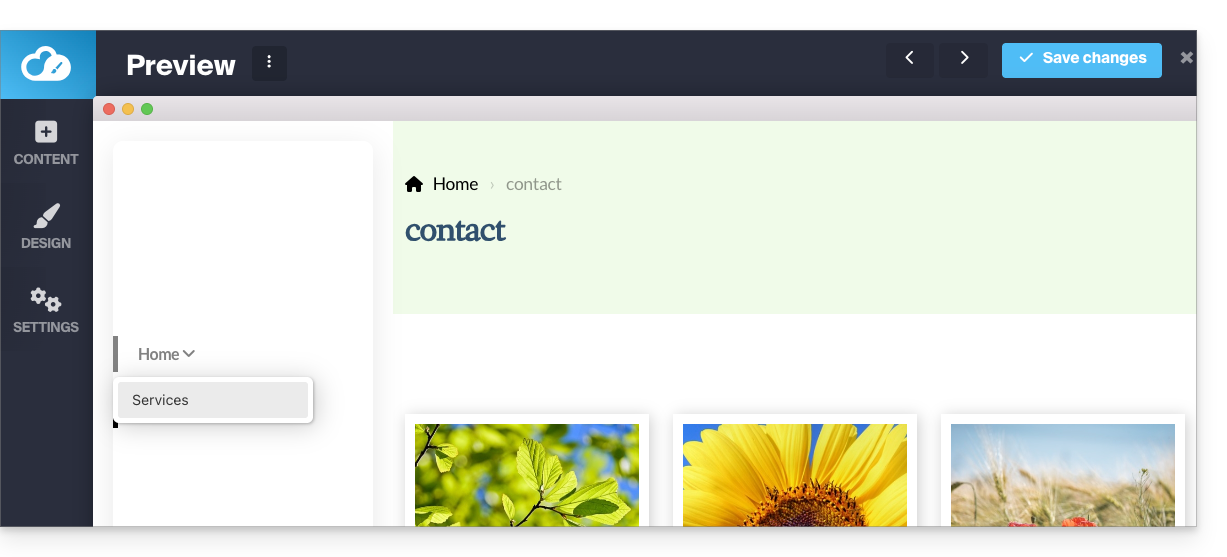
Change the color of the "hamburger" menu (☰)
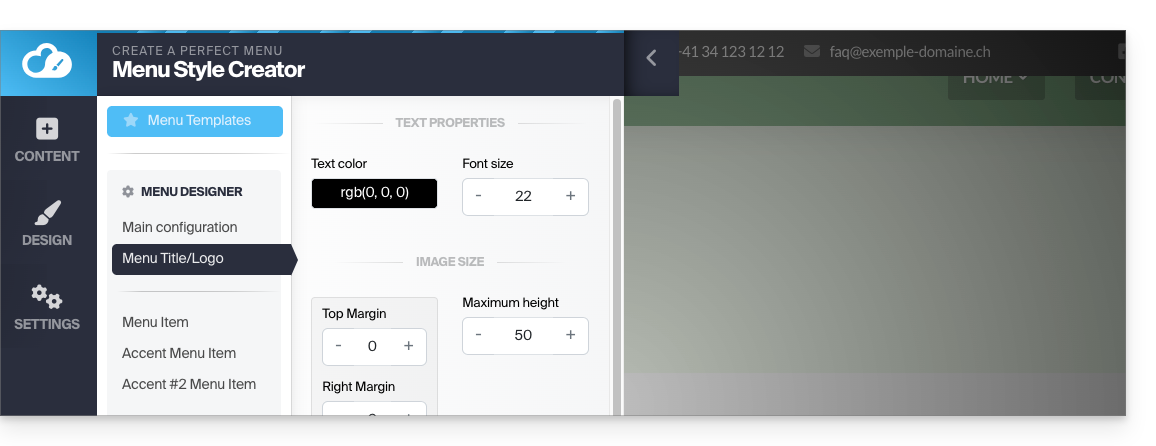
If this menu button with three horizontal lines ☰ appears, for example, white on white on a mobile device:
- Click on the Design button in the left-hand menu.
- Click on Menu Editor.
- Click on Menu title / logo.
- Adjust the text color:
Adopt a new menu theme
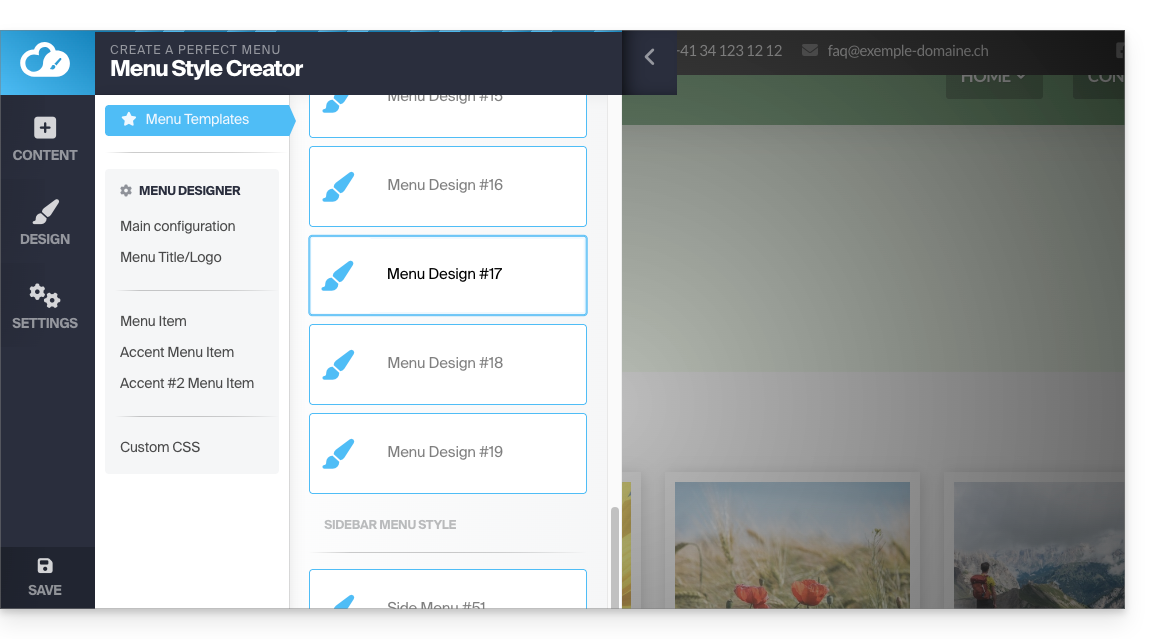
Completely change the predefined style using the themes at the very top of the submenu:
- Click on Menu Templates (still under Design, then Menu Editor):
Fixed menu
Most of the menus will move with the page content.
- The menu disappears when you scroll down the page:
- You can define a menu that will always be fixed to the top edge (with different visual options):
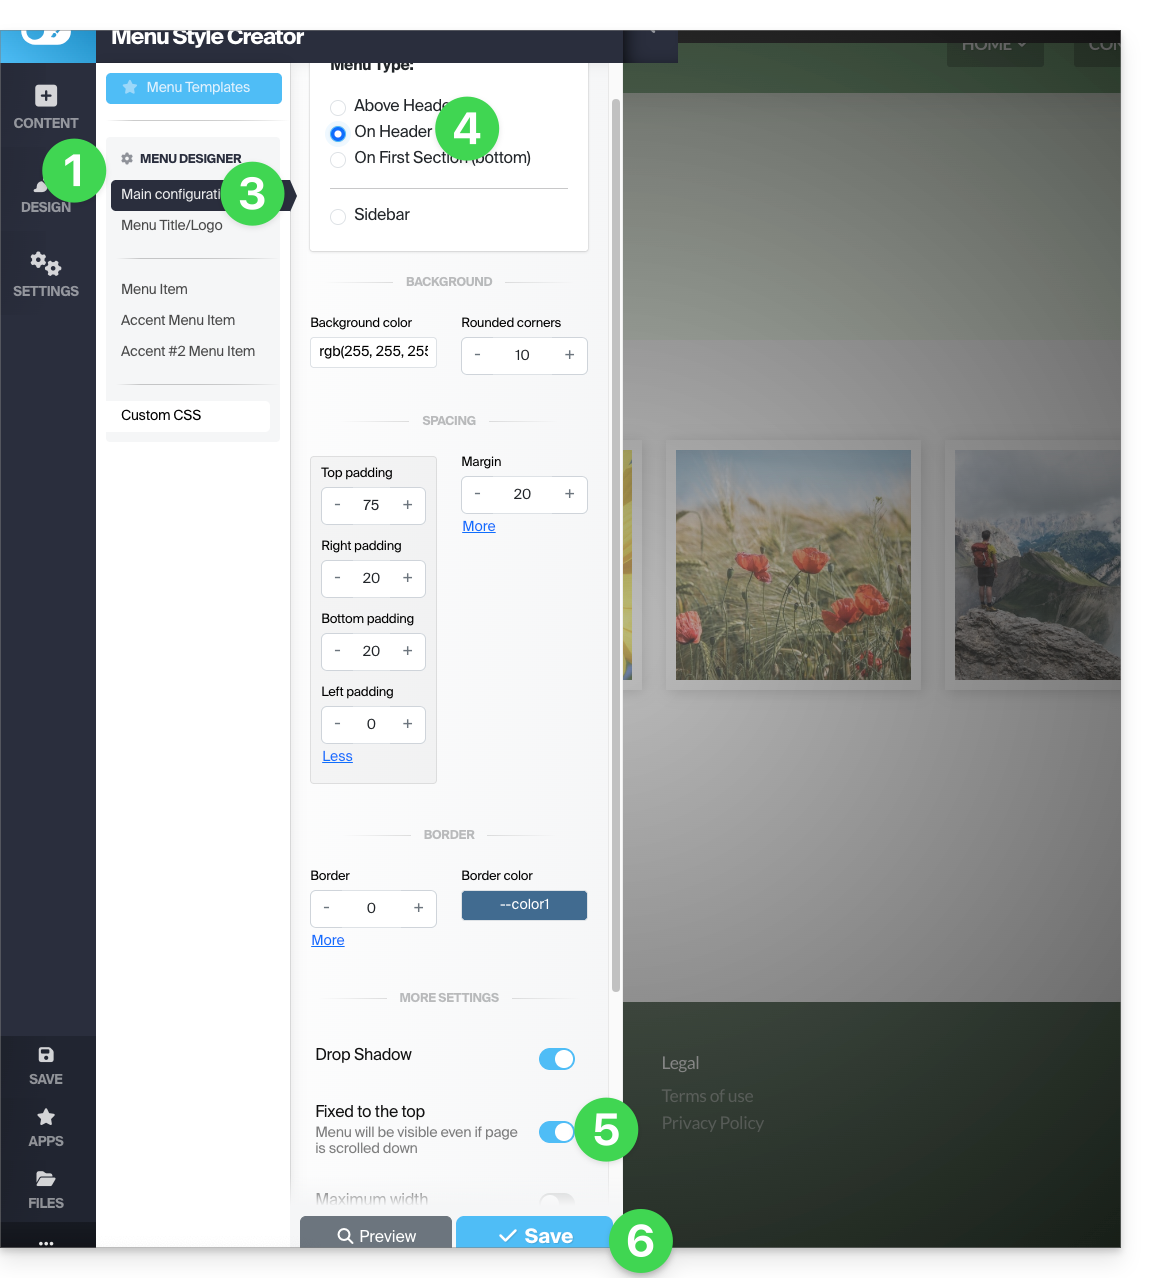
To enable or disable the fixed menu:
- Click on Design.
- Click on Menu Editor.
- Click on Main configuration.
- Choose In the header in the Menu type box.
- The toggle switch Fixed to the top appears further down, and you can enable it.
- Click on Save:
Some menu templates (such as #3 and #16) directly apply the optimal settings for a fixed menu.
Insert your menus into the page body
A Subpage Menu module allows you to insert your menus and submenus anywhere on your page:
- Add the element from Apps:
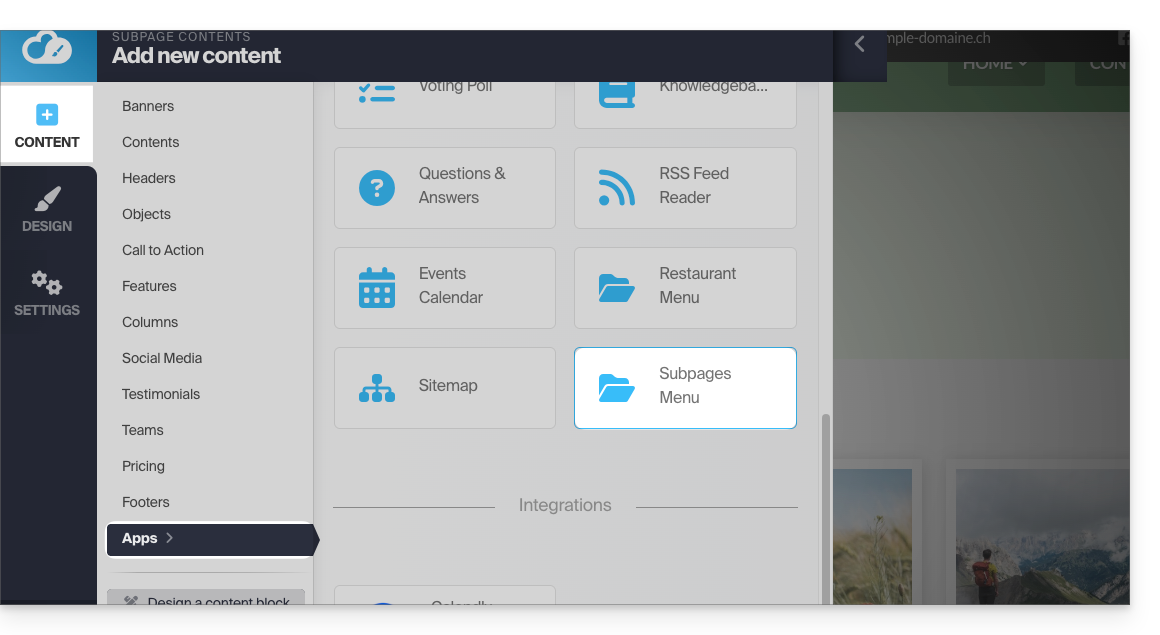
The sitemap module displays all menus and all your pages in a single block.
Define the page URL
By default, if your page name is Contact, the URL to access it will be www.domain.xyz/contact.
If you later change the page name to Hello, the URL will be www.domain.xyz/hello.
To define the custom URL for the page you are on:
- Click the Settings button in the left-hand menu.
- Click SEO & Metadata (under Settings for this subpage).
- The first field at the top allows you to define the page address. Any spaces will be converted into hyphens, and special characters, accents, symbols, etc. should be avoided:
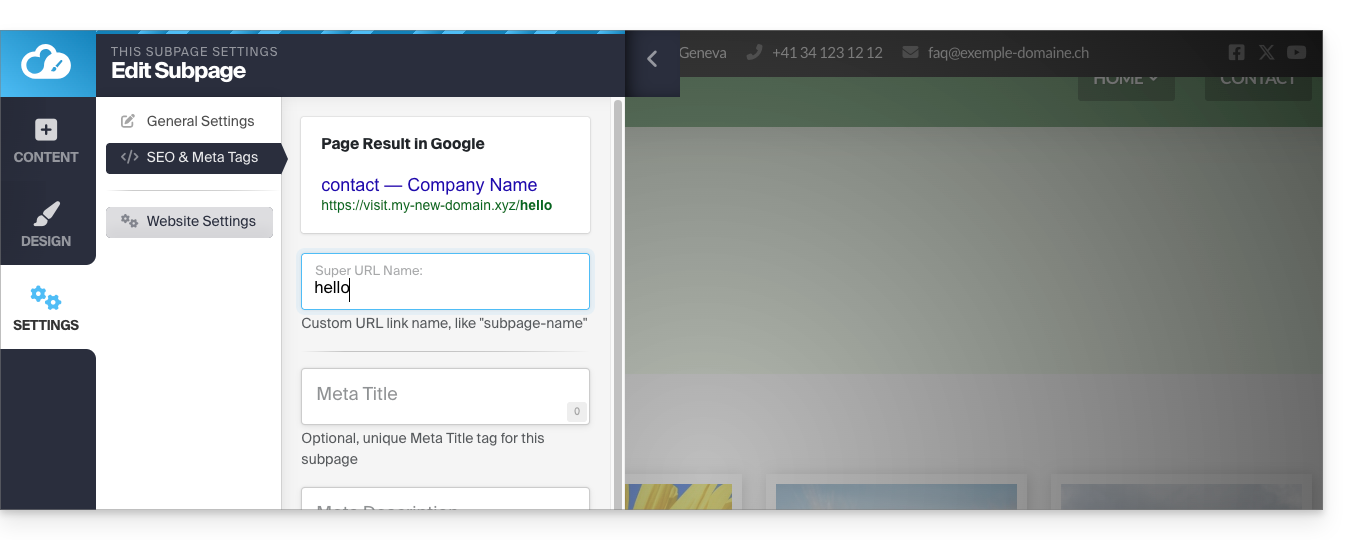
If URL changes are saved while creating the site and a menu already contains a link to the page in question, it will be updated dynamically.
Link to this FAQ: https://faq.infomaniak.com/2730
Has this FAQ been helpful?