Knowledge base
1000 FAQs, 500 tutorials and instructional videos. Here, there are only solutions!
Create a contact form in Site Creator
This guide explains how to add and configure a contact form on your website created with Site Creator Infomaniak.
Create a custom contact form
Start by logging in to the Infomaniak Manager with your credentials (user with the necessary rights for the product in question):
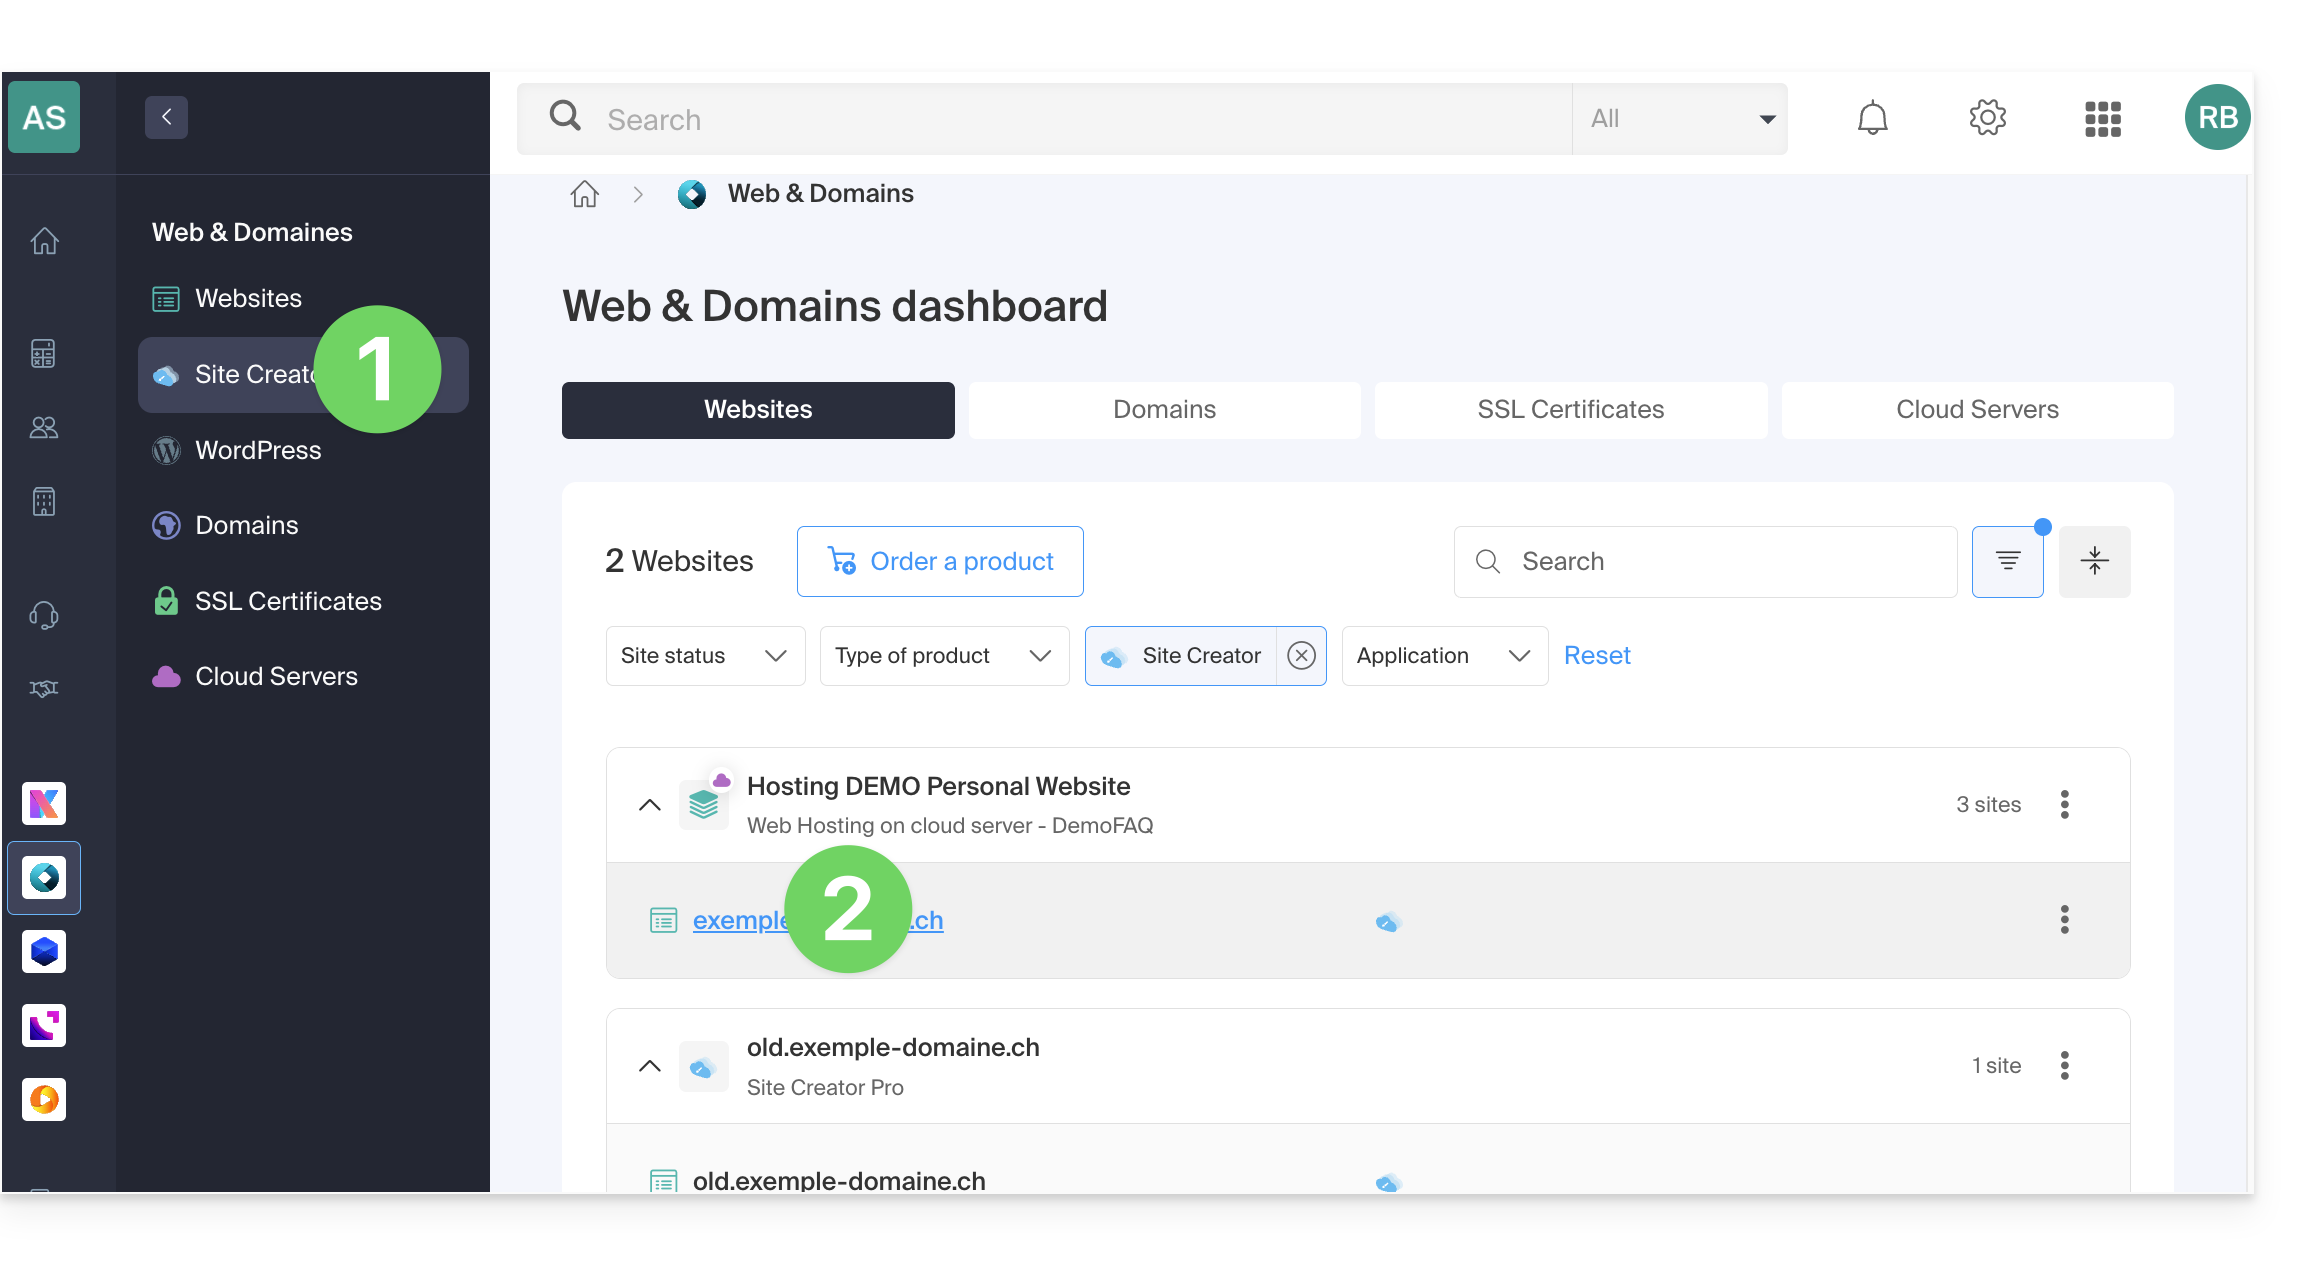
- Click here to access the hosting & site management section (filtered to display only Site Creator).
- If nothing is displayed, you may not be in the Organization to which your site is linked (❓: help).
- Click on the name of the Site Creator in question:
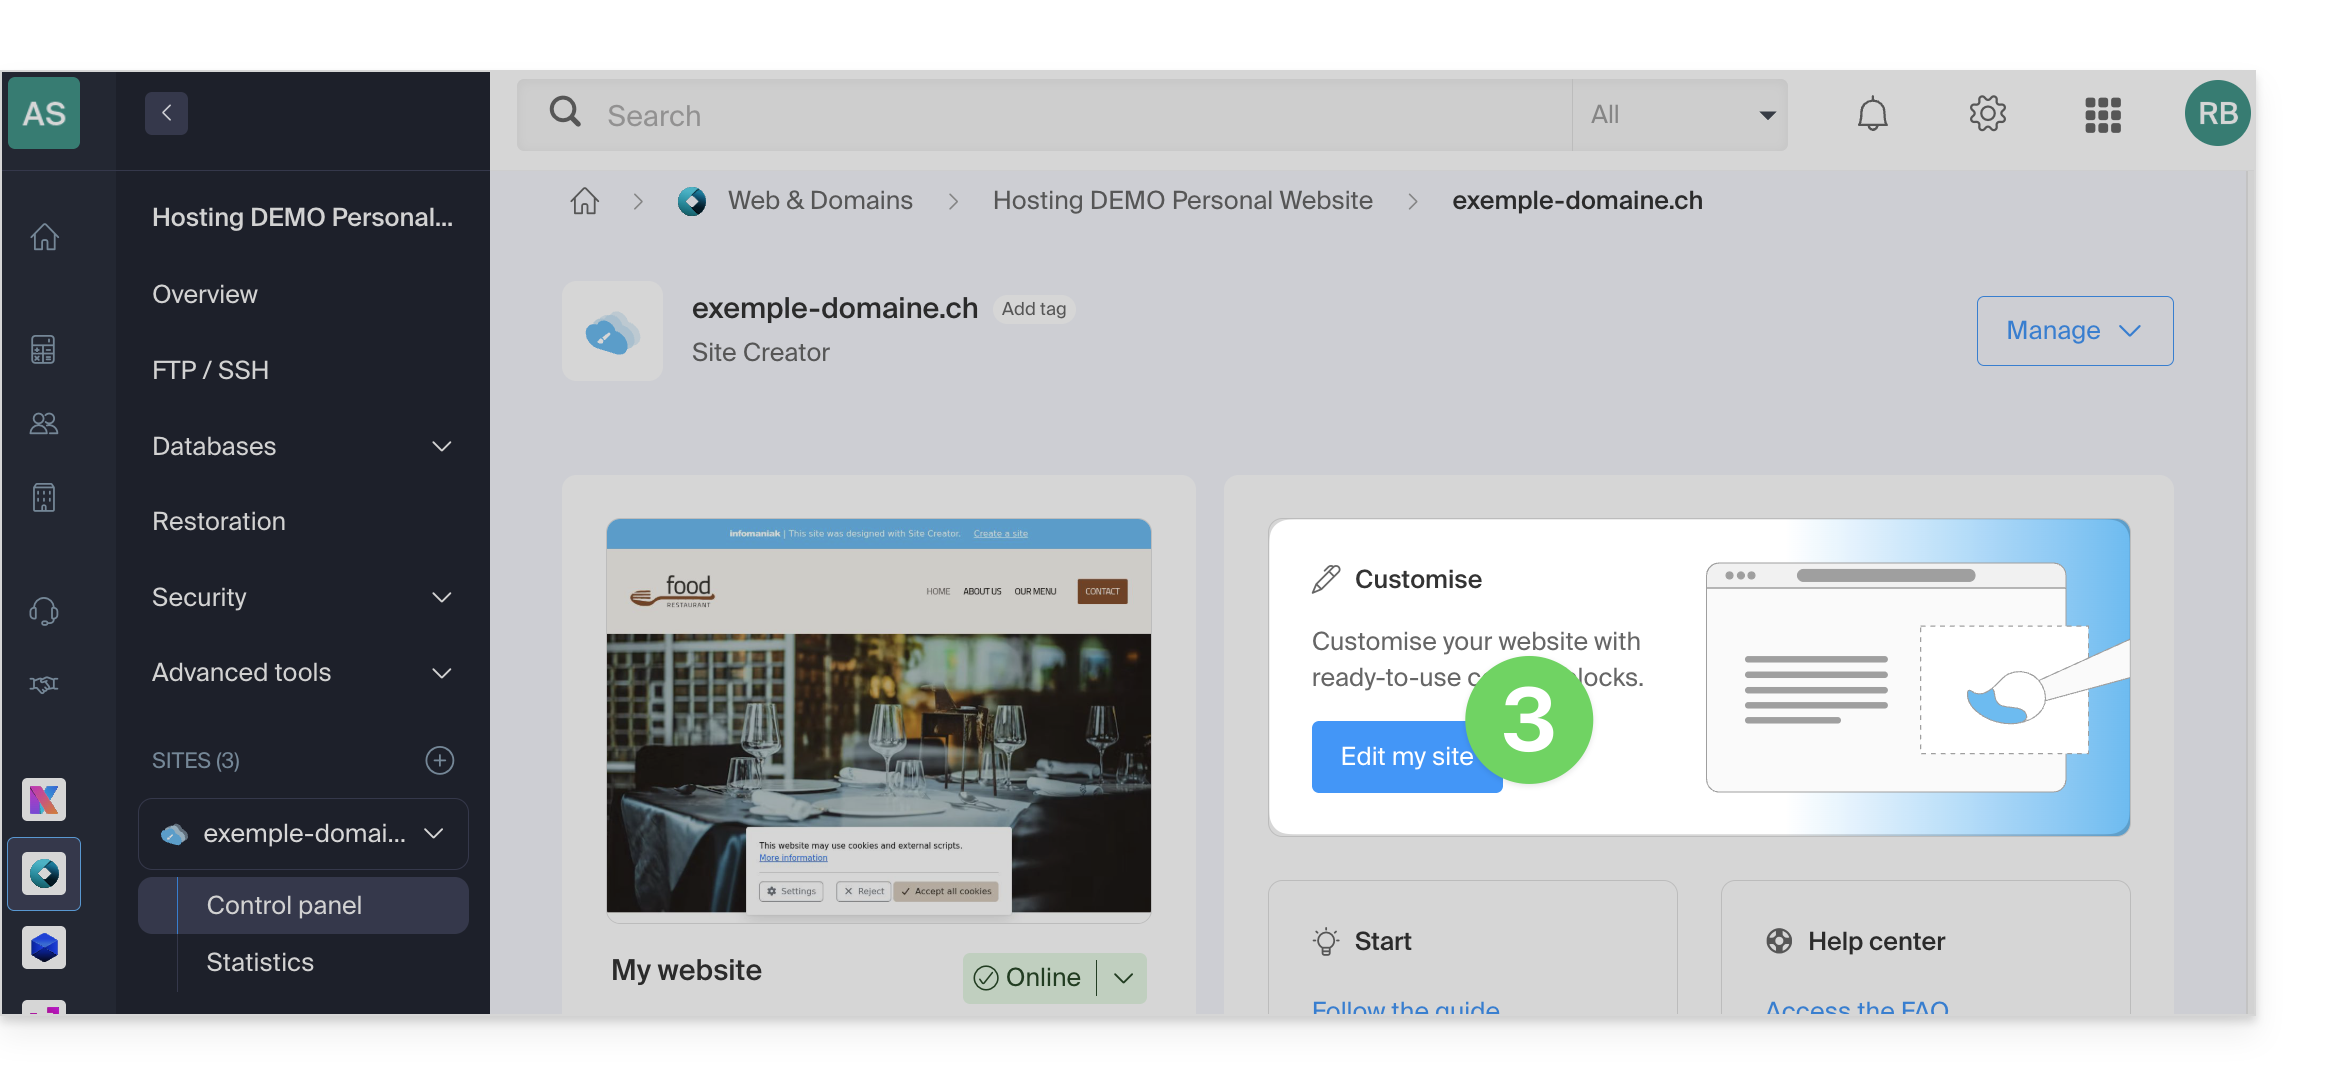
- Click on the button to edit your site:
Once in Site Creator, you can create one or more forms allowing your visitors to write a message, register for an activity, or fill out any kind of online form with or without attachments:
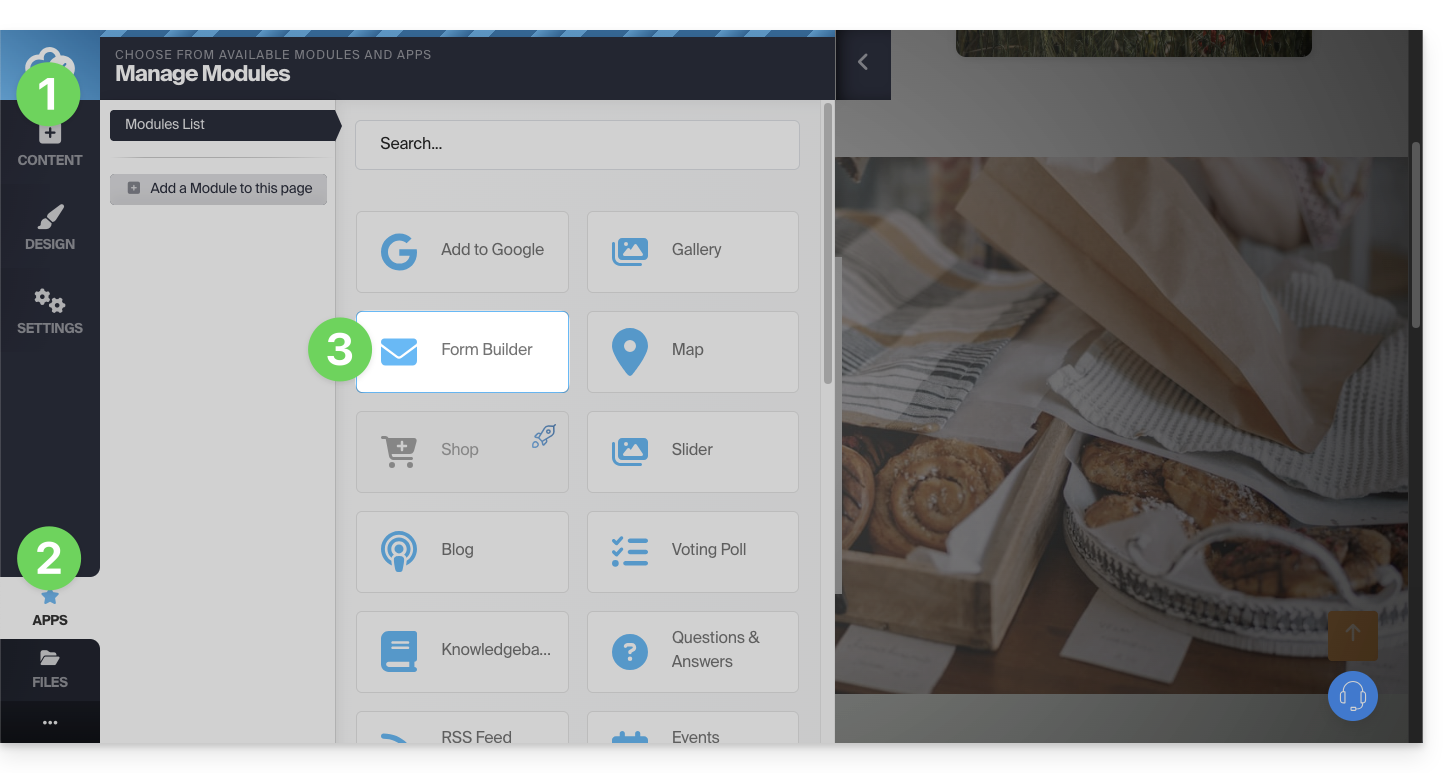
- Click on the Content button in the left-hand menu.
- Click on Applications at the bottom of the list.
- Click on Form Builder:
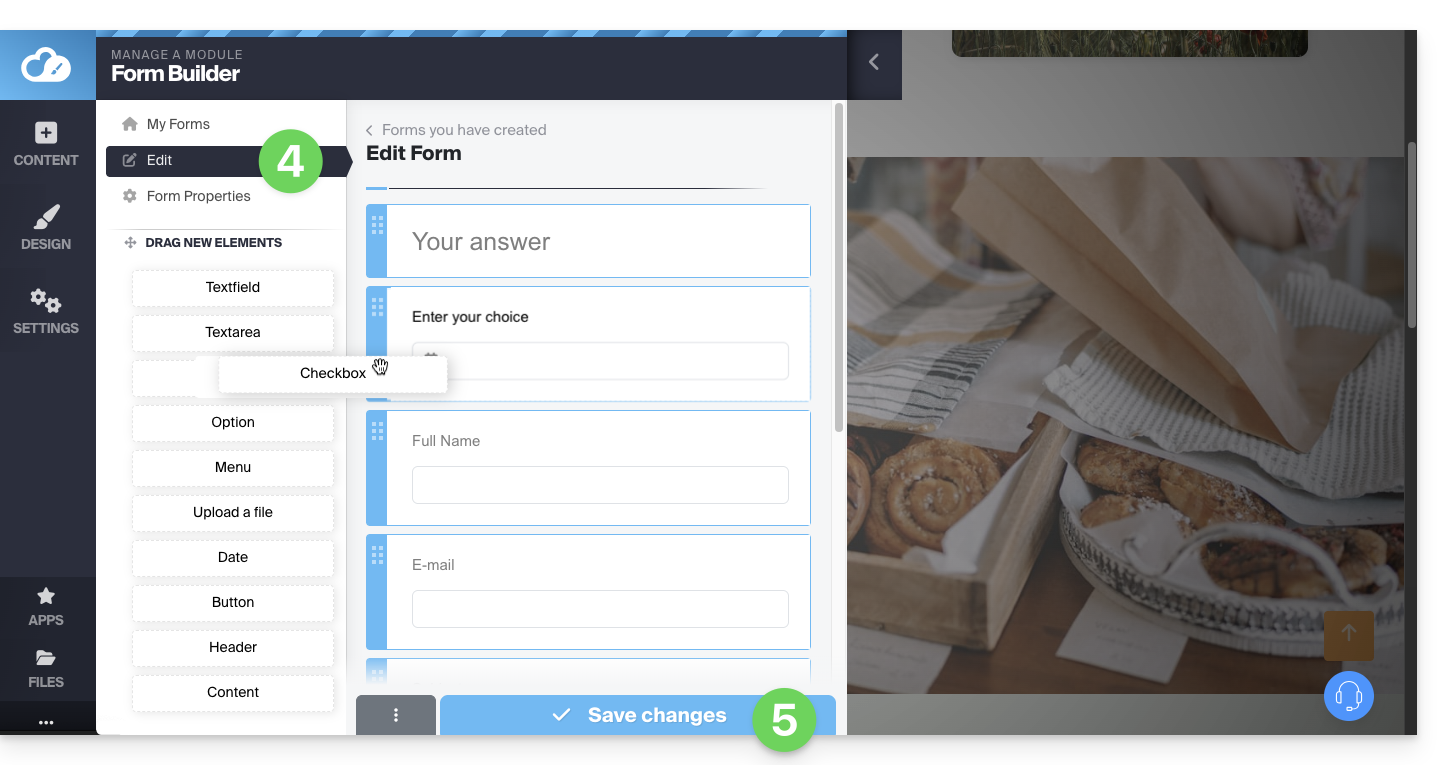
- Build your form using the elements on the left.
- Save at the bottom of the page:
Once the first form has been created, you can insert it by clicking on at the location of your choice and selecting it: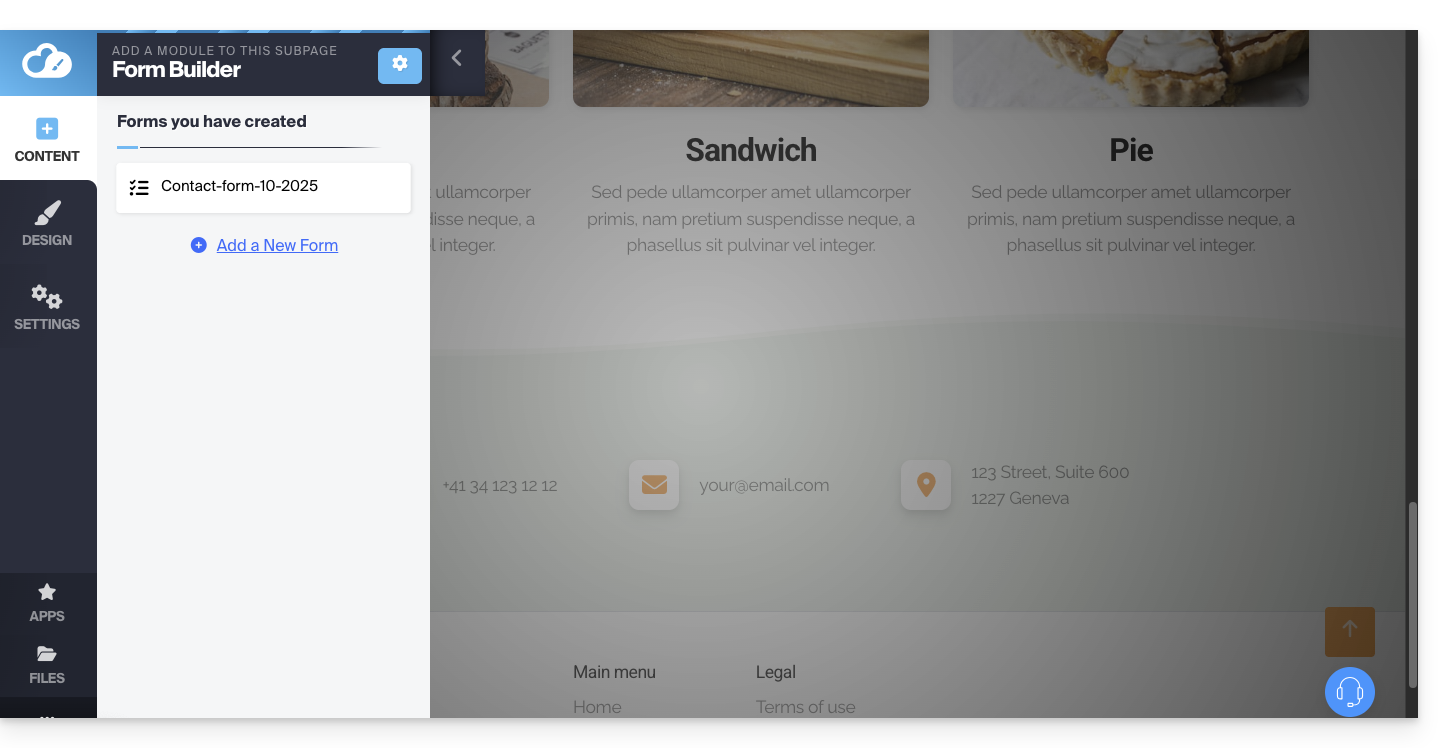
The created form will be inserted into your page: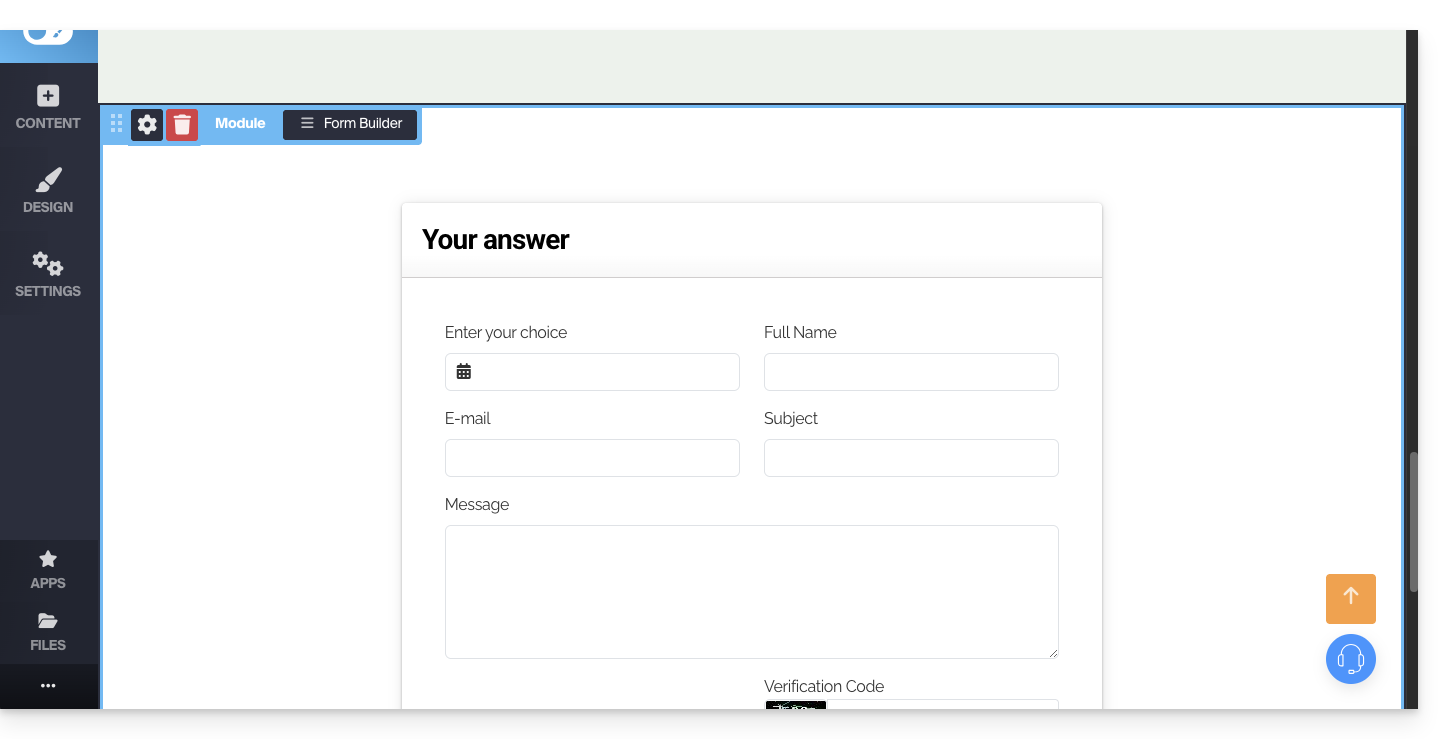
Contact Form Settings
You can customize the thank-you message, the optional redirection page after submission, the email address used, add a CAPTCHA (recommended), etc.
To do this, hover over the module to access its settings: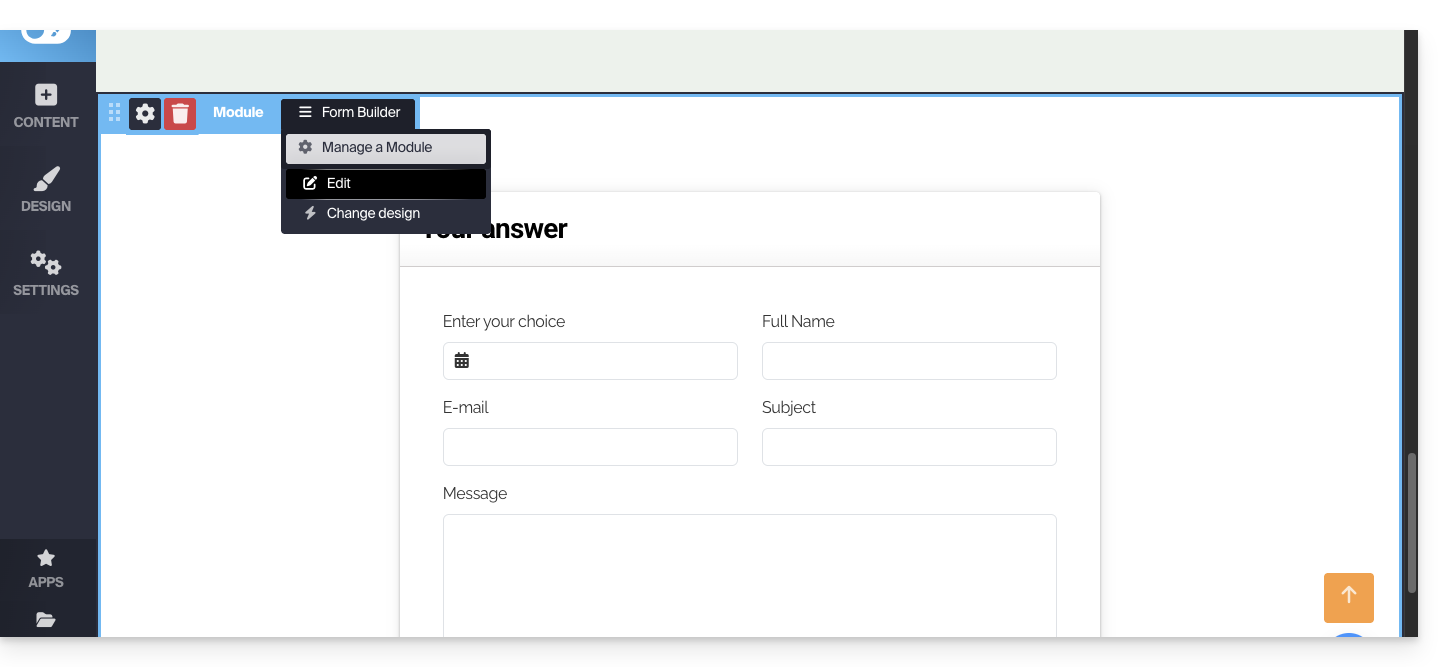
If necessary, click on the form you want to edit, then on Form Properties: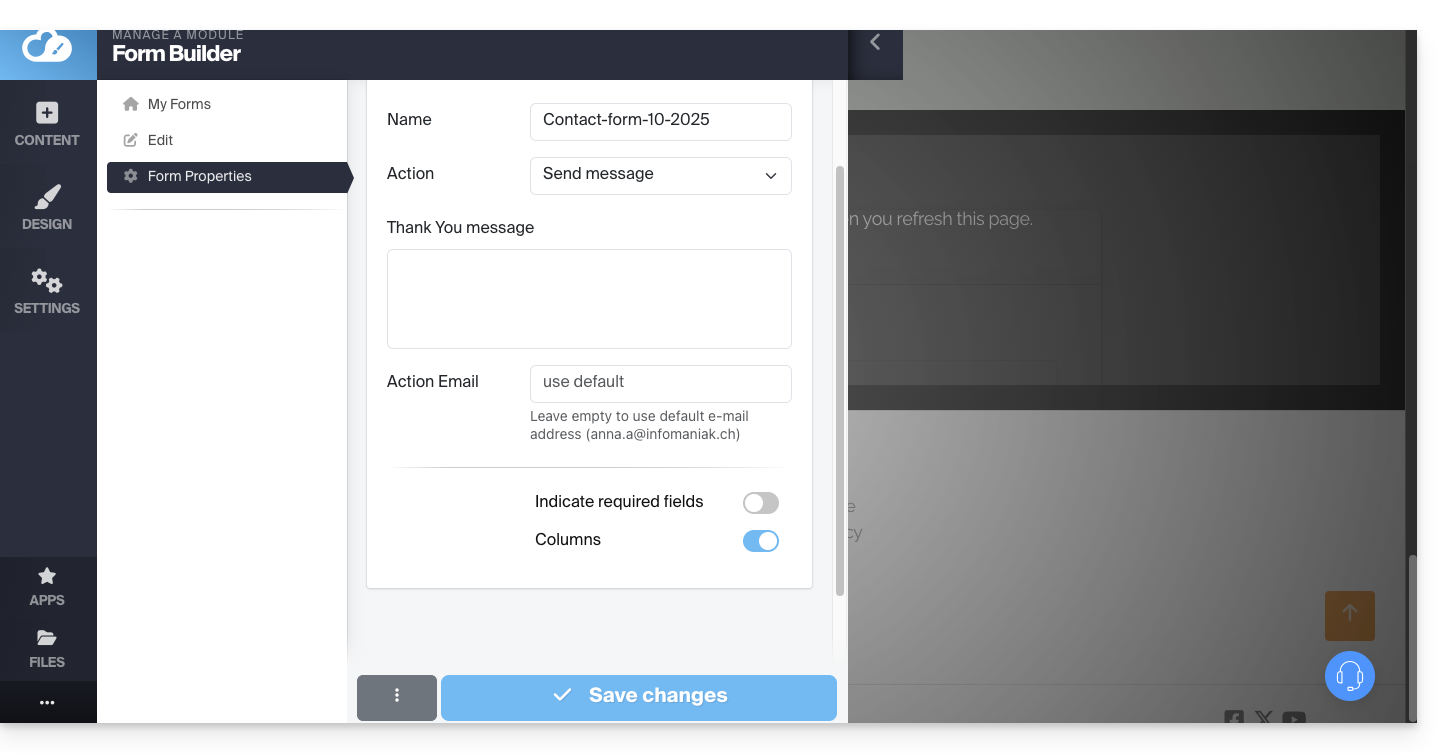
It is recommended to change the default sending method.
You can also delete the form you created so that it is no longer offered:
Please note that you can also insert an Infomaniak newsletter signup form on Site Creator.
Link to this FAQ: https://faq.infomaniak.com/2724
Has this FAQ been helpful?