Knowledge base
1000 FAQs, 500 tutorials and instructional videos. Here, there are only solutions!
Manage logo, header, and footer in Site Creator
This guide explains how to manage the logo, header, and footer sections in Infomaniak's Site Creator.
Prerequisites
- Access Site Creator:
- Click here to access the management of your product on the Infomaniak Manager (need help?).
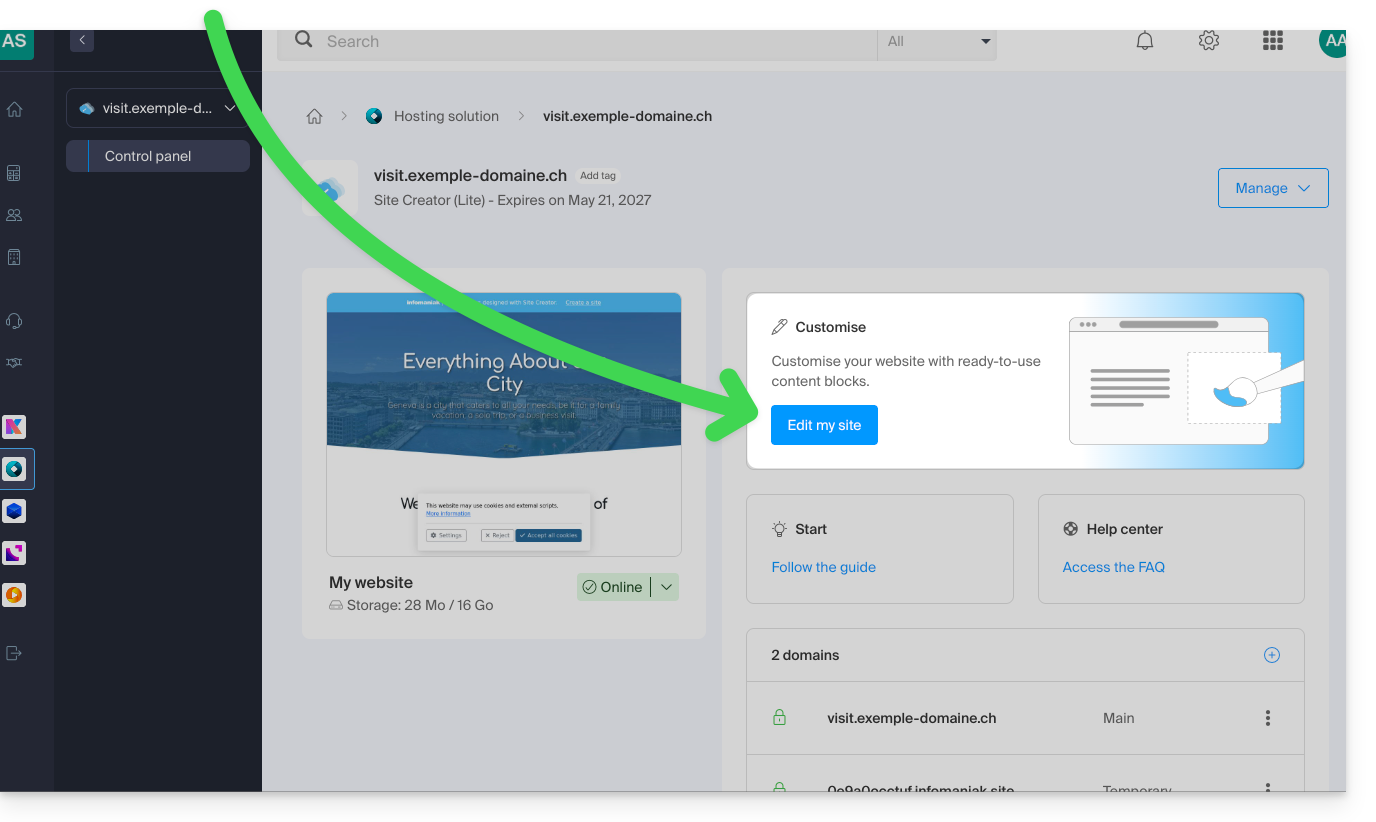
- Click directly on the name assigned to the Site Creator in question.
- Click on the Edit my site button to launch the editor:
Add a website logo
Once in Site Creator:
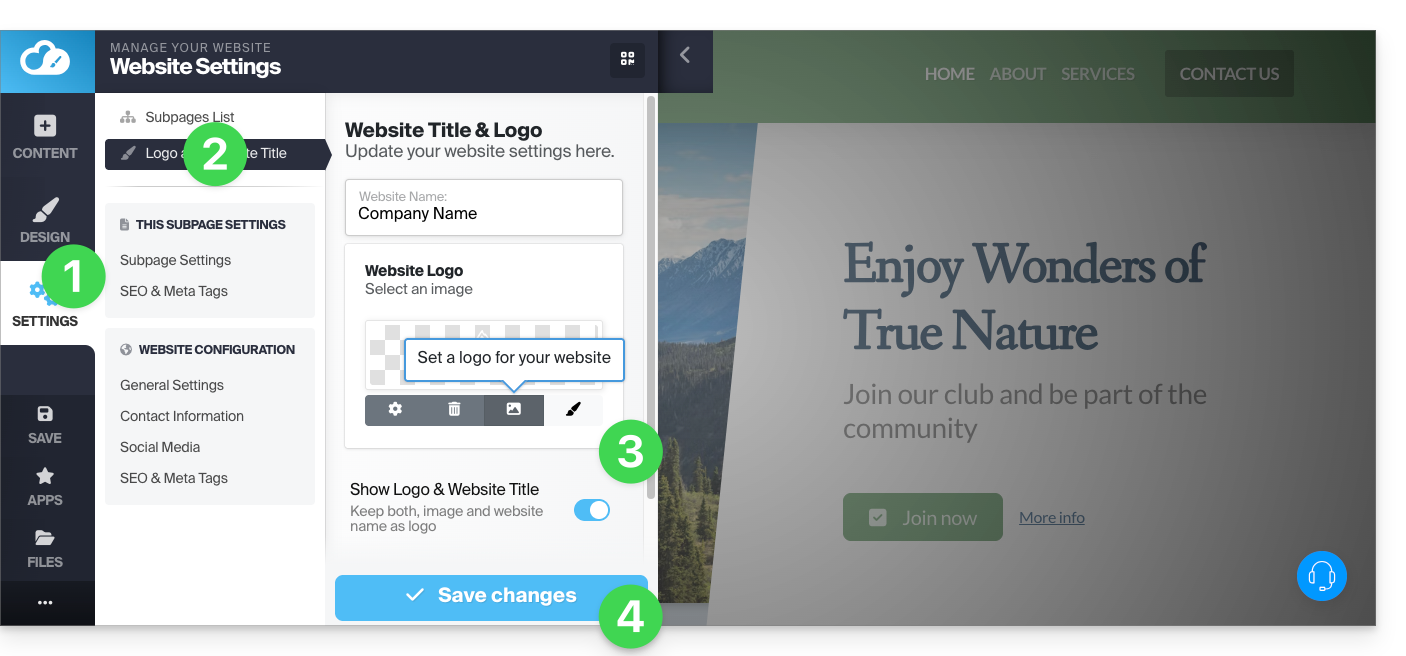
- Click on the Settings button in the left sidebar.
- Click on Logo / title.
- Upload an image and choose whether the site name should also be displayed next to it.
- Save the changes:
Logo settings
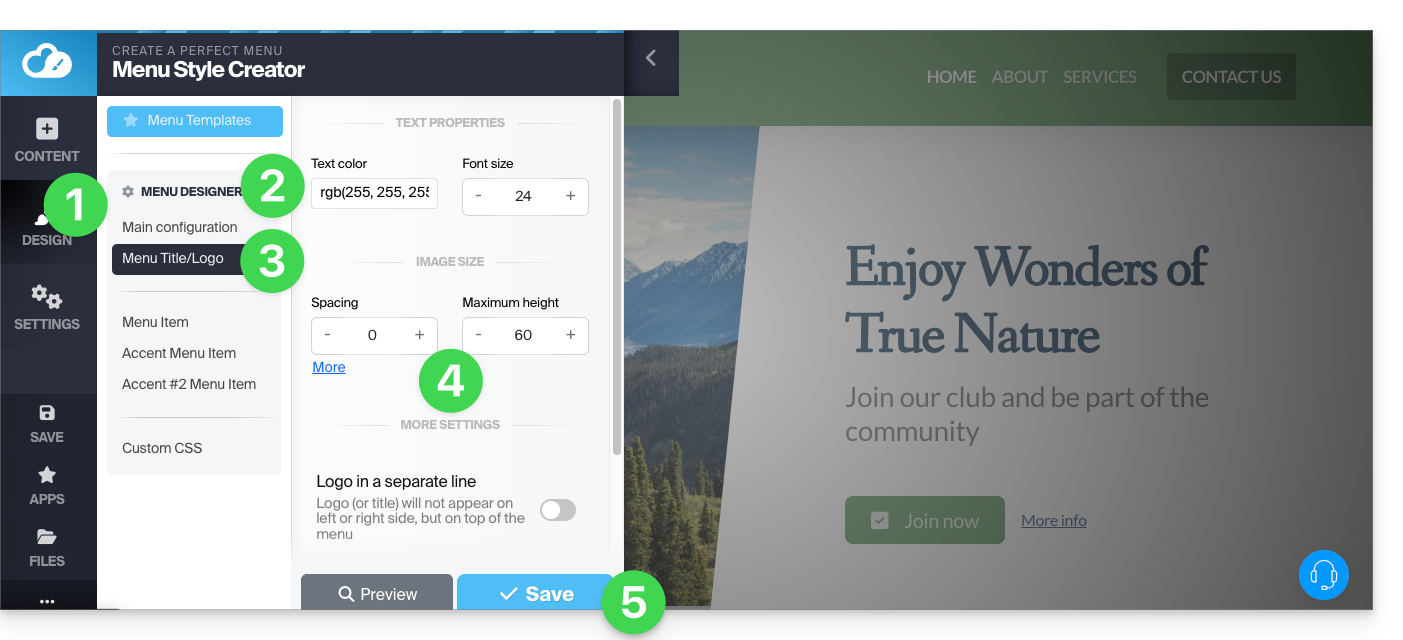
- Click on the Design button in the left sidebar.
- Click on Menu Designer.
- Click on Title/logo.
- Then adjust spacing and colors.
- Save the changes:
Display the logo in the center
In the same location as above (you can also access it by hovering over the header and its logo),activate the option to display the logo on a separate line, which will center the site's logo:
Hide the logo (and header and footer)
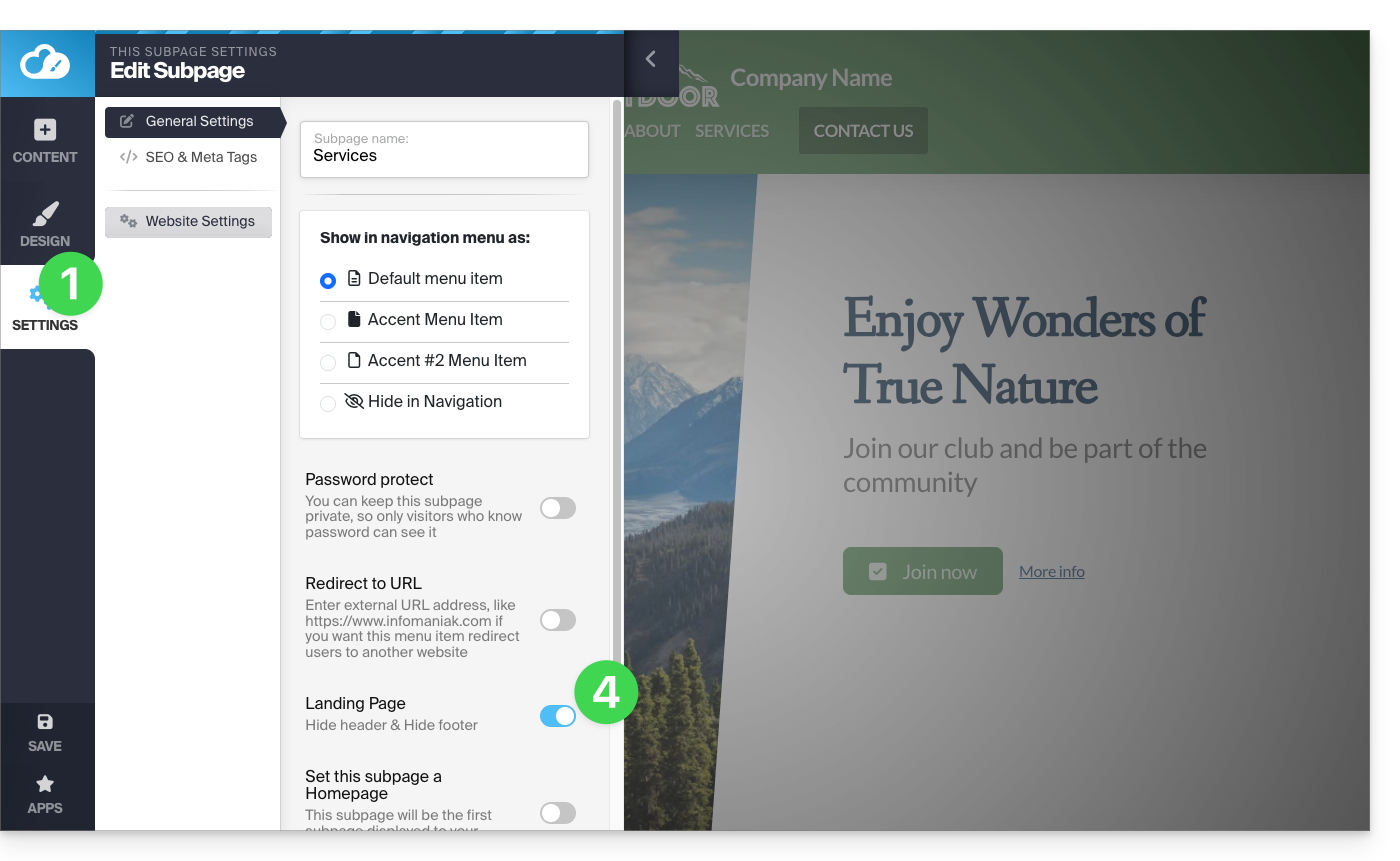
To create a page without a logo that also has no header (and therefore no menu displayed) or footer, you need to define it as a Homepage (i.e., a "Landing page"; note that this does not change the order of the pages) using a button located here:
- Click on the Settings button in the left sidebar.
- Click on Page List.
- Hover over a page in the existing tree and click on the gear icon that appears on hover.
- Activate the "Homepage" option at the bottom to hide headers and footers:
Link to this FAQ: https://faq.infomaniak.com/2720
Has this FAQ been helpful?