Knowledge base
1000 FAQs, 500 tutorials and instructional videos. Here, there are only solutions!
Edit the code (source / CSS) in Site Creator
This guide explains how to customize the source code, modify the CSS, or change the HEAD or BODY section of a website created with Infomaniak's Site Creator.
Prerequisites
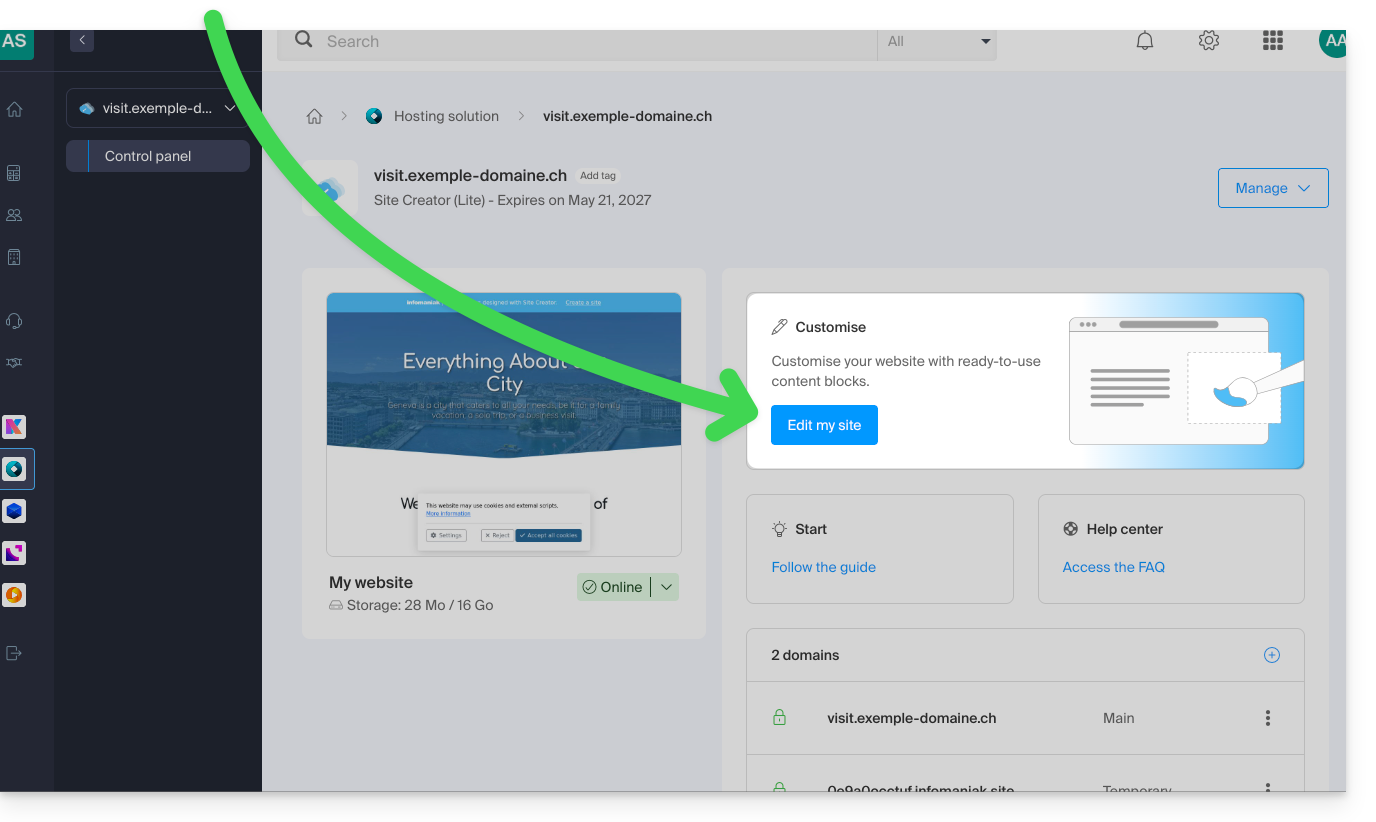
- Access Site Creator:
- Click here to access the management of your product on the Infomaniak Manager (need help?).
- Click directly on the name assigned to the Site Creator in question.
- Click on the Edit my site button to launch the editor:
Add custom code
Once in Site Creator:
- Click on Design in the left-hand menu.
- Click on More settings.
- Click on Custom code at the bottom:
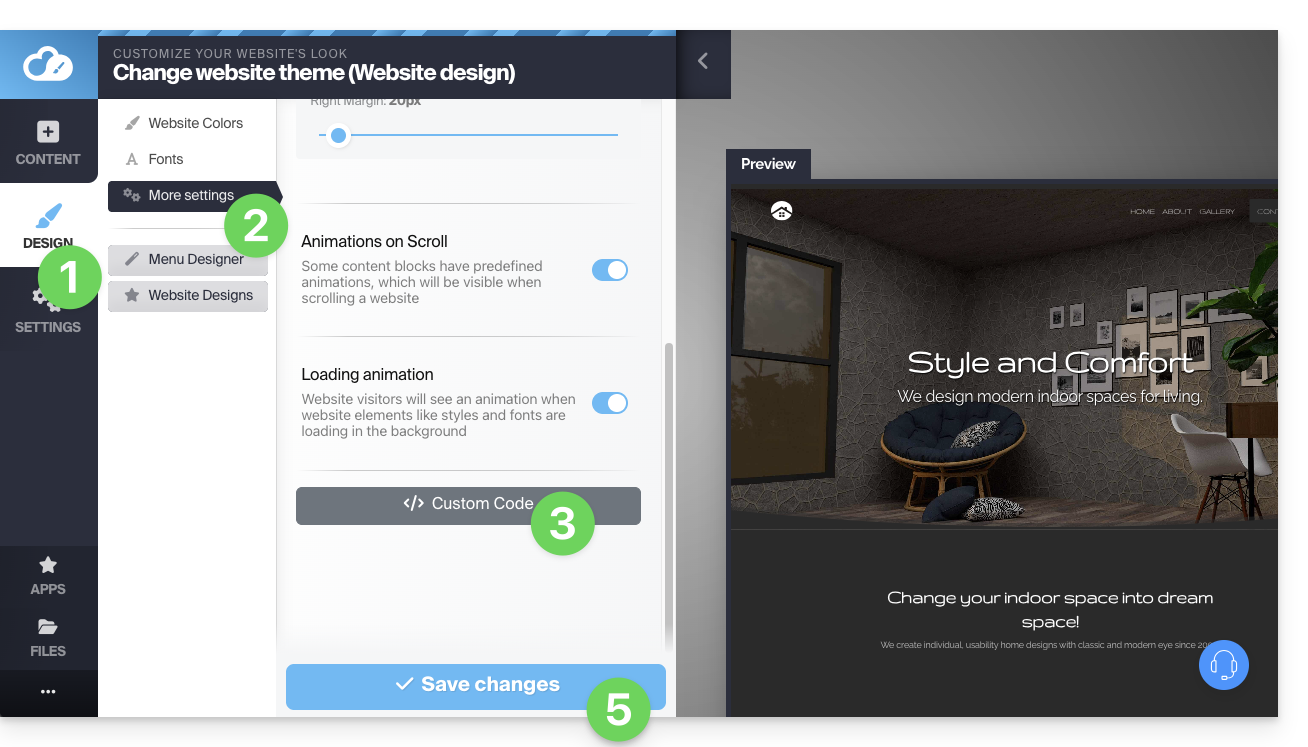
- Enter custom HTML, JavaScript (with its script tags) or CSS (with its style tags) - see below for some examples.
- Save the changes at the bottom of the page.
Metadata in HEAD & BODY
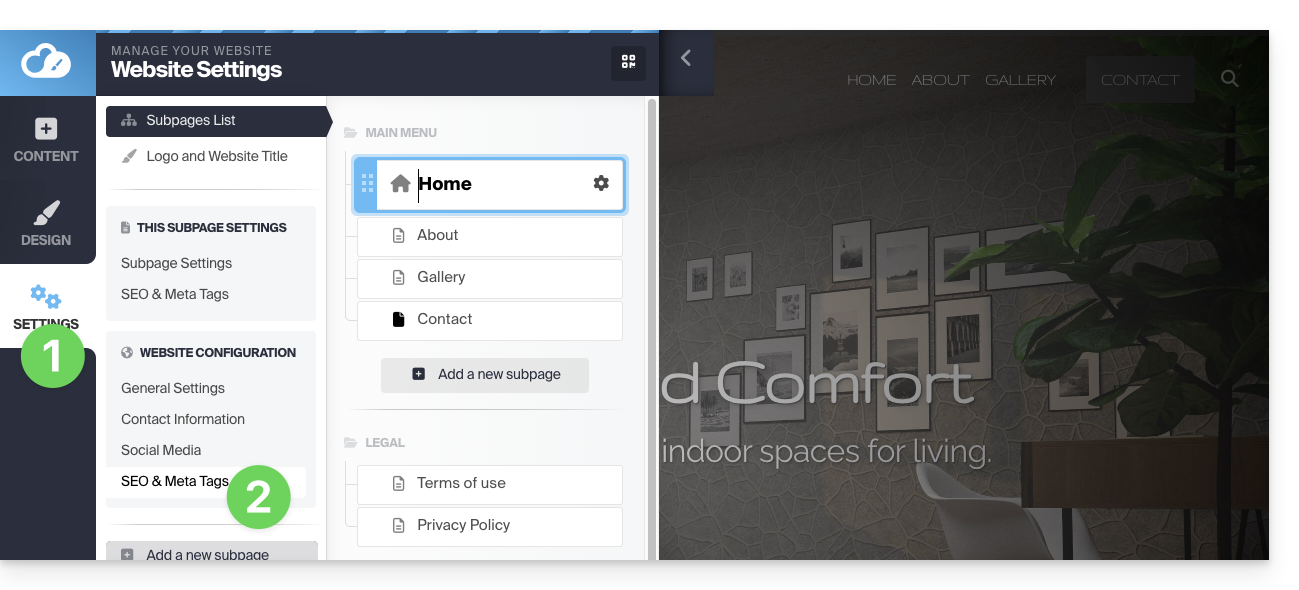
To add JavaScript code or any other code to the HEAD or BODY section of your website's source code:
- Click on Settings in the left-hand menu.
- Click on SEO & Metadata in the Website Configuration section:
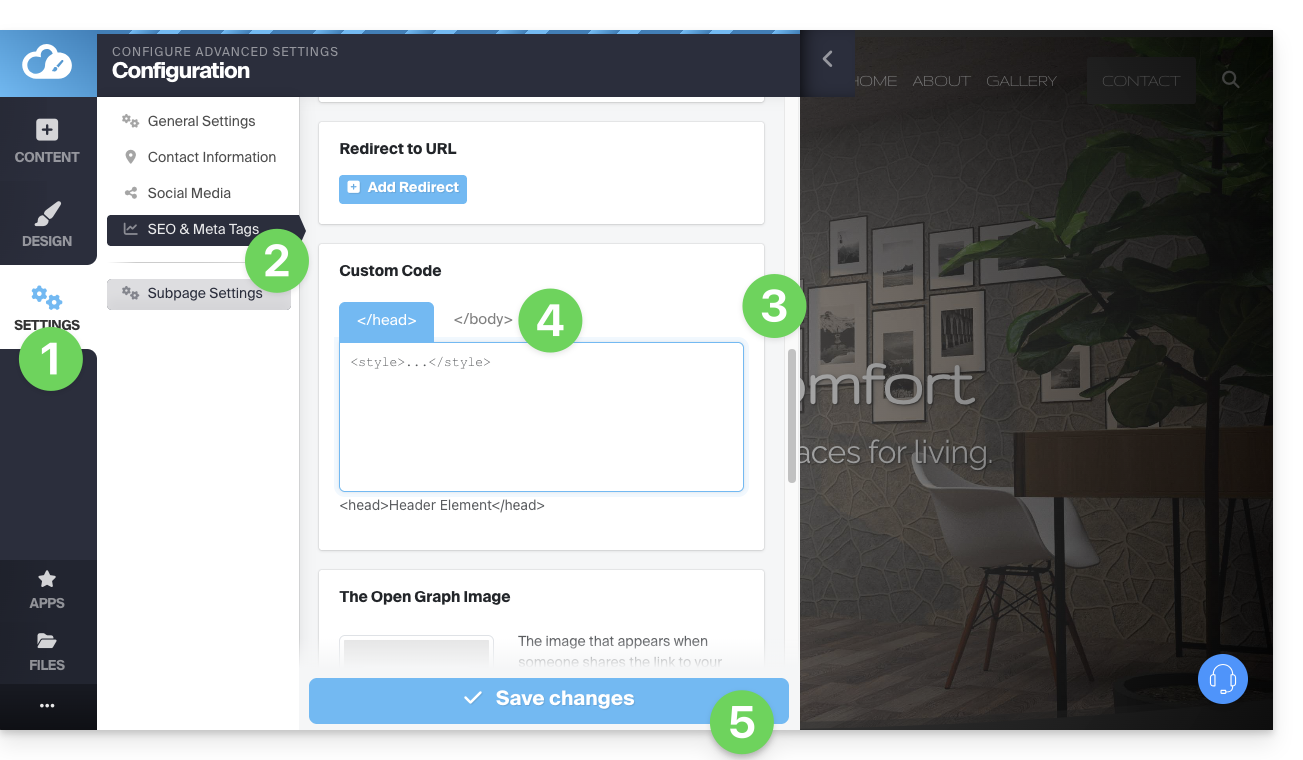
- Scroll down to Custom code.
- Choose to add the code under the HEAD or BODY tabs.
- Save the changes at the bottom of the page:
CSS Customization Examples
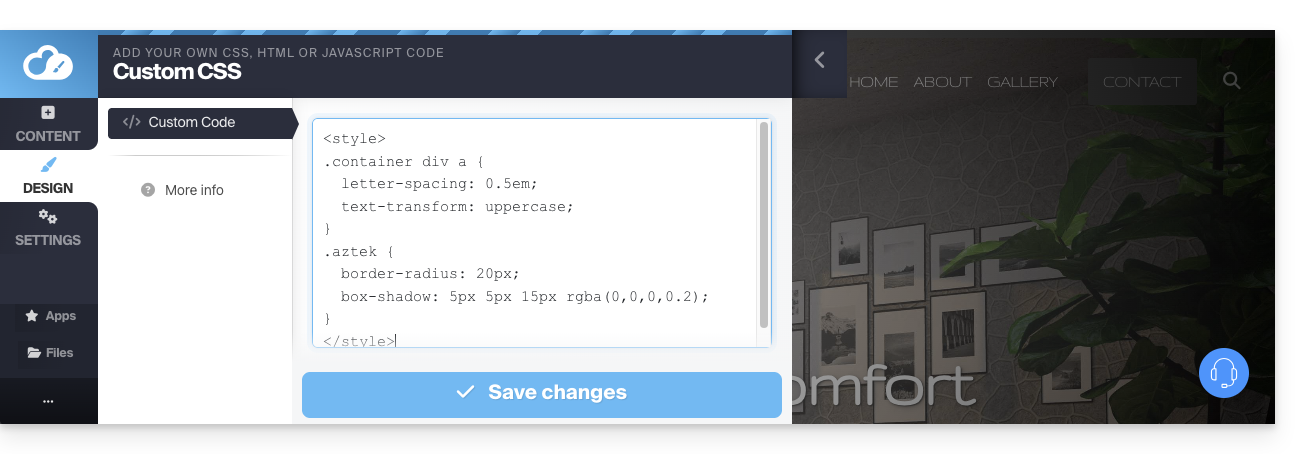
These examples provide a starting point for advanced customization of the website pages. However, there is a risk that, depending on the changes made, you may no longer be able to access the editor itself, which would force you to start over from scratch.
It is strongly recommended that you never insert tags such as html, head, or body, as these could conflict with the application's source code.
Customize the website background
To set the image of your choice (which you can upload to the file library) as the page background and customize its display:
- Go to point 3, which is visible in the first image at the top of this guide.
- Insert the
<style>code to indicate that you want to modify the CSS code. - then
body {to indicate that you want to modify the page body and the "{" to open the space where you can insert the commands, - then
background-image: url("../data/files/fond01.jpg");with the exact path and name of the image uploaded to the library, without forgetting the semicolon to be able to insert the next command. background-repeat: repeat;to repeat the inserted image.background-attachment: fixed;to ensure that the background image remains fixed even when the visitor scrolls down or up to read the content.}to close the previously opened insertion space.</style>to indicate that the code ends here.
Increase the spacing between the letters of all links on the site
To increase the spacing (significantly) between the letters in clickable words (links):
- Go to point 3, which is visible in the first image at the top of this guide.
- Insert the code (if it is not already present)
<style>to indicate that you want to modify the CSS code. - then
.container div a {to indicate that you want to modify the page blocks, and more specifically the links ("a"), and the "{" to open the space where you can insert the commands, - then
letter-spacing:1em;by decreasing the value (0.9emfor example), without forgetting the semicolon so you can insert the next command or finish. }to close the previously opened insertion space.</style>to indicate that the code ends here.
Check out these other CSS code examples to insert on your website.
Link to this FAQ: https://faq.infomaniak.com/2716
Has this FAQ been helpful?