Knowledge base
1000 FAQs, 500 tutorials and instructional videos. Here, there are only solutions!
Manage social media on Site Creator
This guide details the possible interactions between Infomaniak's Site Creator and social networks.
Specify the URLs of your different social profiles
Prerequisites
- Access Site Creator:
- Click here to access the management interface for your product on the Infomaniak Manager (need help?).
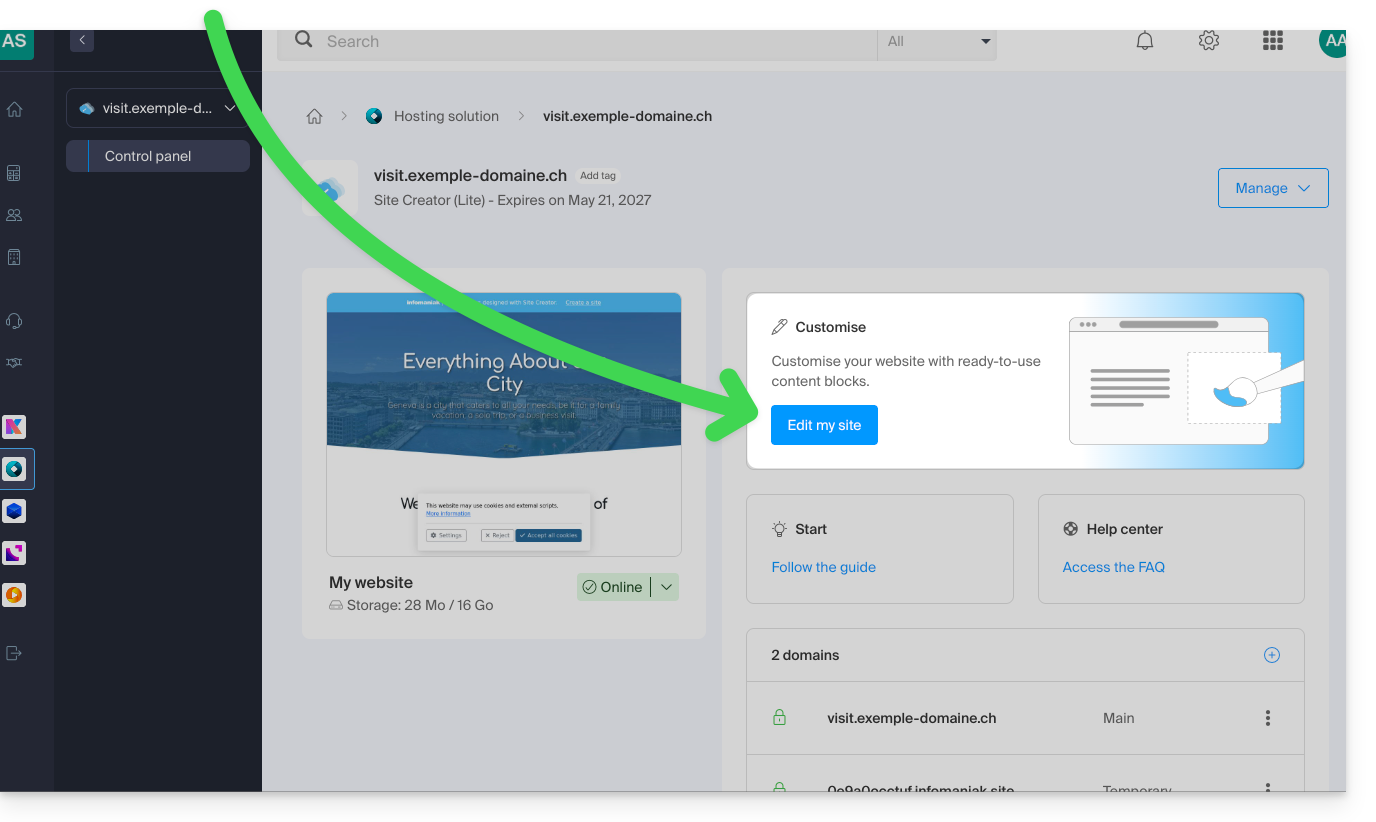
- Click directly on the name assigned to the Site Creator in question.
- Click on the Edit my site button to launch the editor:
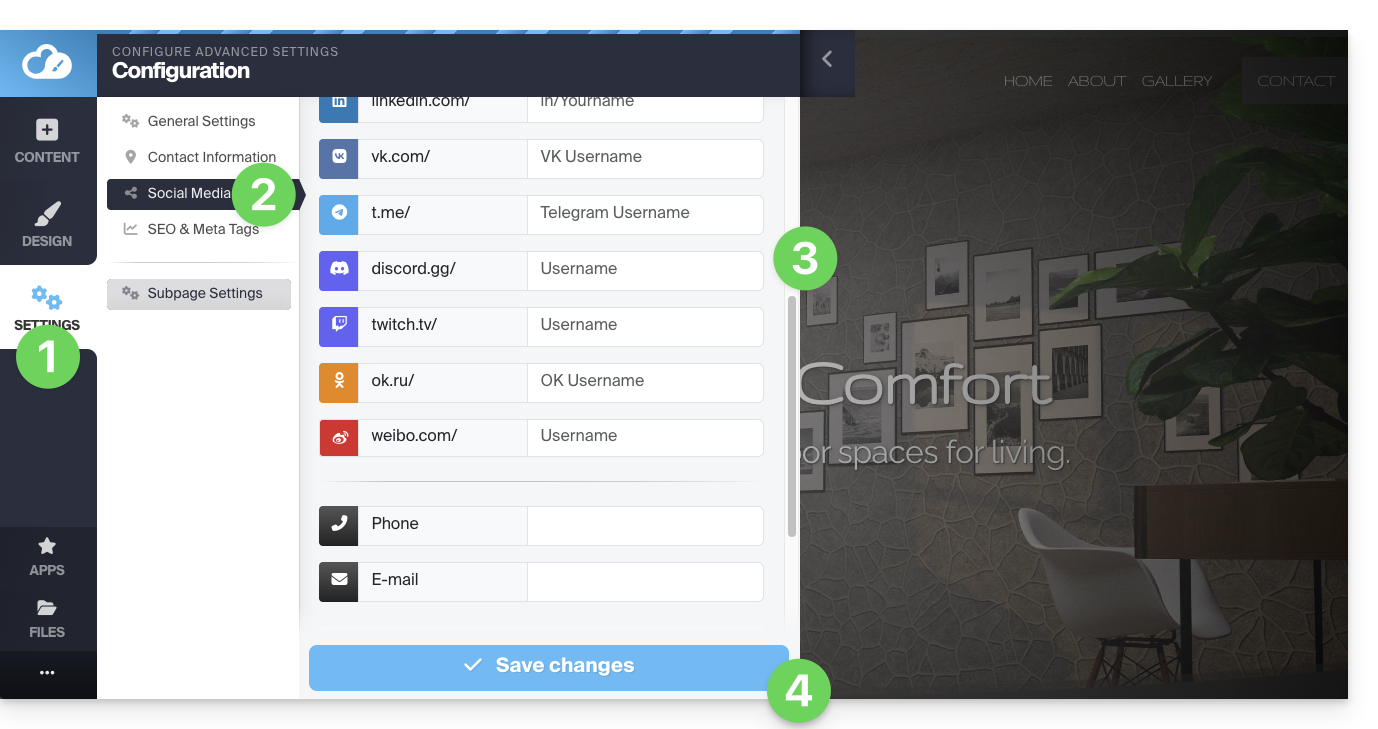
To allow visitors to click on the links to your social networks:
- Click on the Settings button in the left-hand menu.
- Click on Social Media.
- Enter the addresses of your various social media profiles (TikTok, Instagram, etc.), including a phone number and email address if you wish.
- Save the changes at the bottom of the page:
Add the icons for your profiles
Add icons for your social media accounts to the footer or header of your website:
- Click on the Settings button in the left-hand menu.
- Click on Social Media.
At the bottom, you can specify where you want the icons corresponding to the profiles you completed above to appear: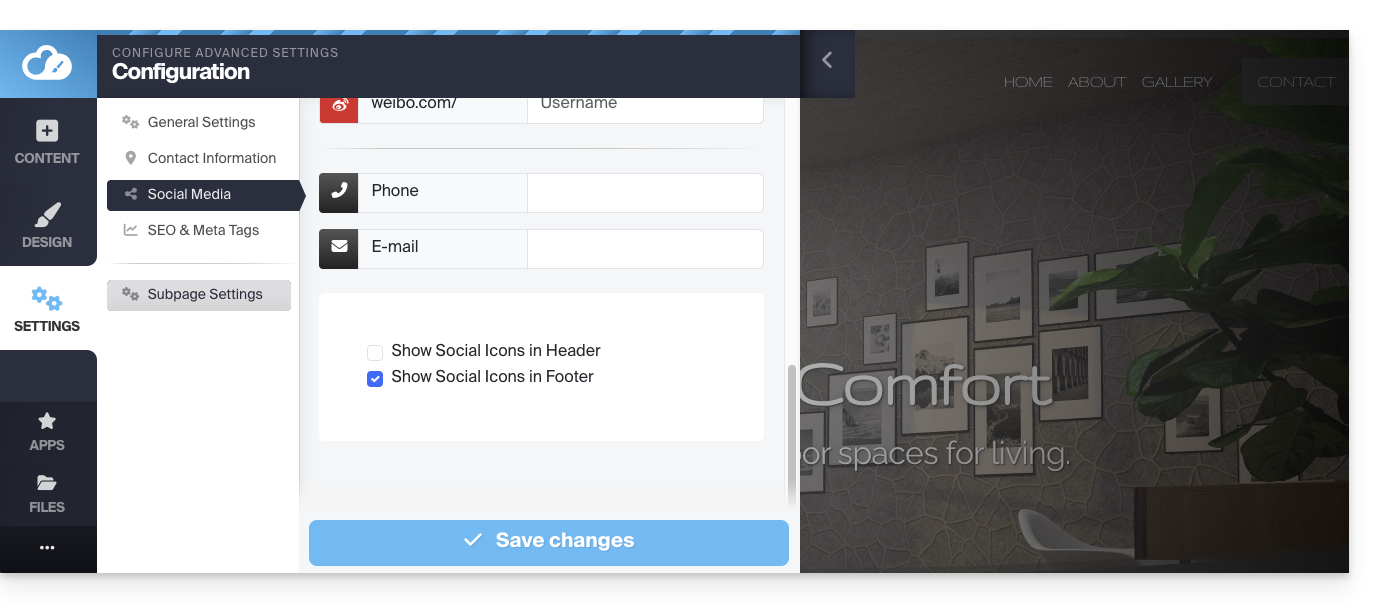
Save the changes at the bottom of the page.
Add a social sharing block
Among the blocks that you can add to a page, one block offers a row of buttons that allow visitors to easily subscribe to your various social media accounts: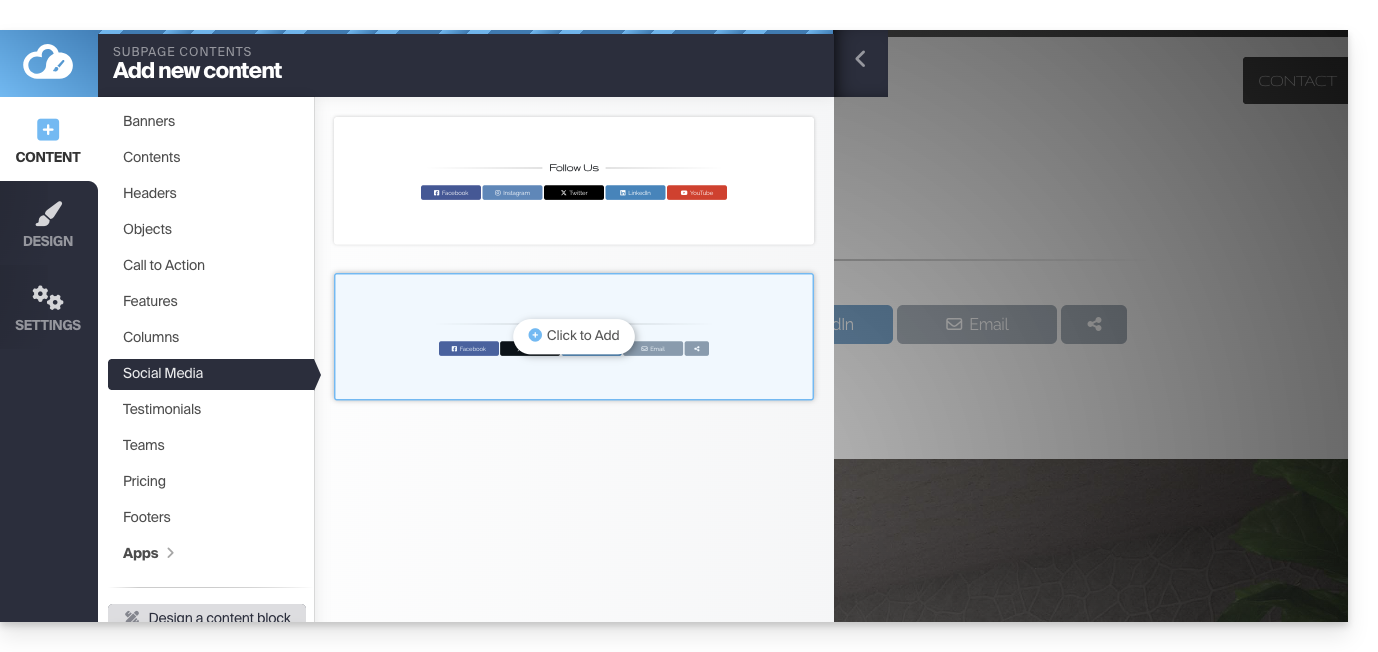
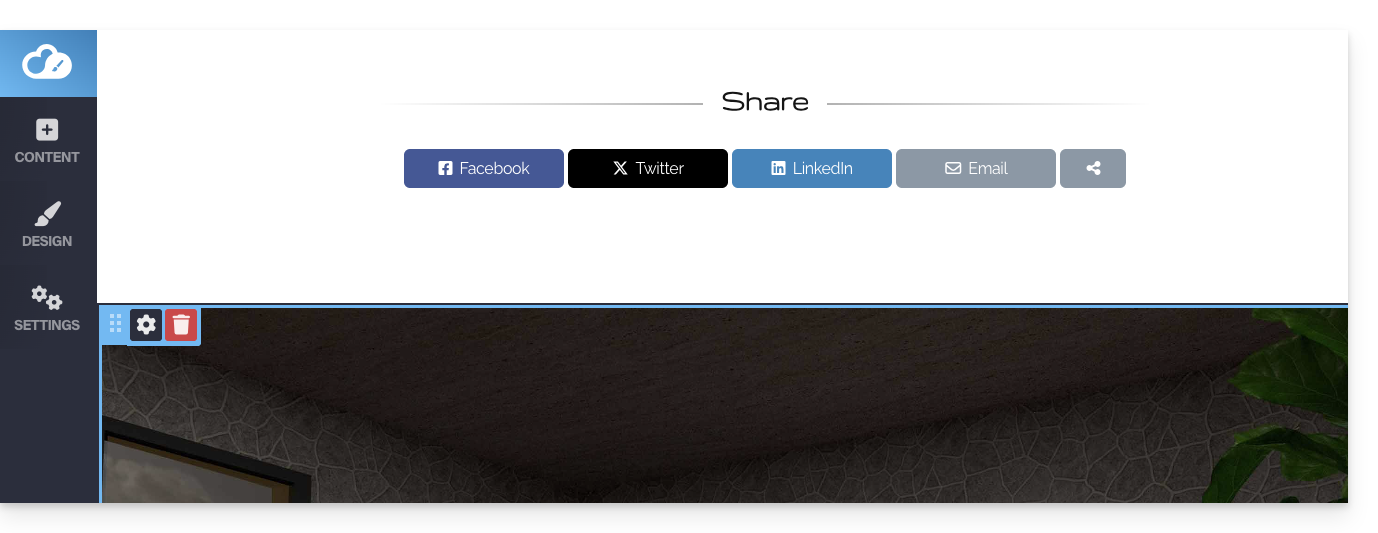
A second type of block offers a row of buttons that allow visitors to share the page on the main social media platforms:
Get the website QR code
To get the QR code for your website:
- Click on the Settings button in the left-hand menu.
- Click on the QR code icon at the very top:
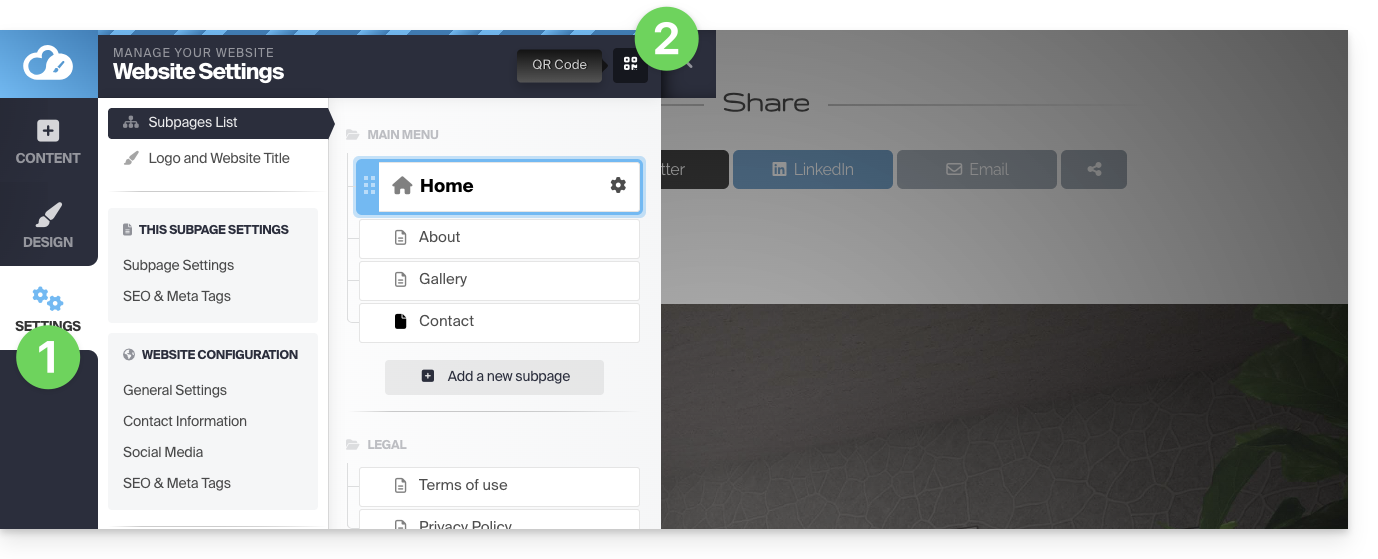
You can download the QR code corresponding to the address of your homepage. This way, a user who scans your QR code can easily access your site.
Change the social sharing OG image
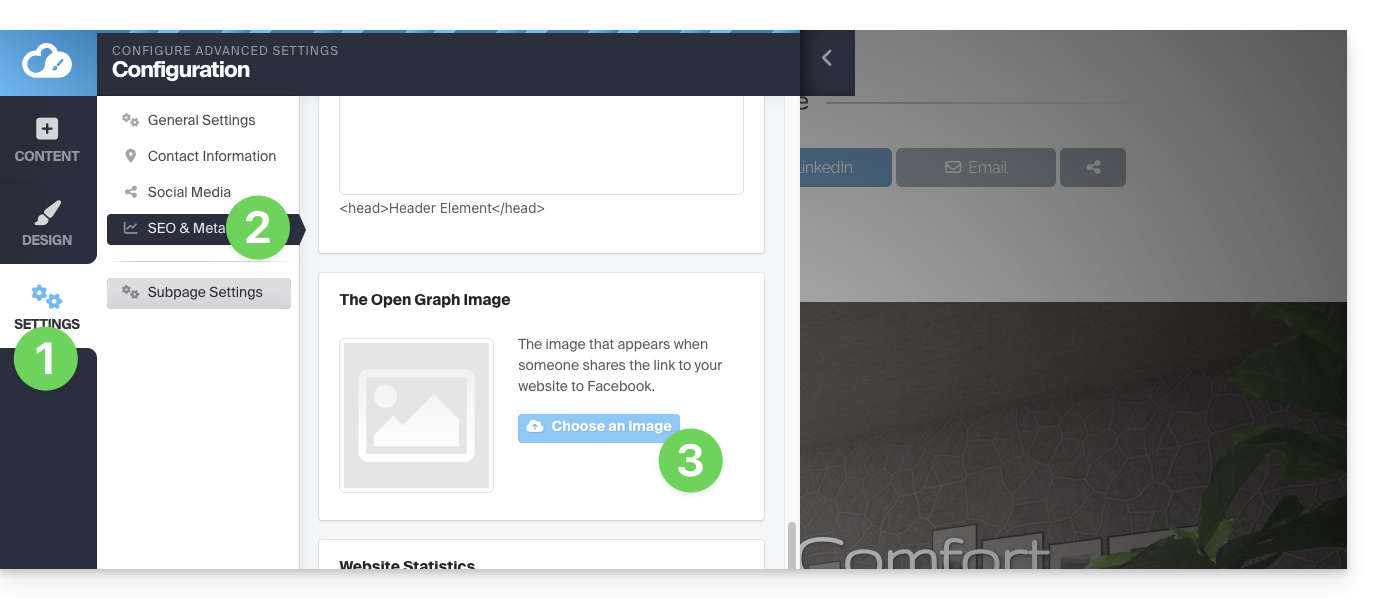
When you share a link to your website on social media, a thumbnail (Og:image for the OpenGraph image) is often automatically associated with it:
- Click on the Settings button in the left-hand menu.
- Click on SEO and metadata under General settings.
- Scroll down to Open Graph and choose the image:
Link to this FAQ: https://faq.infomaniak.com/2712
Has this FAQ been helpful?