Knowledge base
1000 FAQs, 500 tutorials and instructional videos. Here, there are only solutions!
Manage Site Creator SEO
This guide is intended for users of Infomaniak's Site Creator who wish to optimize their website's SEO.
Introduction
- Infomaniak is one of the most efficient hosting providers on the French-speaking market, which contributes to the good ranking of your websites.
- However, Infomaniak will not intervene on the content or development of the hosted websites (please refer to this other guide regarding SEO).
Add Site Creator to Google
Start by logging in to the Infomaniak Manager with your credentials (user account with the necessary rights for the relevant product):
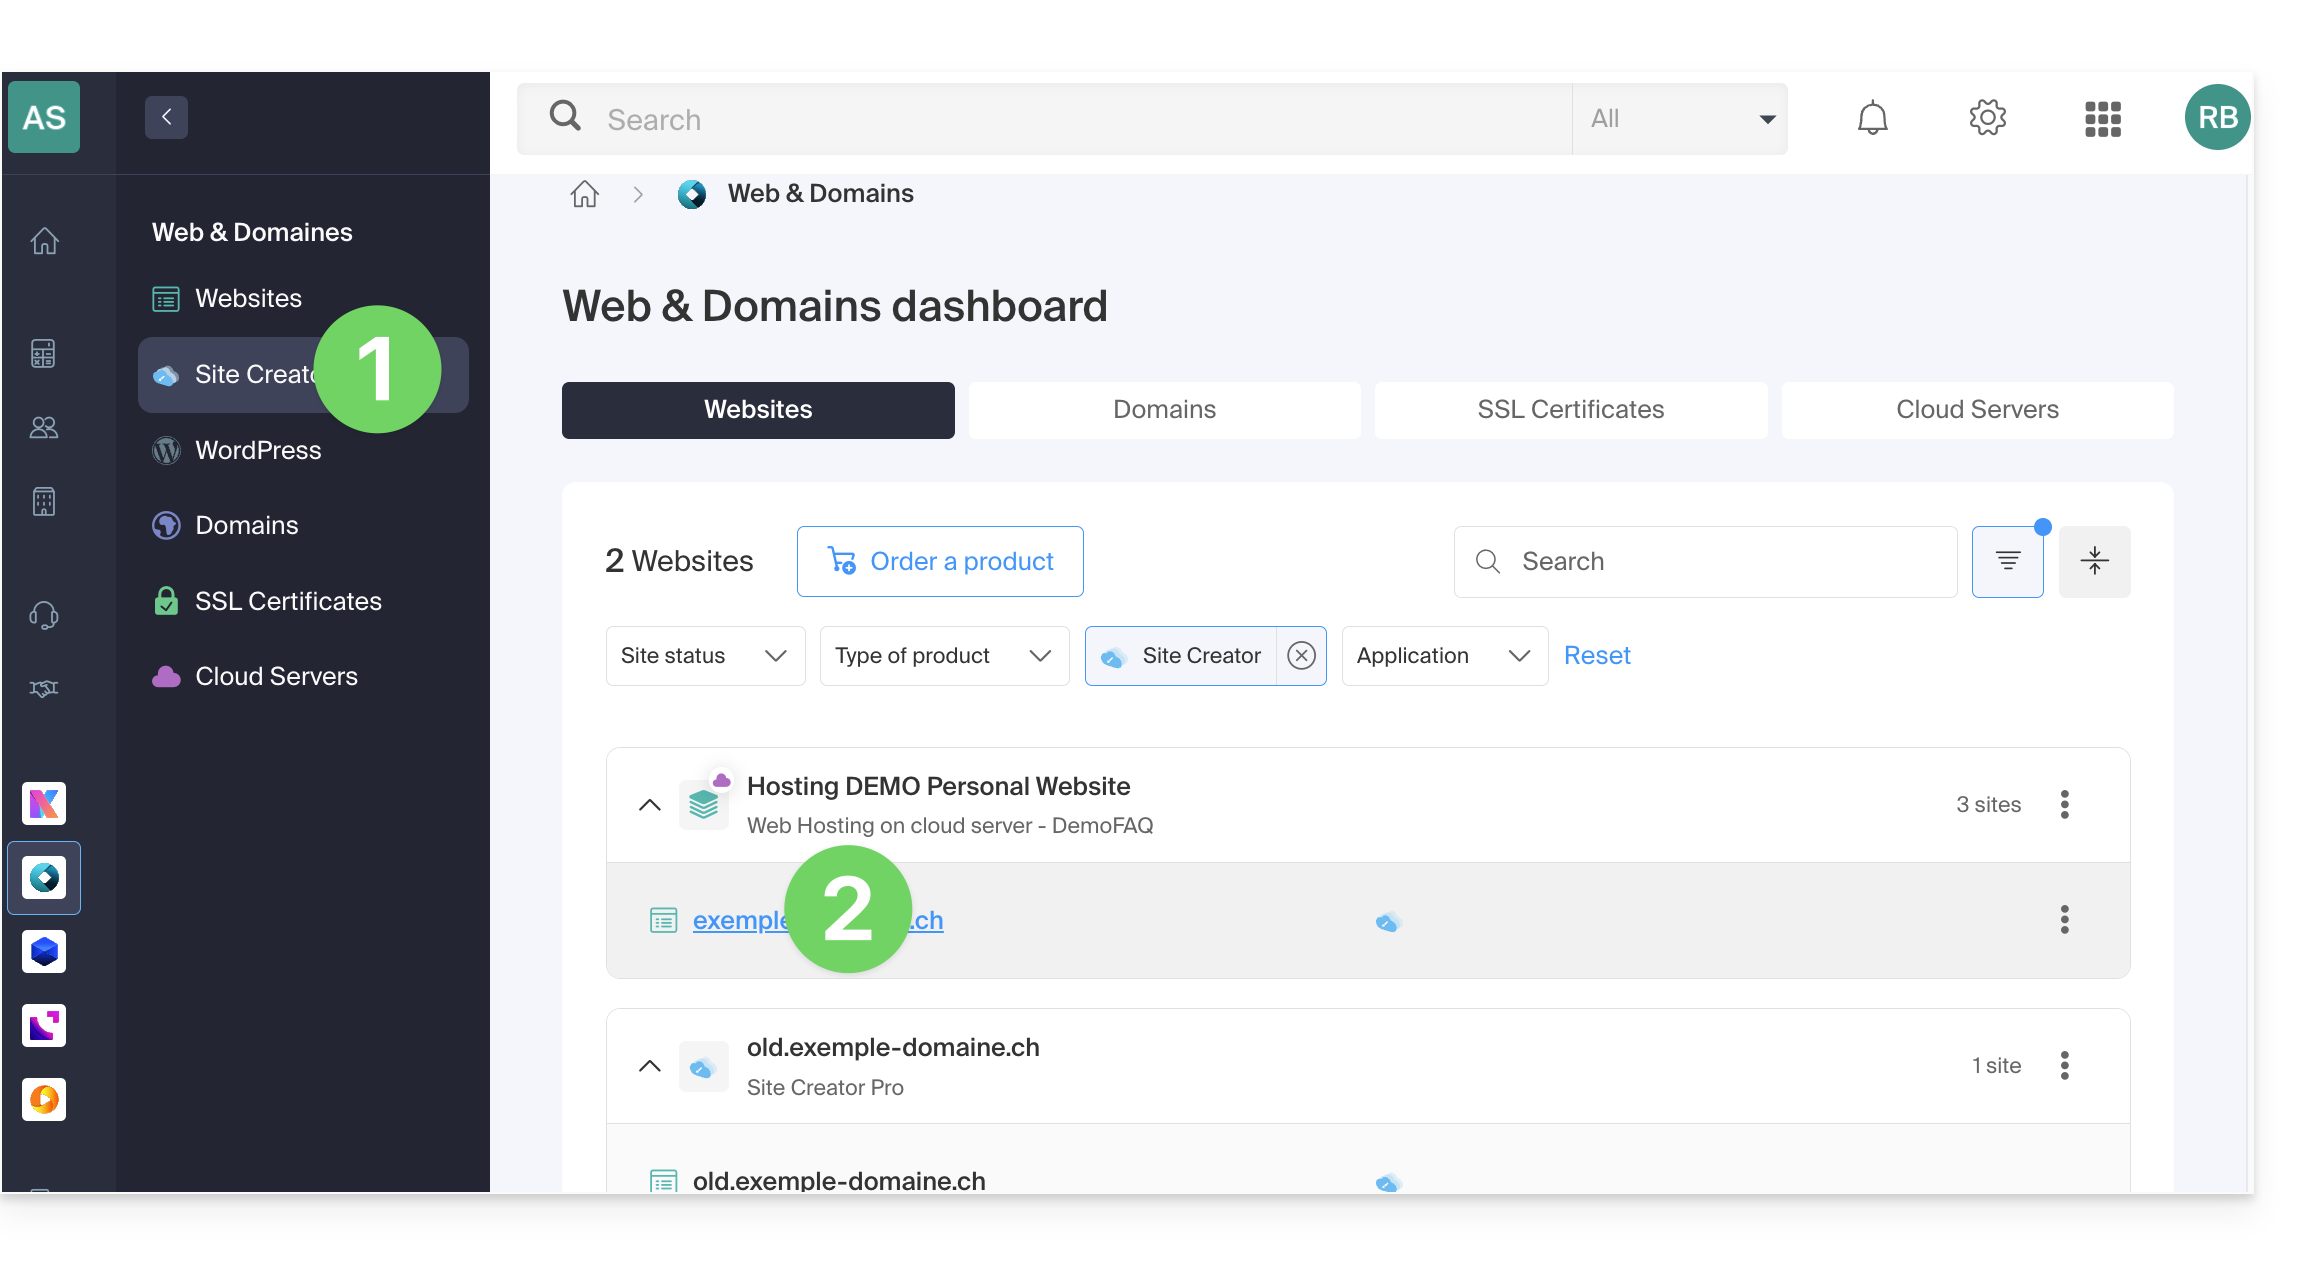
- Click here to access the hosting & site management section (filtered to display only Site Creator).
- If nothing is displayed, you may not be in the Organization to which your site is linked (❓: help).
- Click on the name of the Site Creator in question:
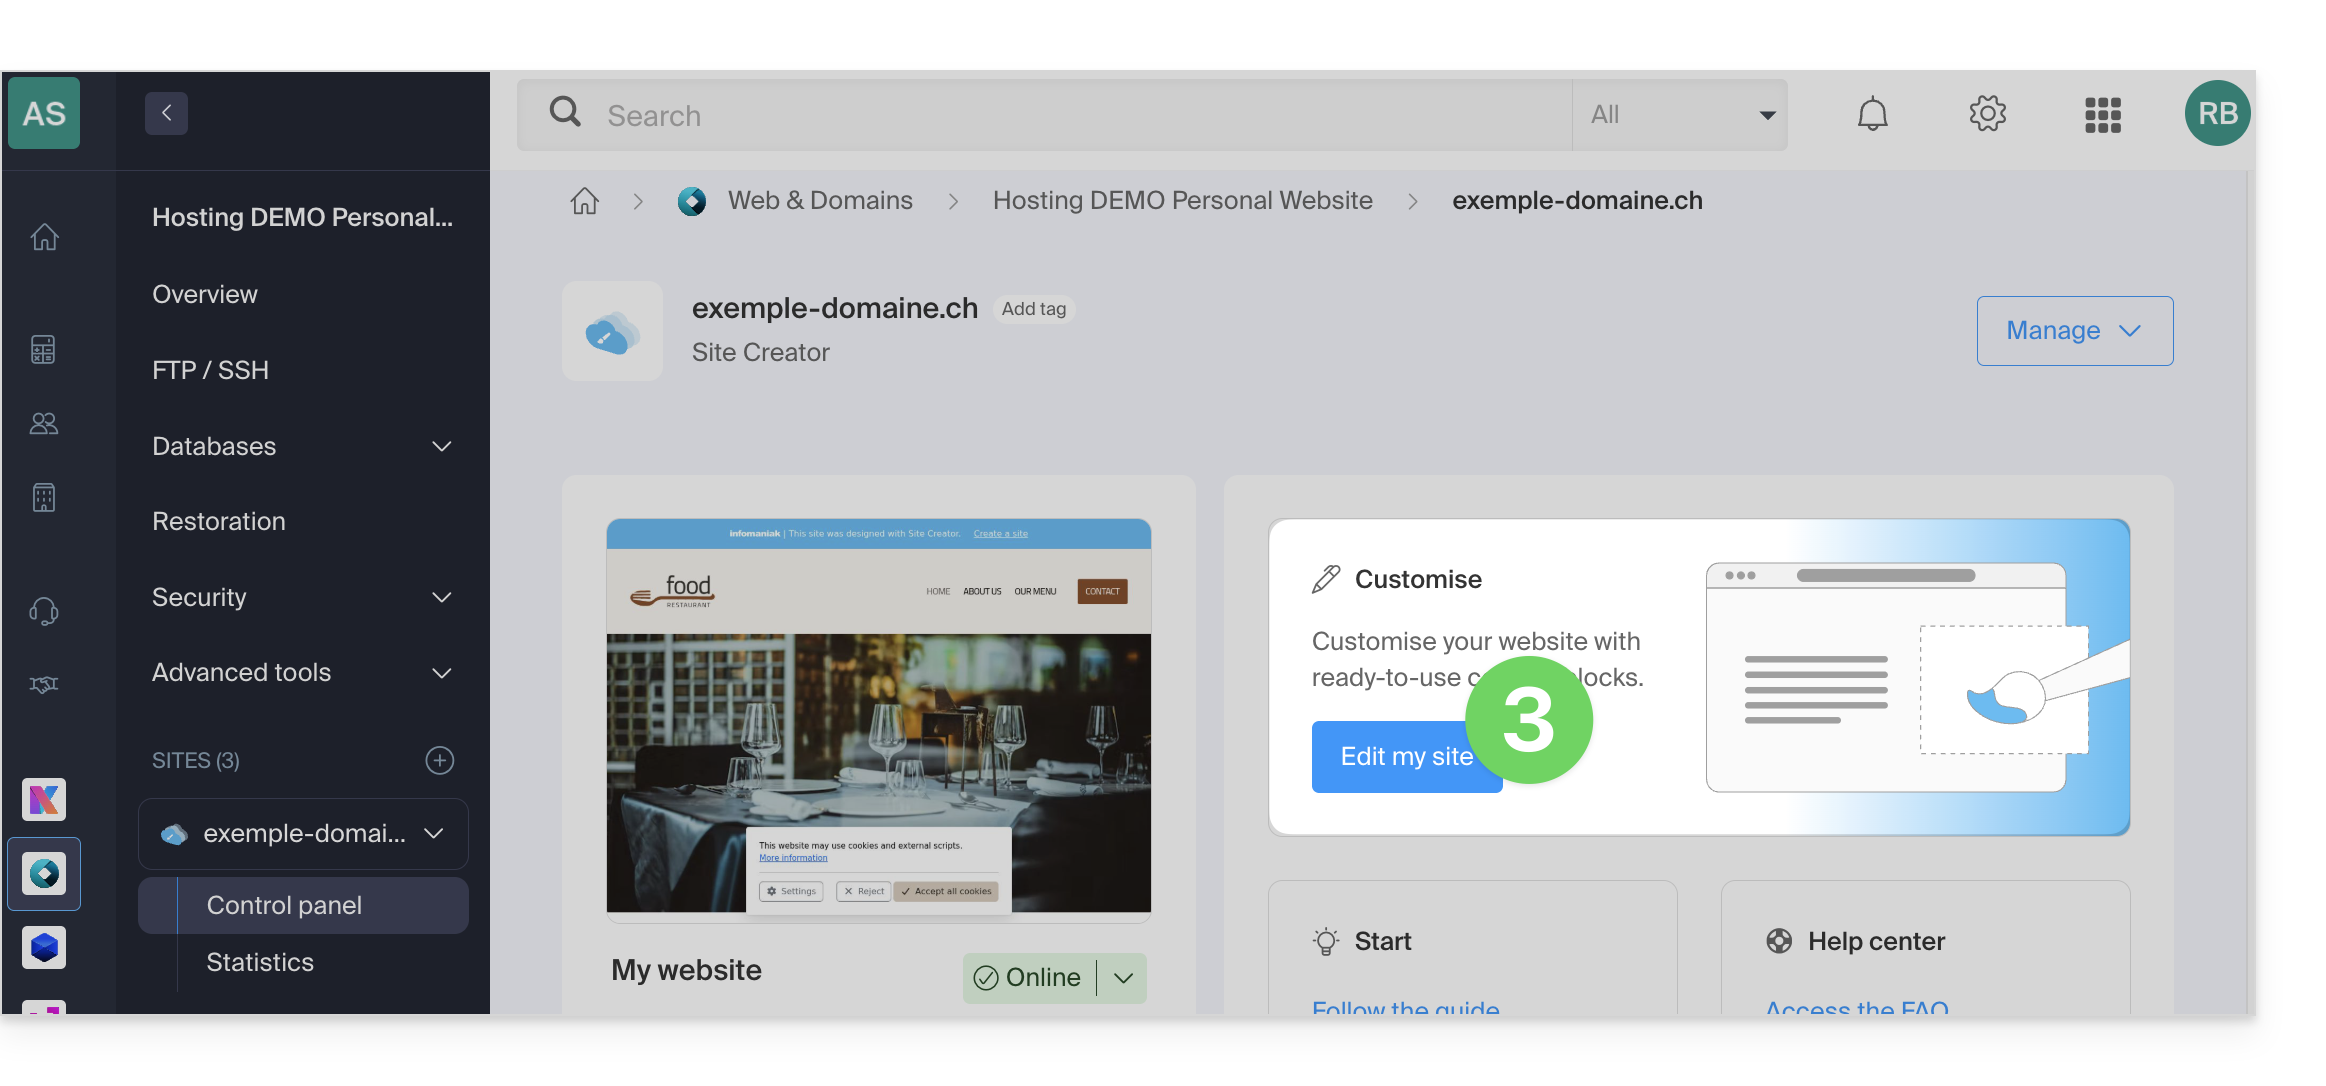
- Click on the button to edit your website:
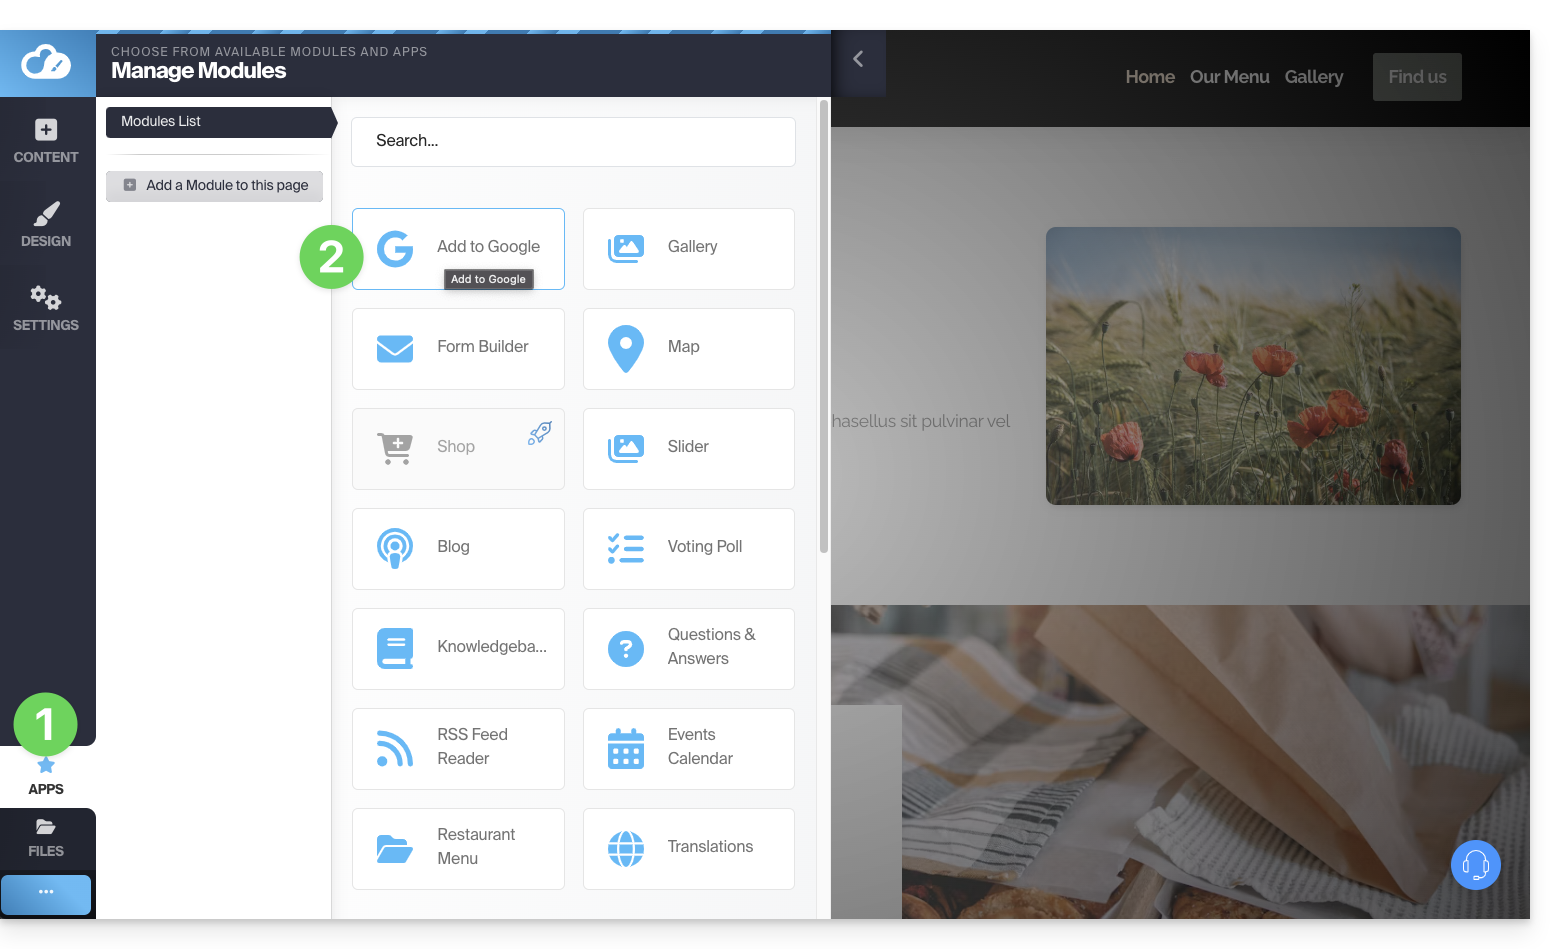
Once in Site Creator, to submit your website to the Google search engine:
- Click on the Applications button in the left-hand menu.
- Click on the Add to Google application:
This application allows you to perform 2 operations:
- Open the Google Search Console interface, which allows you to manage the analytics for your website:
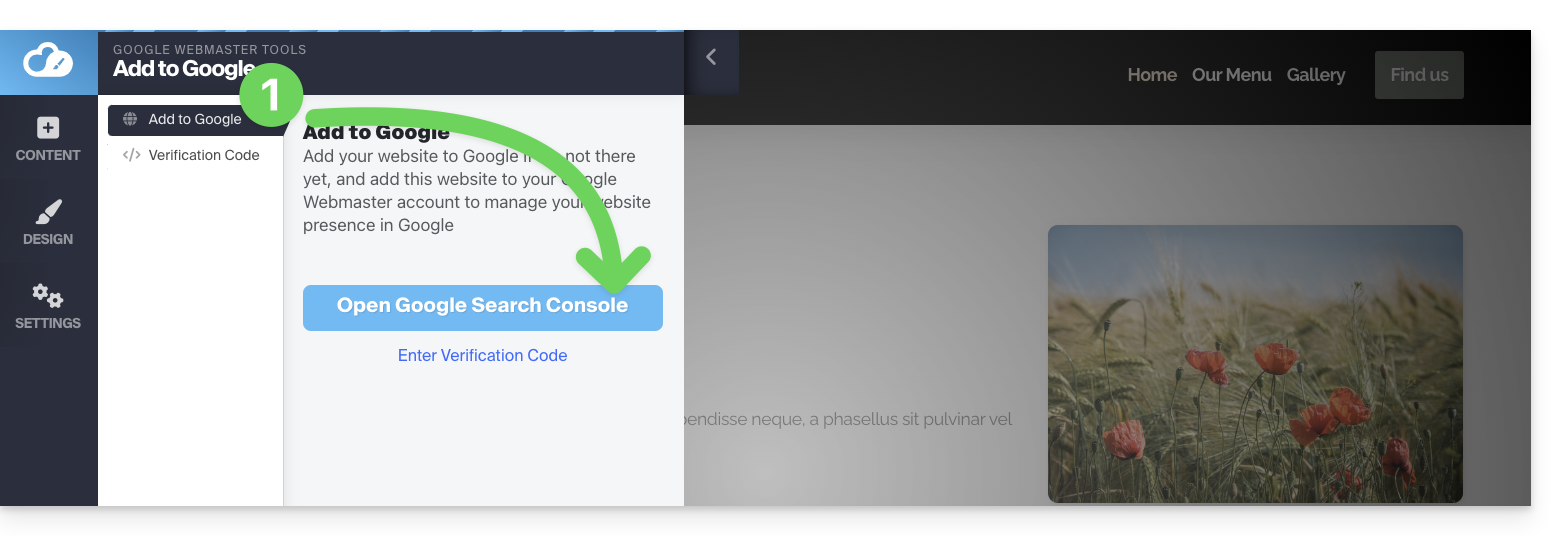
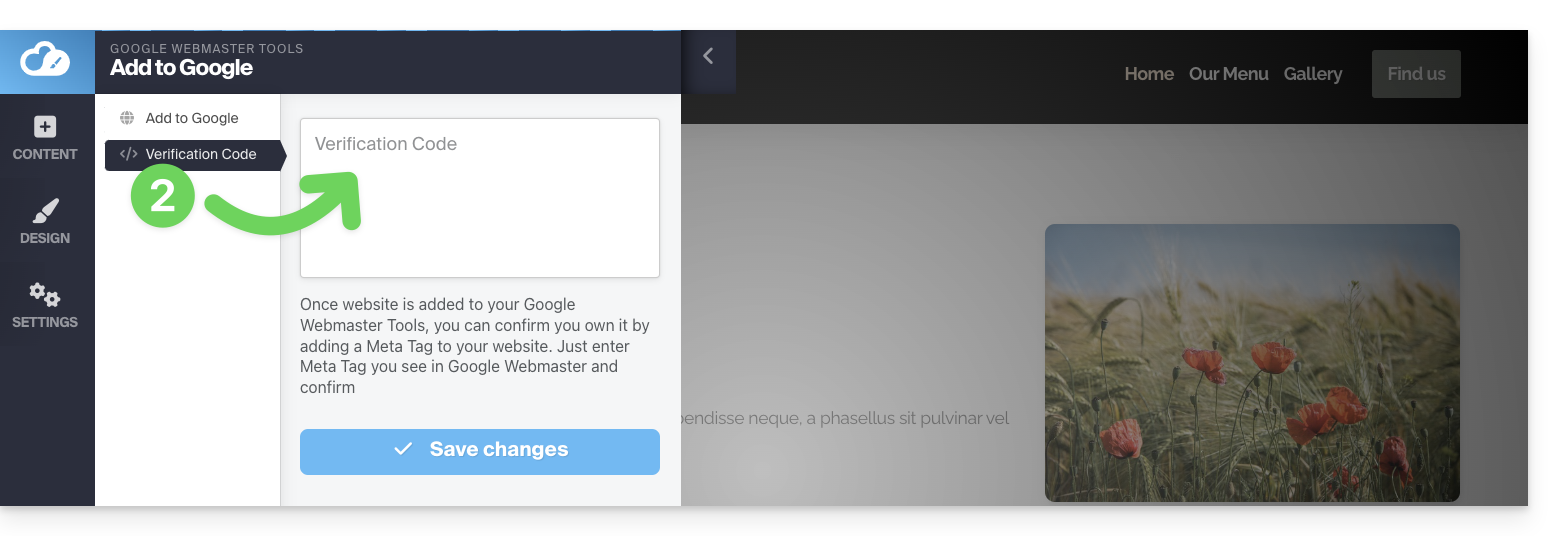
- You can insert the verification code provided by Google Search Console if you choose the simple method (see below):
Ownership verification (required by Google)
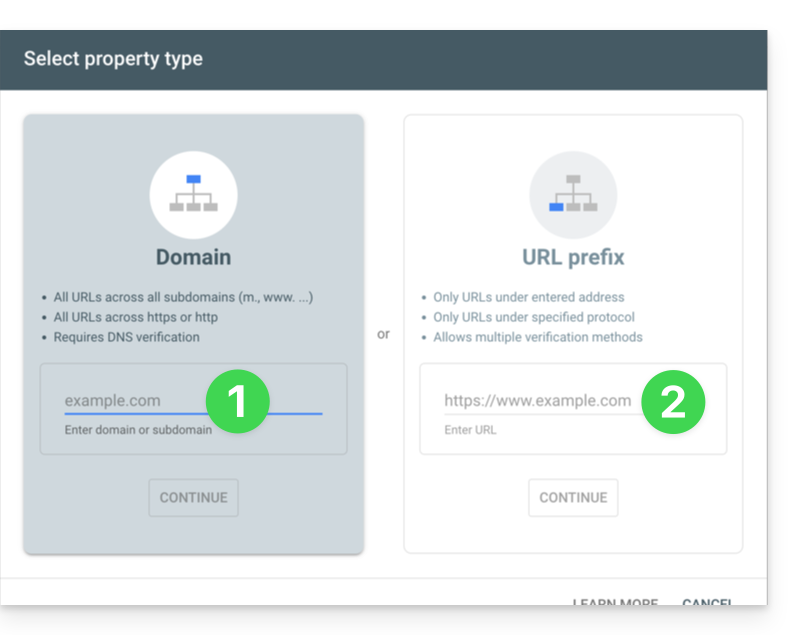
When you want to add your site to the Google tool and click on the button in step 1 above, you will be presented with two options:
- the method for monitoring an entire domain, which requires verification that you will need to perform at the domain name level (on the Infomaniak interface if your domain name/DNS zone is managed by Infomaniak),
- the easiest method for specifying the exact URL of your site, and for which verification will be performed directly from Site Creator:
1. Method with domain ownership verification
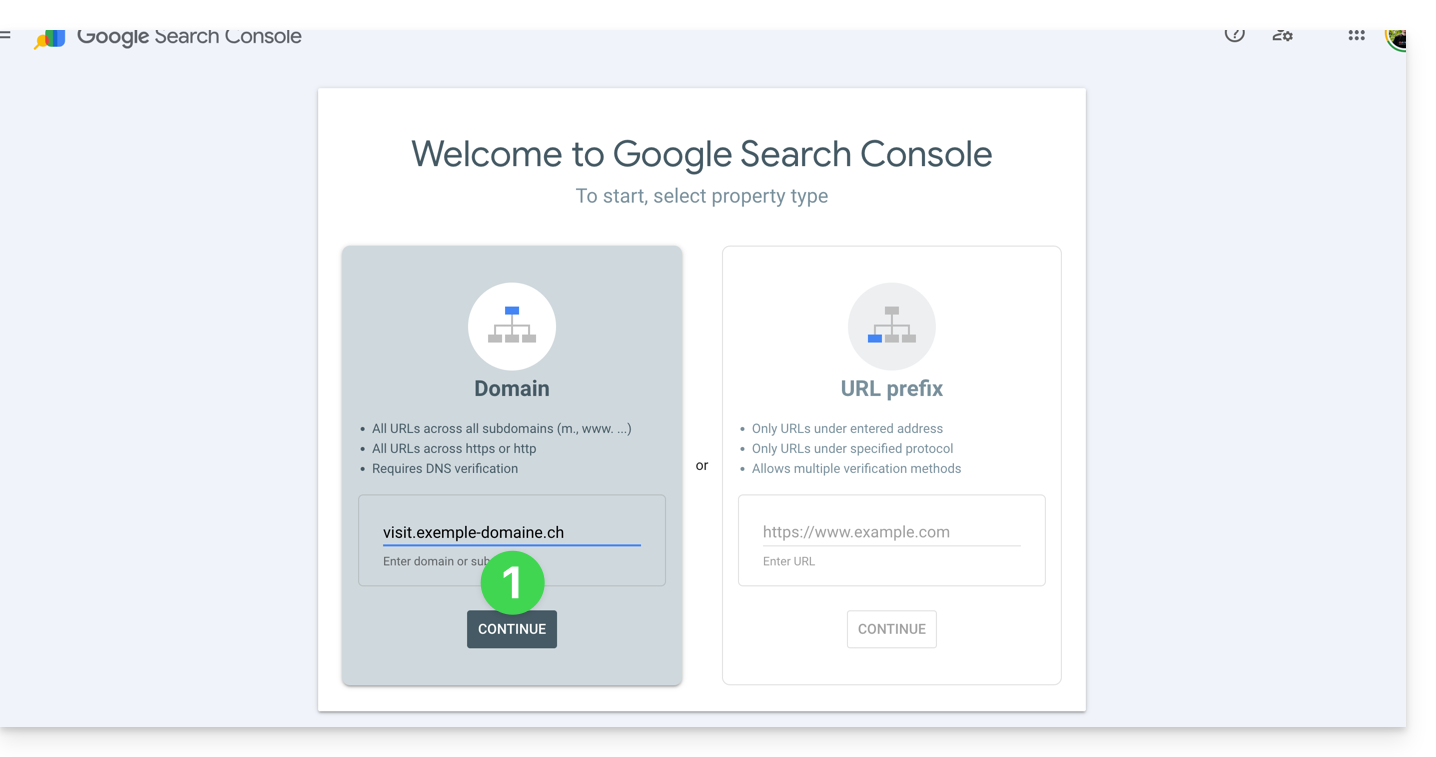
- Enter the complete URL of your Site Creator and click Continue:
- Make sure that the
TXTtype is selected and click the COPY button: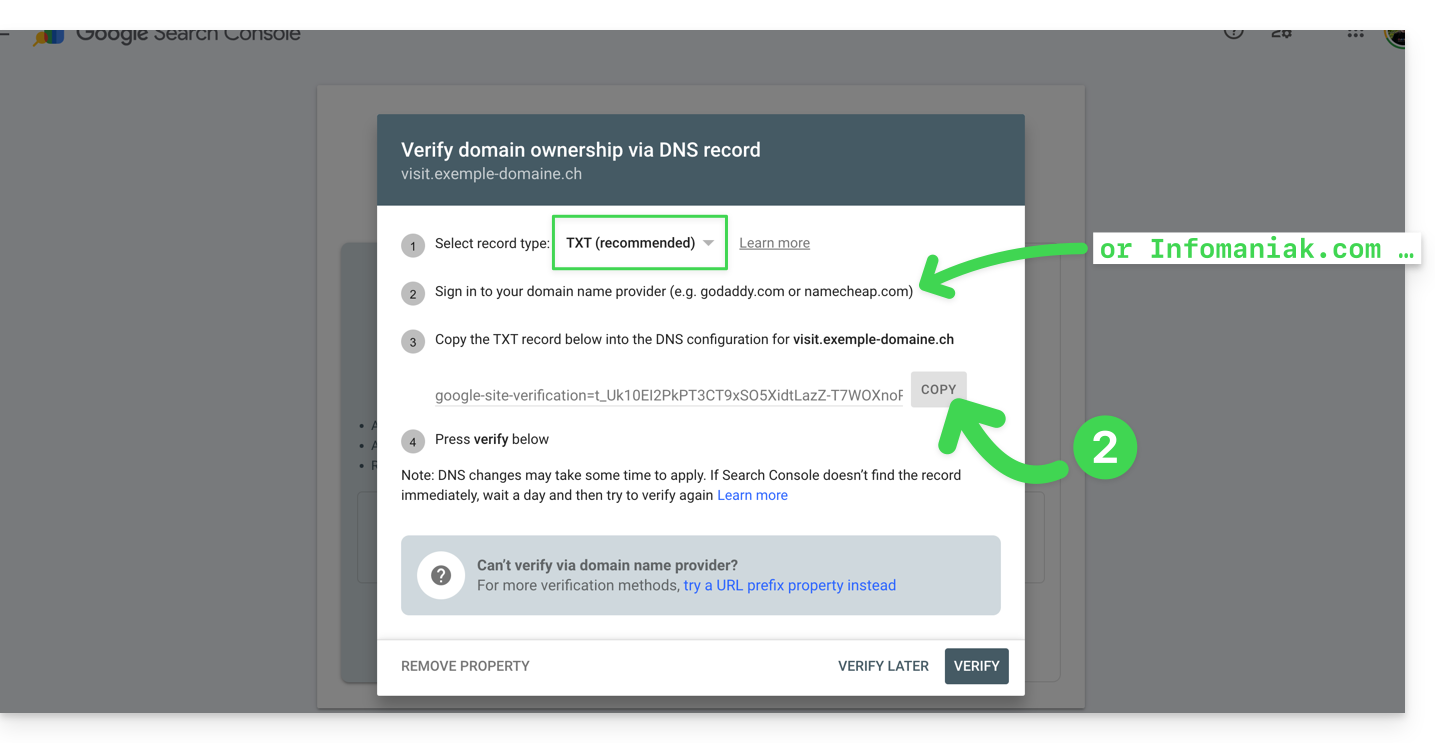
- Click here to access the management of your domain name if it is managed with Infomaniak (otherwise, you will need to perform these operations with the relevant provider).
- Click directly on the name assigned to the product in question.
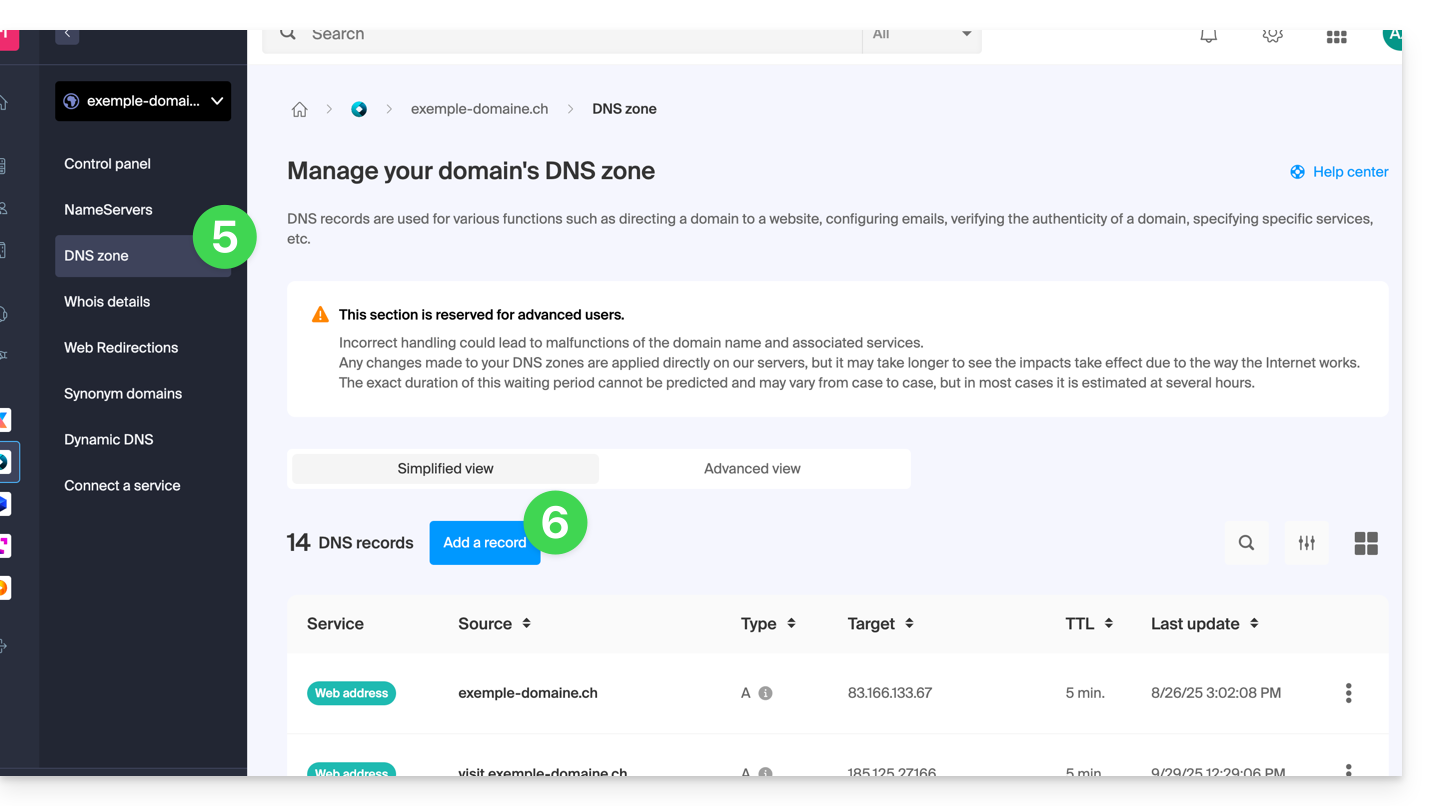
- Click on DNS Zone in the left-hand menu.
- Click on the button to add a record:
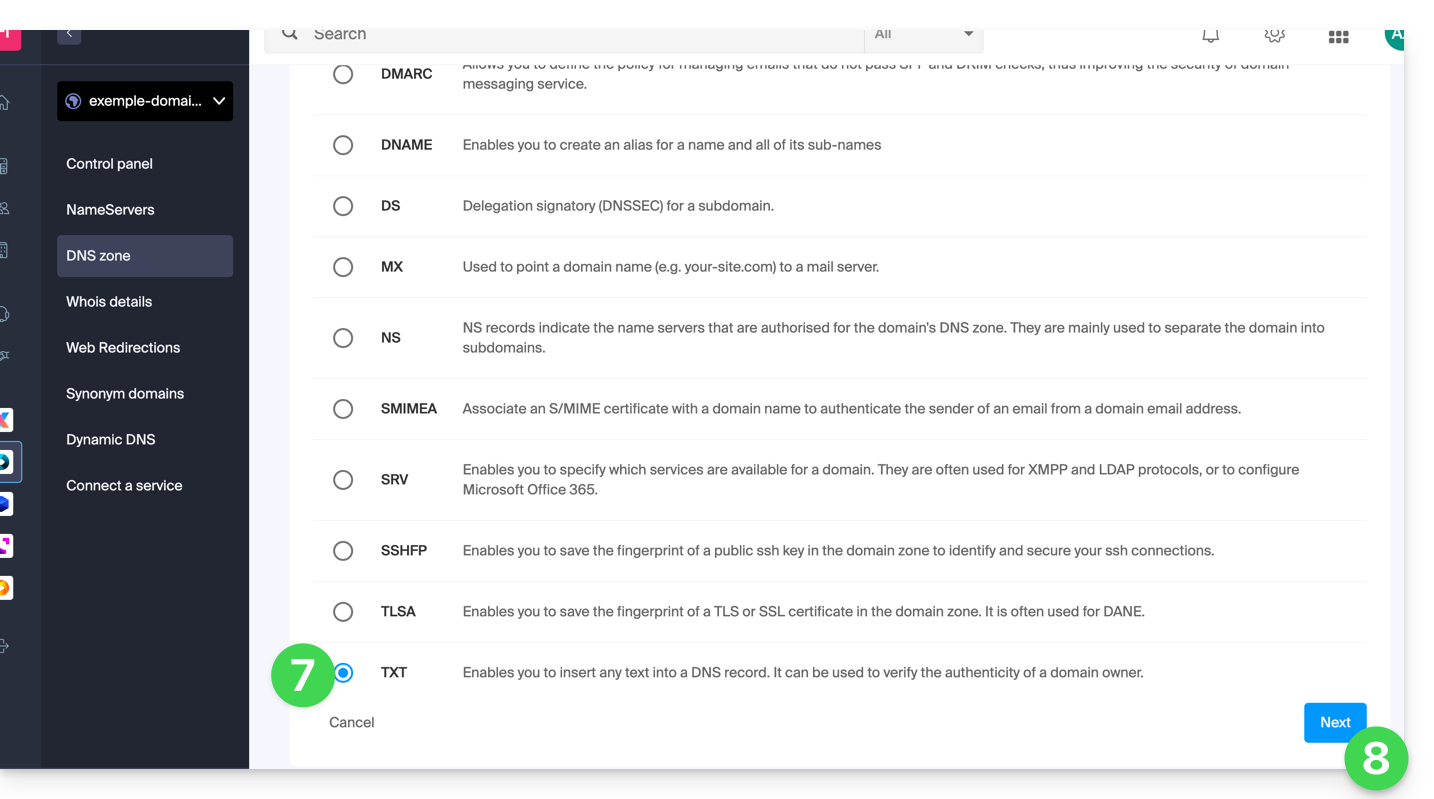
- Select the TXT type from the list.
- Click on the Next button:
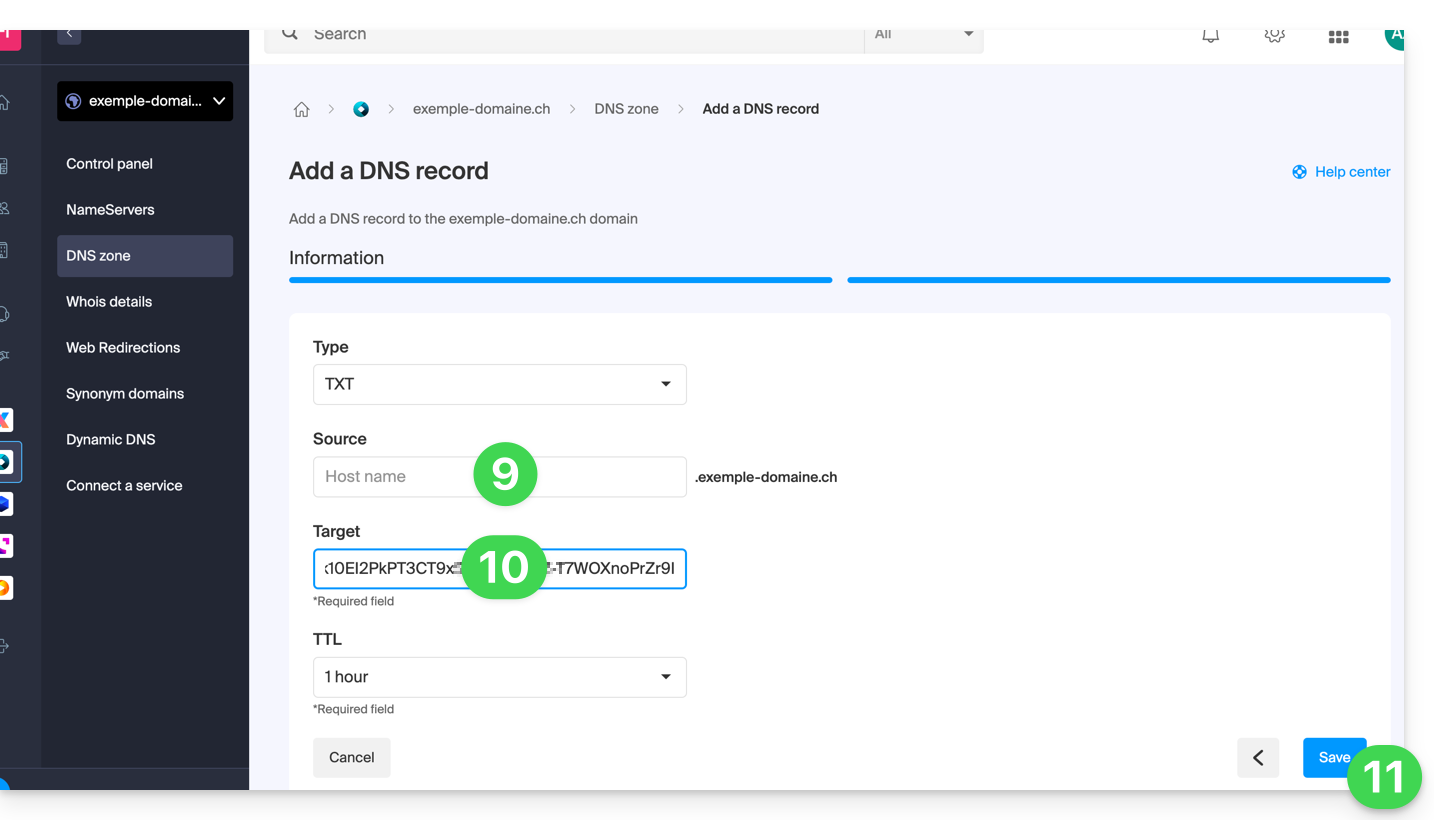
- Leave this field blank or enter the term preceding your domain name if you created a site like
xxx.domain.xyz(in this example, you would entervisitin the Source field, since Site Creator is created onhttps://visit.exemple-domaine.ch). - Paste the information retrieved in step 2 above.
- Click the button to Save:
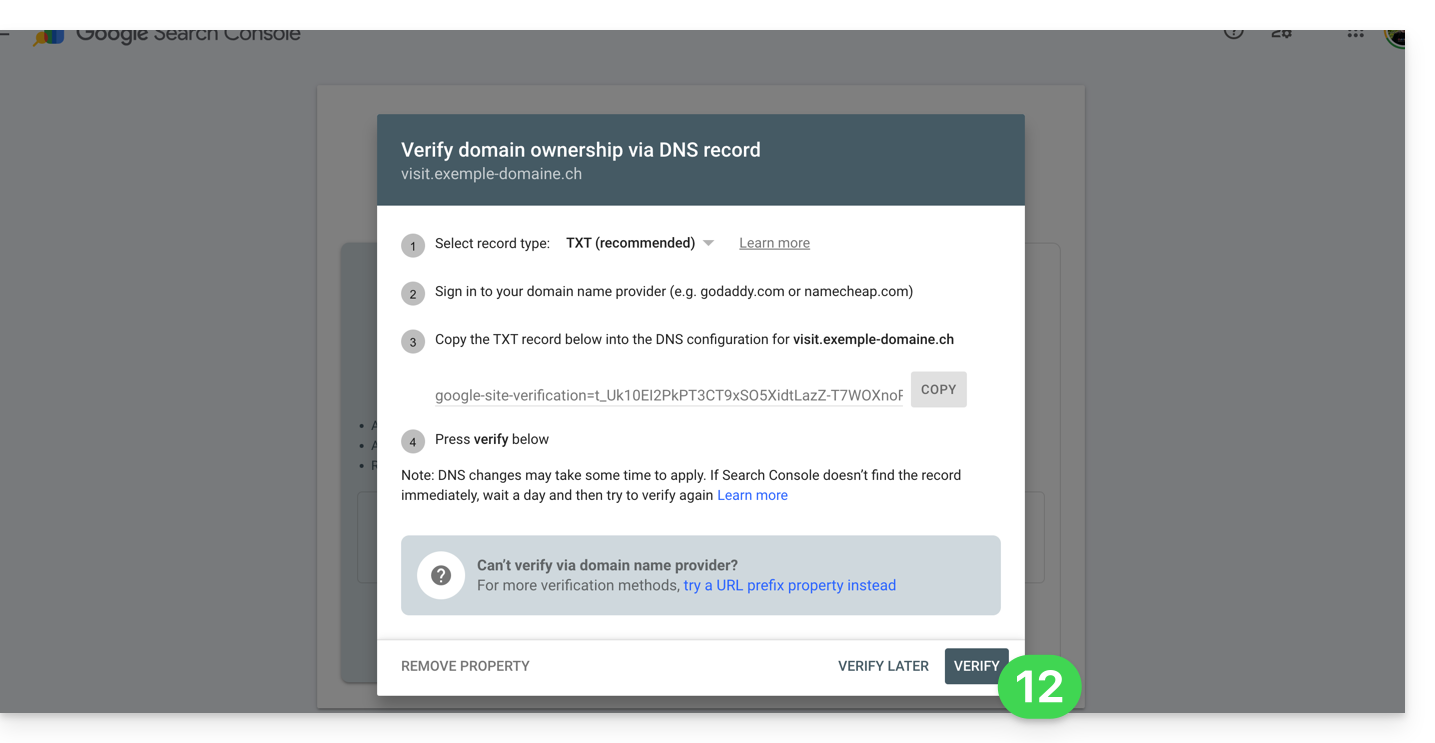
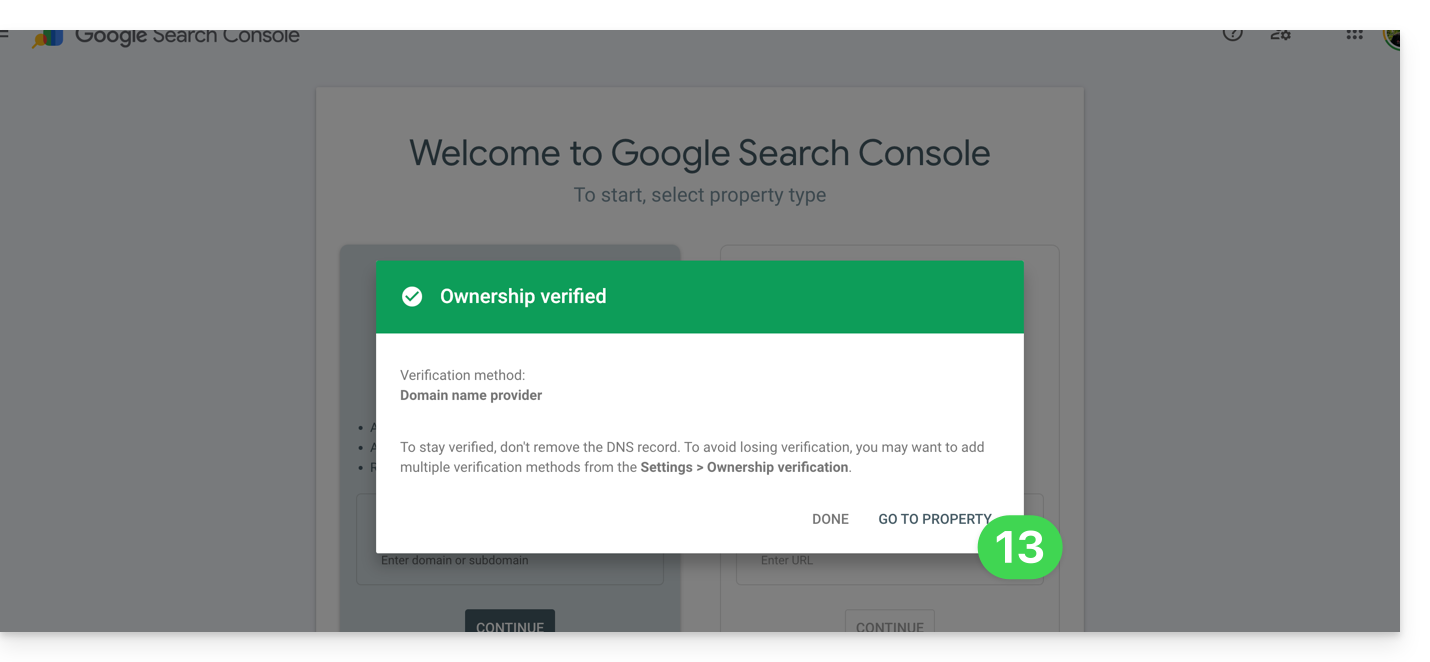
- Go back to the Google tool and click Verify (wait a few minutes if the verification doesn't start):
- There you go, the link between your Site Creator and the analytics console has been established; click the button to configure the property:
2. Simple method
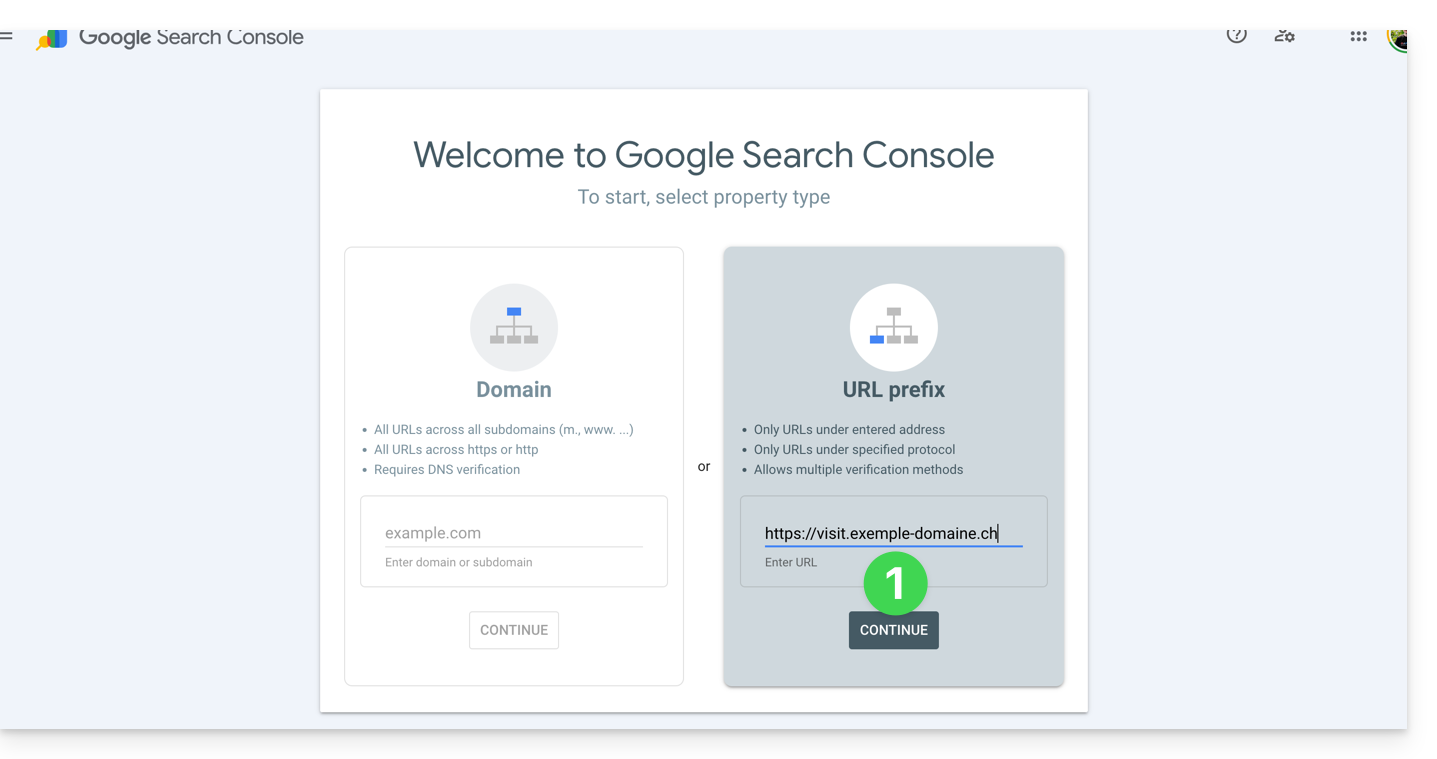
- Enter the complete URL of your Site Creator and click Continue:
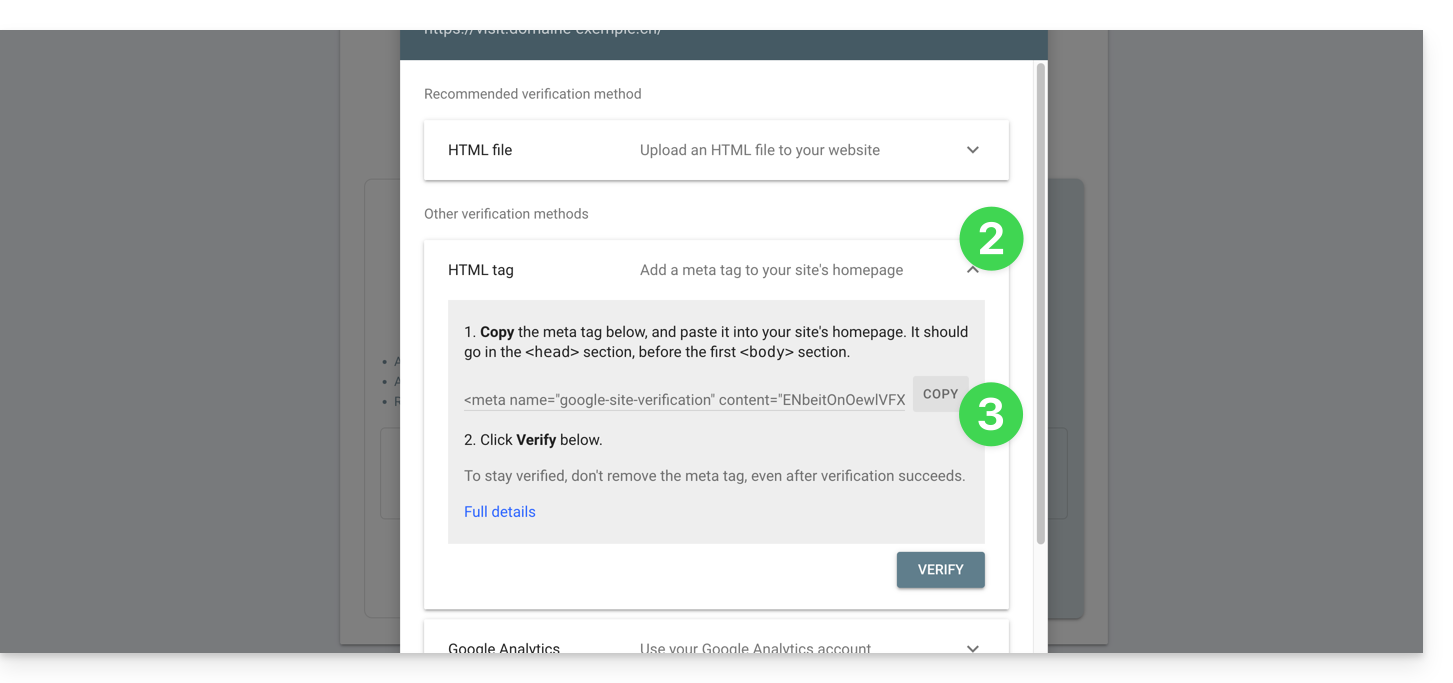
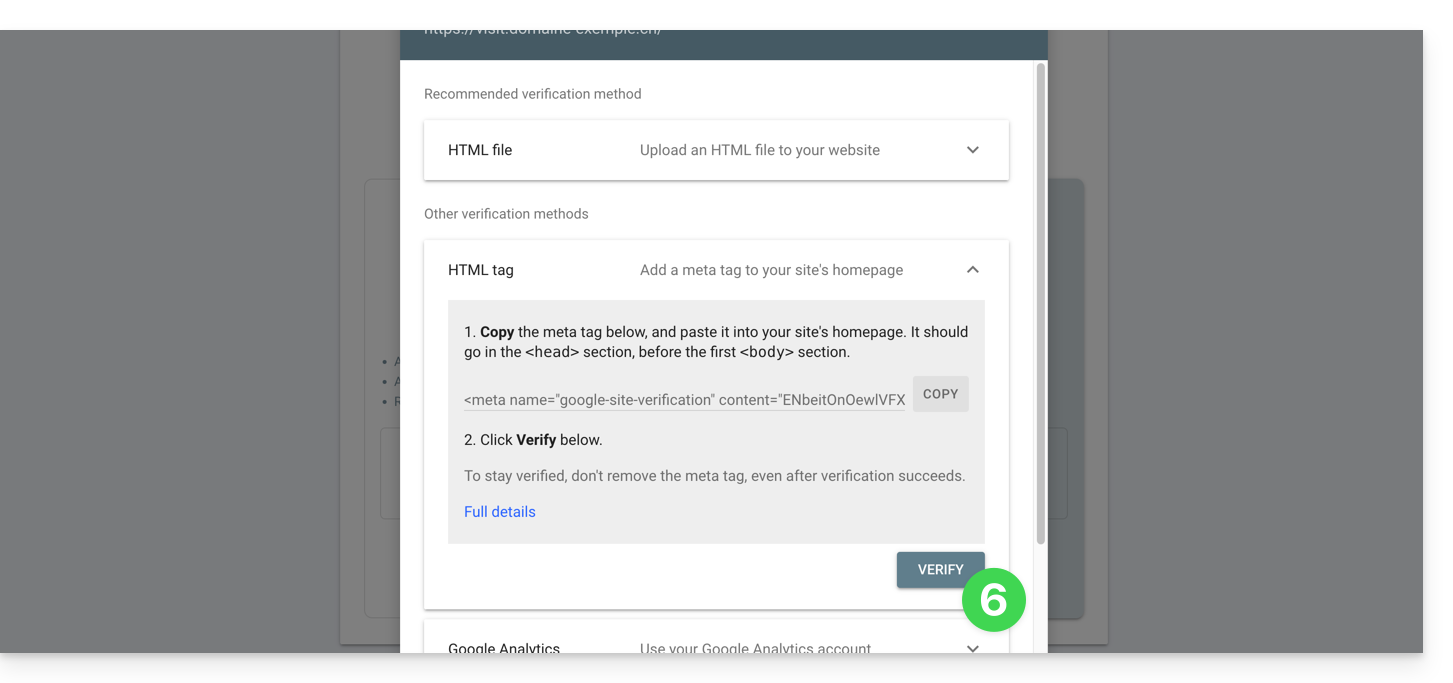
- Click on the chevron to expand the HTML TAG section, which provides the information to be copied into Site Creator to prove ownership.
- Click the COPY button:
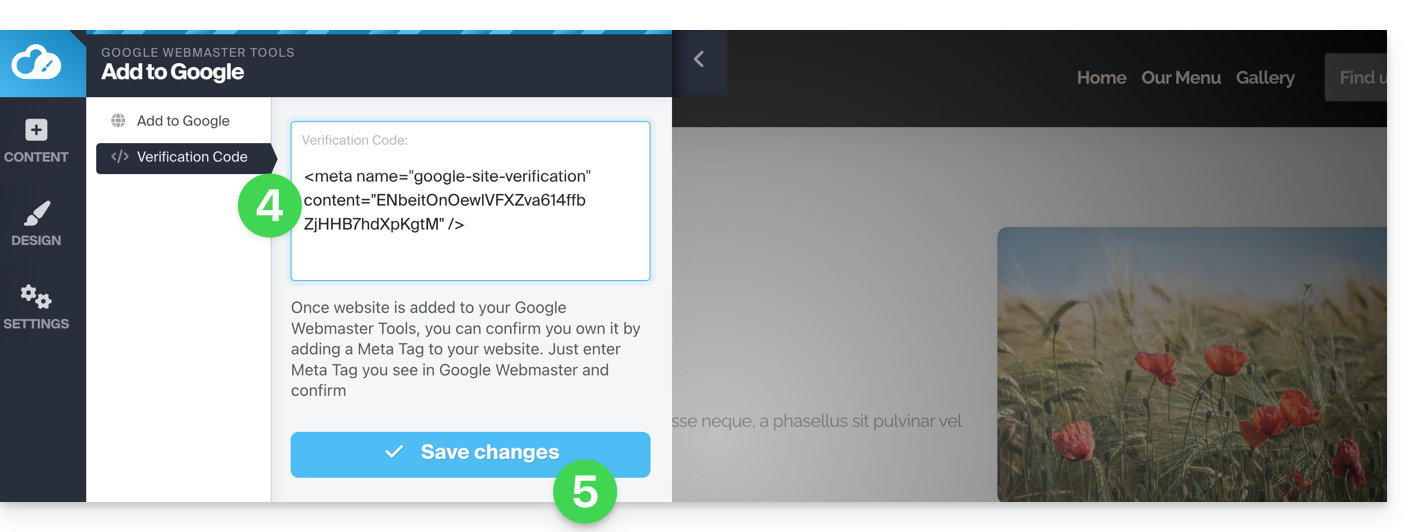
- Paste the information into the designated area in Site Creator.
- Save the changes:
- Go back to the Google tool and click Verify (wait a few minutes if the verification does not start):
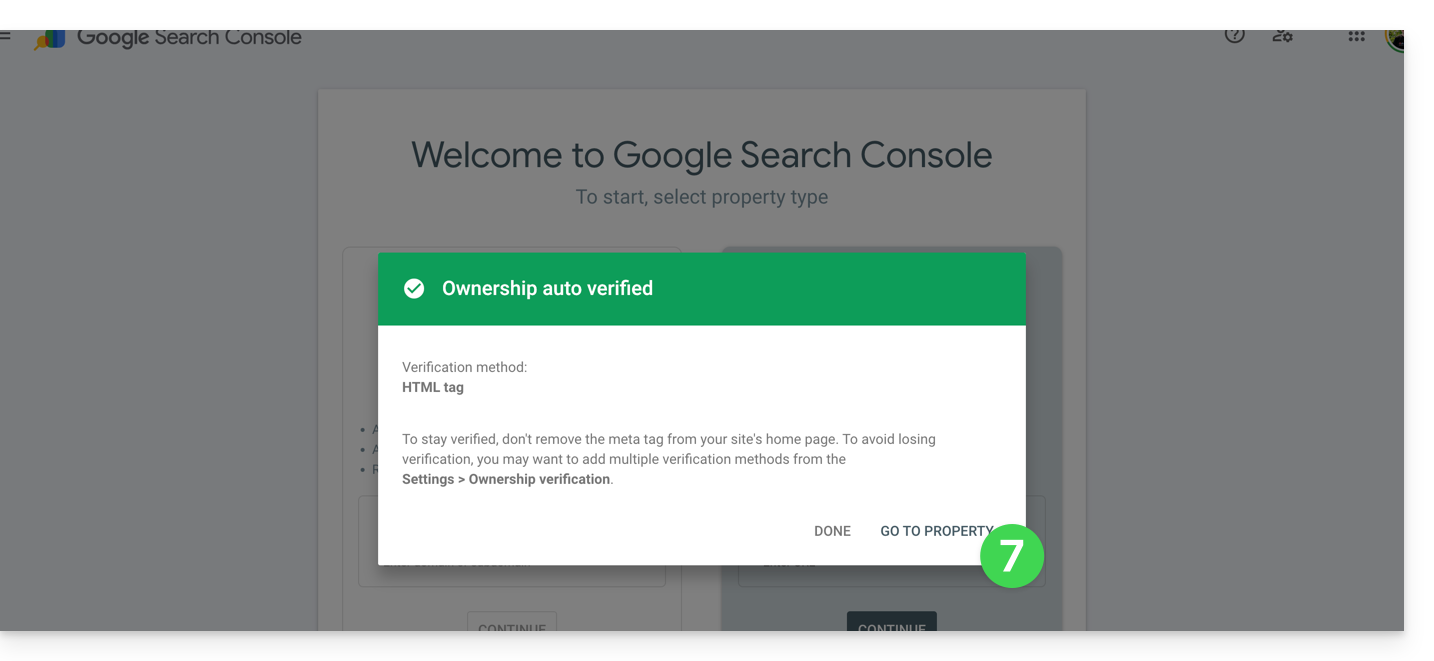
- There you go, the link between your Site Creator and the analytics console has been established; click the button to configure the property:
Define Meta Tags
Once in Site Creator:
- Click on the Settings button in the left-hand menu.
- Click on General settings.
- Click on SEO and metadata.
- Enter the title, description, and keywords for the entire site:
This is also where you can manage the robots.txt file if needed.
To define this, but for a specific page:
- Click on the Settings button in the left-hand menu.
- Click on General Settings.
- Click on Subpage Settings.
- Click on SEO & Metadata.
If you do not make any changes on this page, Site Creator will dynamically manage your tags.
You can also manage the URLs of your pages independently of the SEO title of your page (a page named "Contact" from an SEO perspective, while its URL will be, for example, "/enterprise").
What "Meta Keywords" should I use?
To enter multiple keywords, separate them with a comma or similar:
Sitemap.xml
Do not confuse this with the Sitemap module; the sitemap.xml file lists all the pages of your site to help search engines discover and index them efficiently. You can examine it to understand the site structure; replace domain.xyz with your domain name to access it (publicly) from a browser:
{{URL_31}}Submit your URL to Google Search Console (refer to the first chapter above in this guide) and other webmaster tools to improve indexing.
Insert tracking codes
Your site includes a simple Statistics module, but you can also use Google Analytics or other tracking methods (such as Facebook Pixel, Google Tag...) which require inserting a code on your site:
- Click on the Settings button in the left-hand menu.
- Click on General settings.
- Click on SEO and statistics.
- Scroll down the page and insert your tracking codes.
Link to this FAQ: https://faq.infomaniak.com/2711
Has this FAQ been helpful?