Knowledge base
1000 FAQs, 500 tutorials and instructional videos. Here, there are only solutions!
Manage Site Creator pages
This guide concerns Site Creator by Infomaniak, which allows you to create a complete website consisting of several pages.
Introduction
- The homepage is required (with or without a header and footer).
- Add additional pages, which can be blank, password-protected, or contain specific content directly (e.g., a contact form).
- Add legal pages (e.g., to include your Terms and Conditions).
- These will all be part of the site's navigation menu(s).
- To (re)create a complete website with pages and subpages (examples of pre-designed websites), you can install a website template.
Add a page to the website
Start by logging in to the Infomaniak Manager with your credentials (user account with the necessary permissions for the relevant product):
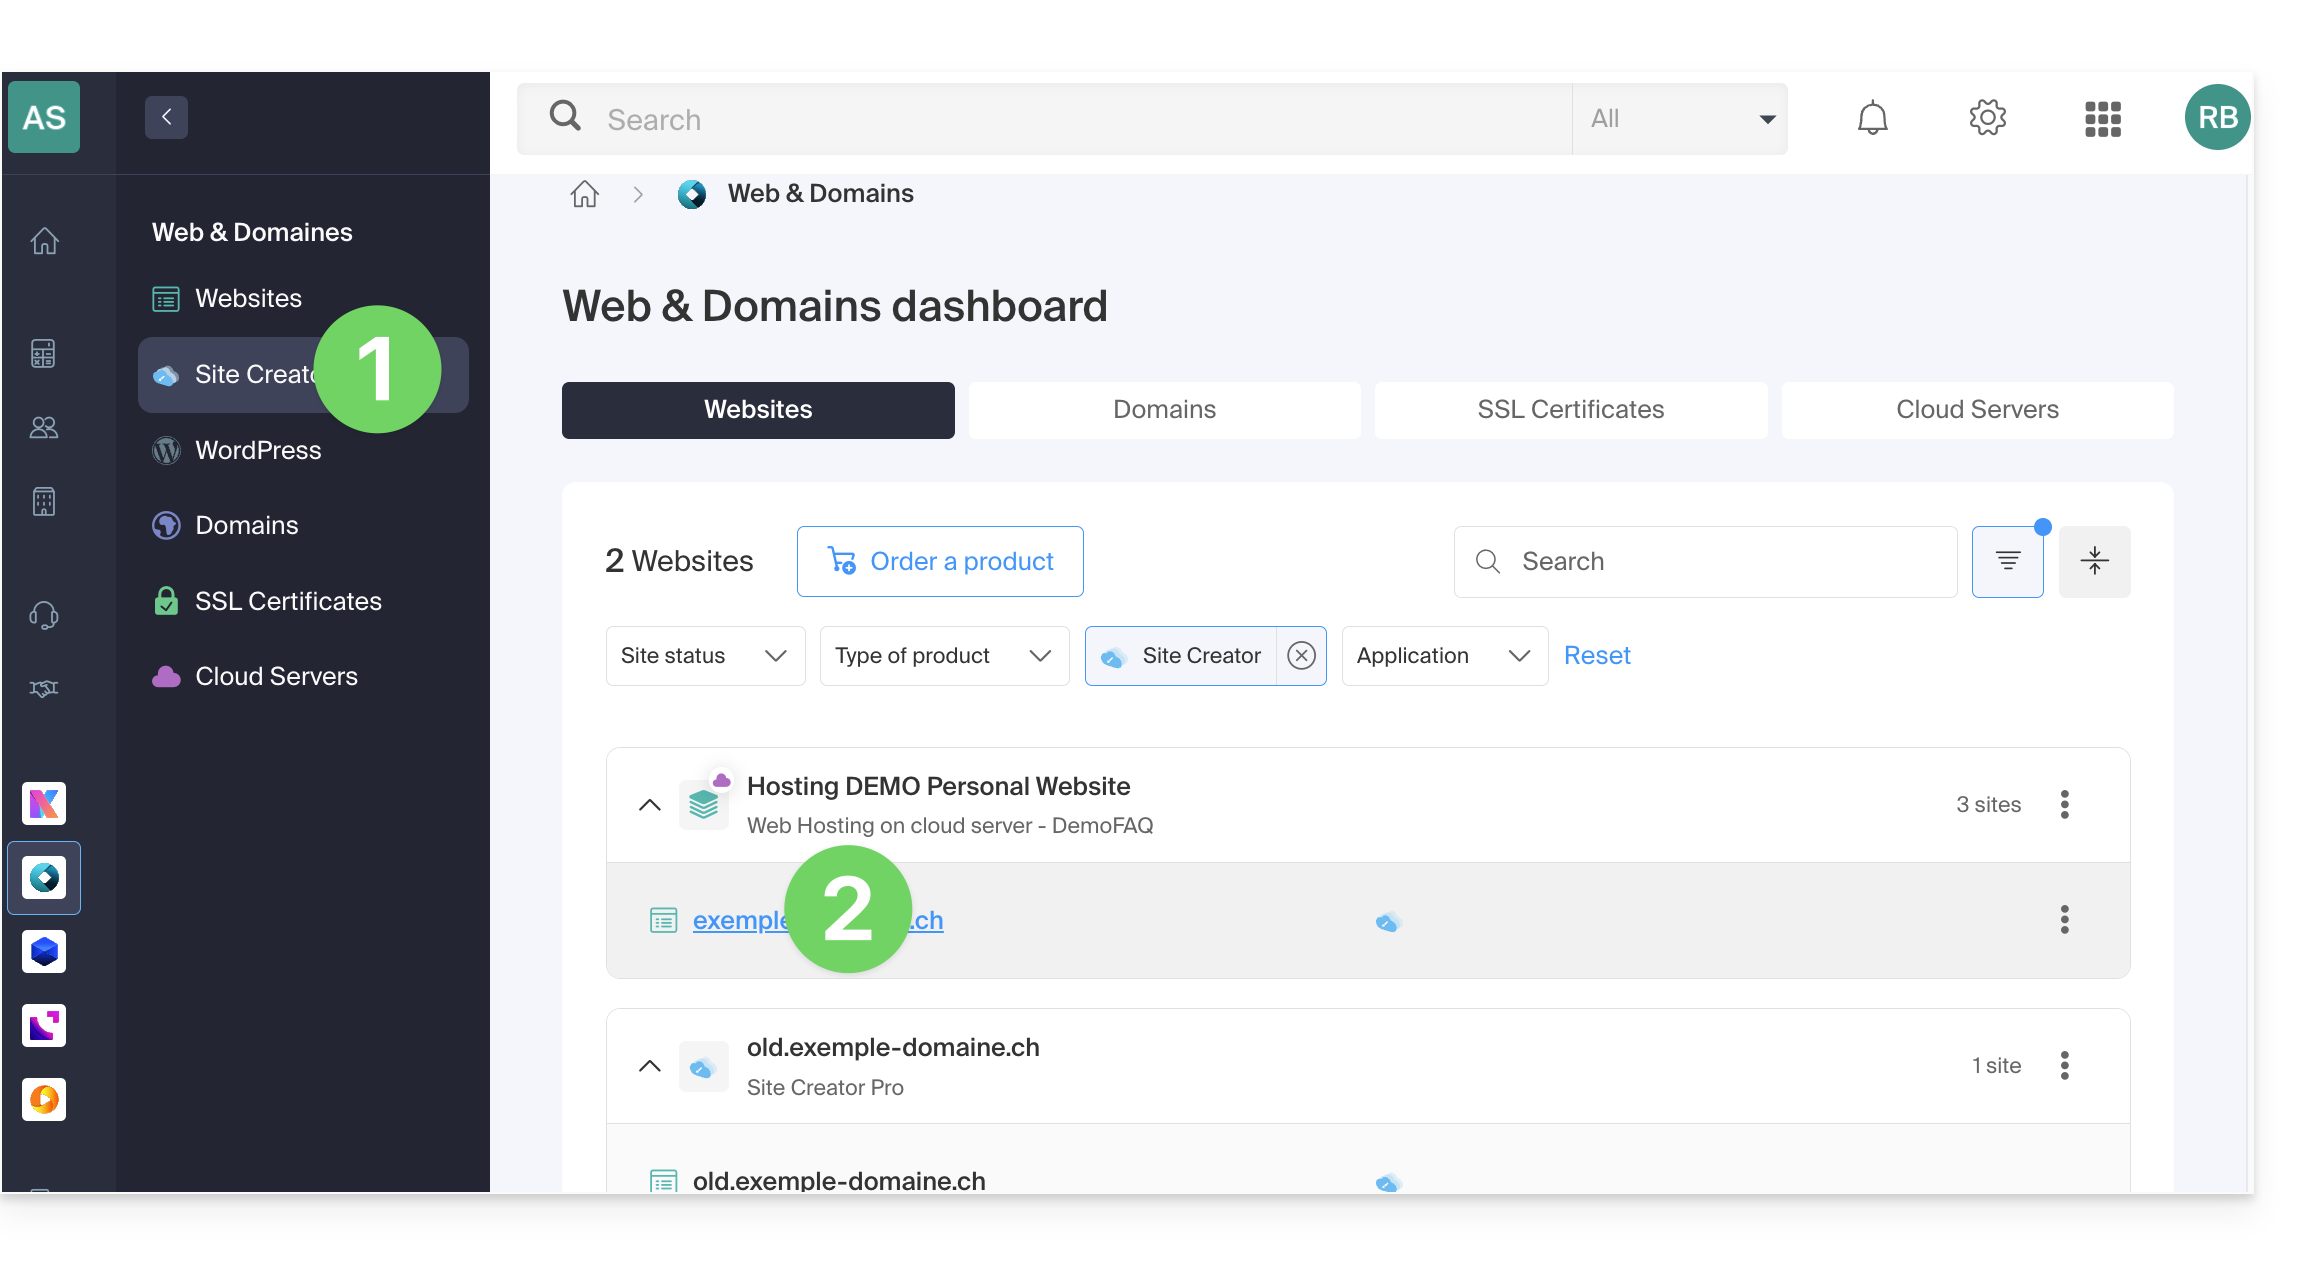
- Click here to access the hosting & website management interface (filtered to display only Site Creator).
- If nothing is displayed, you may not be in the Organization to which your website is linked (❓: help).
- Click on the name of the Site Creator in question:
- Click on the button to edit your site:
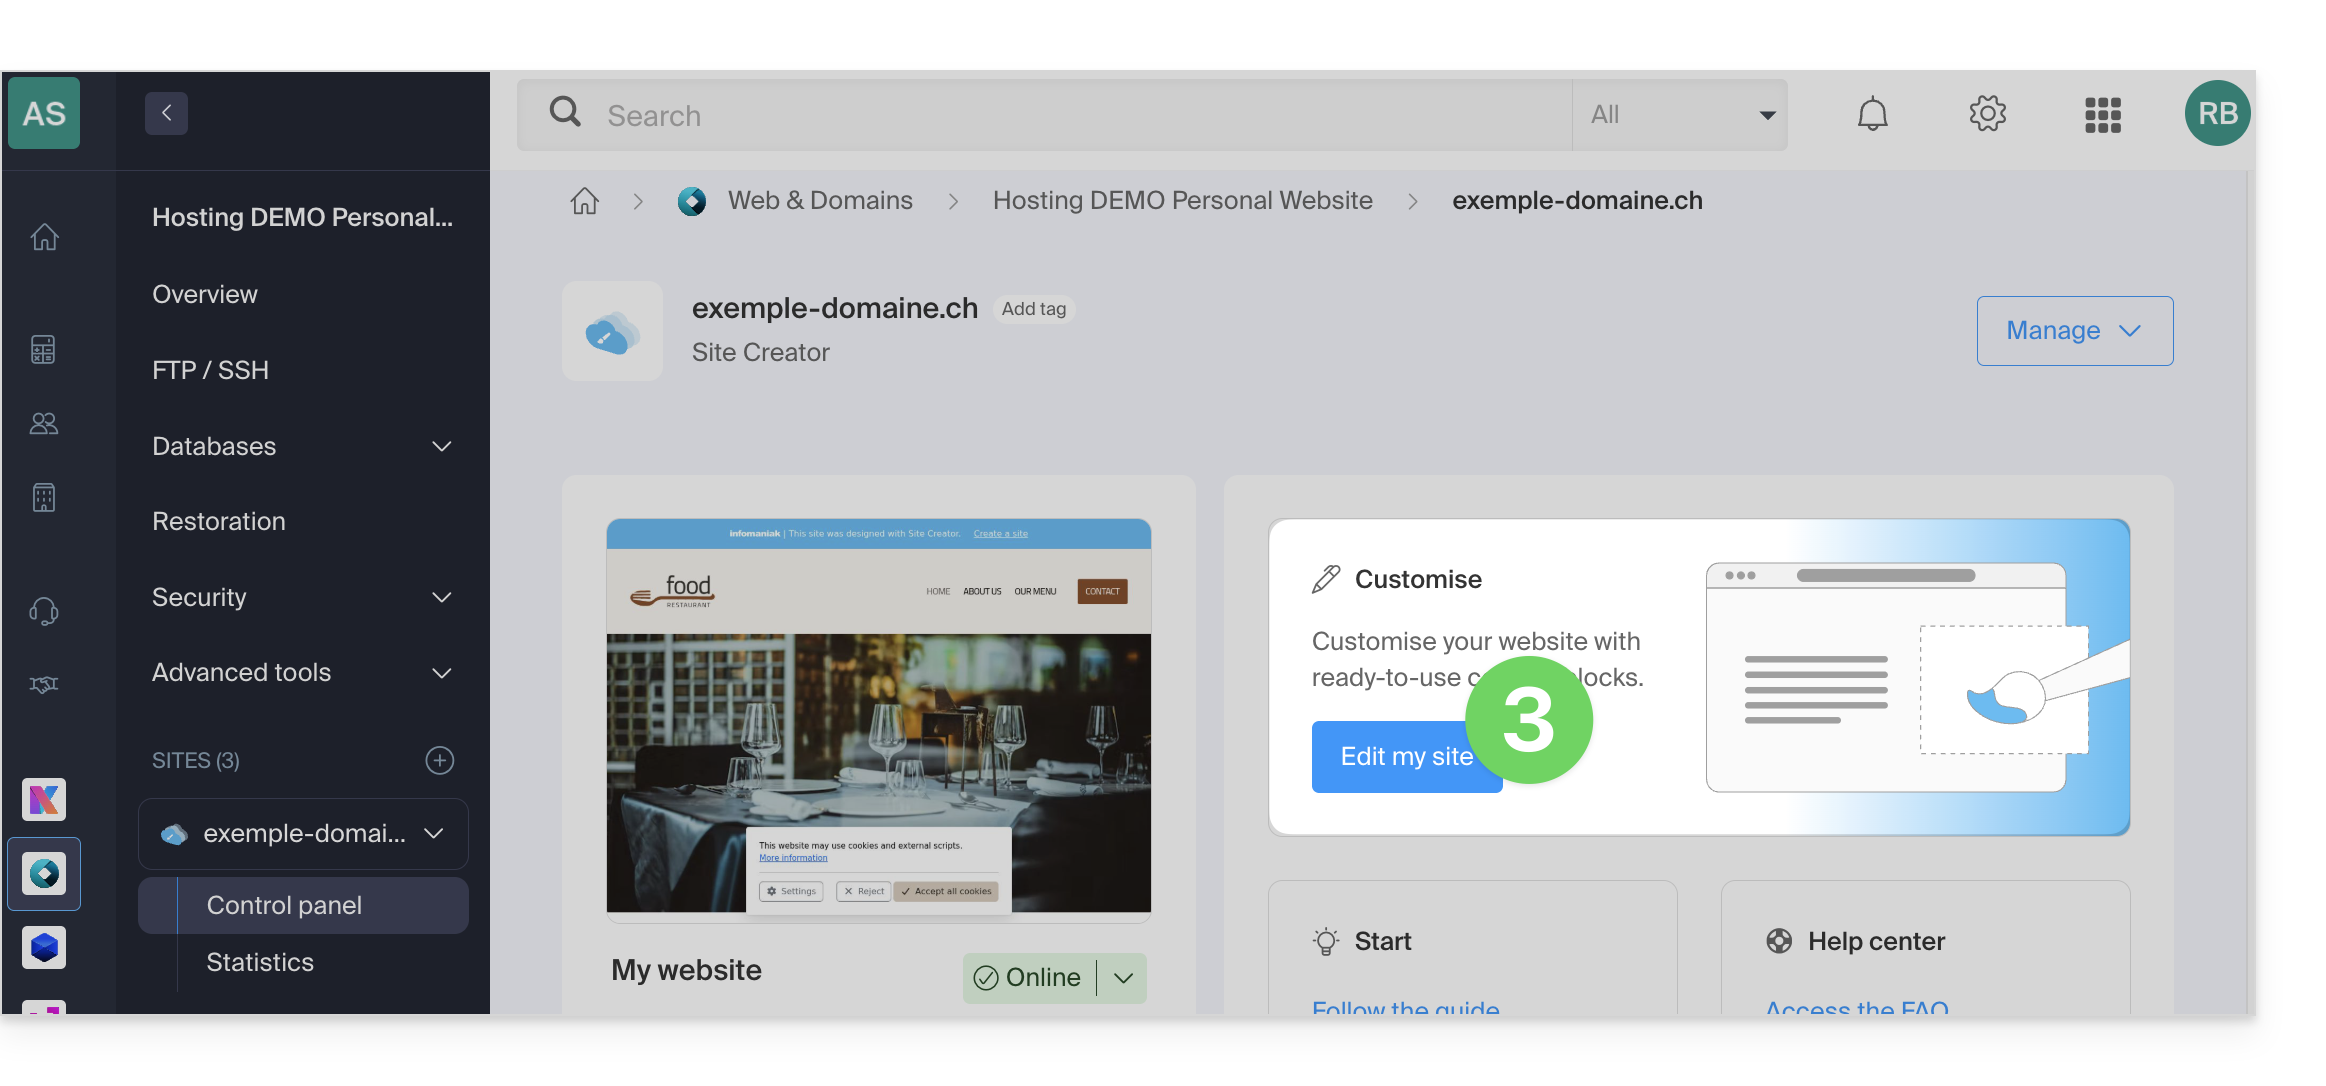
Once in Site Creator:
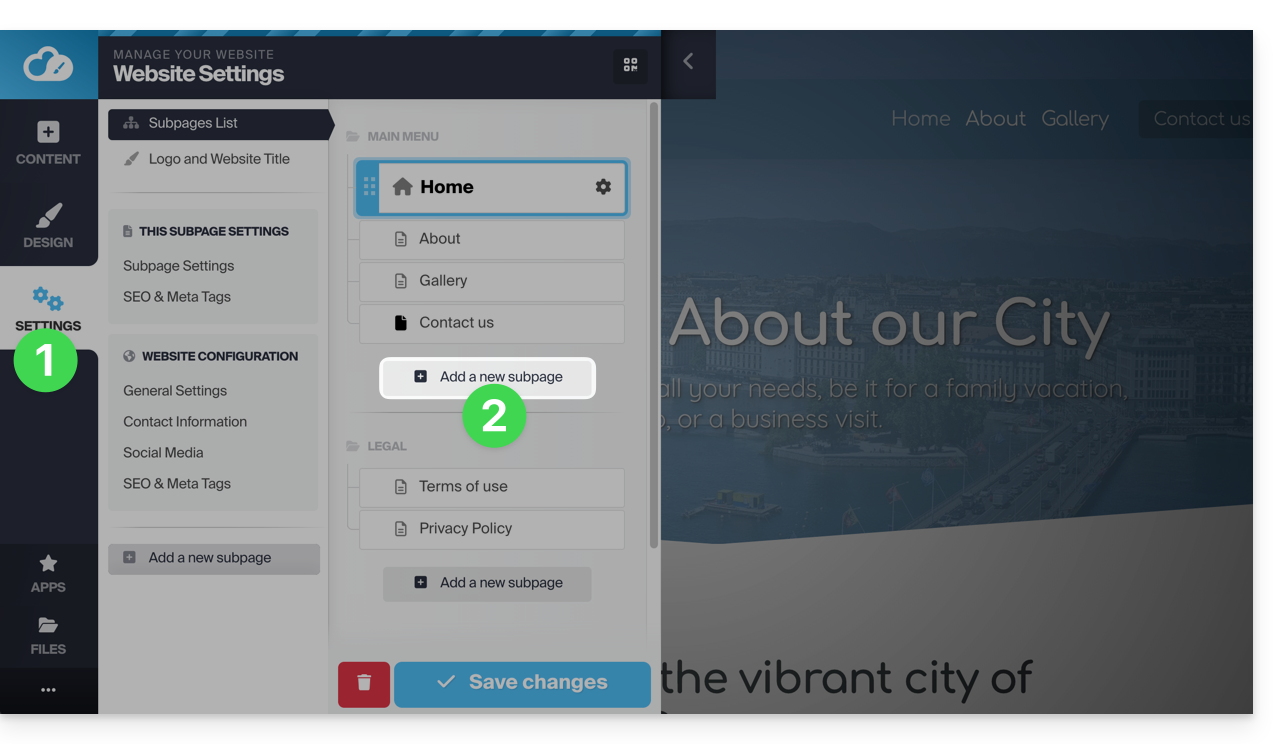
- Click on the Settings button in the left-hand menu – the list of your pages will appear.
- Click the Add Page button below the existing tree:
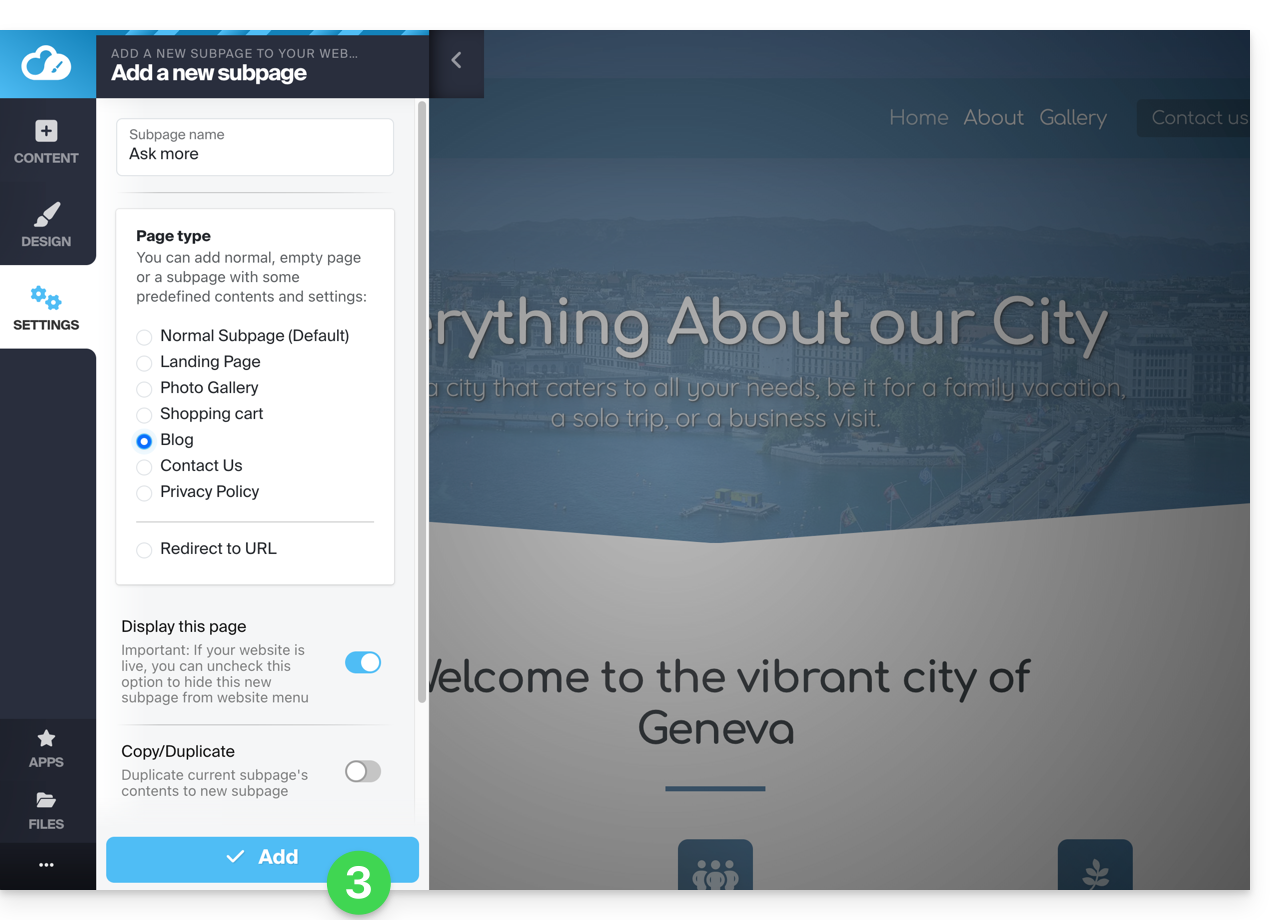
- Choose a page name and Show more options to choose the page type and other settings, then click to Add the page:
Copy / Duplicate a page
To do this:
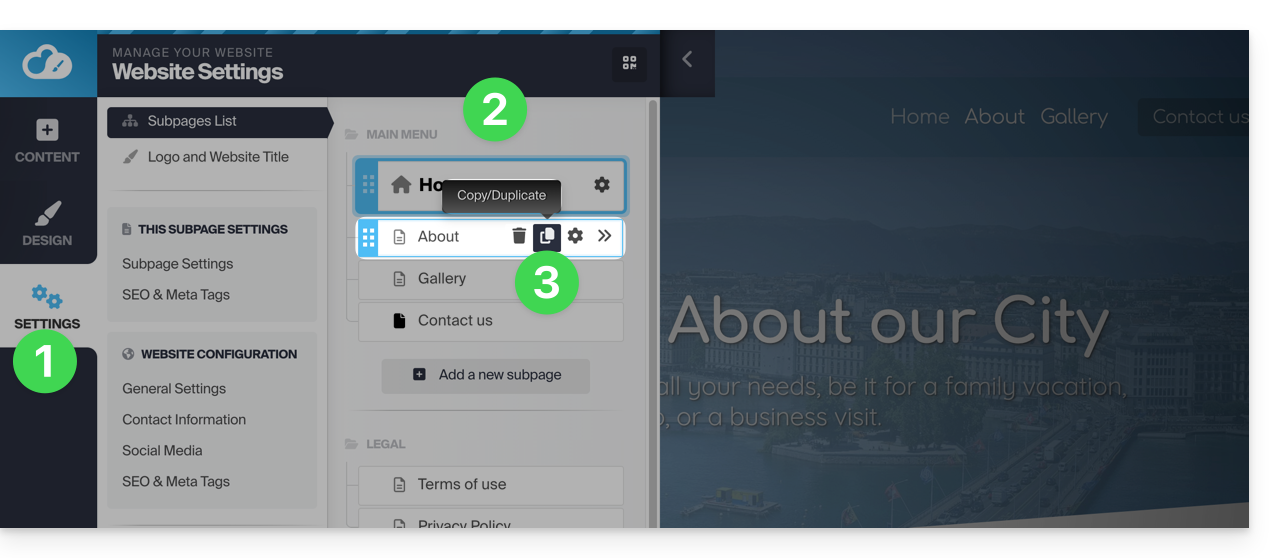
- Click on the Settings button in the left-hand menu – the list of your pages will appear.
- Hover over the desired page in the existing tree.
- Click on the duplicate icon that appears when you hover over it:
Alternatively:
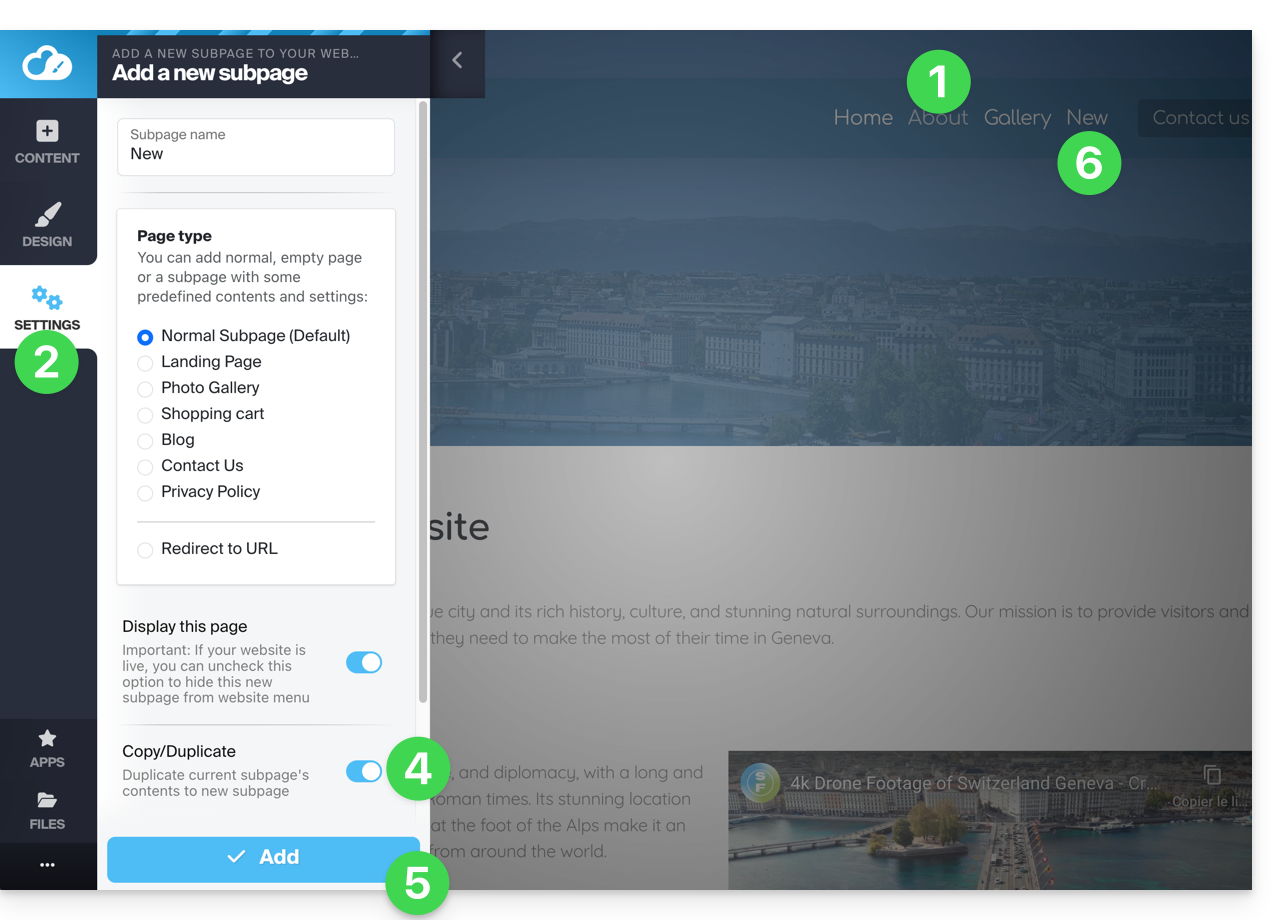
- Go to the page of the website you want to clone.
- Click on the Settings button in the left-hand menu.
- Click on the Add page button below the existing tree. Choose a page name and Show more options to choose the page type.
- In Show more options, enable Clone / Duplicate to reuse the content of the current page.
- Click to Add the page.
- The new page appears in the menu with the same content as the page you were on in step 1:
Rename a page
Please note that renaming a page changes its URL.
To do this:
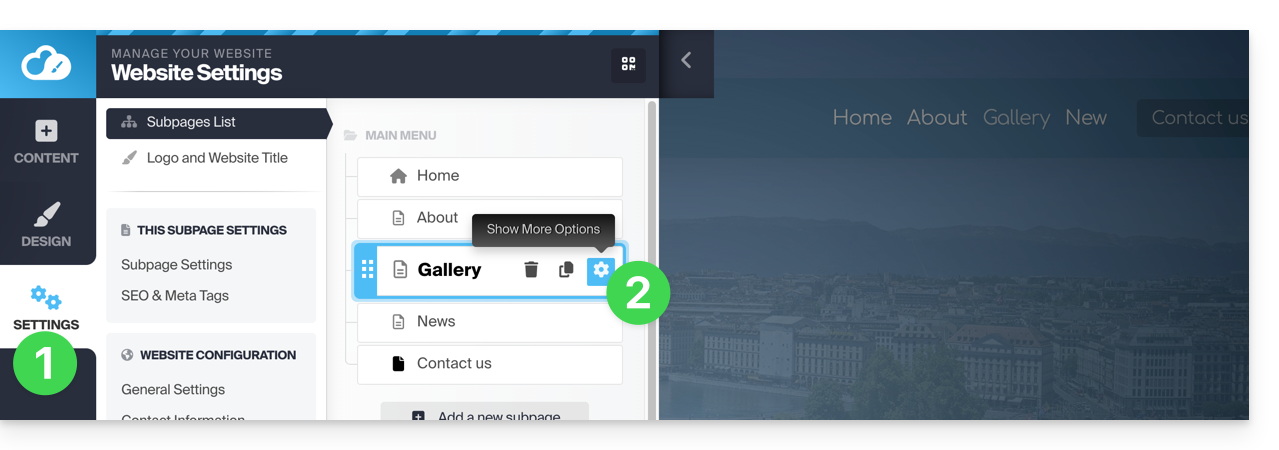
- Click on the Settings button in the left-hand menu – the list of your pages will appear.
- Hover over the desired page in the existing tree and click on the gear icon to access the page options, including the display name:
Alternatively, under Settings, in the existing tree, you can directly rename your pages and then Save changes at the bottom of the page: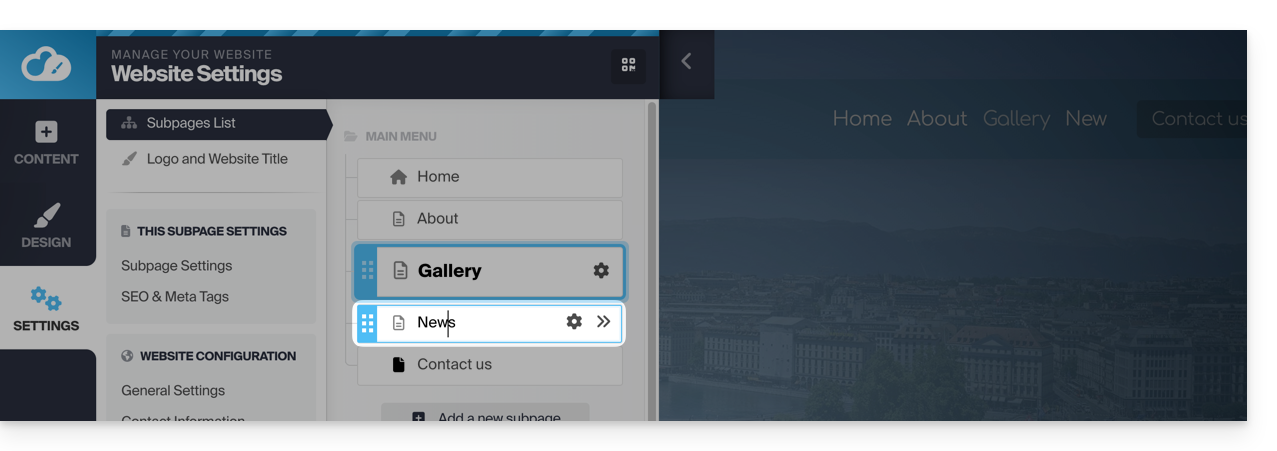
Change the order of pages
This can be useful, especially for set one of your existing pages as the homepage instead of the current homepage. To do this:
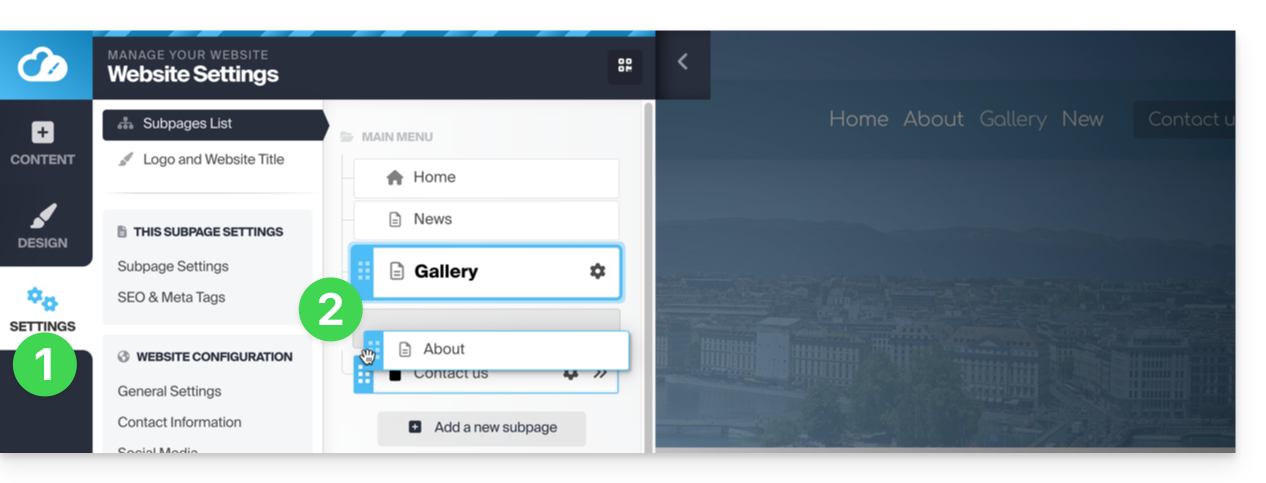
- Click on the Settings button in the left-hand menu – the list of your pages will appear.
- In the existing tree structure, you can directly drag and drop your pages to change their order (this mainly affects how the pages are displayed within a menu), then Save changes at the bottom of the page:
Delete a page
To do this:
- Click on the Settings button in the left-hand menu – the list of your pages will appear.
- Hover over the desired page in the existing tree.
- Hover over the gear icon, then click on the trash can that appears when you hover over it:
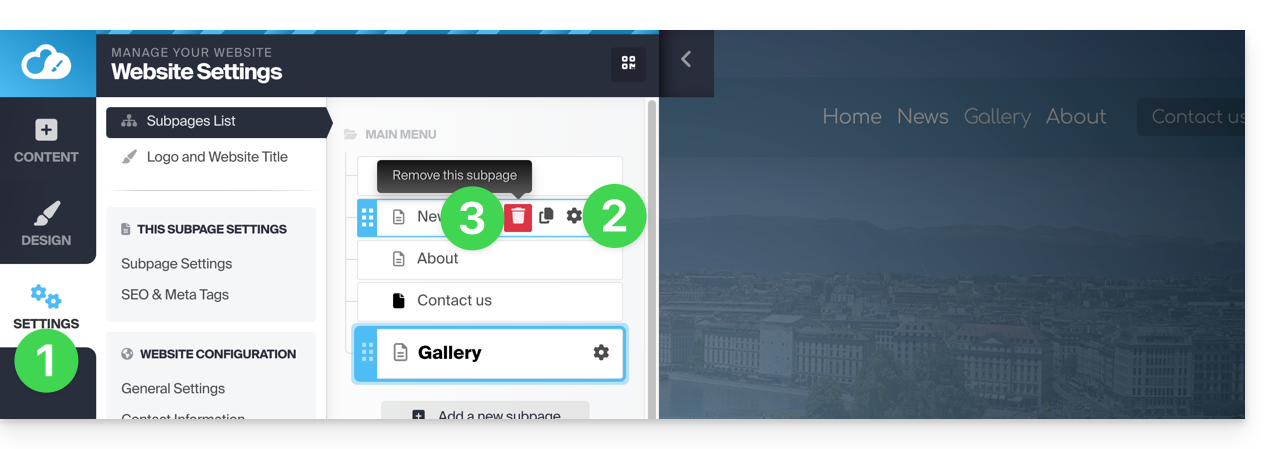
- Confirm the deletion, and the page will disappear without the possibility of canceling.
Another option: go to the page you want to delete. Under Settings, click the red Trash button at the bottom of the page to delete the current page: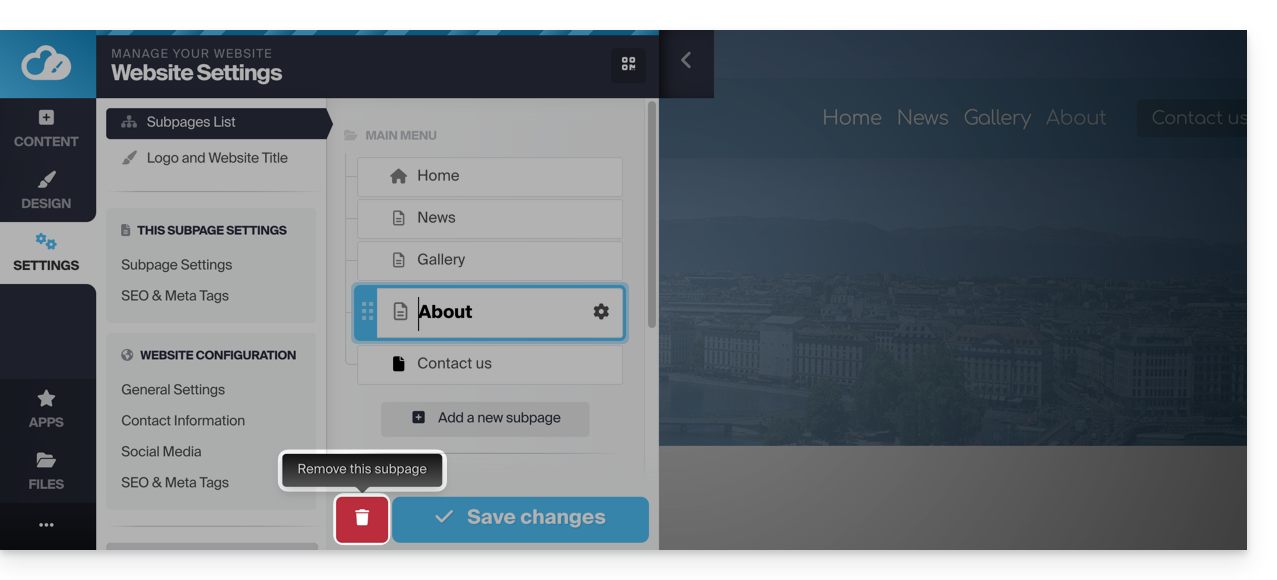
Create a private / password-protected page
To do this:
- Click on the Settings button in the left-hand menu – the list of your pages will appear.
- Hover over the desired page in the existing tree structure.
- Click on the gear icon to access the page options.
- Enable the password protection option to set a password that will be required to view the page.
- Save the changes at the bottom of the page:
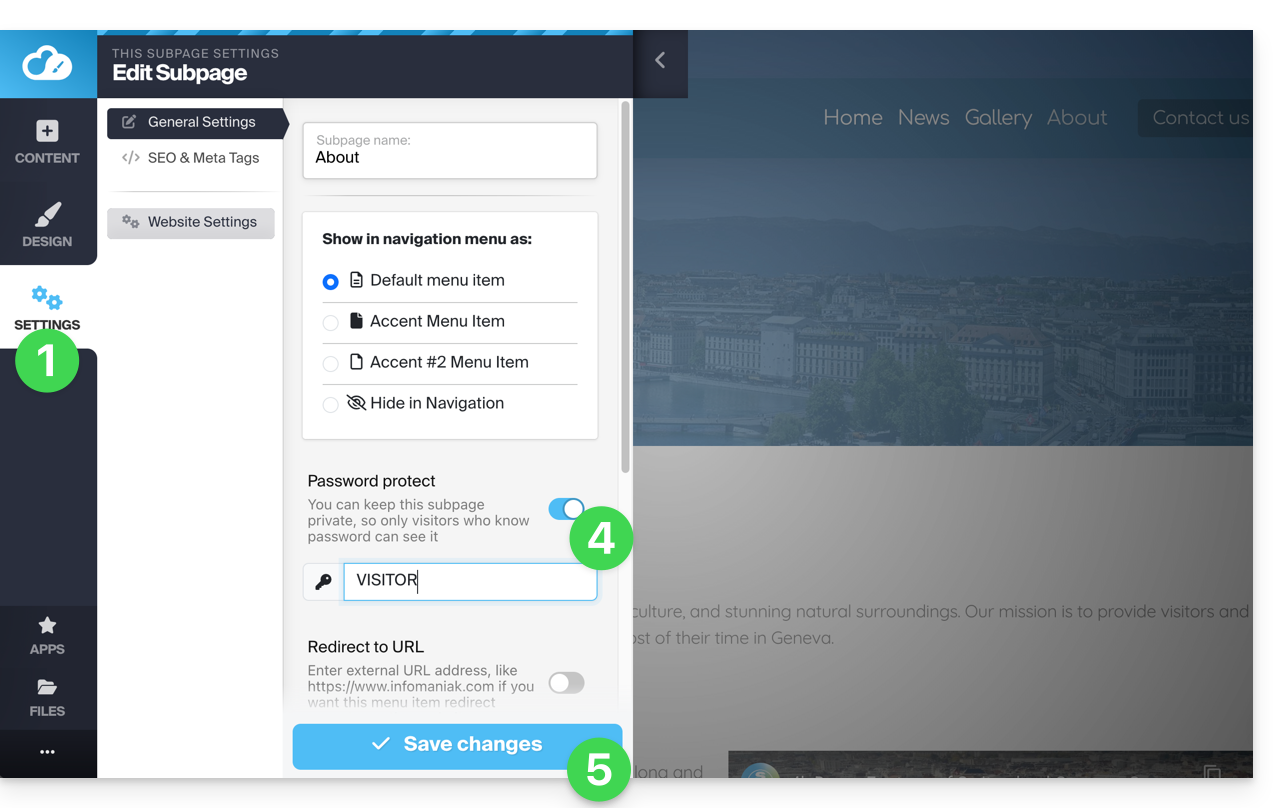
To test, visit the page from a browser in private browsing mode (to avoid being logged in to Site Creator) or preview the page from the editor: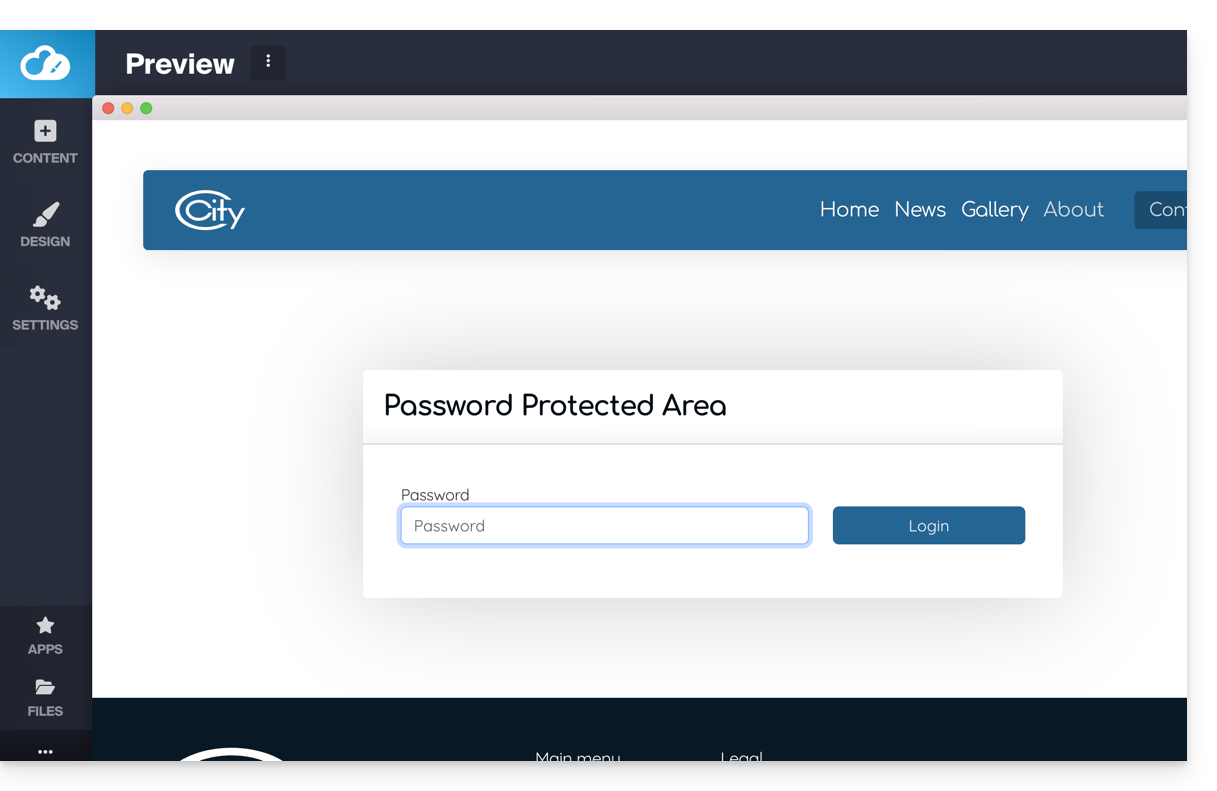
Add a "hidden" page
To add a page that will not appear in the main menu (but will still be accessible via its direct address and by a search engine if it indexes your page, as well as in the sitemap if you wish):
- Click on the Settings button in the left-hand menu - the list of your pages will appear.
- Hover over the desired page in the existing tree structure.
- Click on the gear icon to access the page options.
- Choose the latest display type to hide the page in the navigation and determine whether you still want to include the page in the sitemap.
- Save the changes at the bottom of the page:
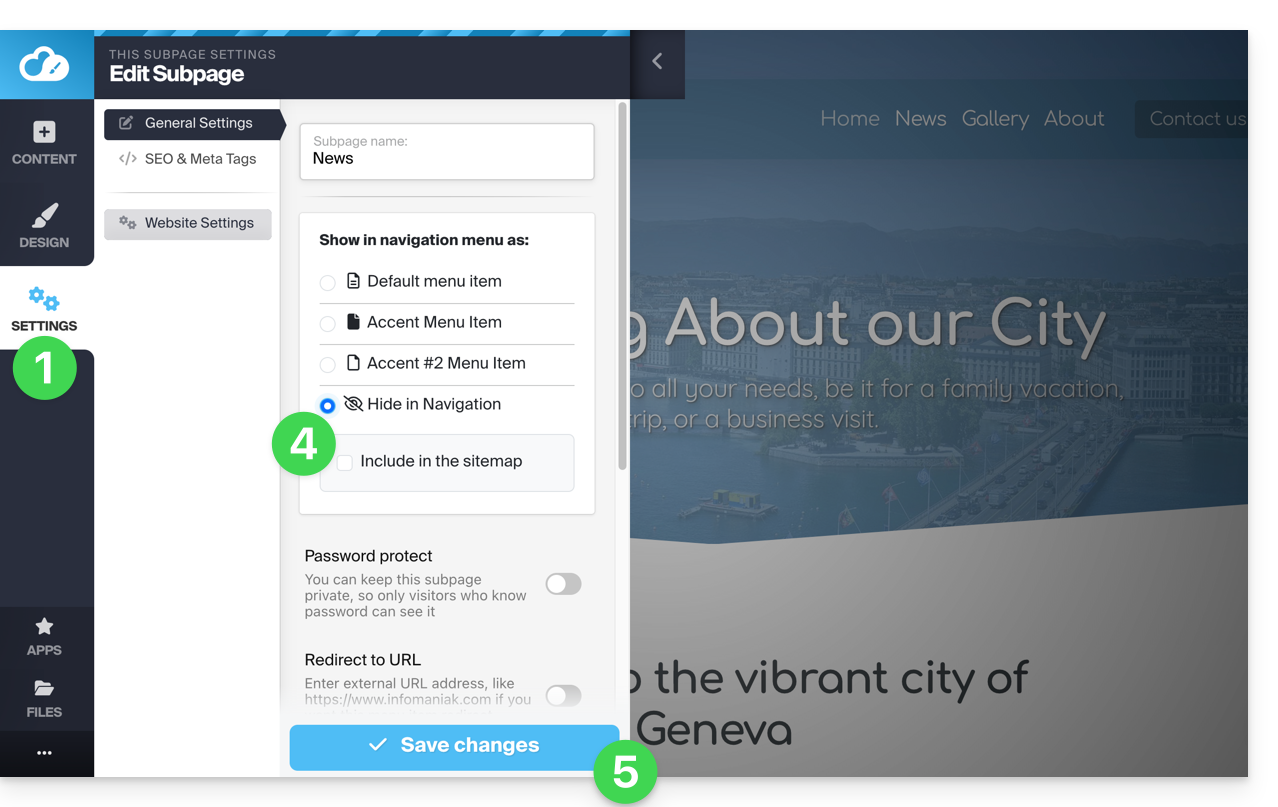
Another option: hover over the desired page in the existing tree structure and click on the page icon to the left of your page's name until the crossed-out eye appears:
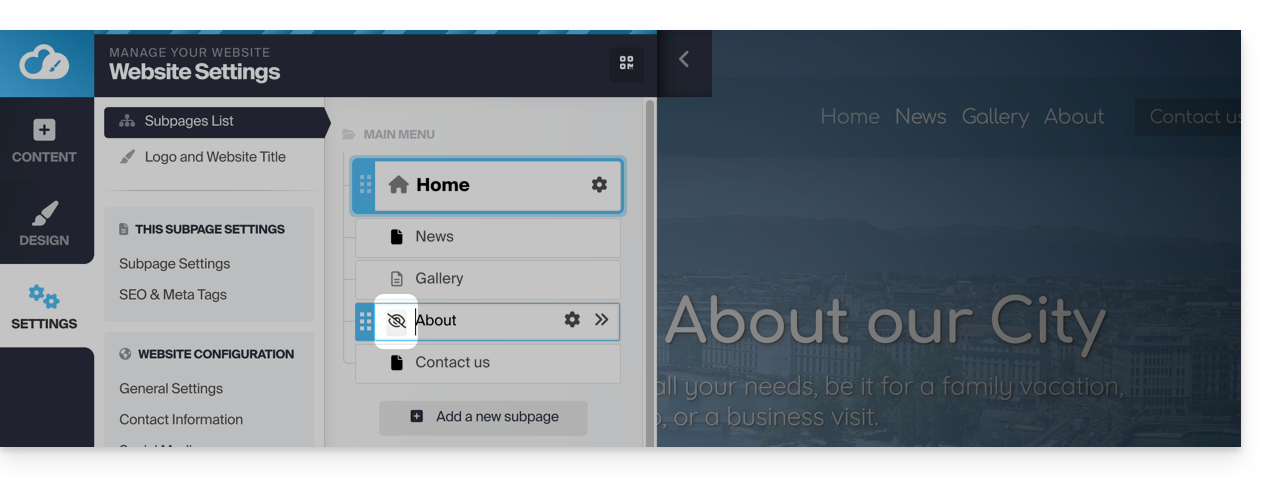
Save the changes at the bottom of the page.
If necessary, you can create a link to this hidden page from another page, as the hidden page will still appear in the list of site pages when you add an internal link: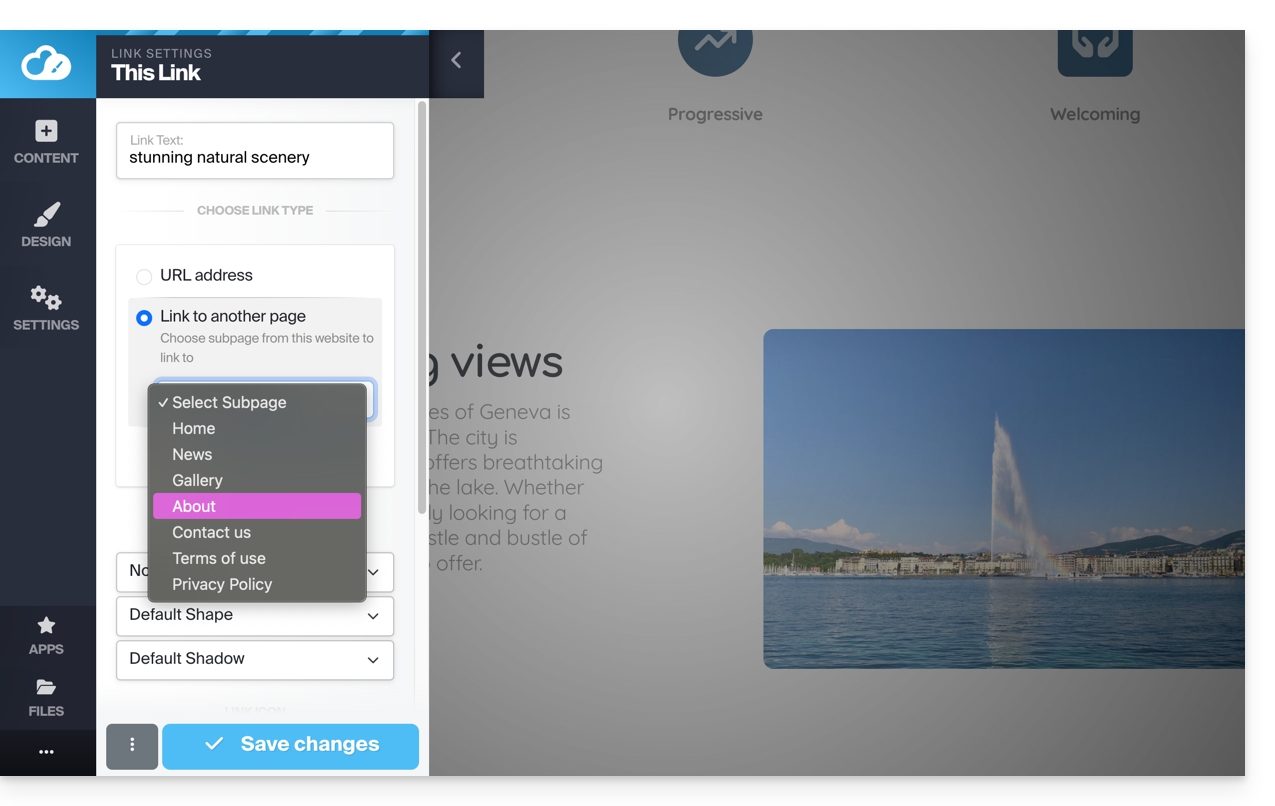
Link to this FAQ: https://faq.infomaniak.com/2706
Has this FAQ been helpful?