Knowledge base
1000 FAQs, 500 tutorials and instructional videos. Here, there are only solutions!
Create an out-of-office message template for your email
Update 09/24/2026
This guide explains how to create a template for the automatic out-of-office message tool for all your email accounts on the Infomaniak Mail web app (online service ksuite.infomaniak.com/mail).
Introduction
- A template allows you to create the basic structure of a tool that can then be used by multiple users of the same Infomaniak Mail service, and even customized according to the person who will be using it.
- In the case of an auto-reply template, the template creator chooses the text that will be sent when a new sender contacts an address to which the template has been applied.
- You can also hide a template so that it is no longer used.
Create an out-of-office reply template
To create a template:
- Click here to access the management of your Mail Service in the Infomaniak Manager (❓: help).
- Click directly on the name assigned to the Mail Service in question:
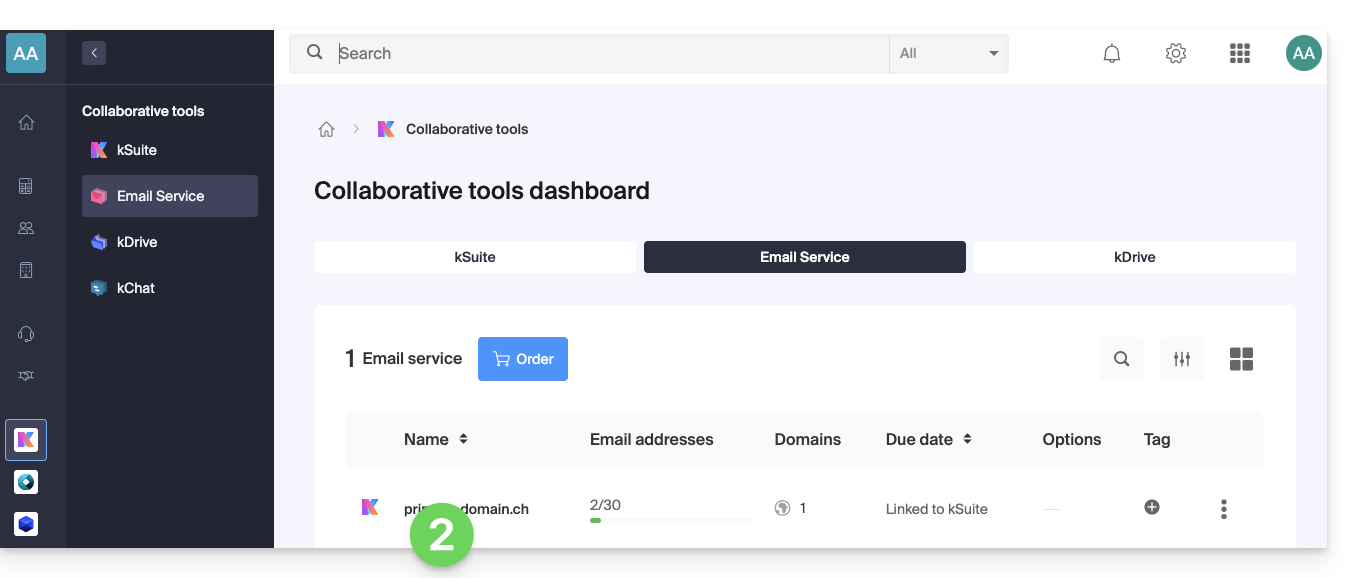
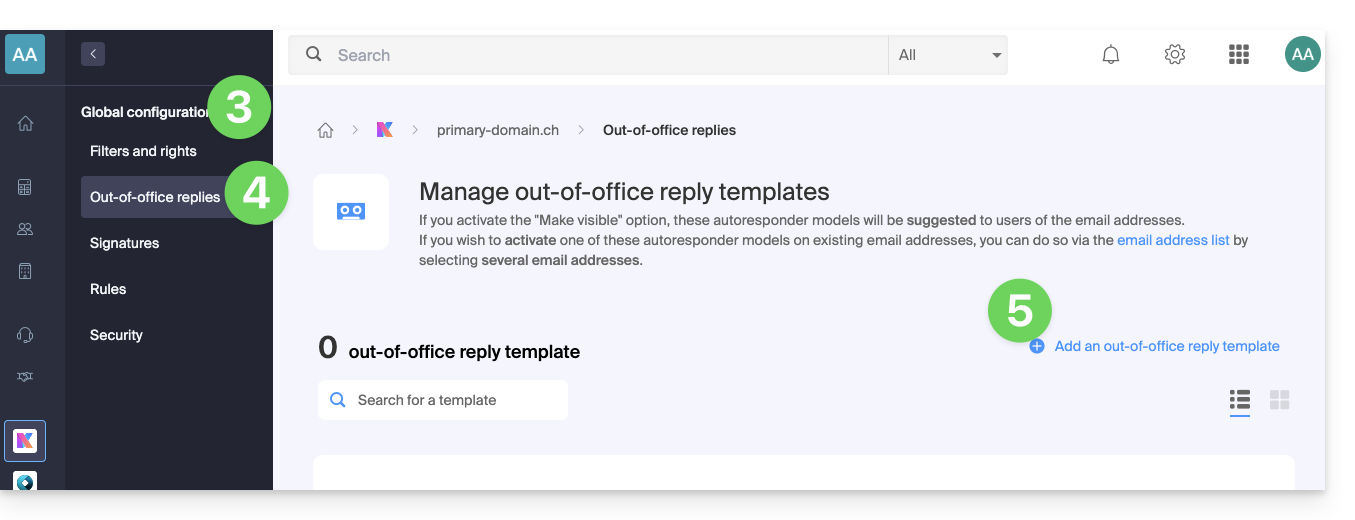
- Click on Global Configuration in the left-hand menu.
- Click on the Voicemail menu.
- Click on Add a voicemail template:
- Fill in the fields and click Add Out-of-Office Template:
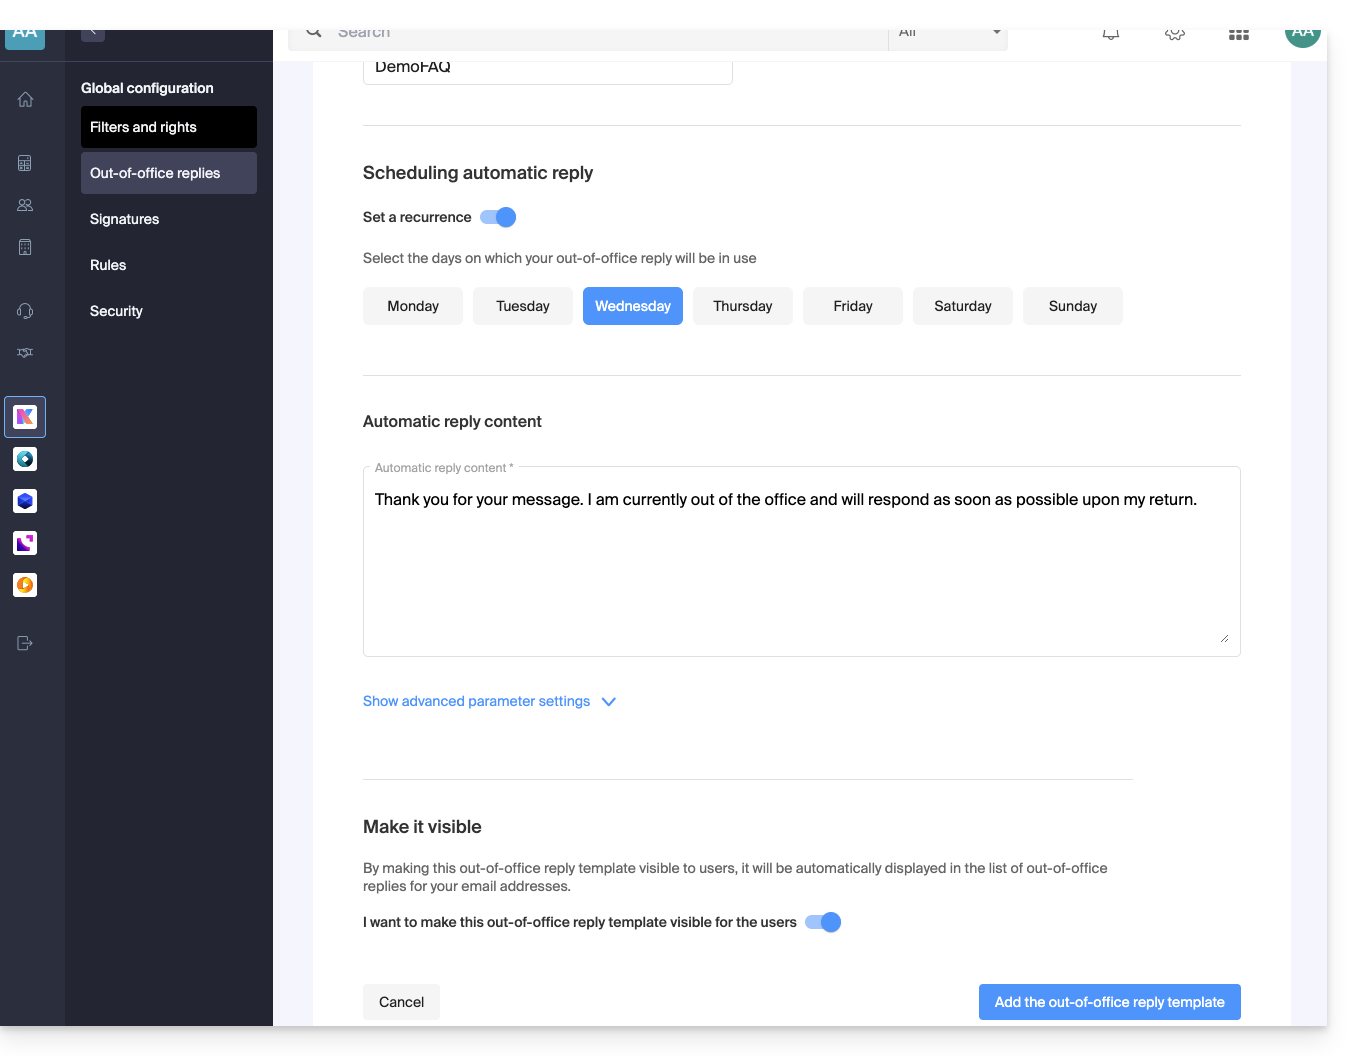
- If the Make visible option is enabled (during creation or can also be selected later), the created out-of-office templates will be suggested to users of the email addresses.
Activate a template on an existing email address
You need an existing template to activate it for one or more email addresses:
- Click here to access the management of your Mail Service in the Infomaniak Manager (❓: help).
- Click directly on the name assigned to the Mail Service in question.
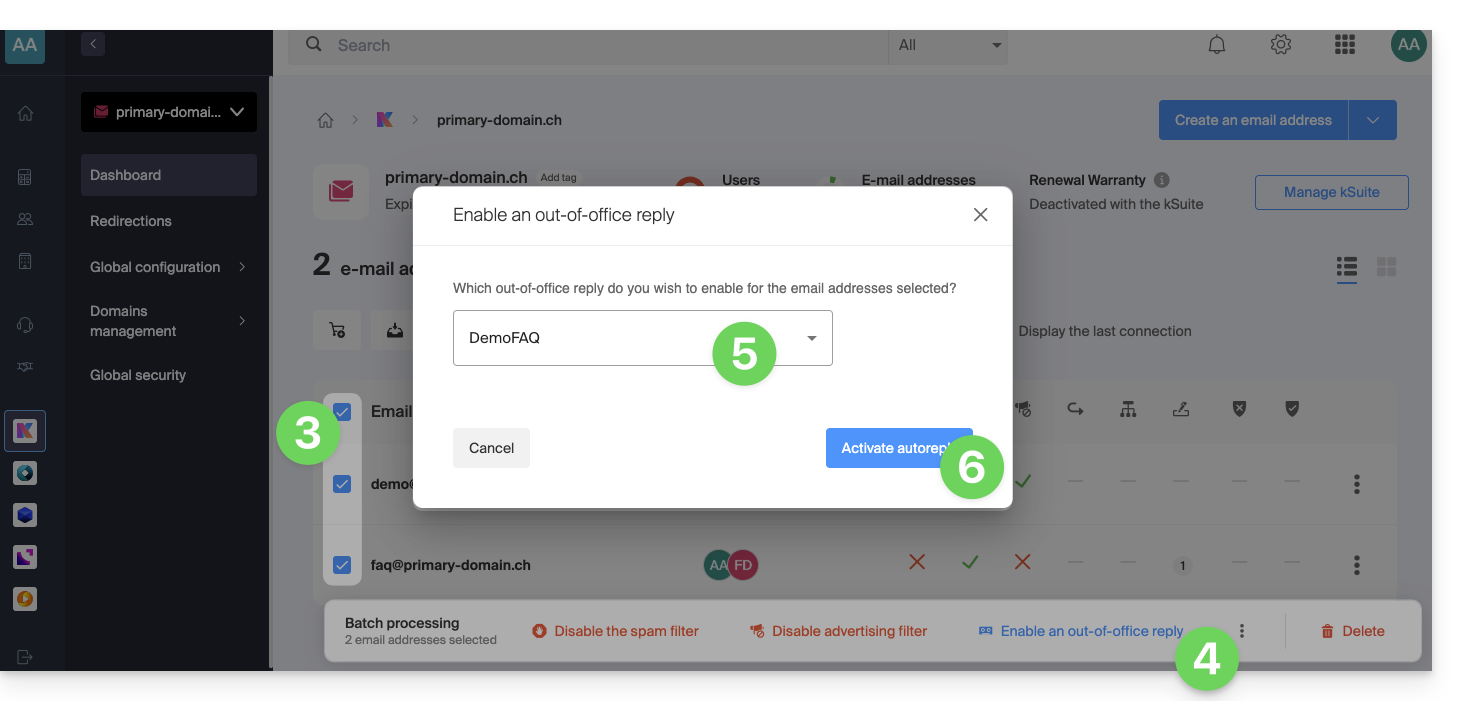
- Click on the boxes to select one or more email addresses in the table that appears.
- Depending on the screen size, first click on the action menu ⋮ or directly on Apply a voicemail template.
- Select the template of your choice.
- Only the templates that are visible are available when activated.
- Click on the Activate button:
Link to this FAQ: https://faq.infomaniak.com/2687
Has this FAQ been helpful?