Knowledge base
1000 FAQs, 500 tutorials and instructional videos. Here, there are only solutions!
Ticketing: create a form for each price plan
This guide explains how to create forms that will be linked to the different pricing options for an event (within the Infomaniak ticketing system). This allows you to create specific forms for each pricing option available for an event.
Create a form for each pricing option
To do this:
- Click here to access the management interface for your product in the Infomaniak Manager (need help?).
- Click directly on the name assigned to the ticketing system for the event.
- Click on Settings in the left-hand menu.
- Click on Form in the left-hand menu.
- Click on the Add a form button and give the form a name:
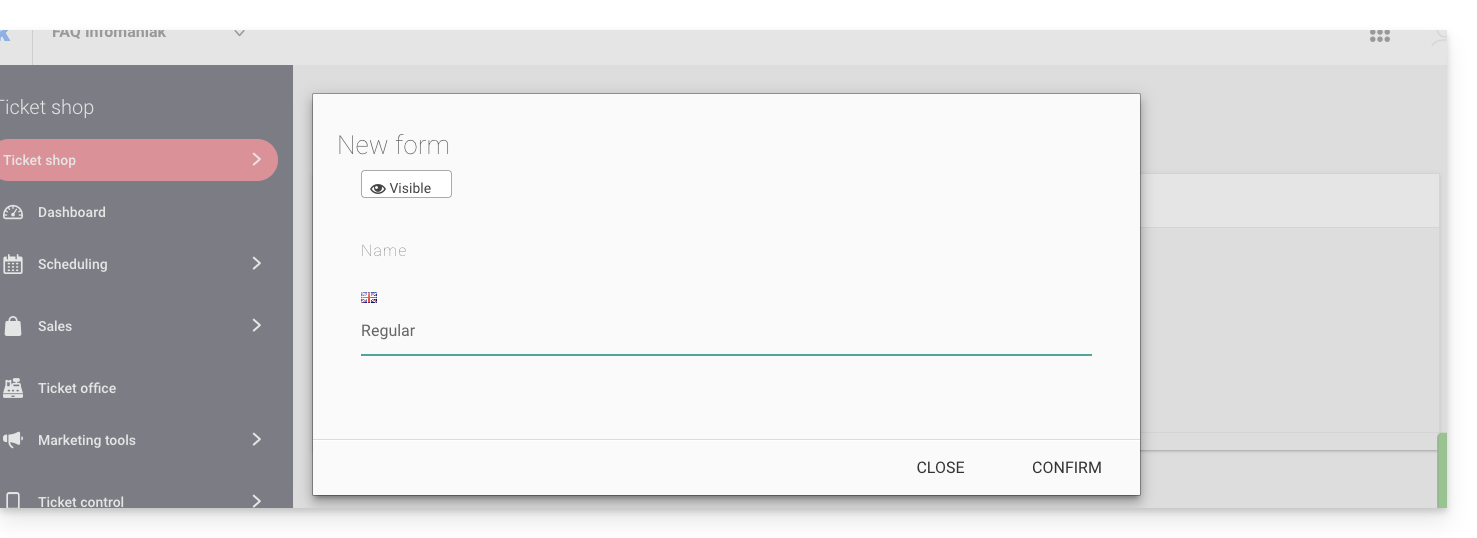
Add fields
Add the items to include in the form, per pricing plan:
- Click on the Add button:
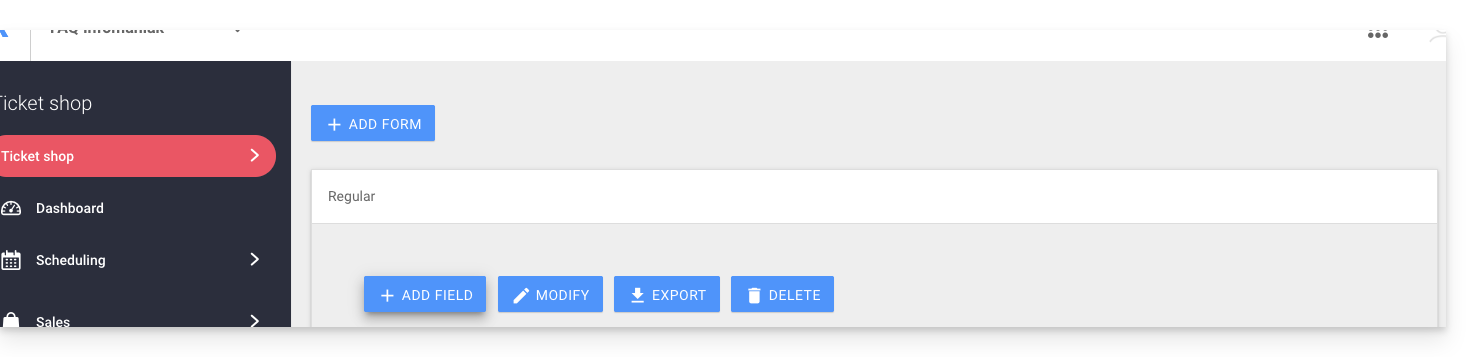
Choose the field name and type:
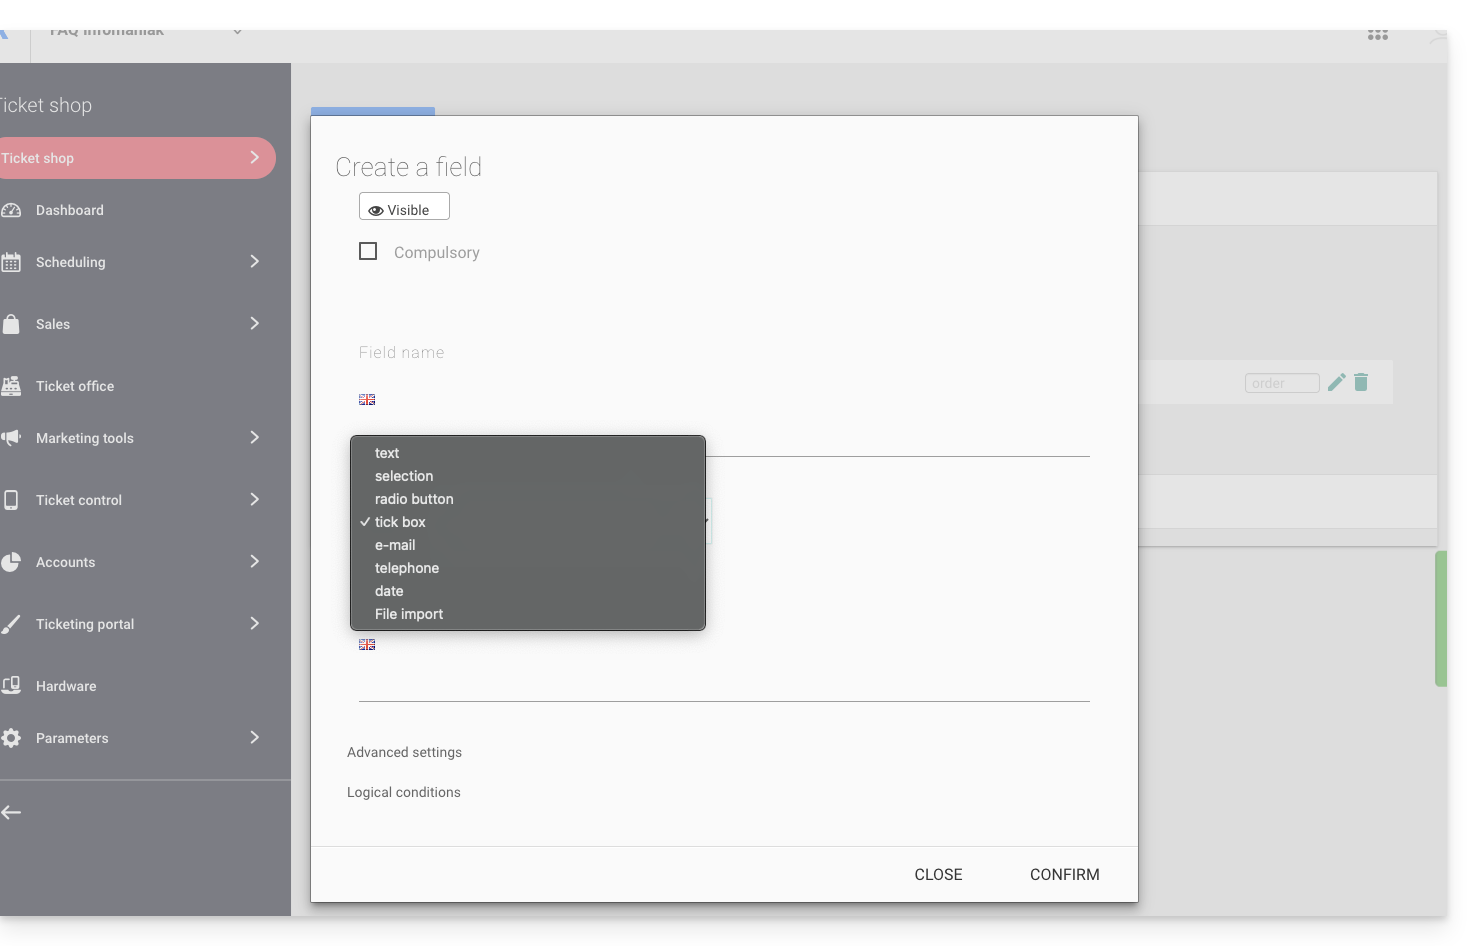
- Text: a free field for inserting text
- Selection: a drop-down menu for selecting an option from the available options
- Radio button: radio buttons for selecting an option from the available options
- Checkboxes: checkboxes that can be checked or left blank
Note: if the required option is selected, all checkboxes must be checked to proceed. Example use: “I have read and accept the terms of use”…
- Email: for entering an email address. This allows you to use a different email address than the one used by the person who placed the order.
- Phone: for a phone number
- Date: for a date
Advanced options and logical conditions
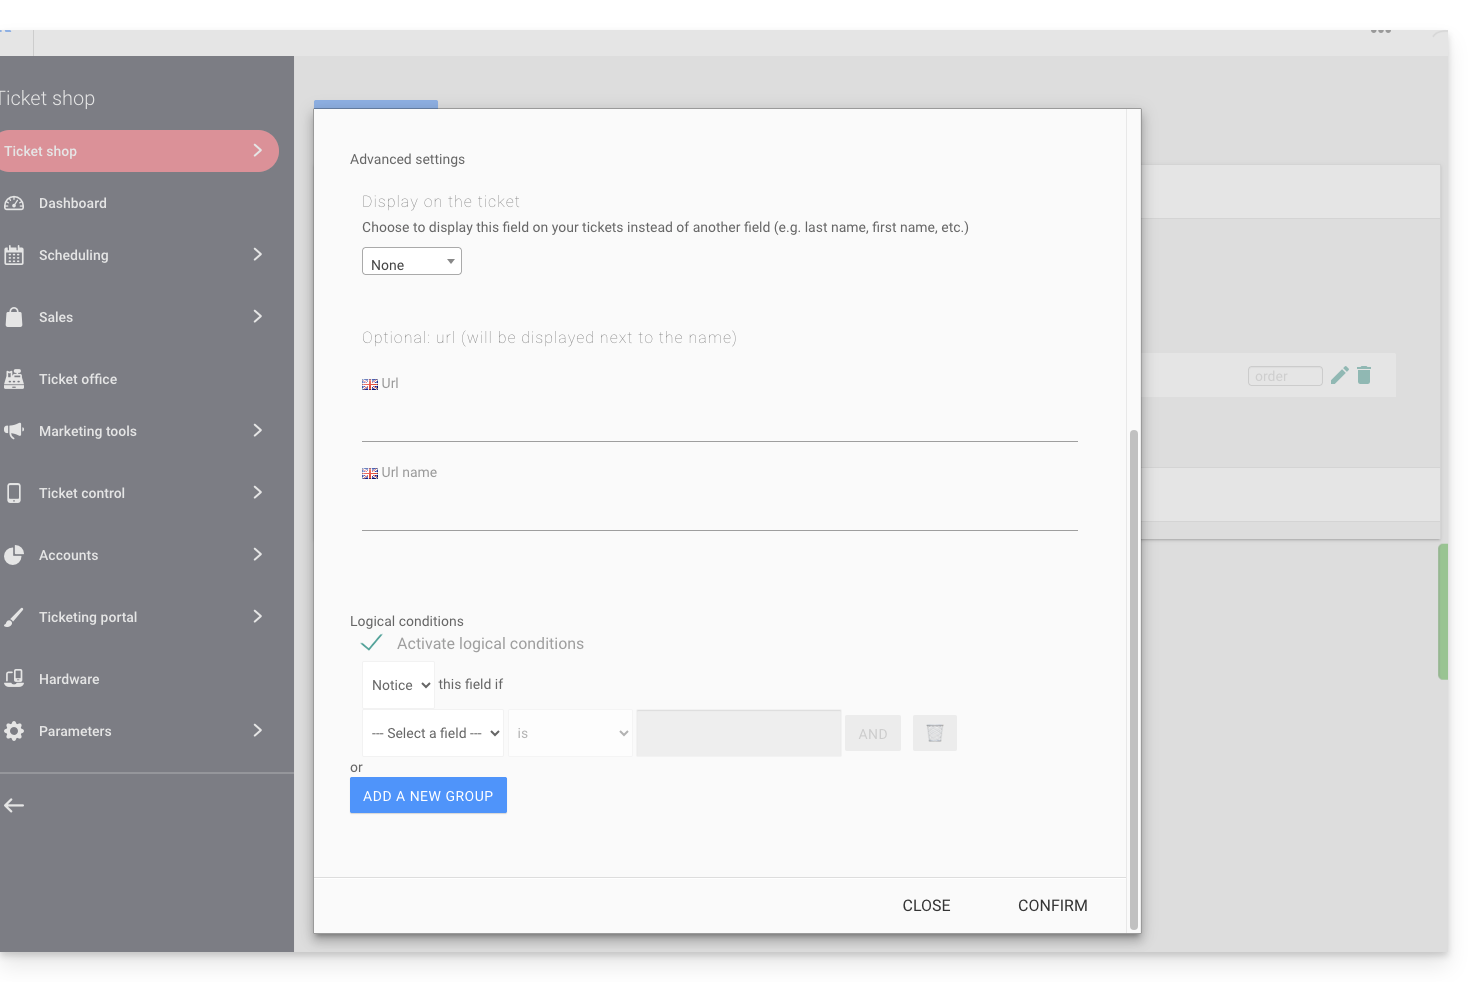
- Display on the ticket: allows you to replace the form information directly. For example, to display the name of the person attending the event on the ticket instead of the name of the person who made the order…
- Add a URL: URL that will be displayed in the field, then above the field to allow the visitor to fill it in.
- Logical conditions should be used when multiple fields have been created and you want to control their display/visibility/presence.
Choose the order of the questions
Choose the order in which the questions will appear on the ticketing form: 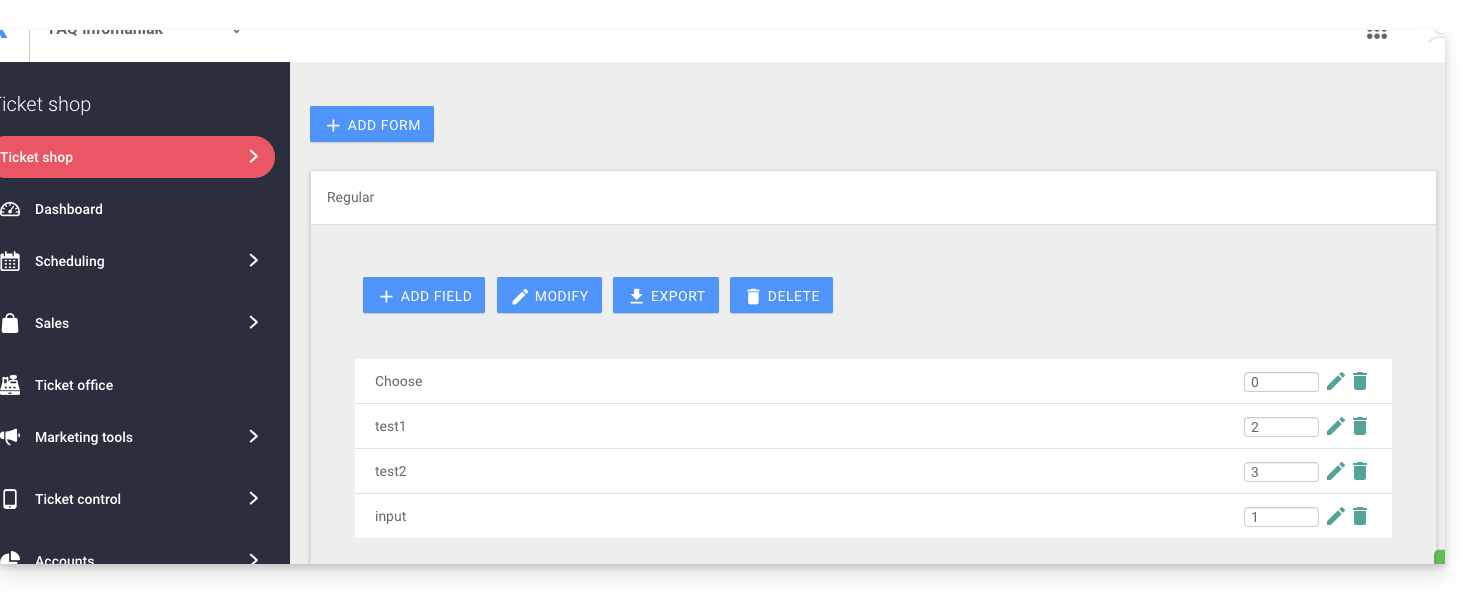
- Numbered positions will be in numerical order: 1, 2, 3, etc.
- Those without a defined order will follow (not recommended).
- Position 0 will appear at the very end.
Link the form to a pricing plan
To do this:
- Click here to access the management interface for your product in the Infomaniak Manager (need help?).
- Click directly on the name assigned to the ticketing system for the event.
- Click directly on the name assigned to the event (or, if necessary, click on Program in the left-hand menu, then Events):
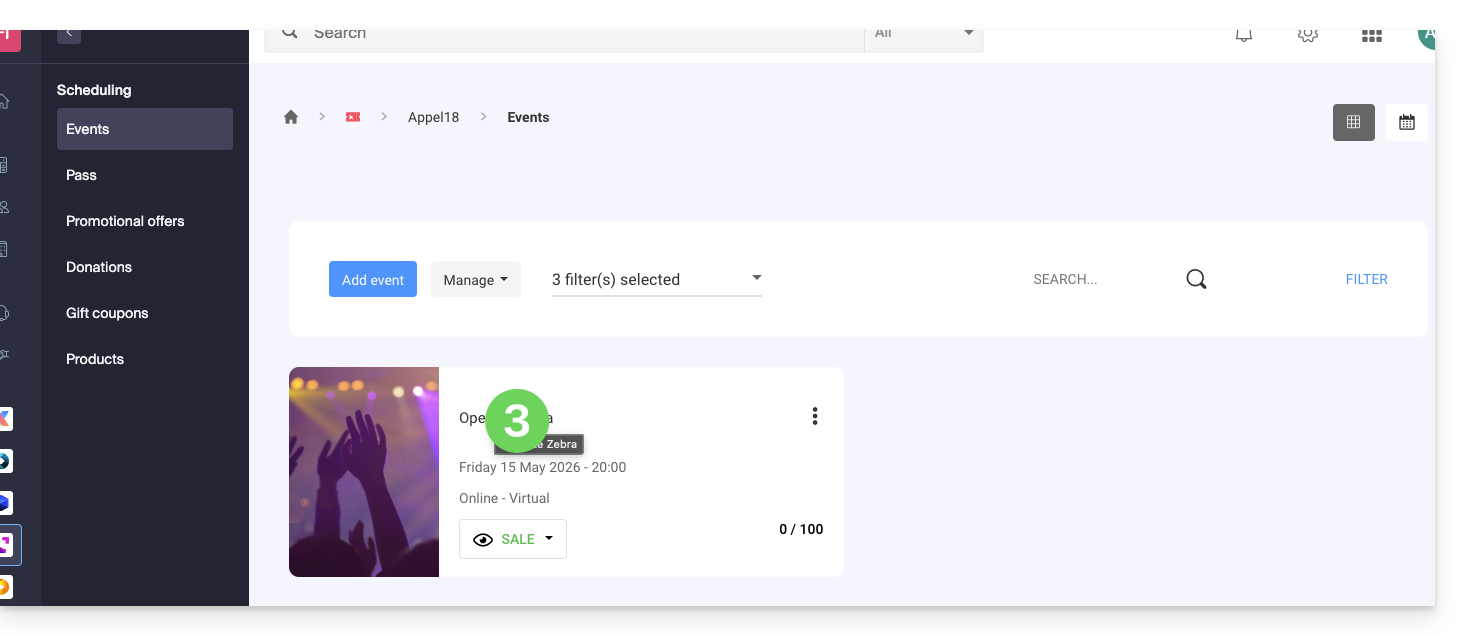
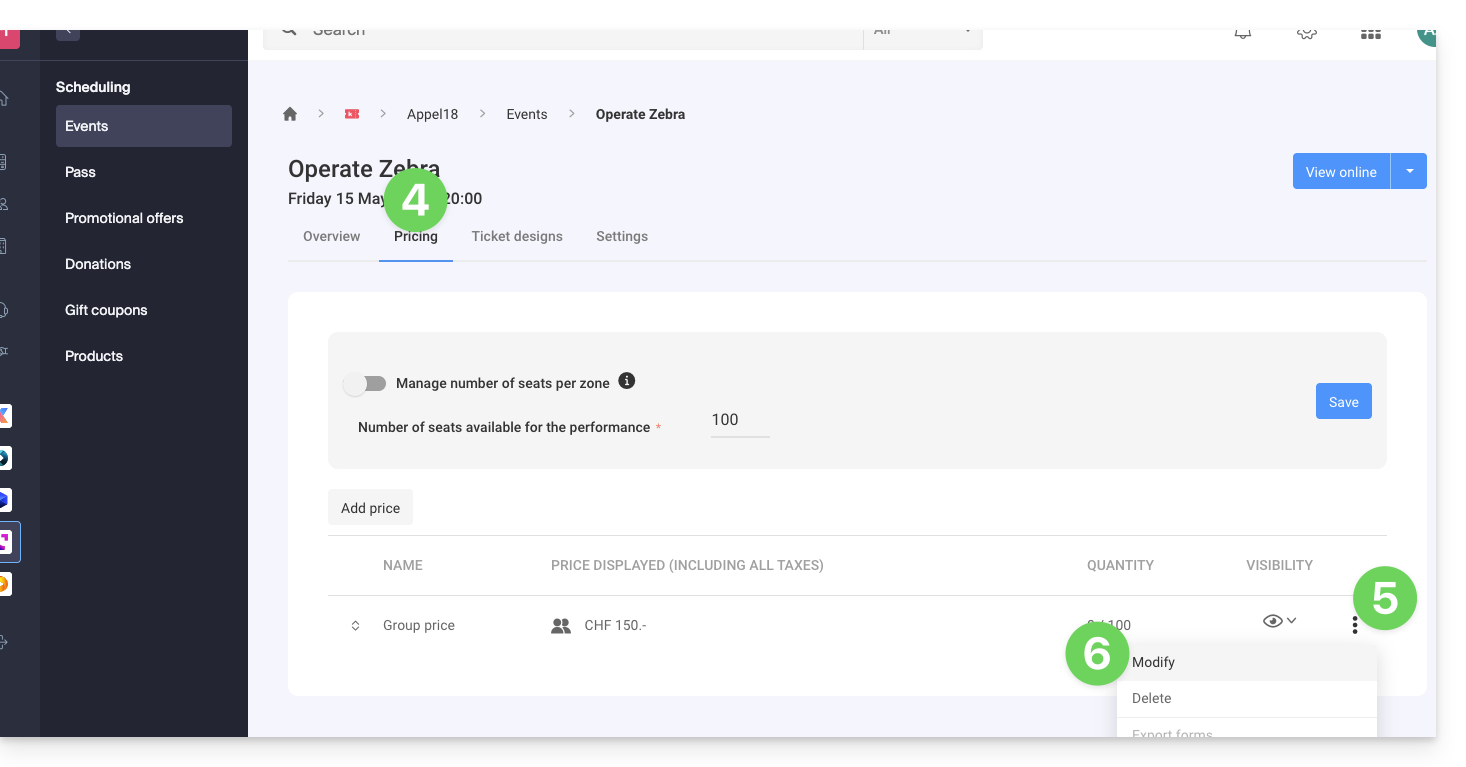
- Click on the Pricing tab.
- If the event has multiple dates, this section is replaced by “Dates”, which opens a calendar.
- Click on the date in the calendar to access the pricing…
- Click on the action menu ⋮ located to the right of the price to which you want to associate the form (by expanding the Zone using the chevron if necessary).
- Click on Edit:
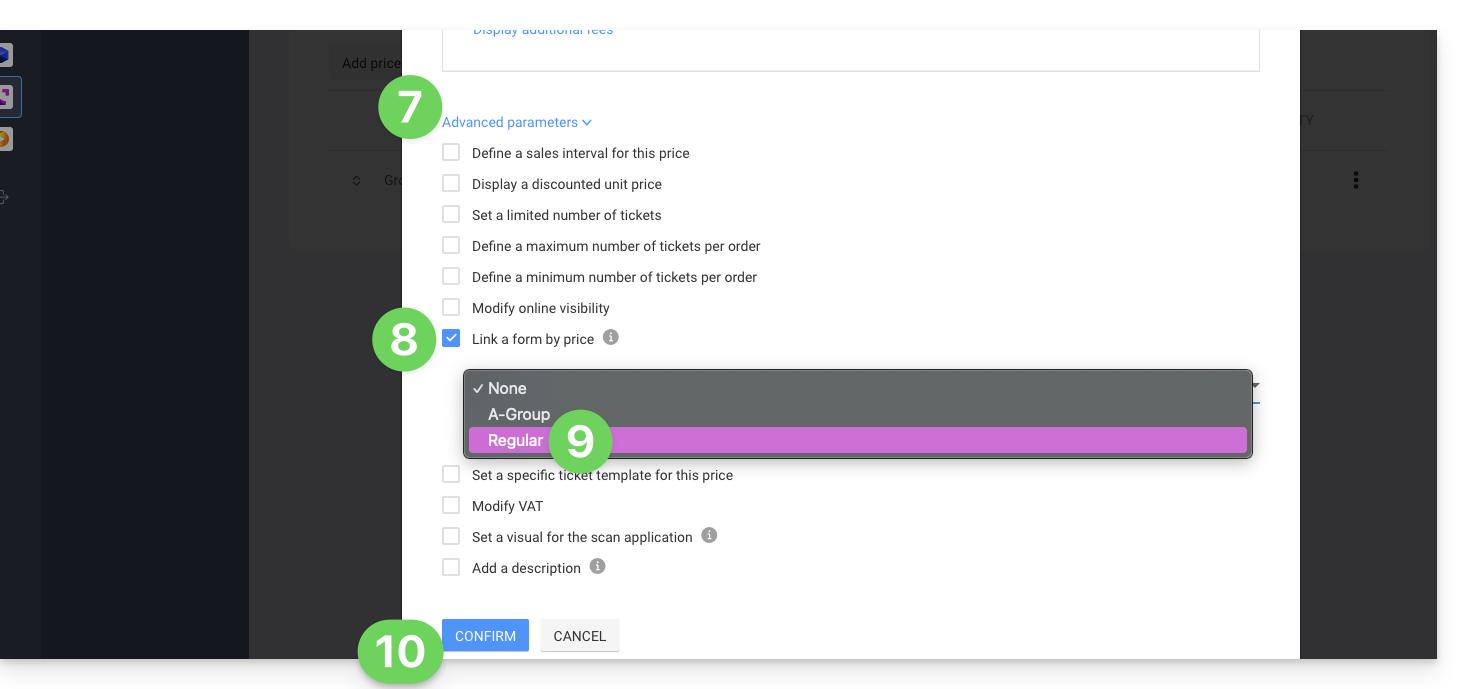
- Then, click on the down arrow to expand the advanced settings.
- Enable the Link a form to a price option.
- Choose the form to link.
- Click the Confirm button:
To retrieve information related to the forms, please refer to this other guide.
Link to this FAQ: https://faq.infomaniak.com/2678
Has this FAQ been helpful?