Knowledge base
1000 FAQs, 500 tutorials and instructional videos. Here, there are only solutions!
Ticketing: Manage promotional codes
This guide explains how to create and manage your promotional codes (within the Infomaniak ticketing system).
Enable the option in your ticketing system
To do this:
- Click here to access your product management interface on the Infomaniak Manager (need help?).
- Click directly on the name assigned to the ticketing system for the event.
- Click on Schedule in the left-hand menu.
- Click on Promotional Offers in the left-hand menu:
- Click on the blue Add button:
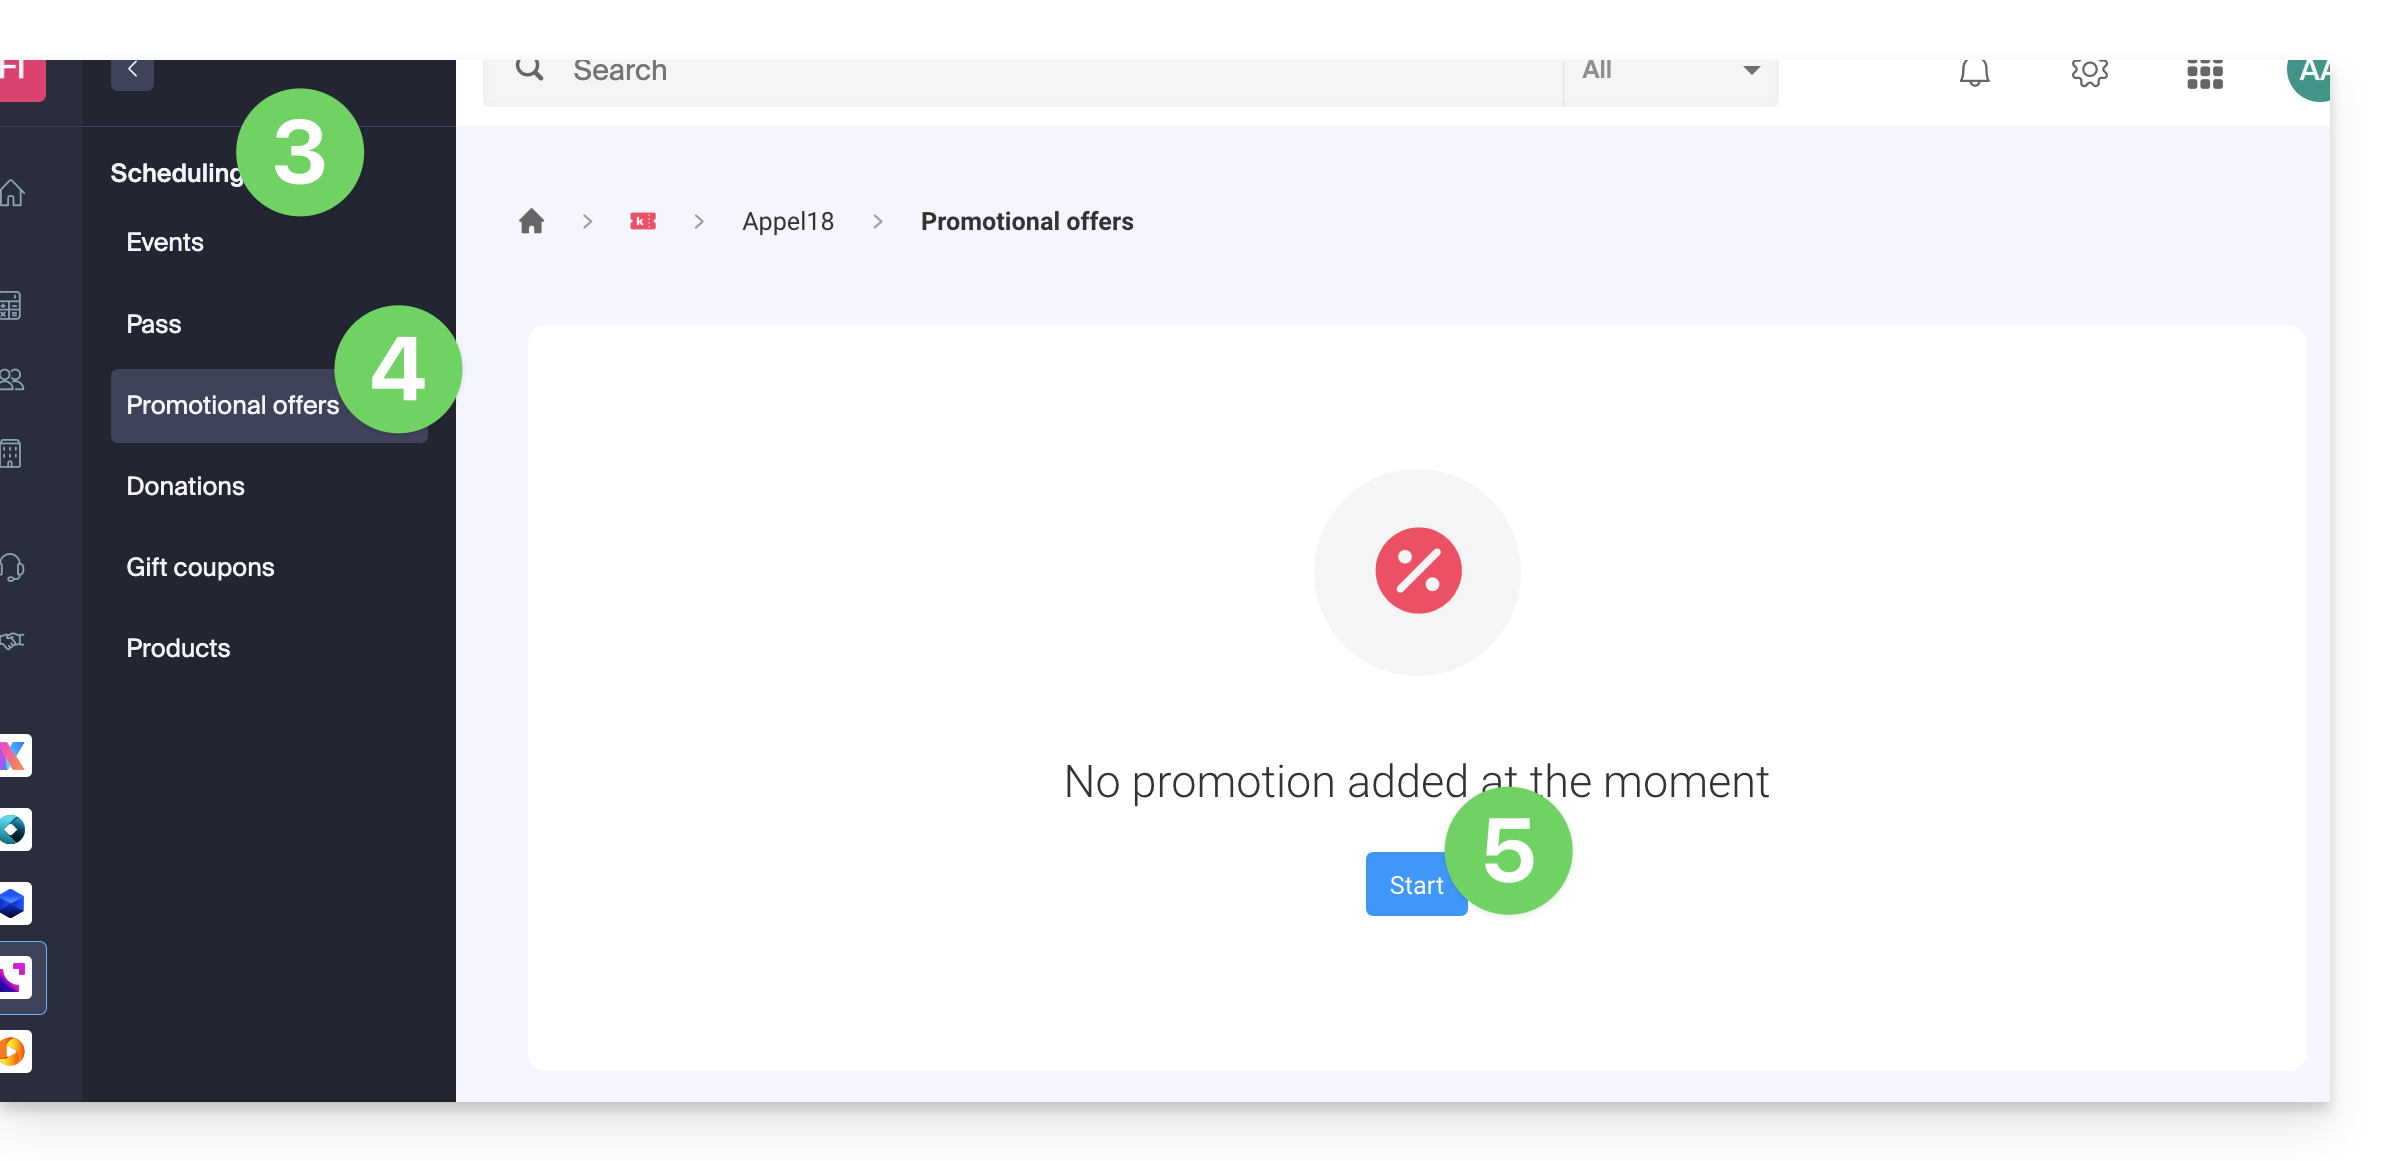
Promotional codes and offers are only valid for the purchase of tickets and/or subscriptions/passes. They are not compatible with the purchase of gift vouchers and products. If the buyer's cart contains either of these two types of items, they will not be able to apply a promotional code to their order.
Configure the offer
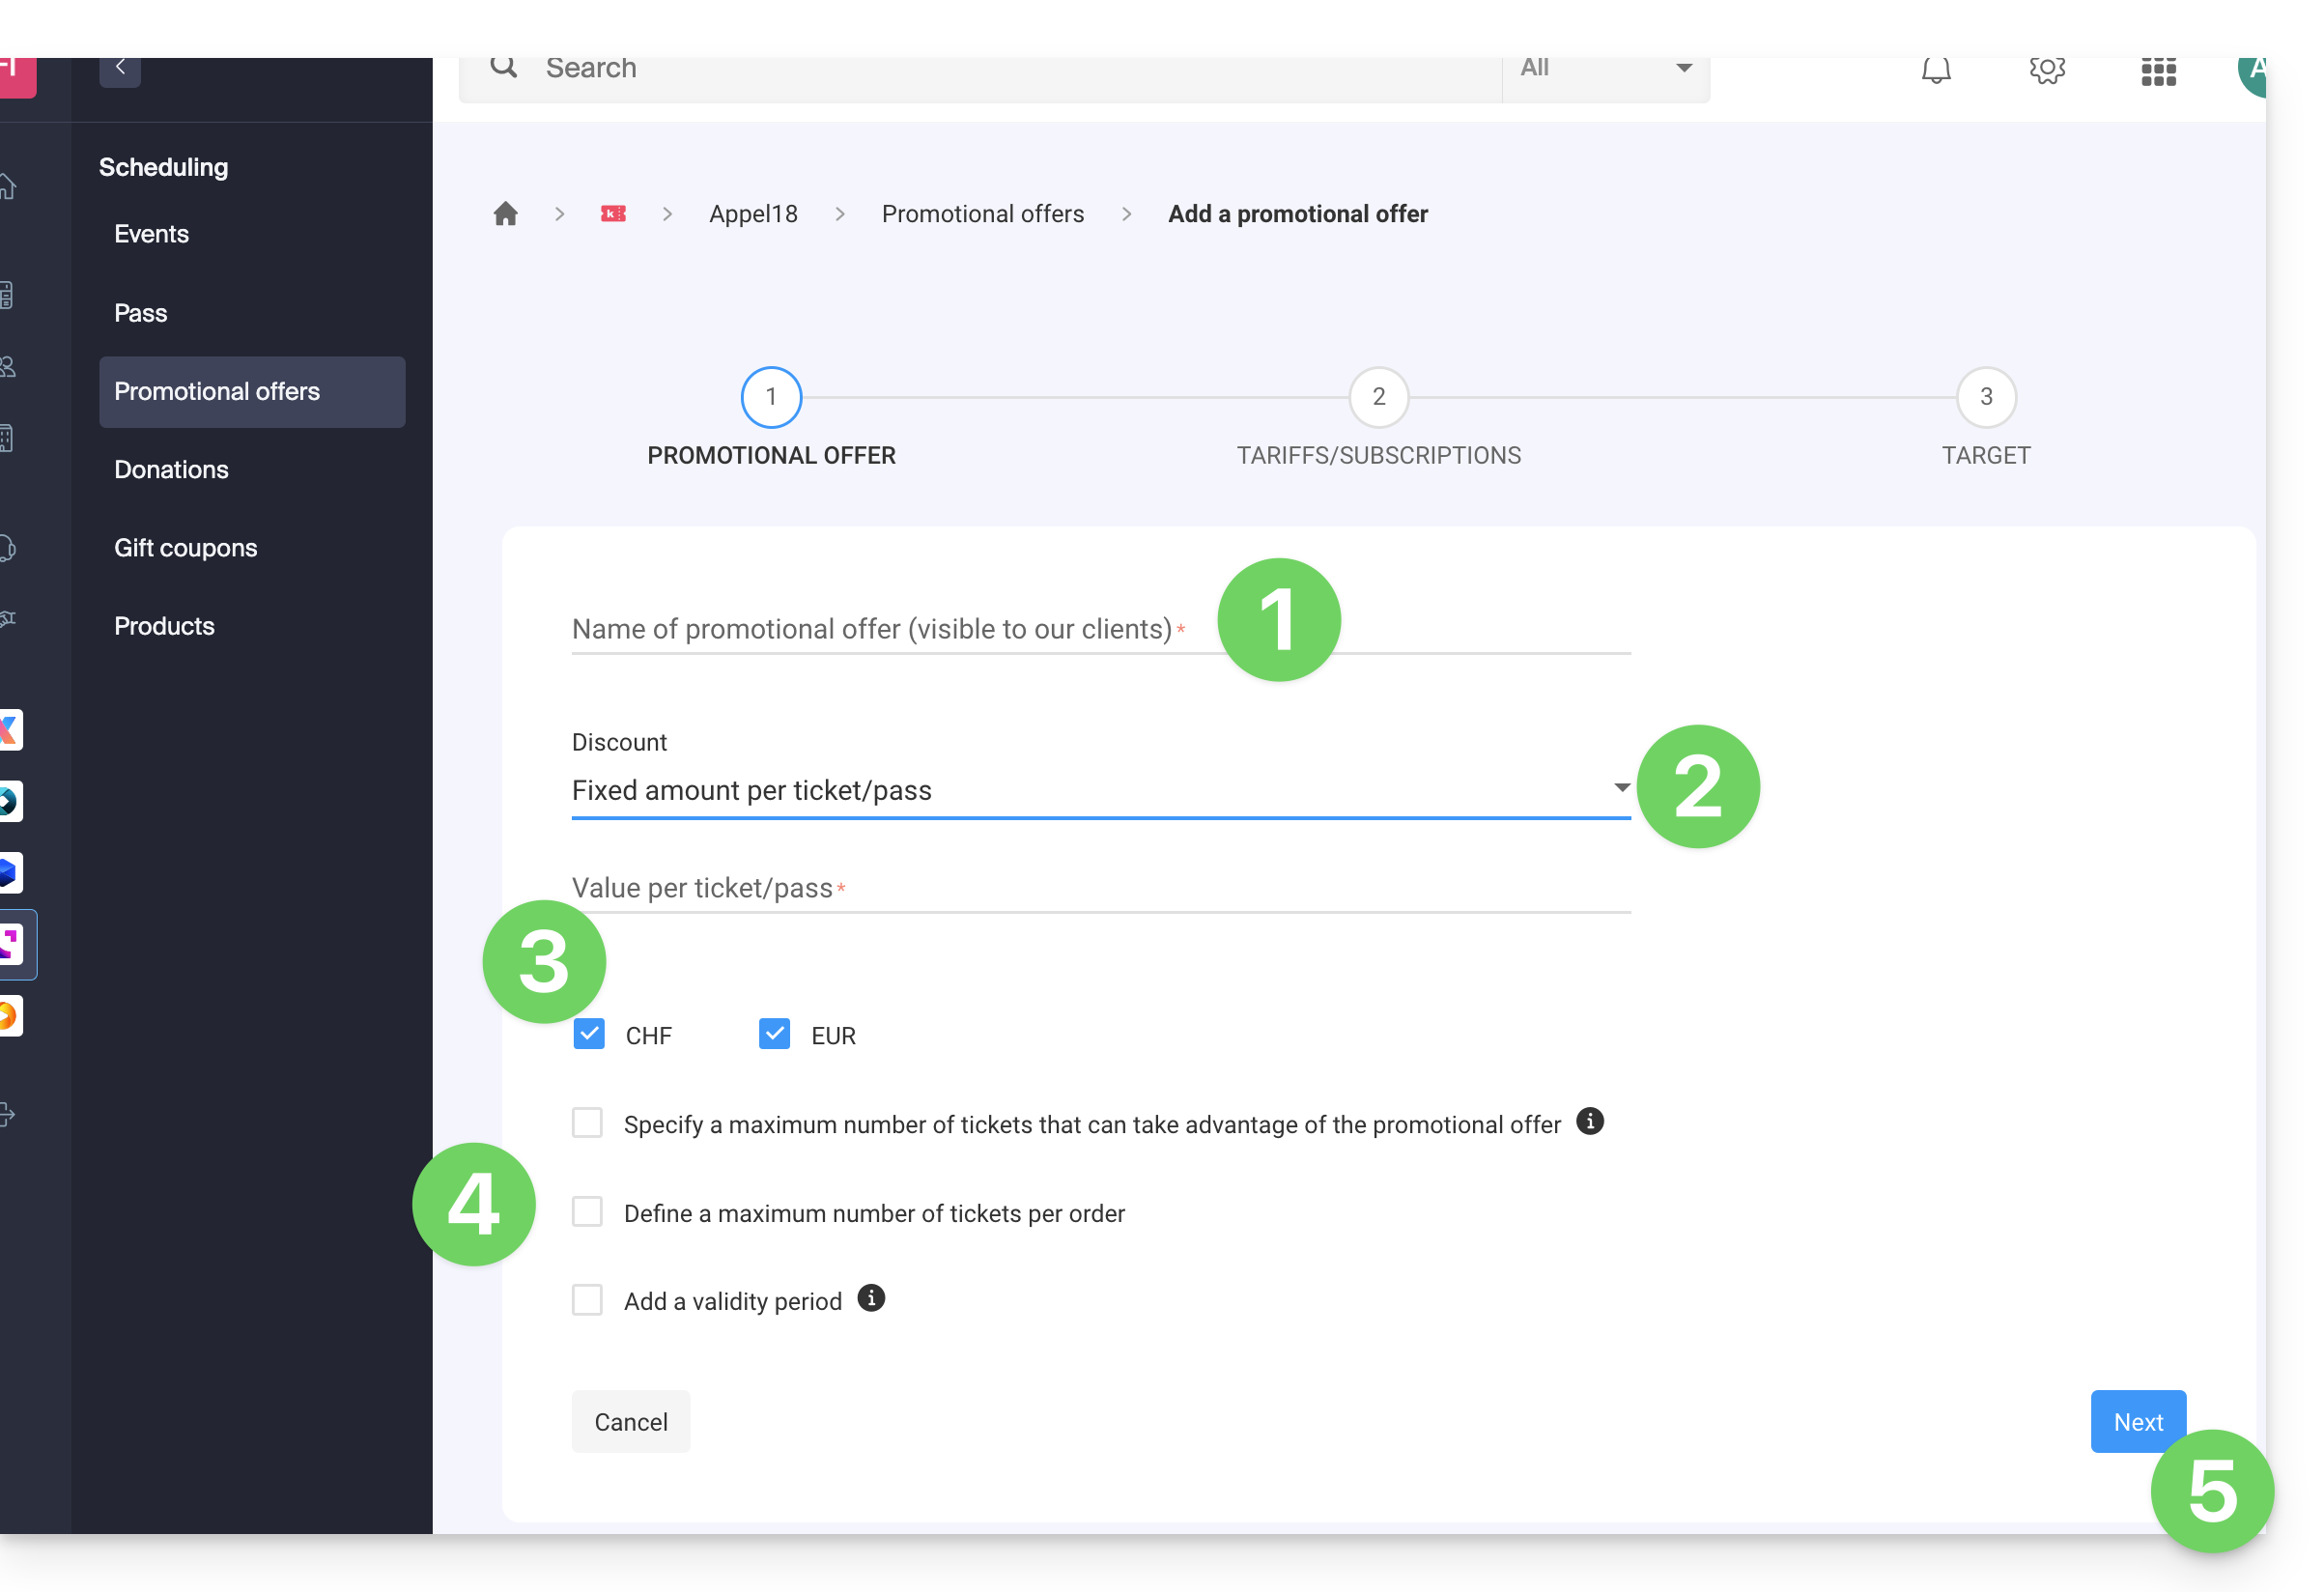
1. Promo code
- Enter a name for the offer to be proposed; this name will be visible to the customer when using the promo code(s).
- In Discount, choose the type of discount: you can set a percentage on the cart, a fixed amount per ticket/pass, or a fixed amount on the total cart value.
- Choose the currency and the discount price or the percentage of the discount to apply.
- It is possible to define 3 additional options:
- The maximum number of tickets that can benefit from this offer: once this quota is reached, no promotional code can be validated; this is useful if you want to provide a large number of codes, but only the first X users can benefit from the offer; note that pending orders will count towards the quota unless the order is cancelled.
- The maximum number of tickets per order: if the order contains more than this number, an error message will indicate that the code cannot be used because the maximum number has been exceeded.
- The validity period: this defines when this offer can be used.
- Click the button to Continue:
2. Pricing
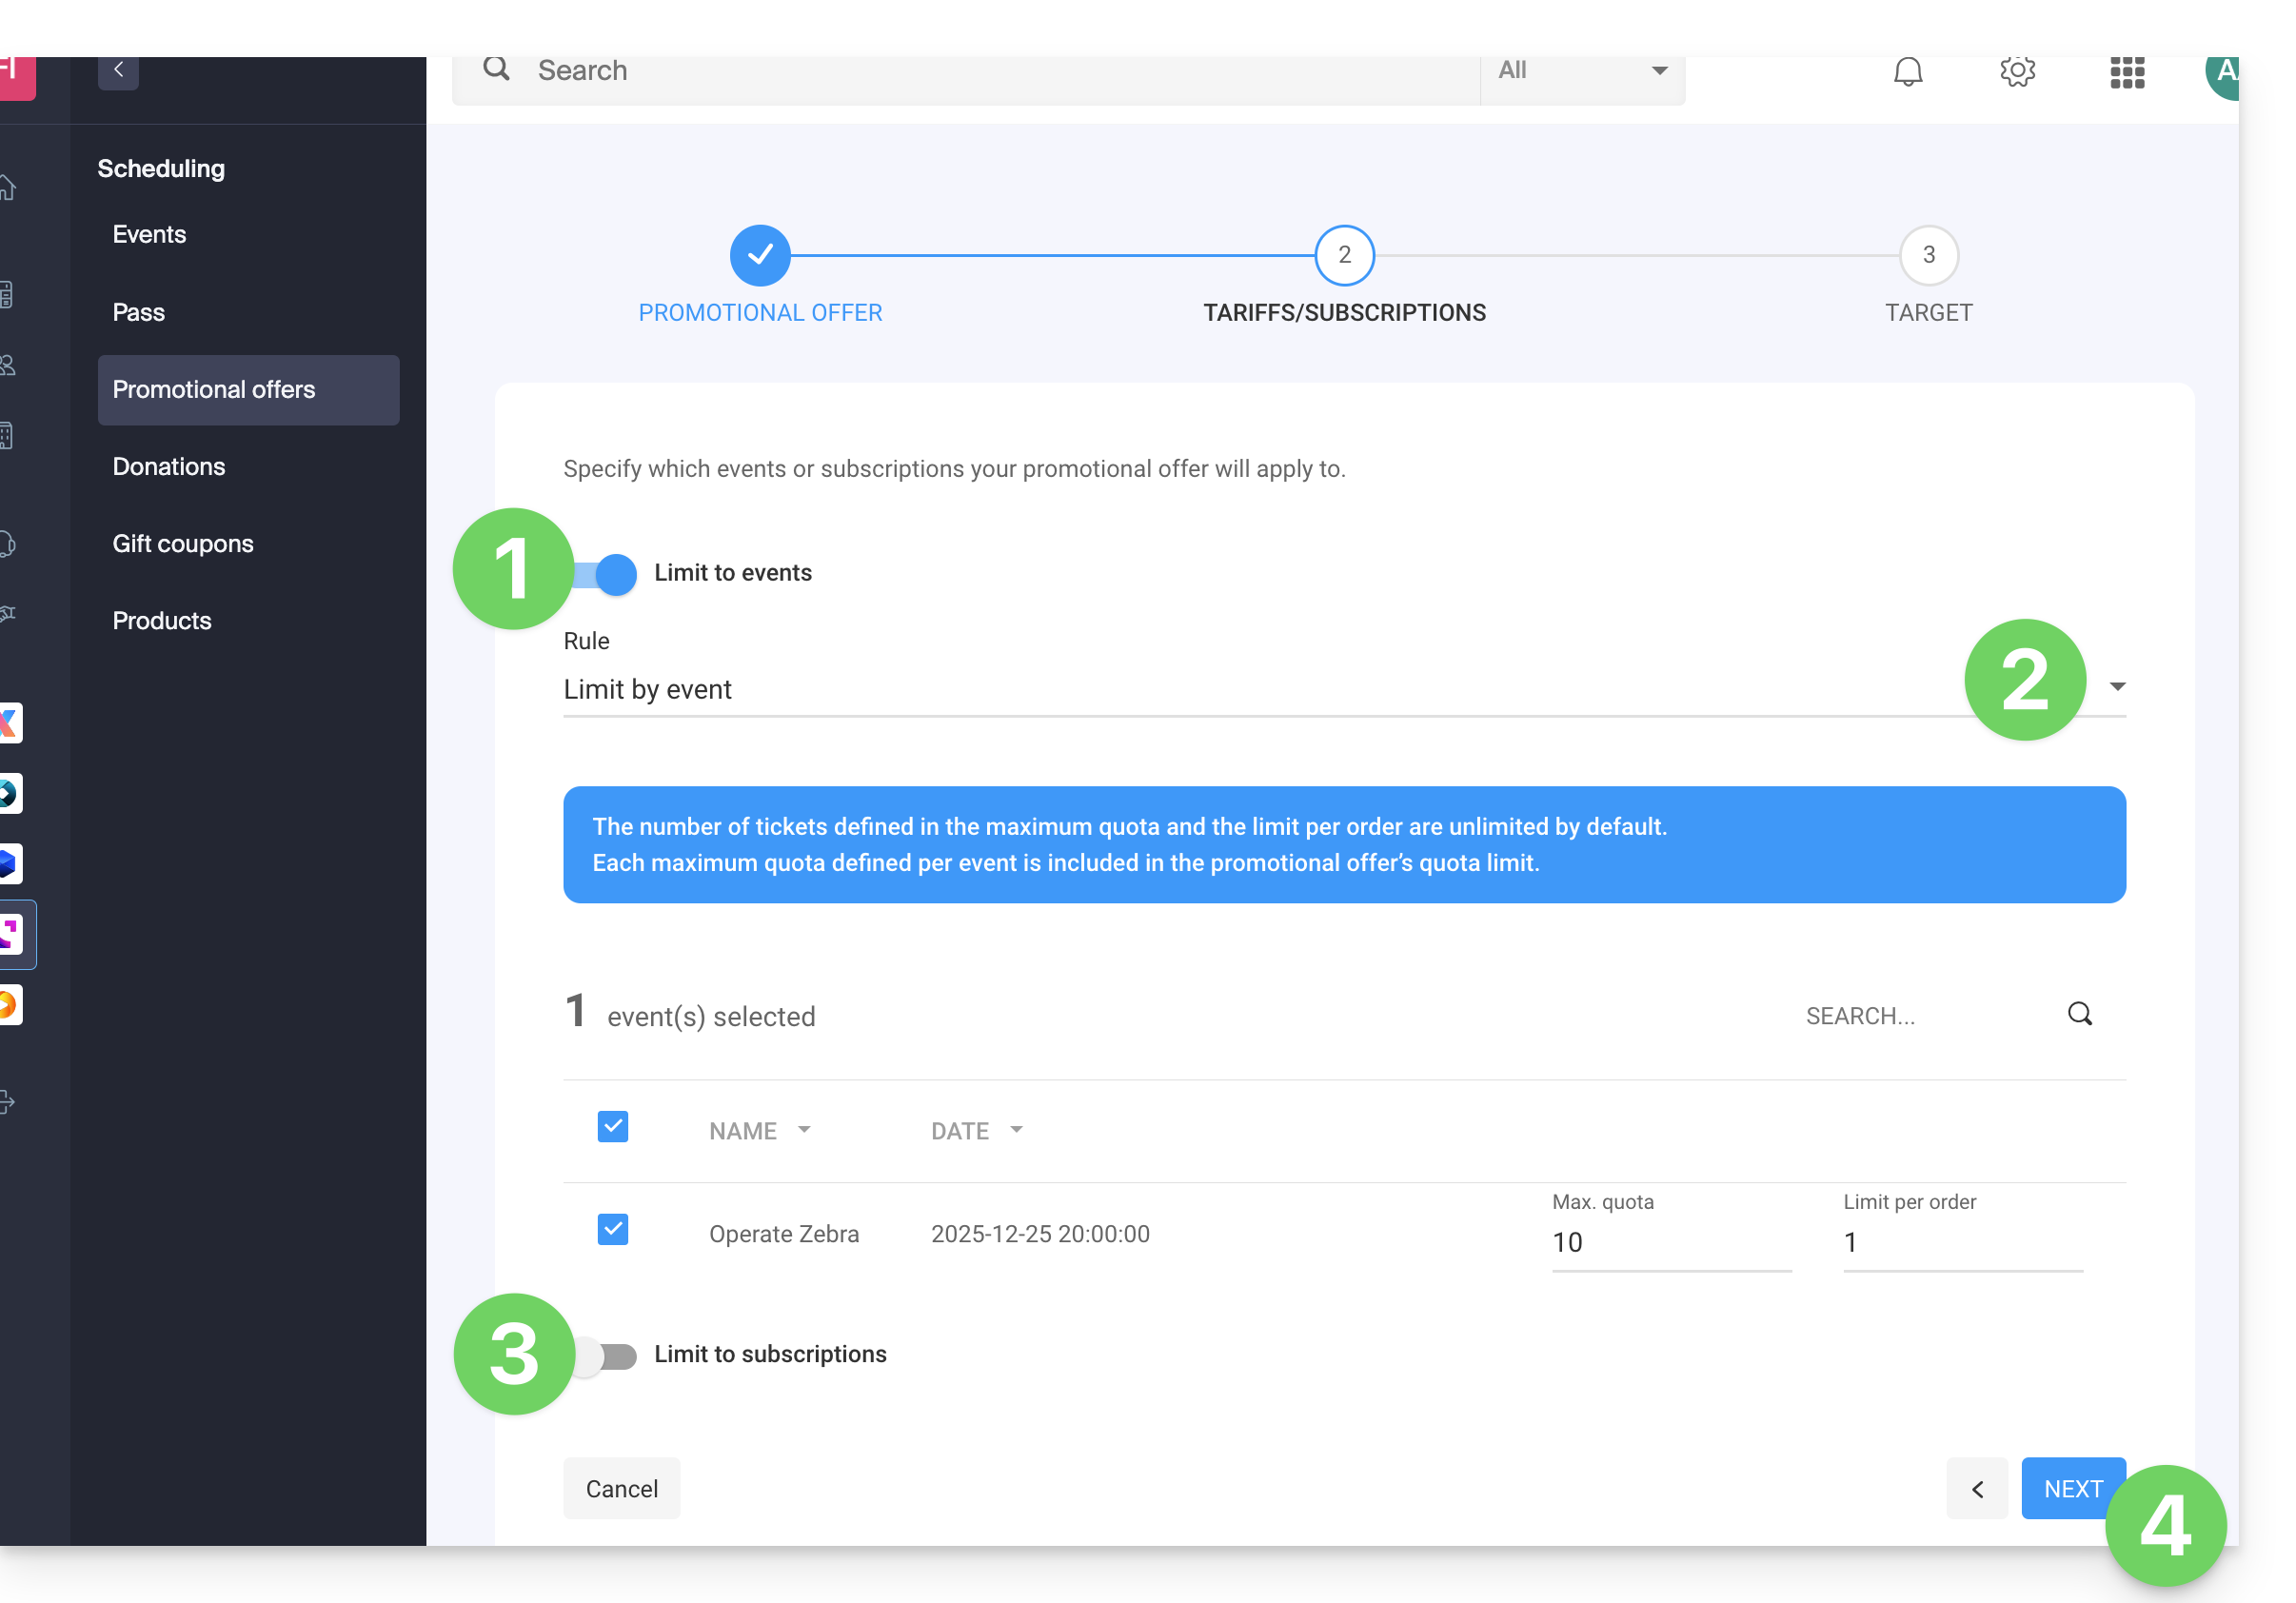
This step allows you to specify which events or subscriptions your promotional offer will apply to:
- If you limit it to events…
- … configure the events, zones, and prices for which this promotion will apply:
- It is possible to set maximum quotas and limits per order per item.
- The number of tickets defined in the maximum quota and the limit per order are unlimited by default.
- Each maximum quota defined per event is included in the quota limit of the promotional offer.
- If you limit it to subscriptions…
- The number of tickets defined in the maximum quota and the limit per order are unlimited by default.
- Each maximum quota defined per subscription is included in the quota limit of the promotional offer:
- Click Next to continue:
3. Target
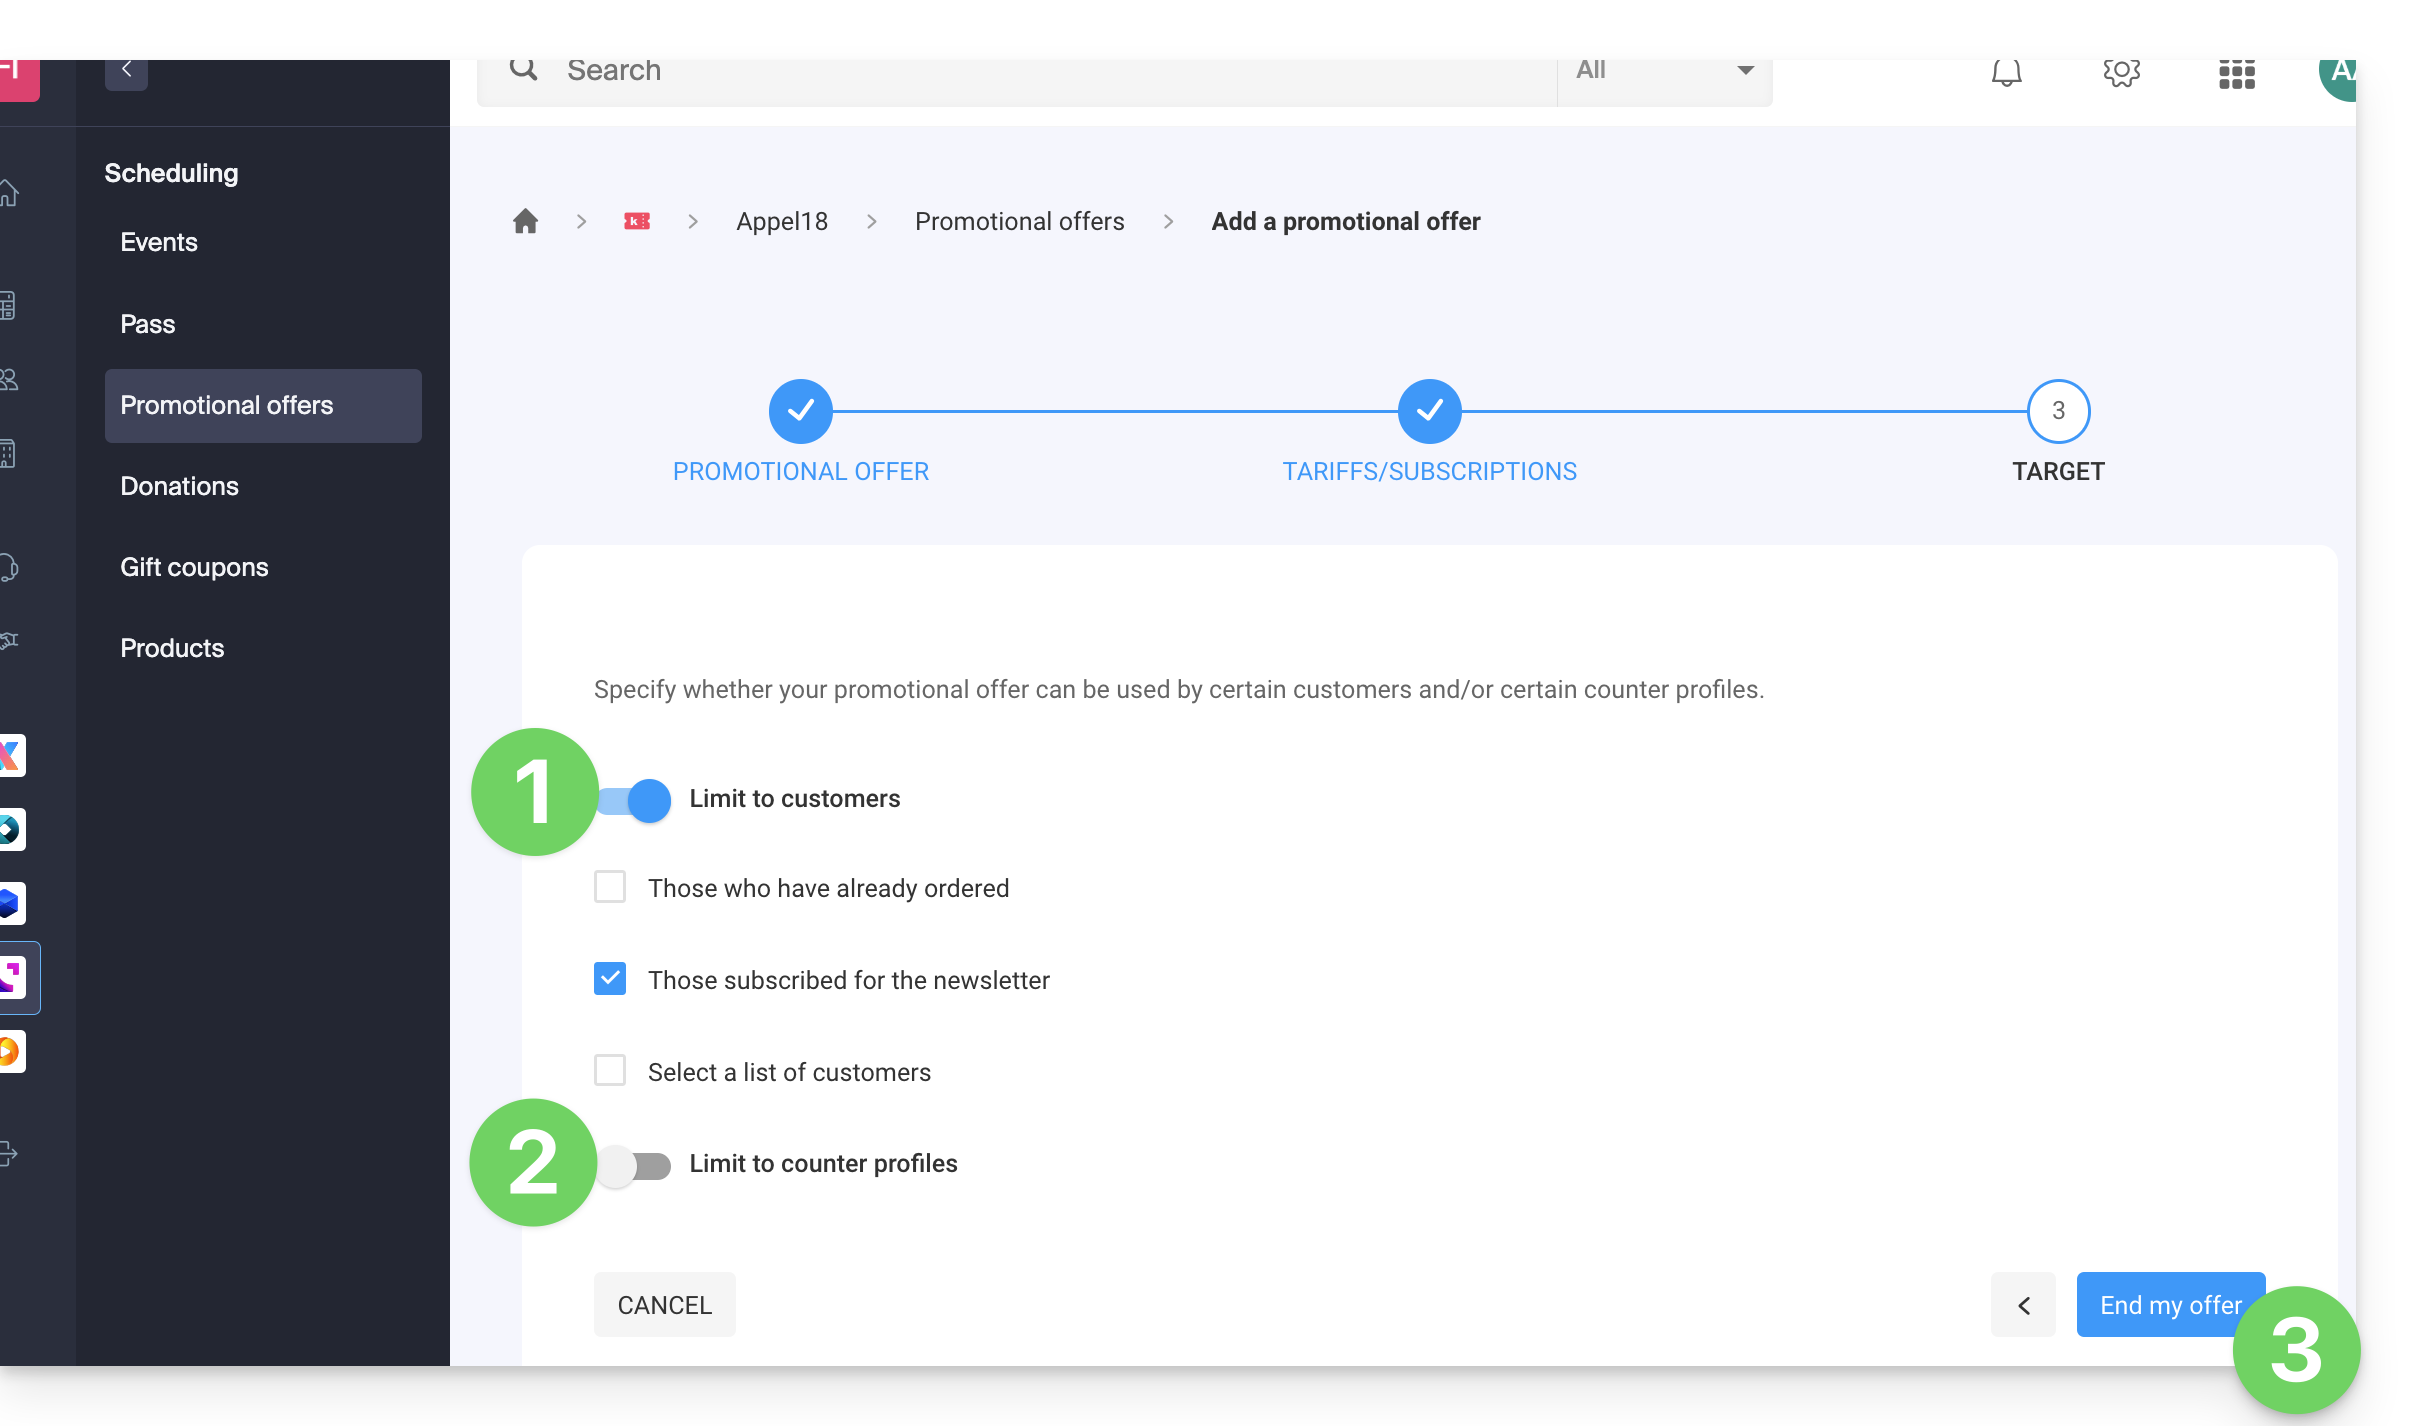
This step allows you to configure the following conditions for which this promotion will apply:
- Limit to specific customers (limit to customers who have already ordered tickets and are therefore already on the ticketing system's customer list, to those who have subscribed to the newsletter, or to a manually selected customer list…)
- Limit to certain cashier profiles.
- Click the button to Finish:
Once activated, the promotion will be applied immediately from the start date.
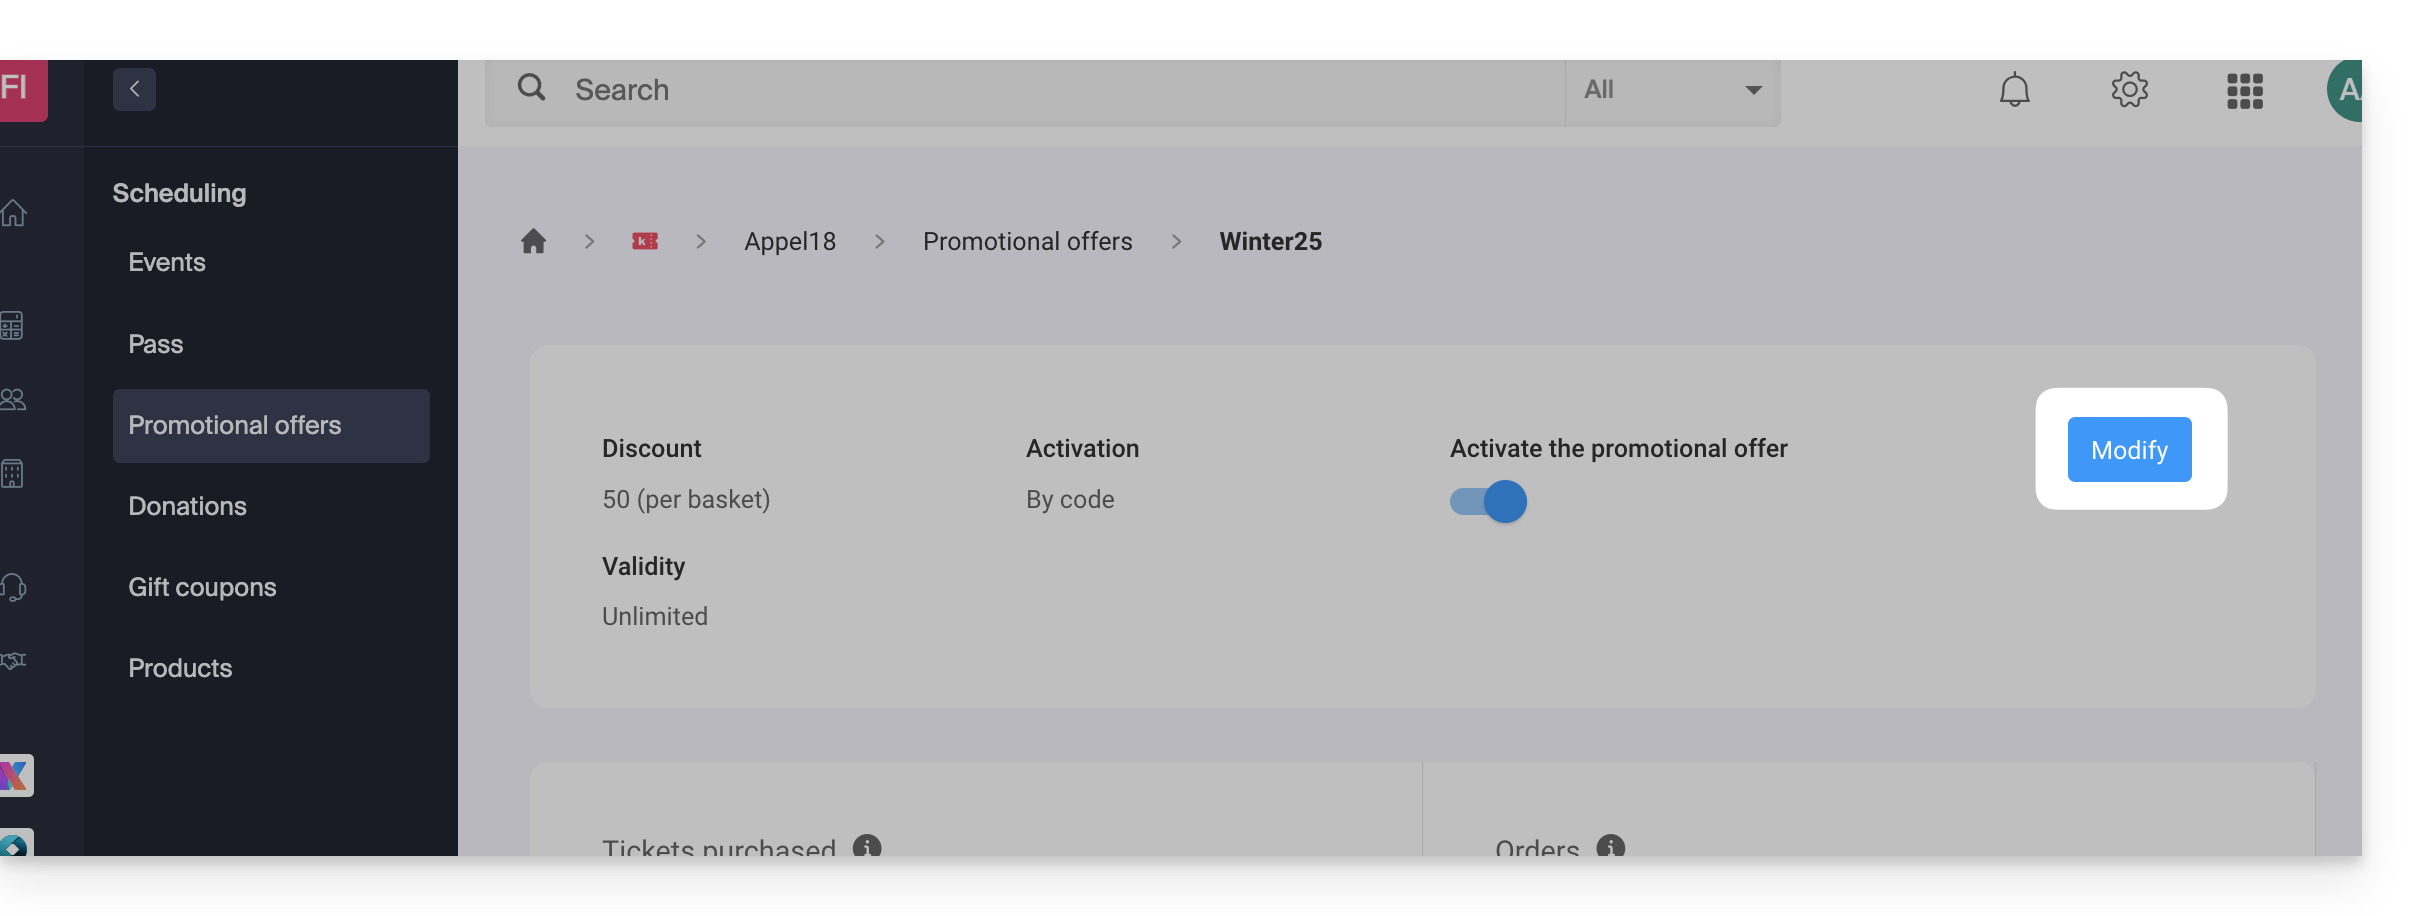
Please note that you can modify the settings later:
- Click on the Edit button on the promotional offer page:
Add promotional codes
Once the offer has been created, you now need to create the codes that customers can use when placing an order:
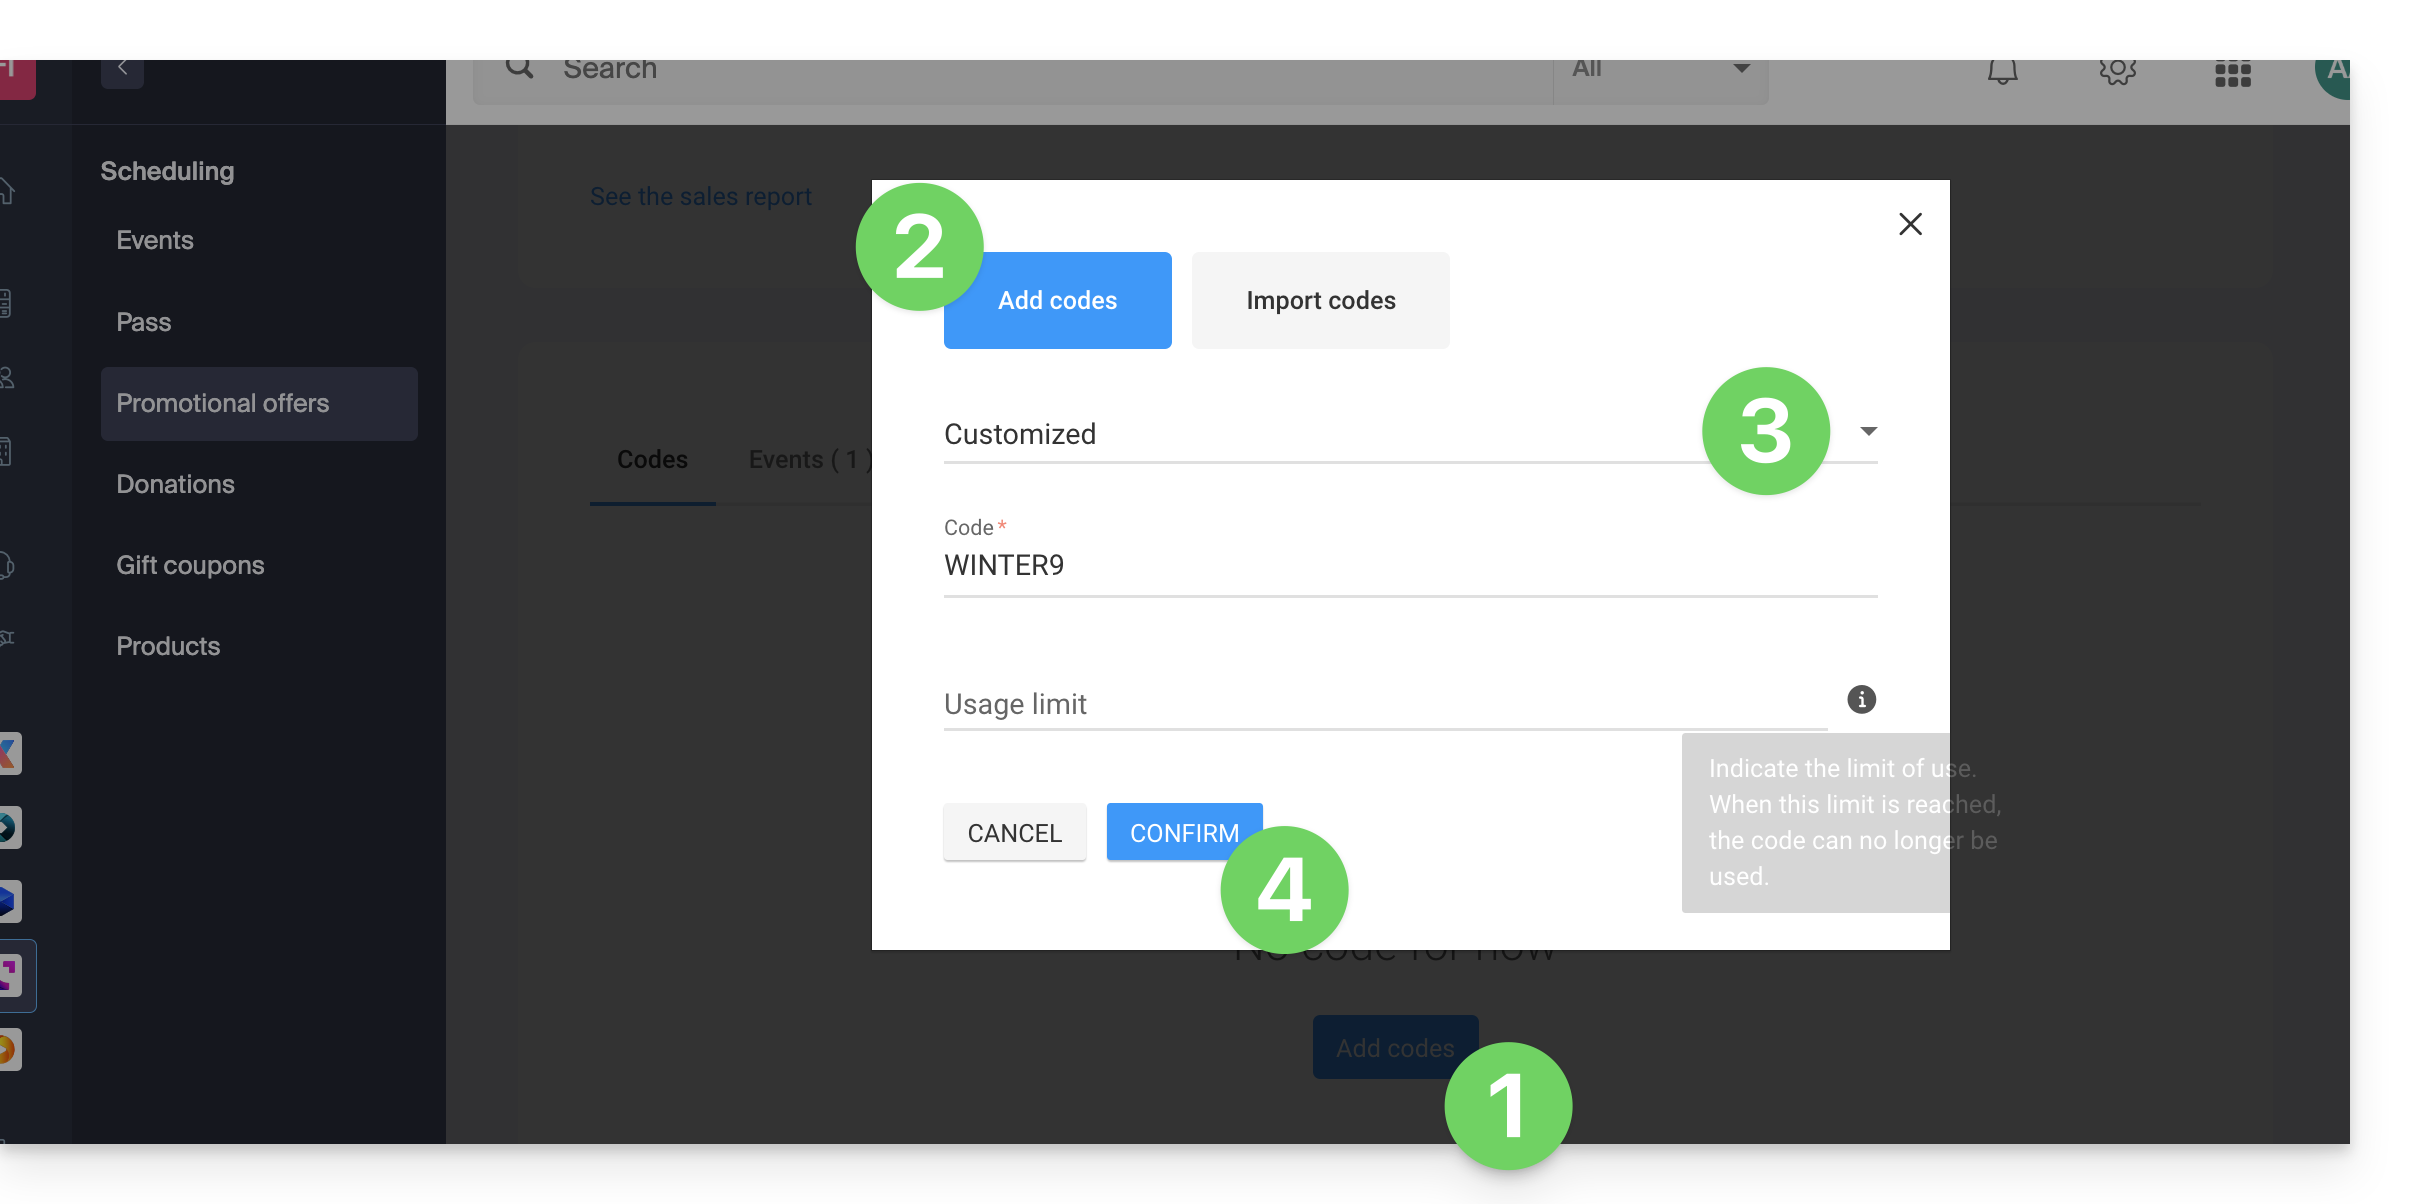
- Click on the Add codes button at the bottom of the page.
- Make sure you are adding codes (importing is described further down in this guide).
- Choose the type of code:
- Custom: Allows you to define a code manually, as well as the maximum number of uses; this makes it possible to generate codes with words that are easy to remember or share on various media, even personalized for certain people.
- Random: Generates a specified number of unique codes randomly; useful if the code itself is not important.
- Click on Confirm to validate the addition of the code:
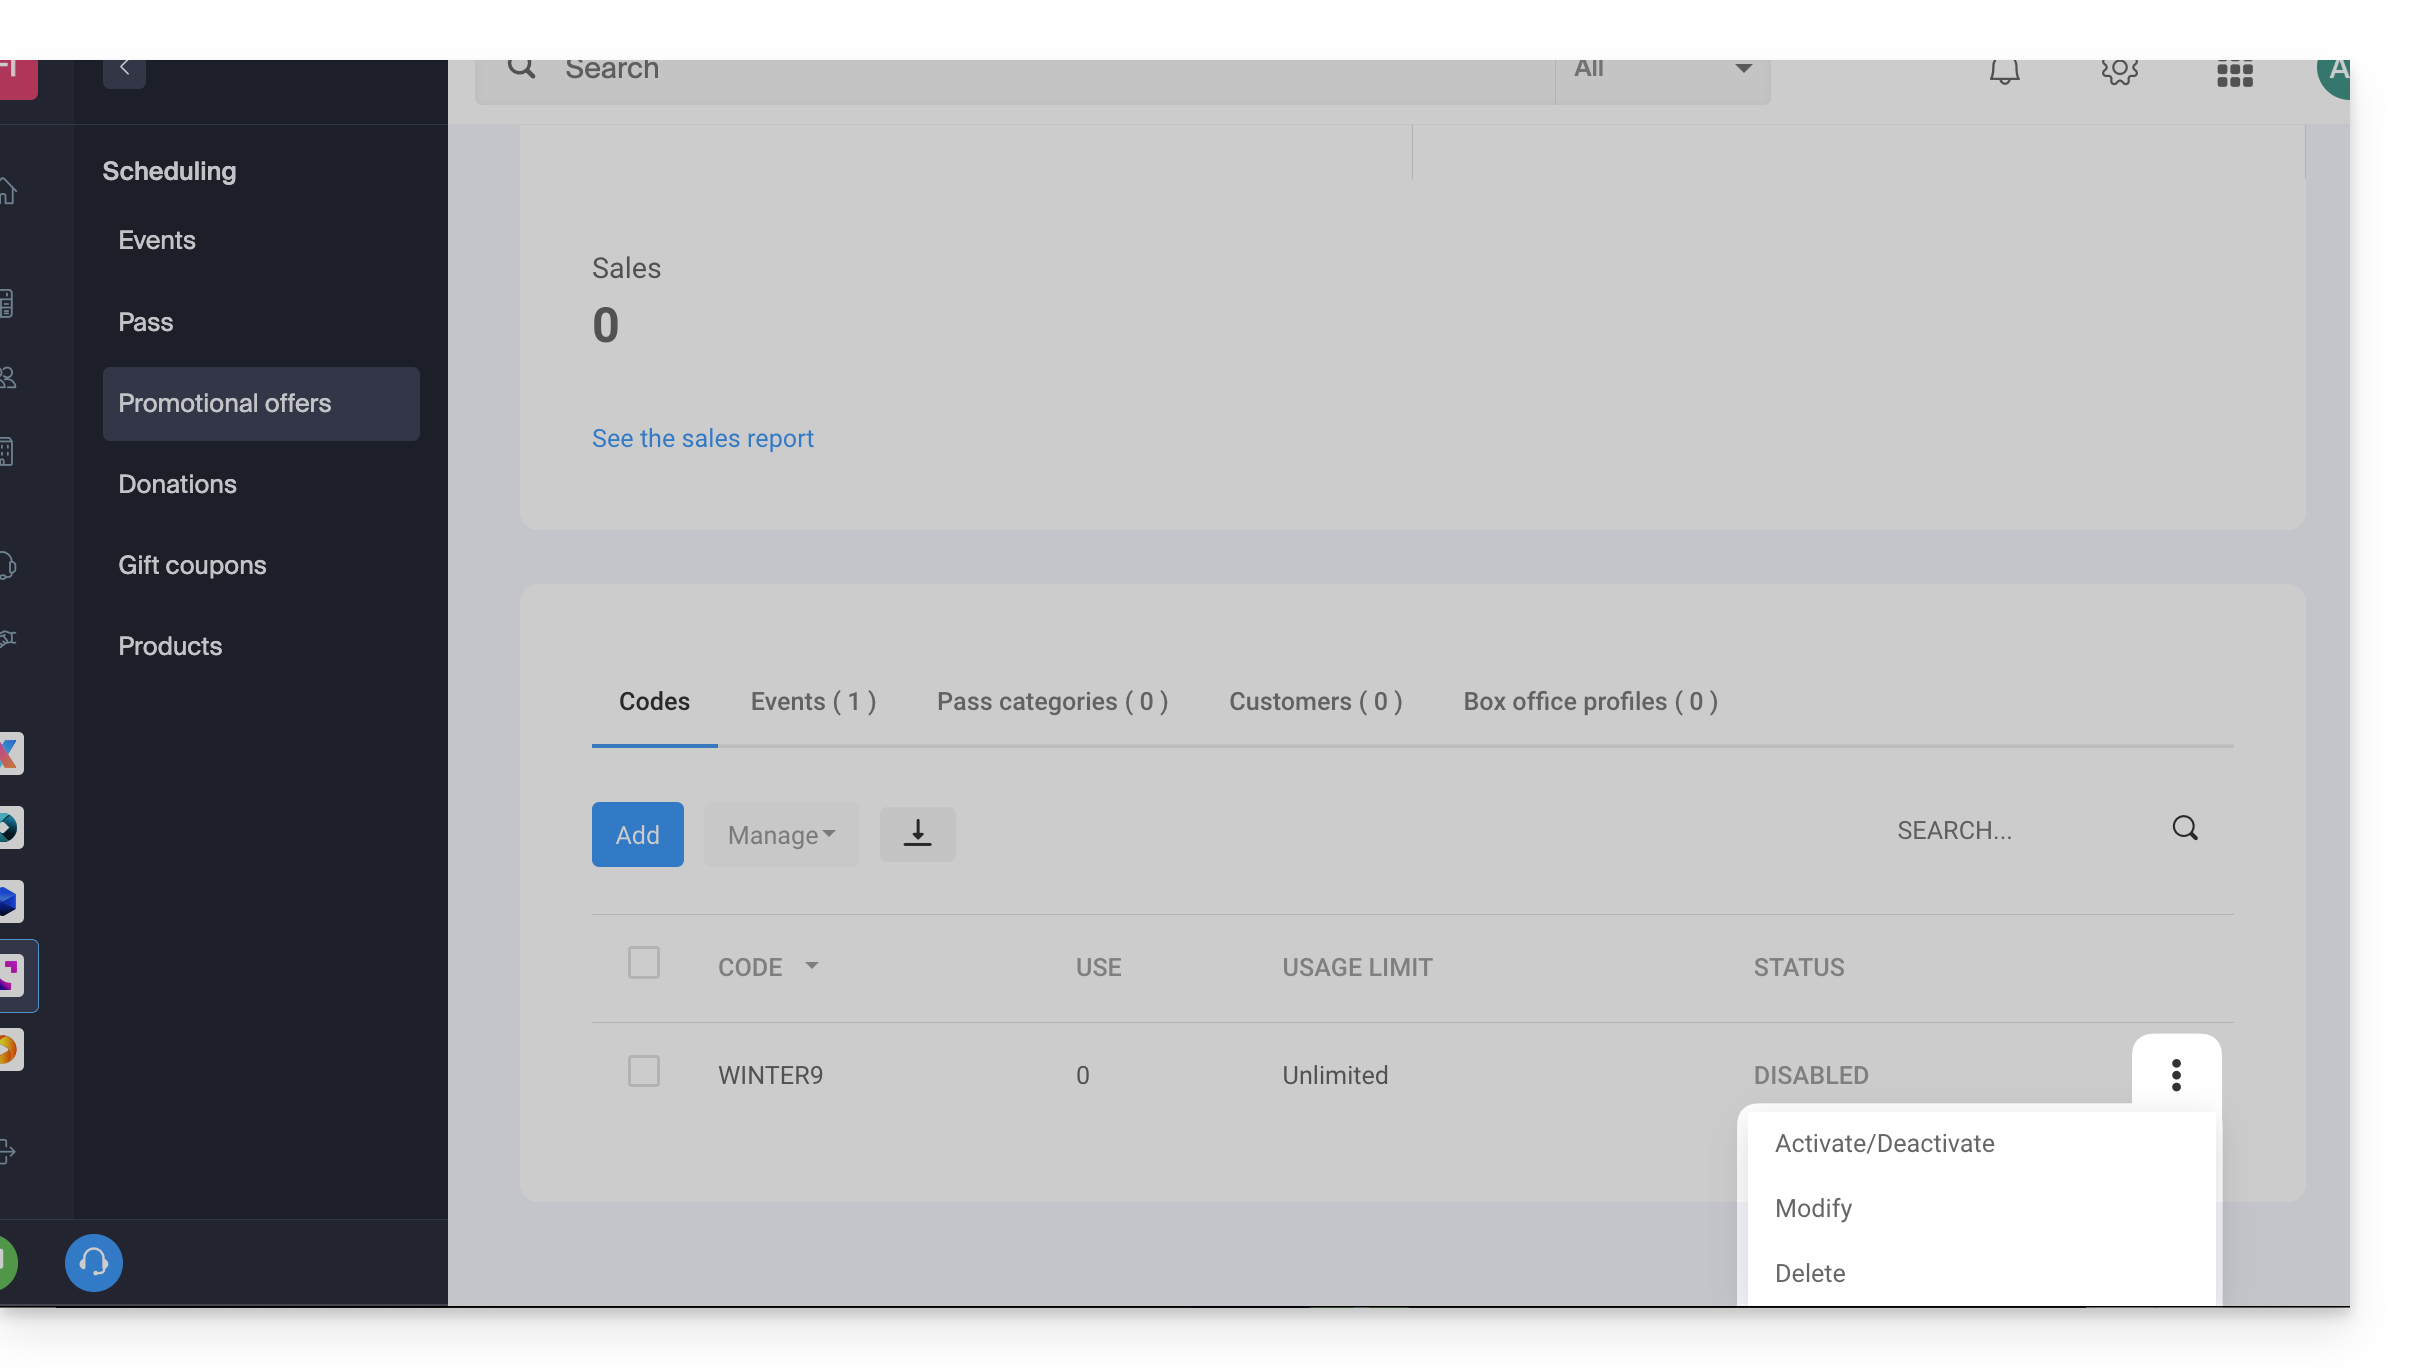
An action menu allows you to, for each generated promo code, either:
- disable (or enable)
- modify
- delete:
Export and/or import promo codes
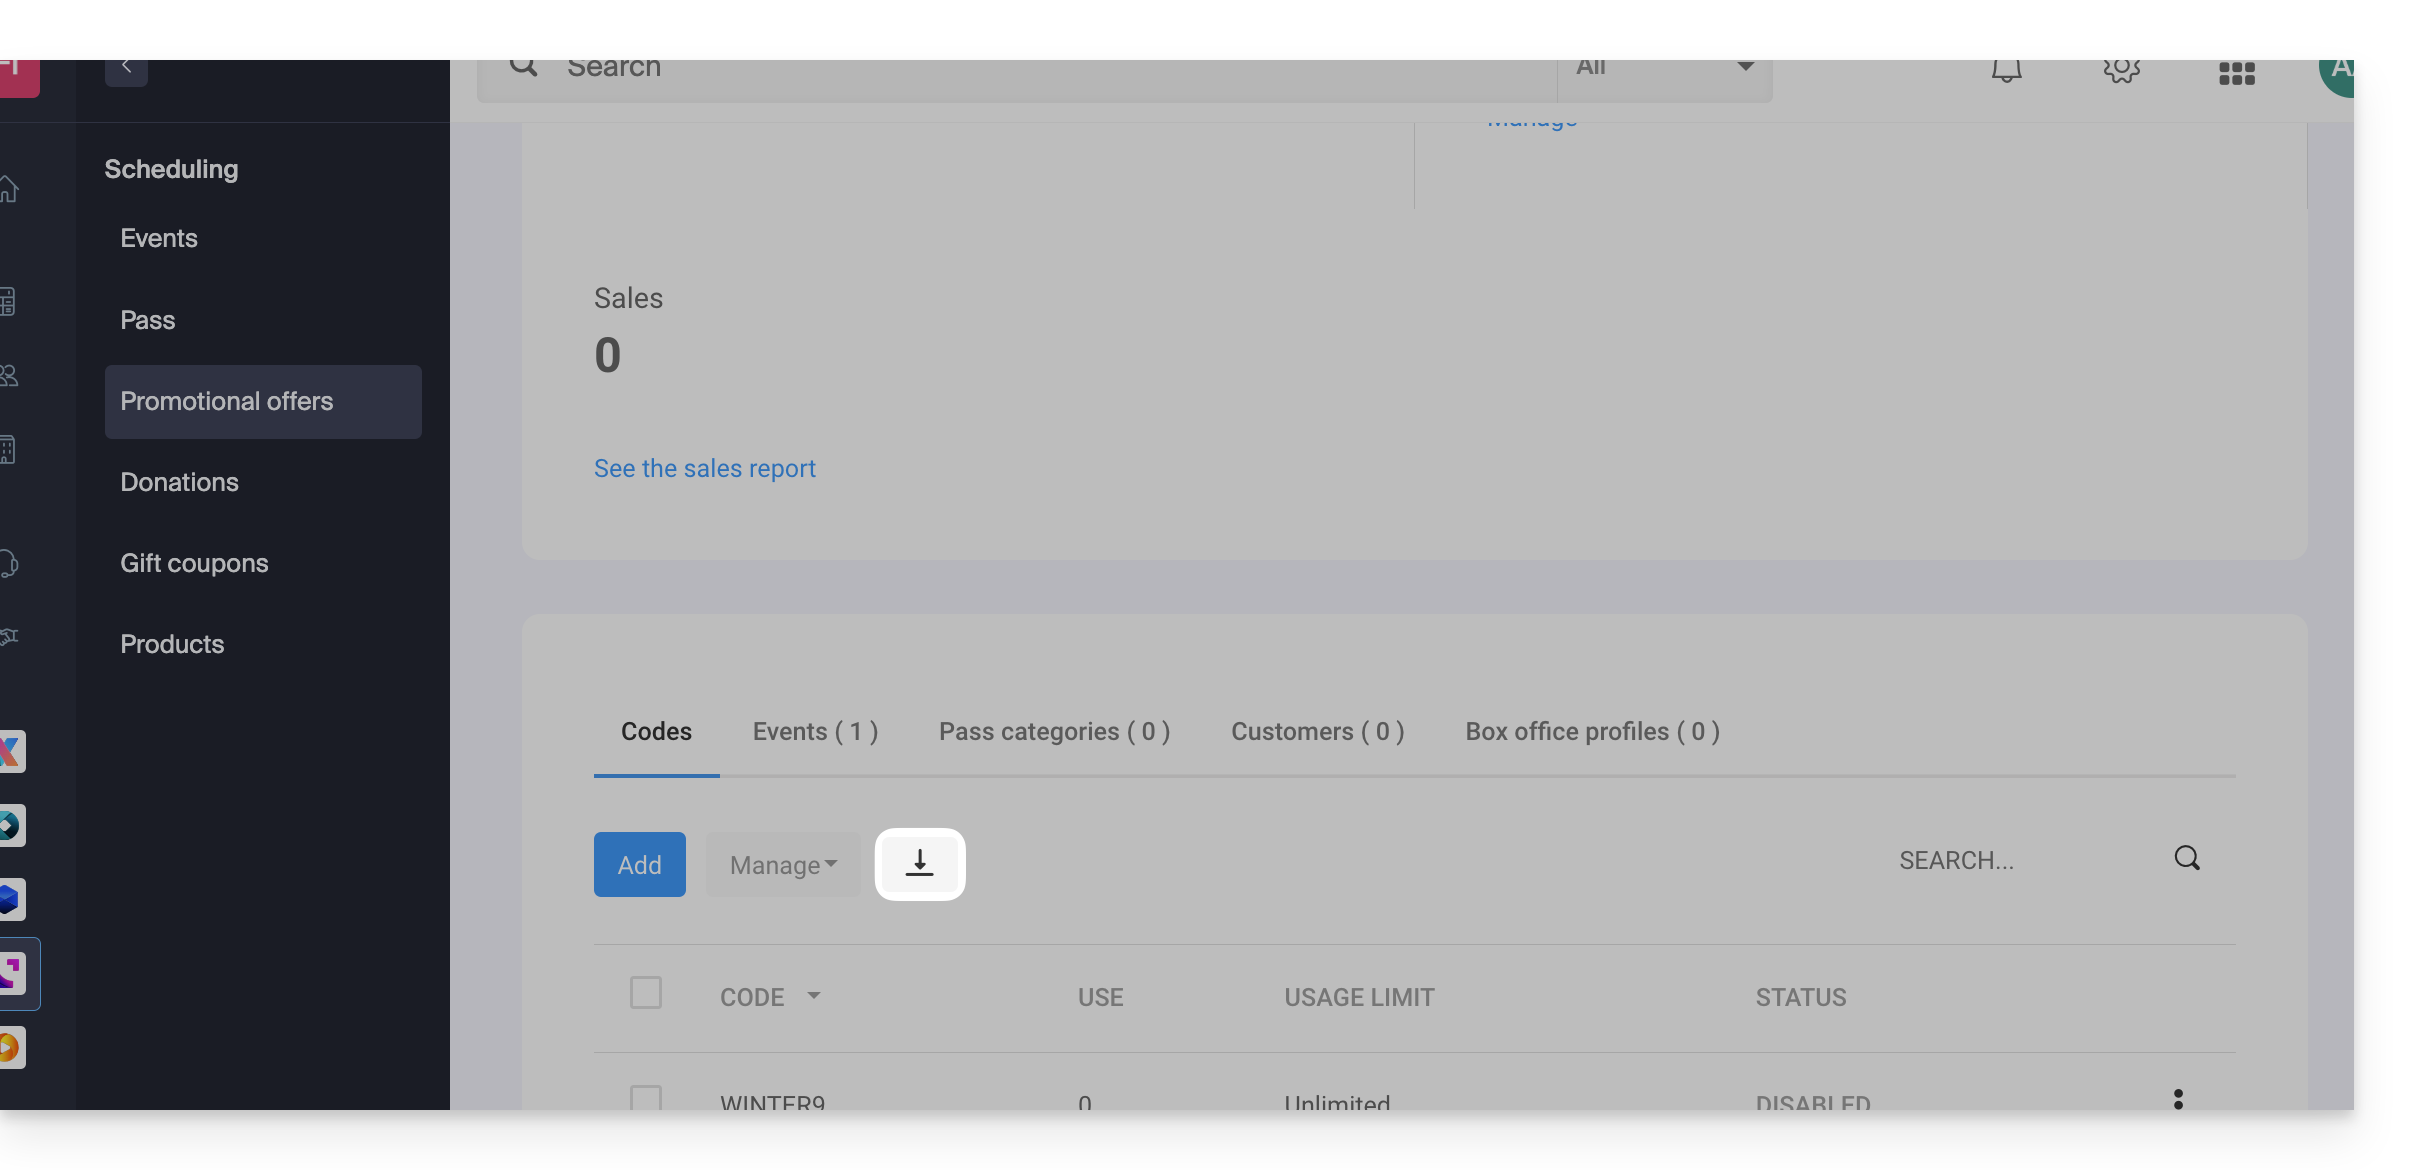
Once the promotional codes have been generated, you can download a CSV file containing all the codes:
- Click on the button with the downward arrow to download the list of codes:
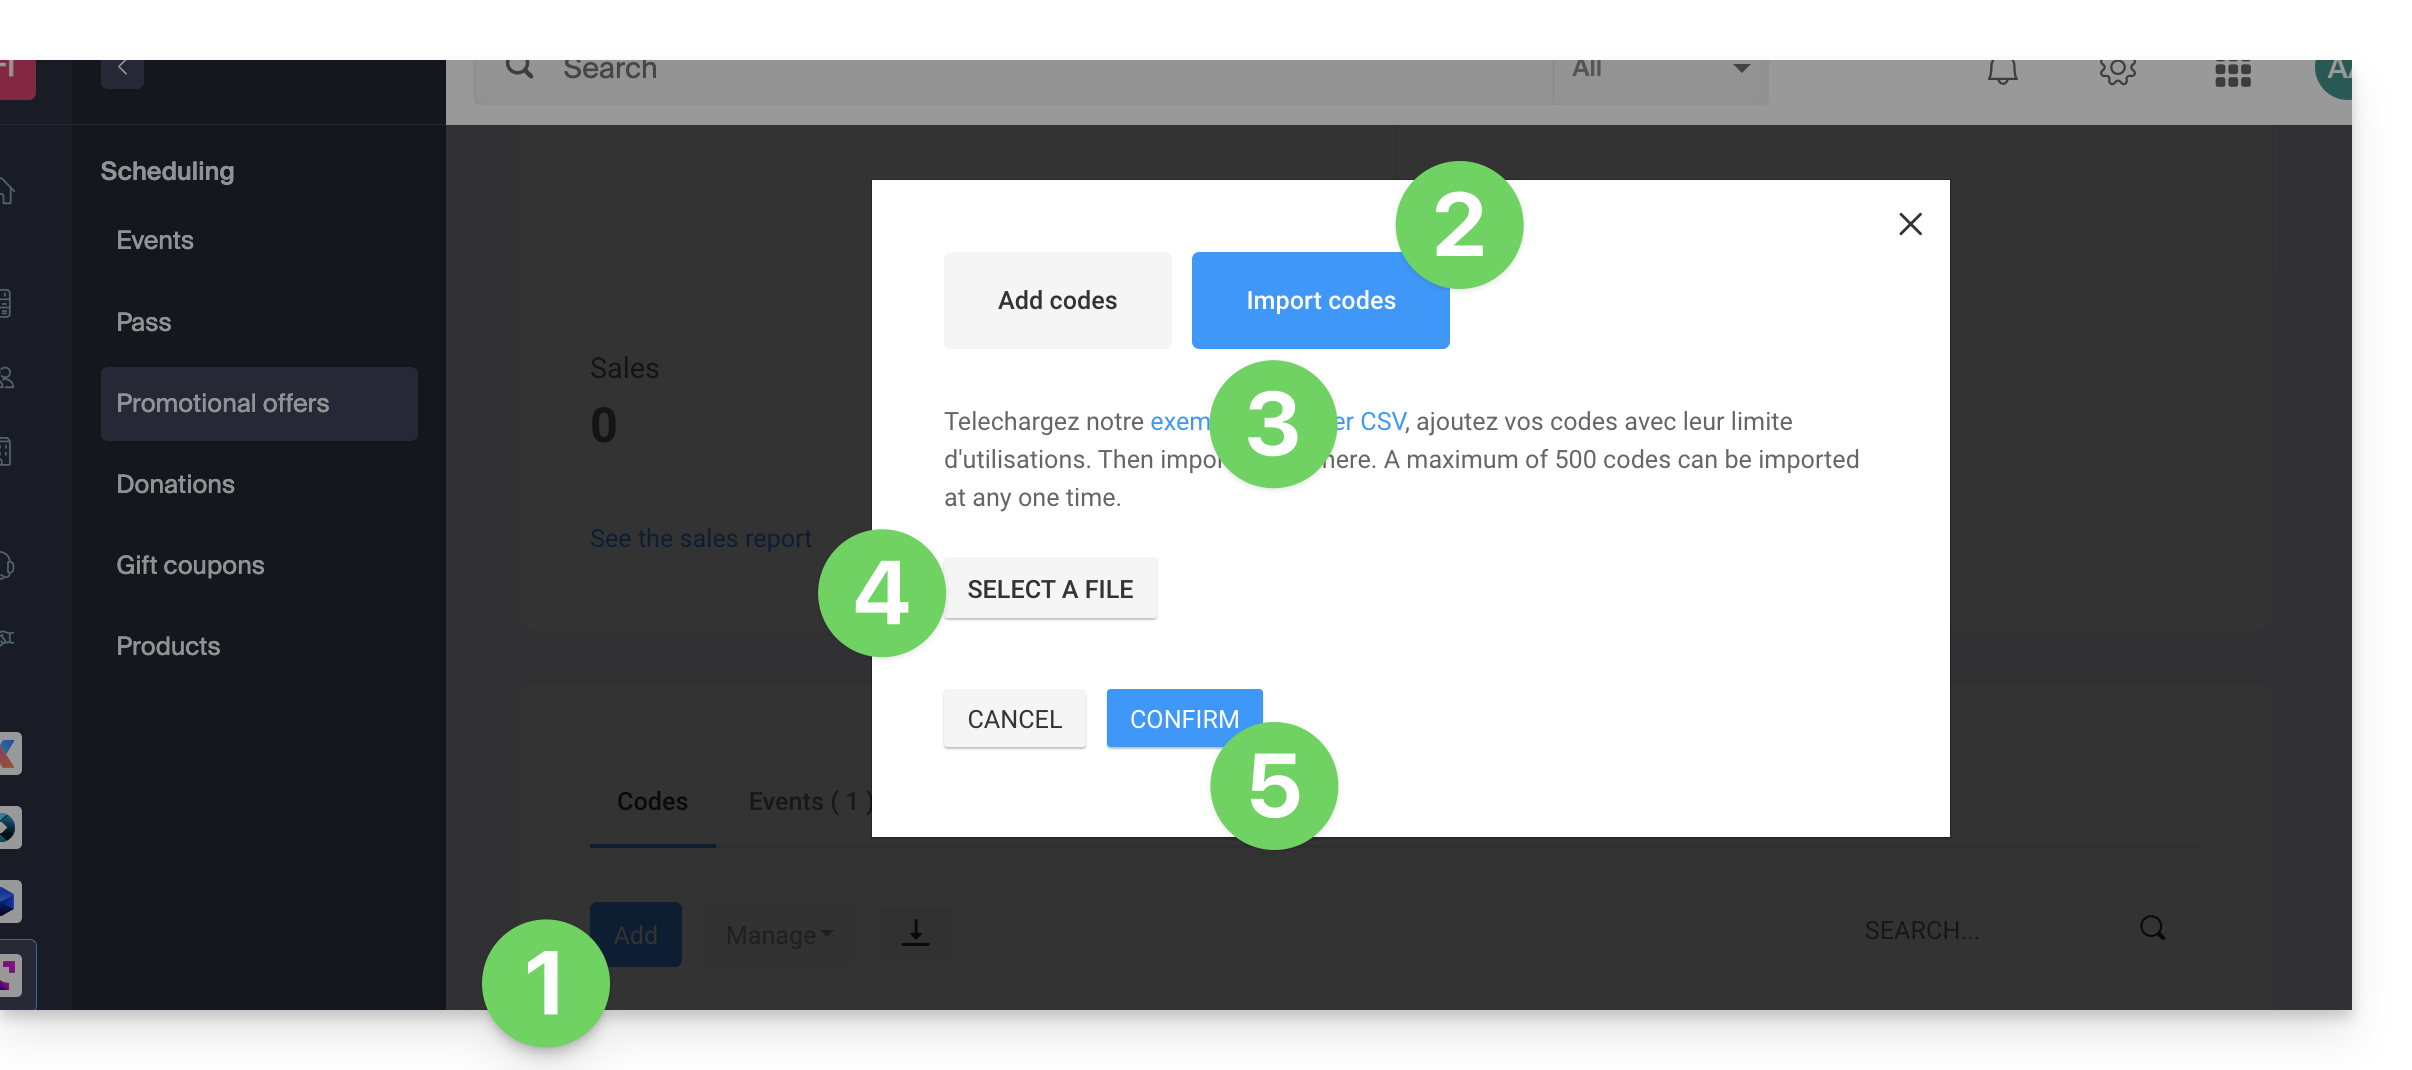
For example, you can export a list of promotional codes from last year's ticketing system and re-import it into this year's ticketing system (maximum of 500 codes per import):
- Click the Add codes button at the bottom of the page.
- Click on Import codes.
- If necessary, download a sample
CSVfile so that the document structure is accepted during import. - Select your correctly formatted
CSVfile. - Click the button to Confirm the import:
Link to this FAQ: https://faq.infomaniak.com/2675
Has this FAQ been helpful?