Knowledge base
1000 FAQs, 500 tutorials and instructional videos. Here, there are only solutions!
Ticketing: create and configure a new event
This guide explains how to create a new event (within the Infomaniak ticketing system).
Create an event
To do this:
- Click here to access your ticketing management in the Infomaniak Manager (need help?).
- Click directly on the name assigned to the ticketing system for the event:
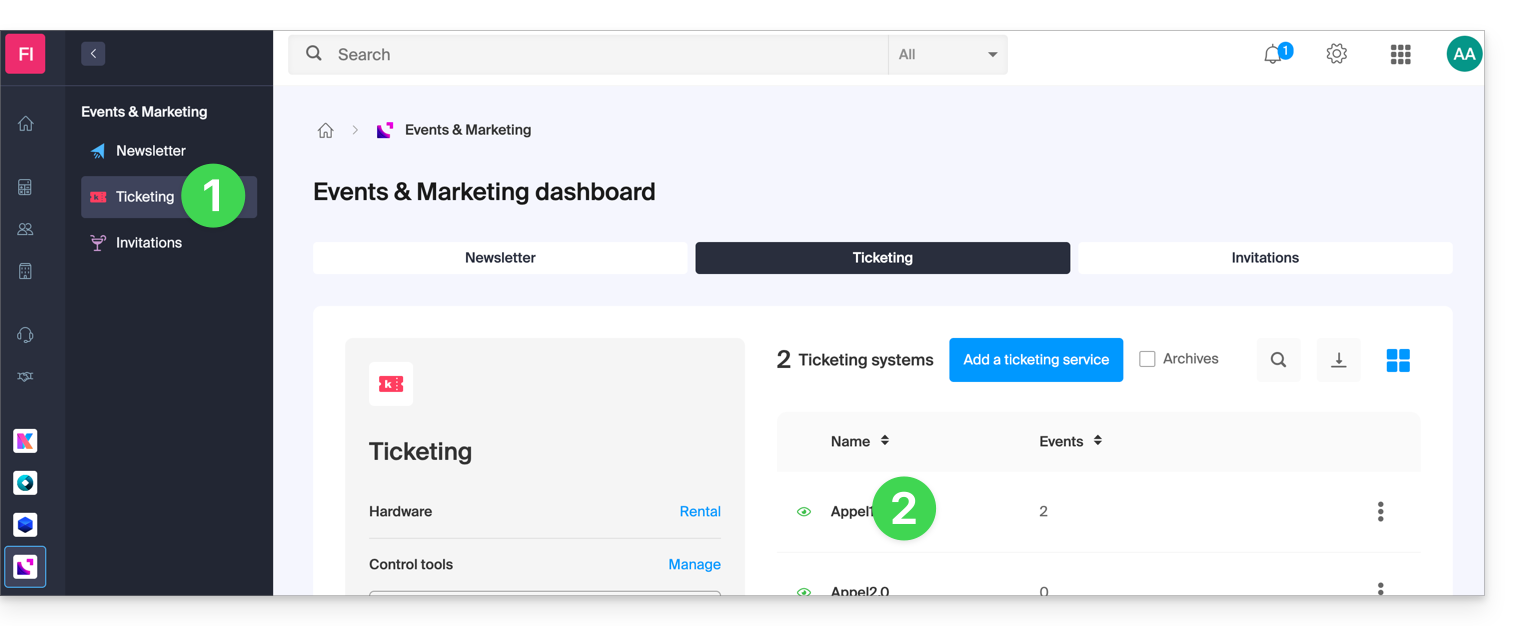
- Click on Program in the left-hand menu.
- Click on Events in the left-hand menu.
- Click on the Add event button:
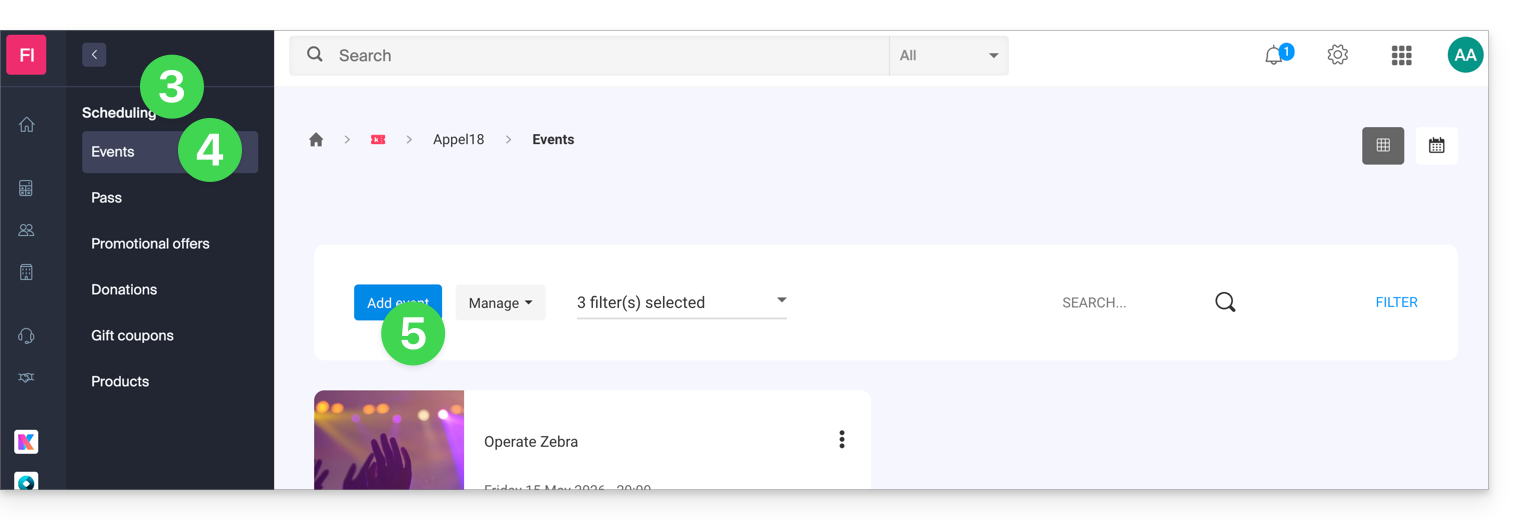
Configure the event
All information can be added or modified later in the event settings.
Define event information
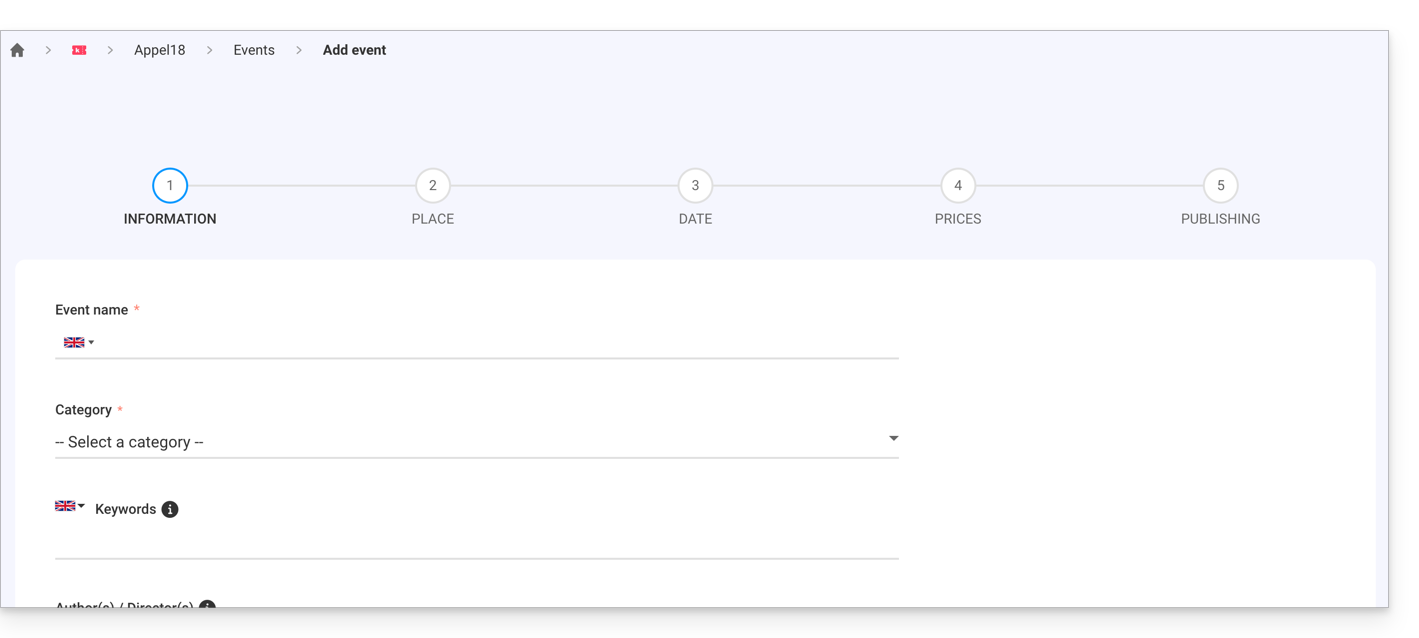
- Event name which will be displayed on the ticketing page and on the tickets.
- Category of the event, which will allow you to identify the event and associate it with other events of the same type on the Infomaniak Events portal.
- Keywords that allow you to find the event on the Infomaniak Events portal.
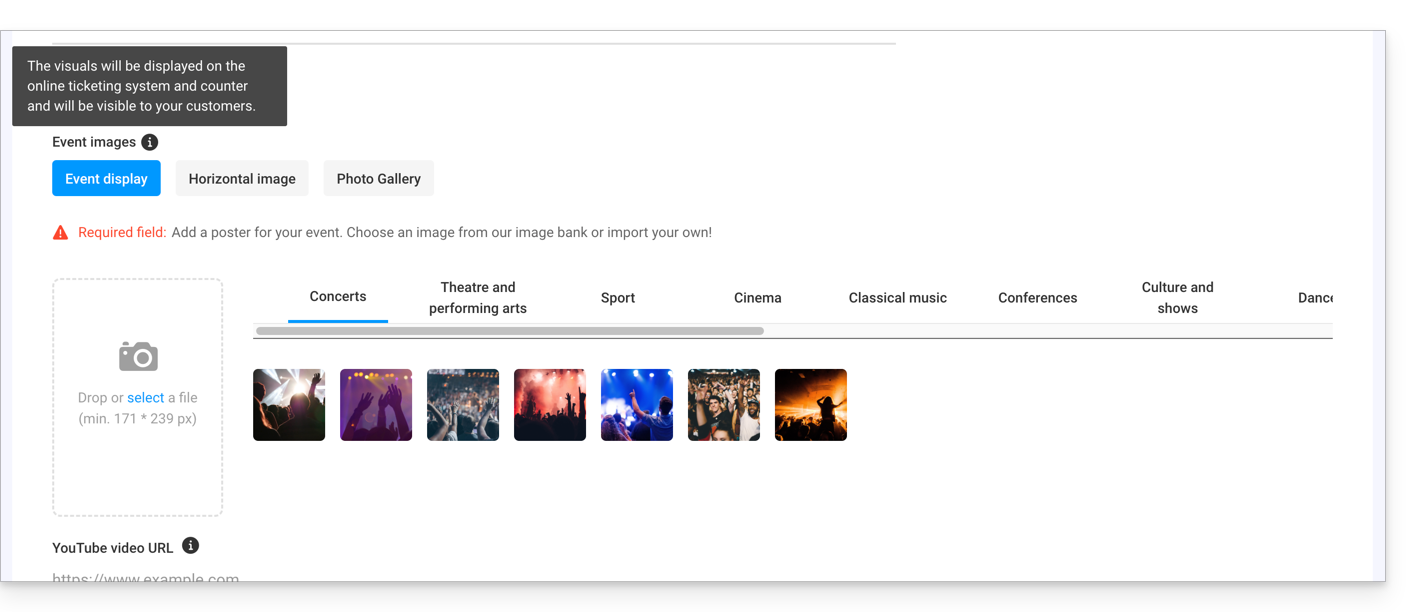
- Event poster and other images associated with your event.
- Description of the event as it will appear on the online ticketing platform when visitors make a purchase.
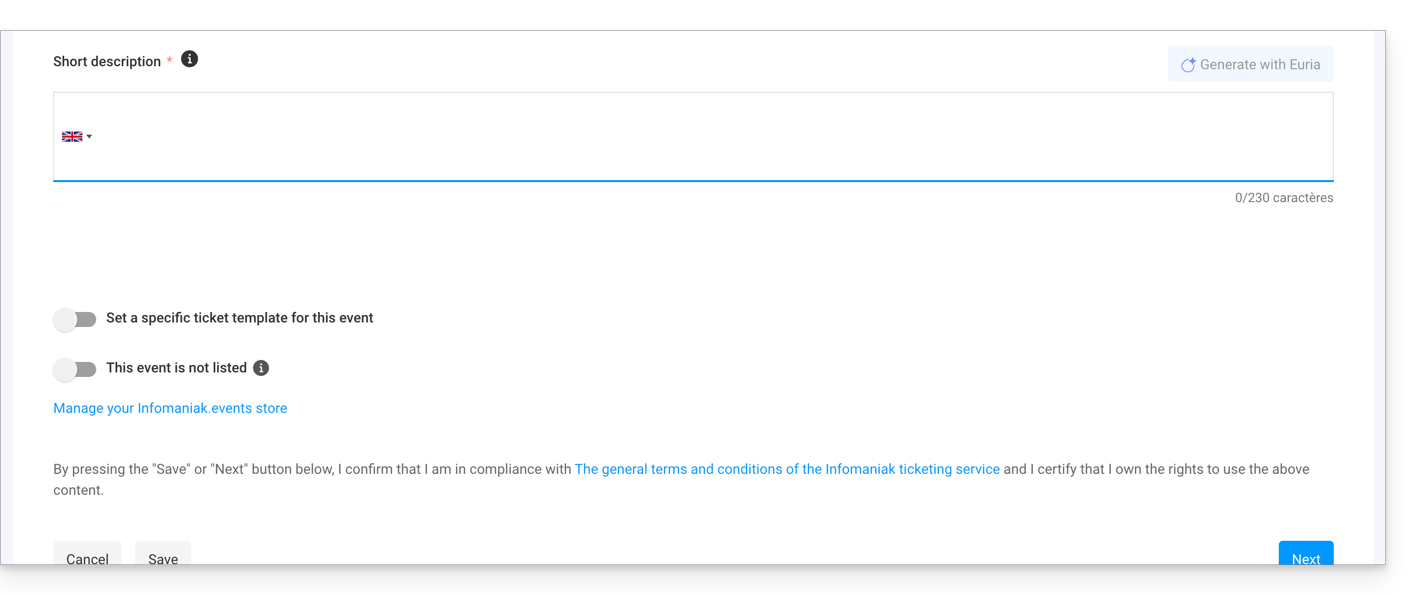
- Short description that you can generate via Euria (click on the dedicated button), which will then be based on the details of the long description and the event information (director, artists, etc.).
- Define a ticket template to be used specifically for this event.
- Specify whether the event is private or not; leave this option disabled if you want your event to be visible on the infomaniak.events portal.souhaitez que votre évènement soit visible sur le portail infomaniak.events.
Define the event location
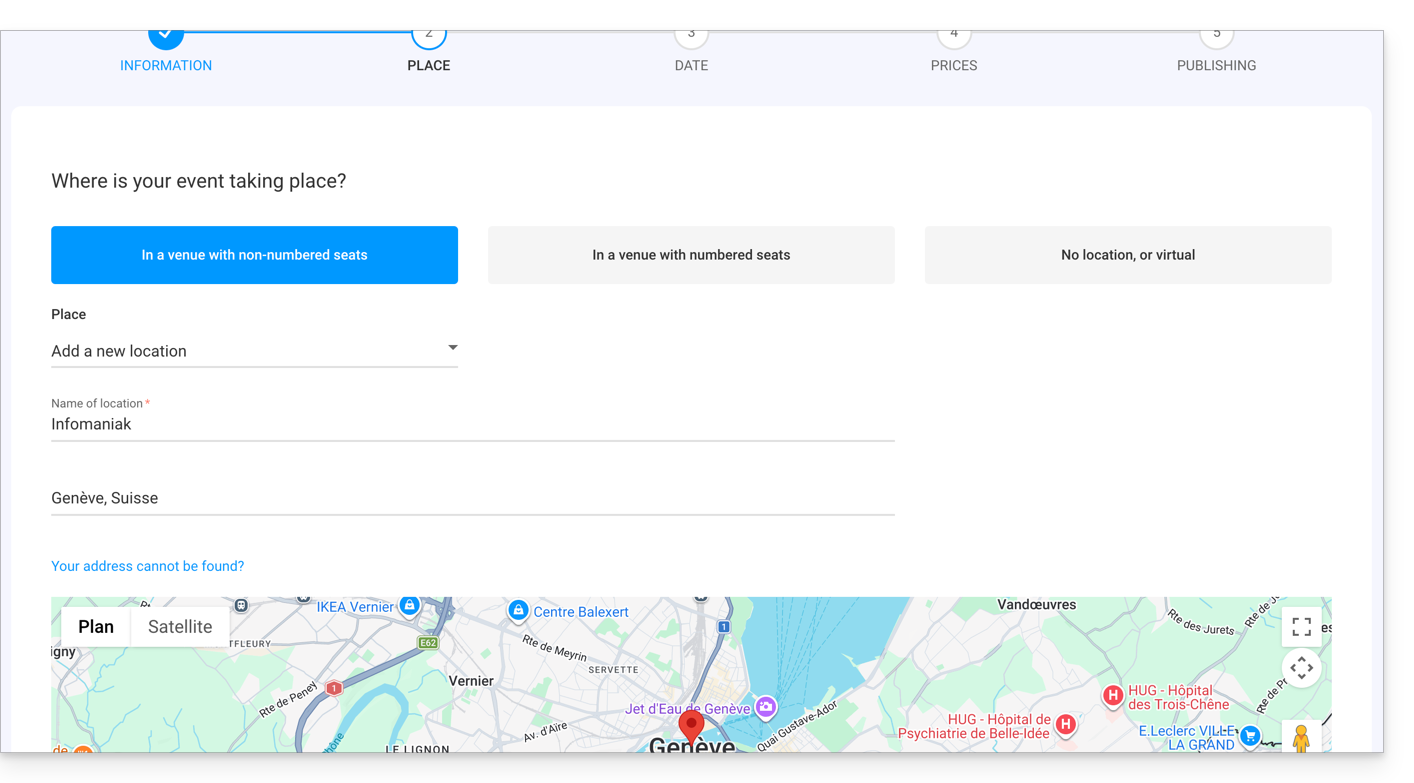
In a venue with free seating
- Seats are not assigned when purchasing a ticket.
- It is possible to define a new location or an existing location.
- For an event taking place at a physical address, the address will be automatically detected and the map will be generated on the event page. You can move the red pointer directly on the map to correct the address.
In a venue with numbered seats
- Allows you to define a floor plan associated with the event.
- This makes it possible to assign seats on the floor plan when purchasing a ticket or pass.
- To create or assign a room to the ticketing system, you will need to contact Infomaniak support.
No location or virtual
- For any event that does not take place in a physical location (online).
- Allows you to not assign a location or address.
The Broadcast event online option allows you to use Infomaniak's Streaming tool to broadcast your events live.
Add dates to the event
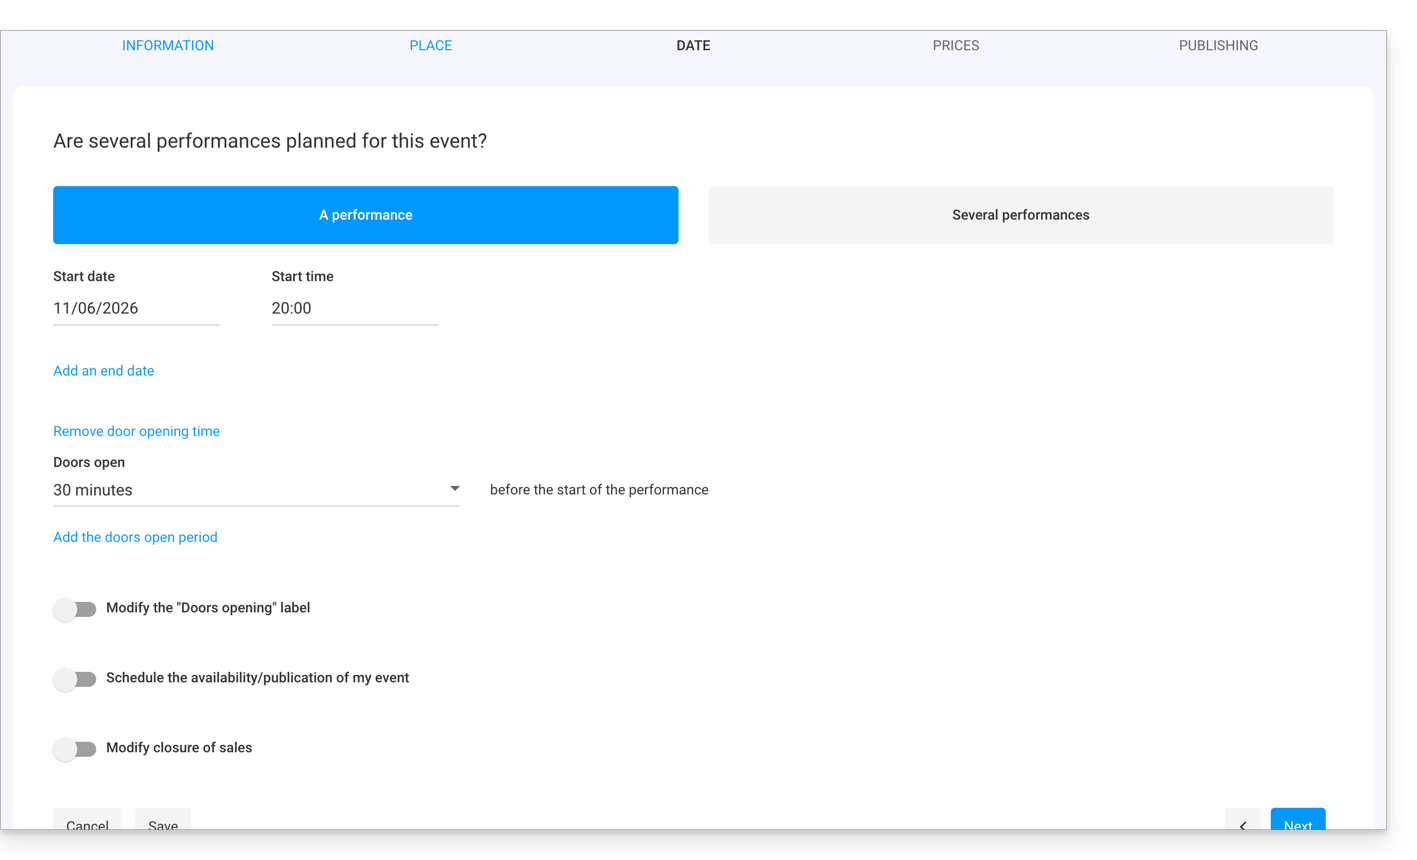
- Choose the date and time of the event.
- You can also add an end date, for example if the event takes place over several days.
- The opening time and the duration during which the doors are open allow you to manage the arrival time of visitors.
- It is also possible to change the text of the door opening times in order to have a text that suits your event.
- It is possible to create an event with multiple dates for the event.
- The online scheduling/event publishing option allows you to define how many days in advance the event becomes accessible online for customers:
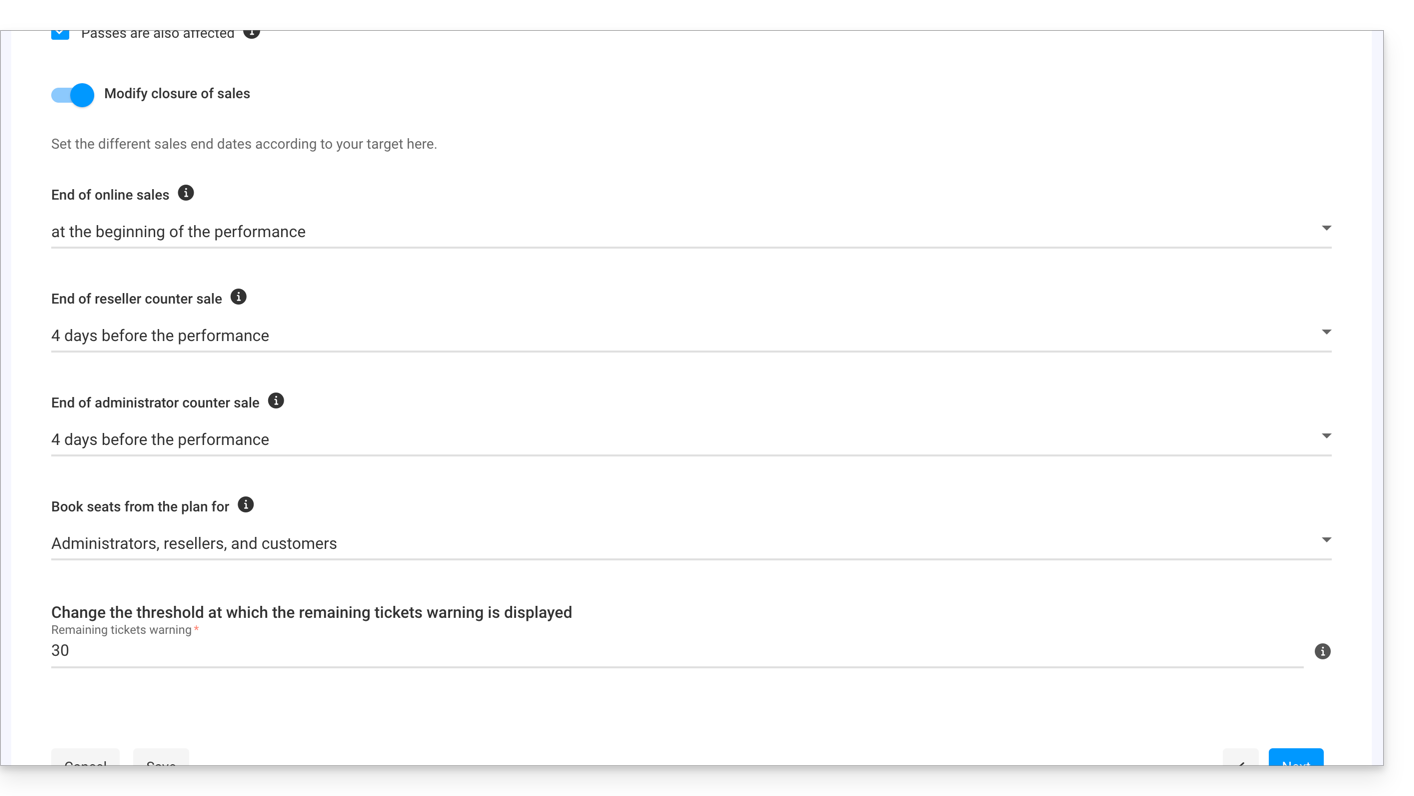
- The last option allows you to configure the closing times for online and on-site sales. By default, these will be set at the beginning of the event for online sales, and 1 day after the event for resellers and the organizer:
Manage pricing
This page allows you to define the zones (standing area, bleachers, VIP, etc.), quotas, and prices for ticket sales. Please refer to this other guide regarding pricing per zone: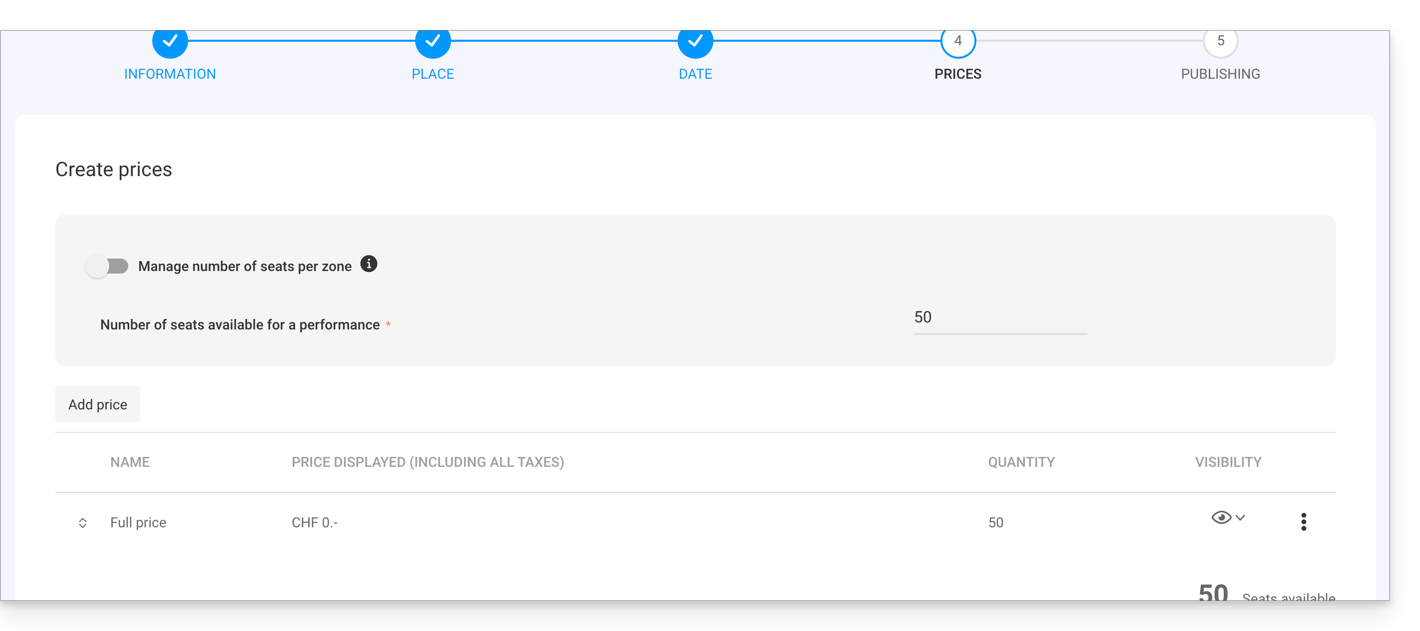
Page overview and publishing
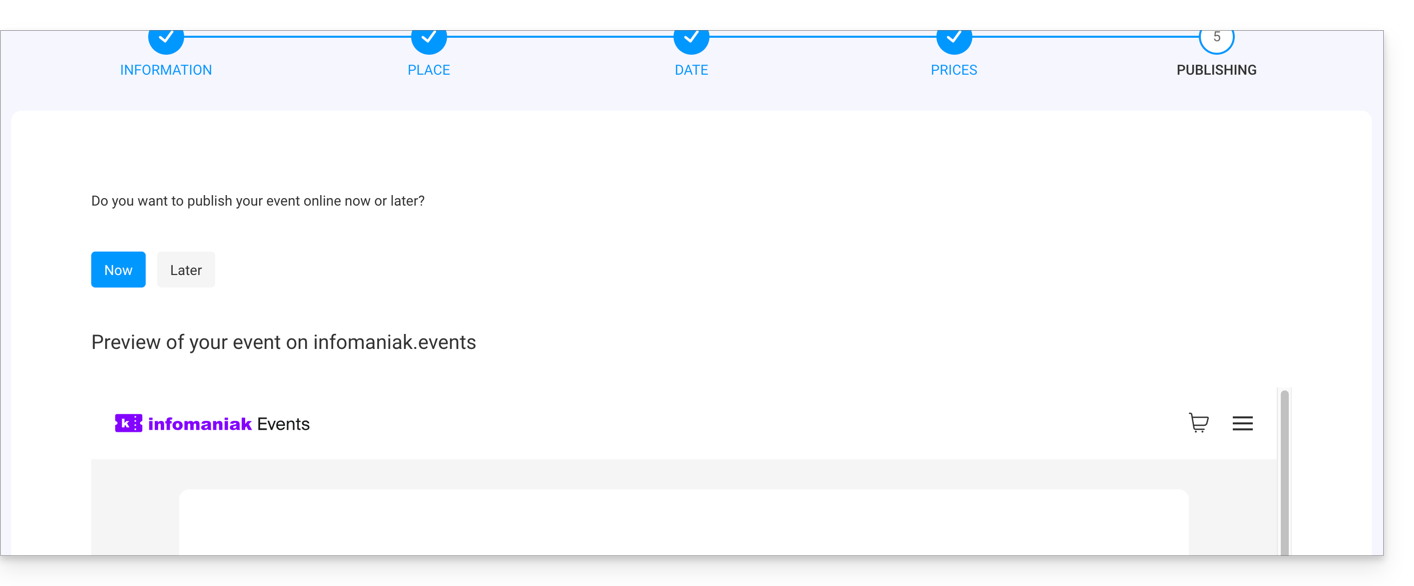
Once you have finished configuring your event, you can preview the event's sales page, and you can choose to make the event available immediately or keep it hidden from sale for now (refer to this other guide to check the essential points before publishing).
Link to this FAQ: https://faq.infomaniak.com/2659
Has this FAQ been helpful?