Knowledge base
1000 FAQs, 500 tutorials and instructional videos. Here, there are only solutions!
Display the logs of an email address
This guide explains how to view the activity logs of email addresses contained within an Infomaniak Mail Service.
Preamble
- The logs of your email addresses are available free of charge for the last 19 days.
- Consulting logs over a longer period is payable:
View logs from the Infomaniak Web Mail app
Prerequisites
- Have a valid access to the Web Mail app Infomaniak (online service ksuite.infomaniak.com/mail) to which the email address is attached.
- Be Administrator or Legal Representative within the Organization that manages the Mail Service.
- Have permission to view the logs: it is possible that the Mail Service manager has removed this right from their admin account.
Then to access the logs from Infomaniak Mail:
- Click here to access the Web Mail app Infomaniak (online service ksuite.infomaniak.com/mail).
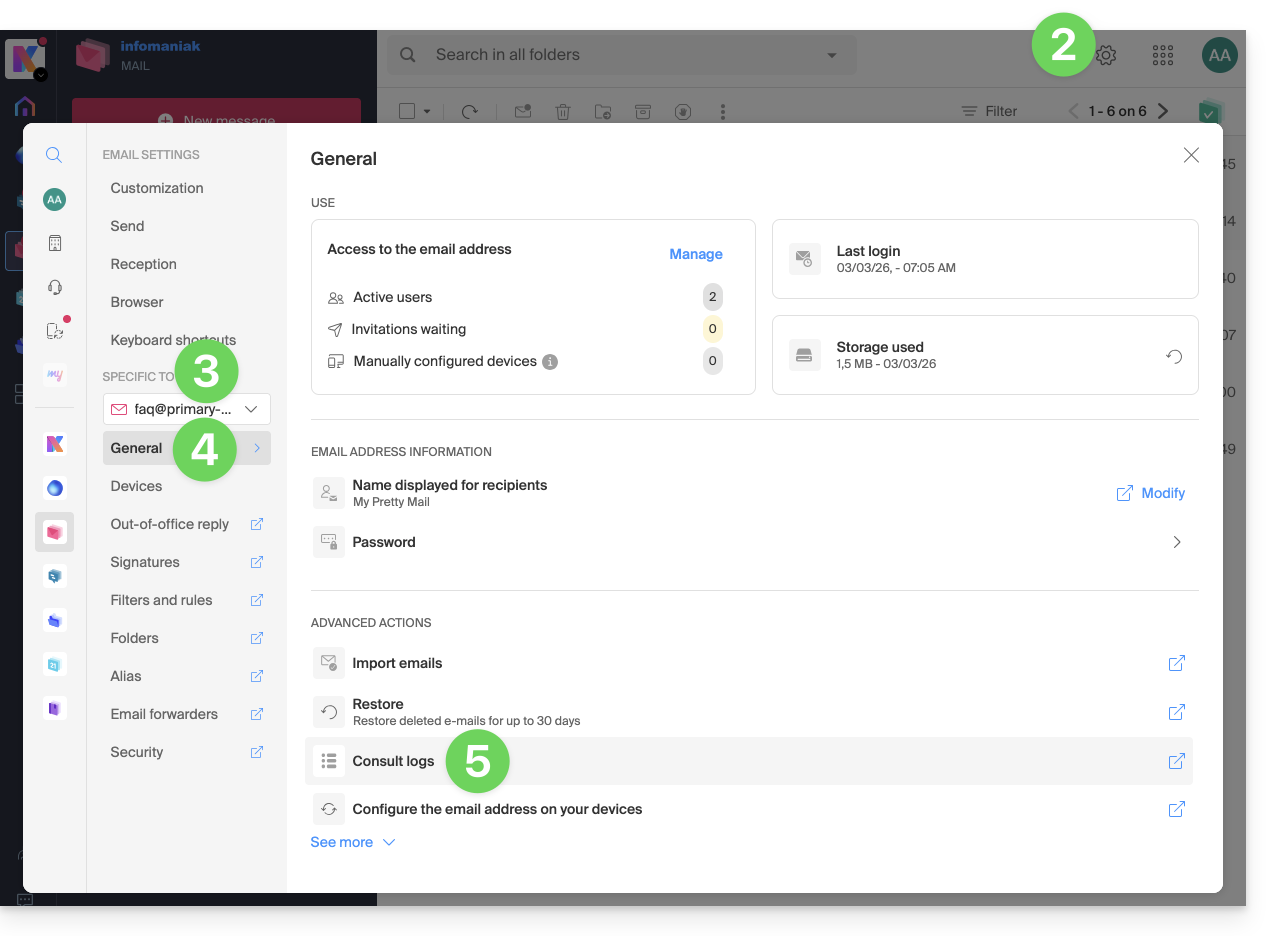
- Click on the Settings icon at the top right.
- Check or select the email address concerned in the dropdown menu of the left sidebar.
- Click on General below.
- Click on View logs:
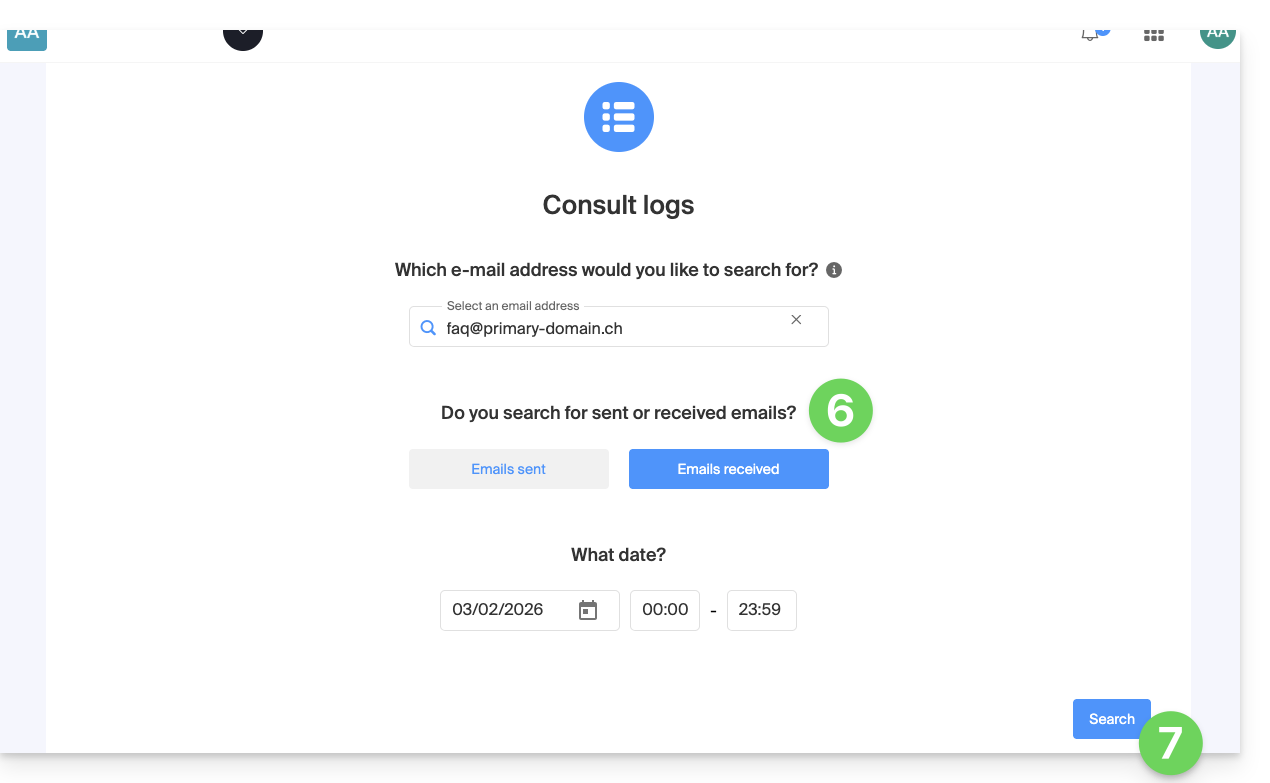
- Choose to view the logs of sent or received emails, and set the date and time.
- Click on Search:
View logs from Mail Service
To access the Mail Service:
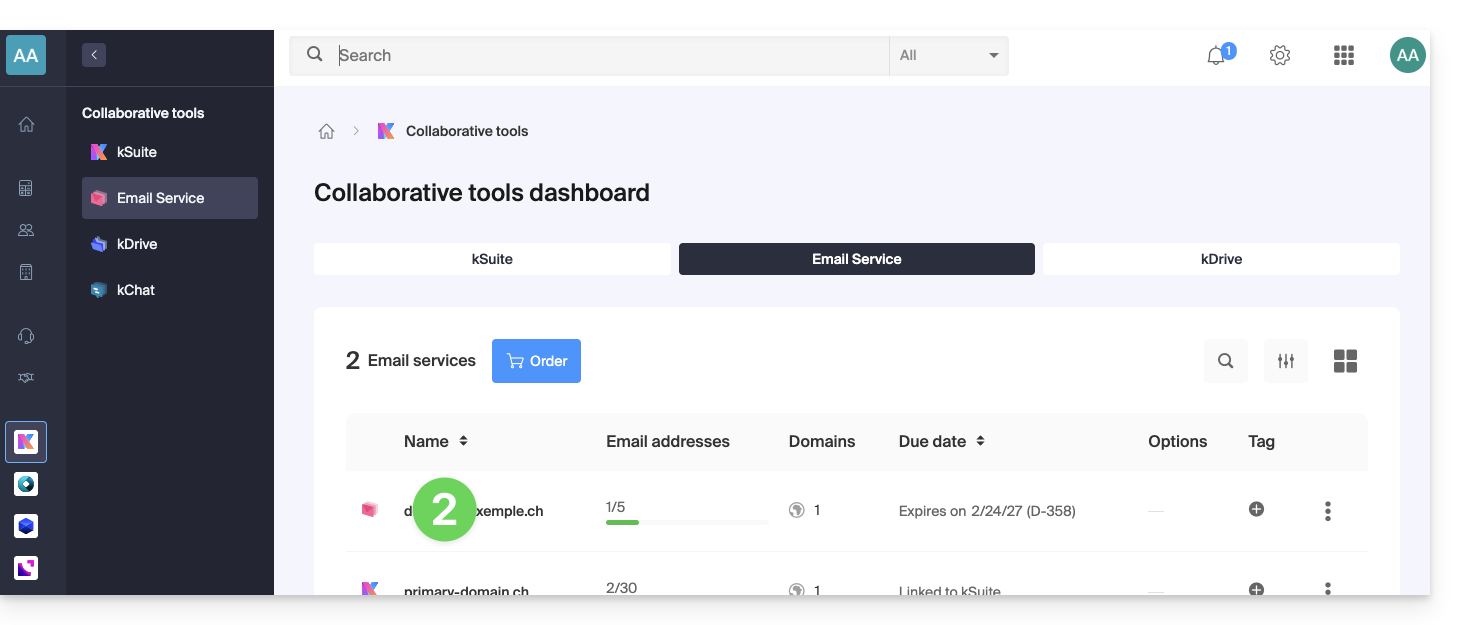
- Click here to access the management of your Mail Service on the Infomaniak Manager (need help?).
- Click directly on the name assigned to the Mail Service concerned:
- Click on the email address concerned in the table that appears:
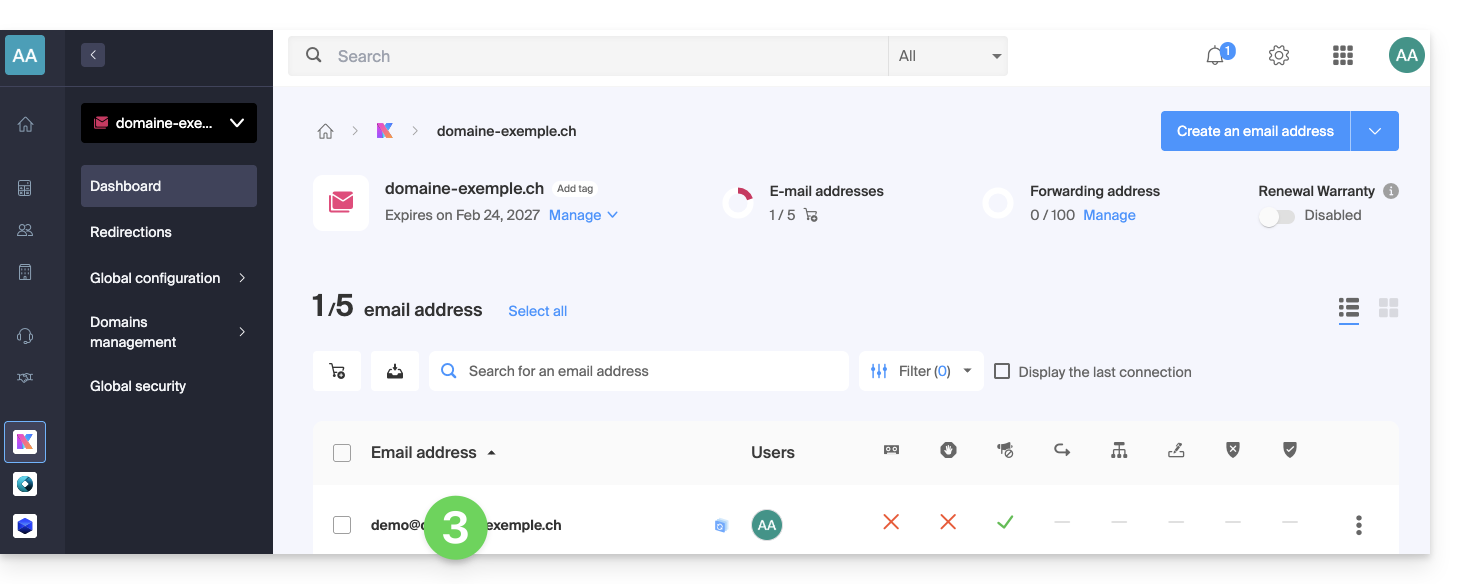
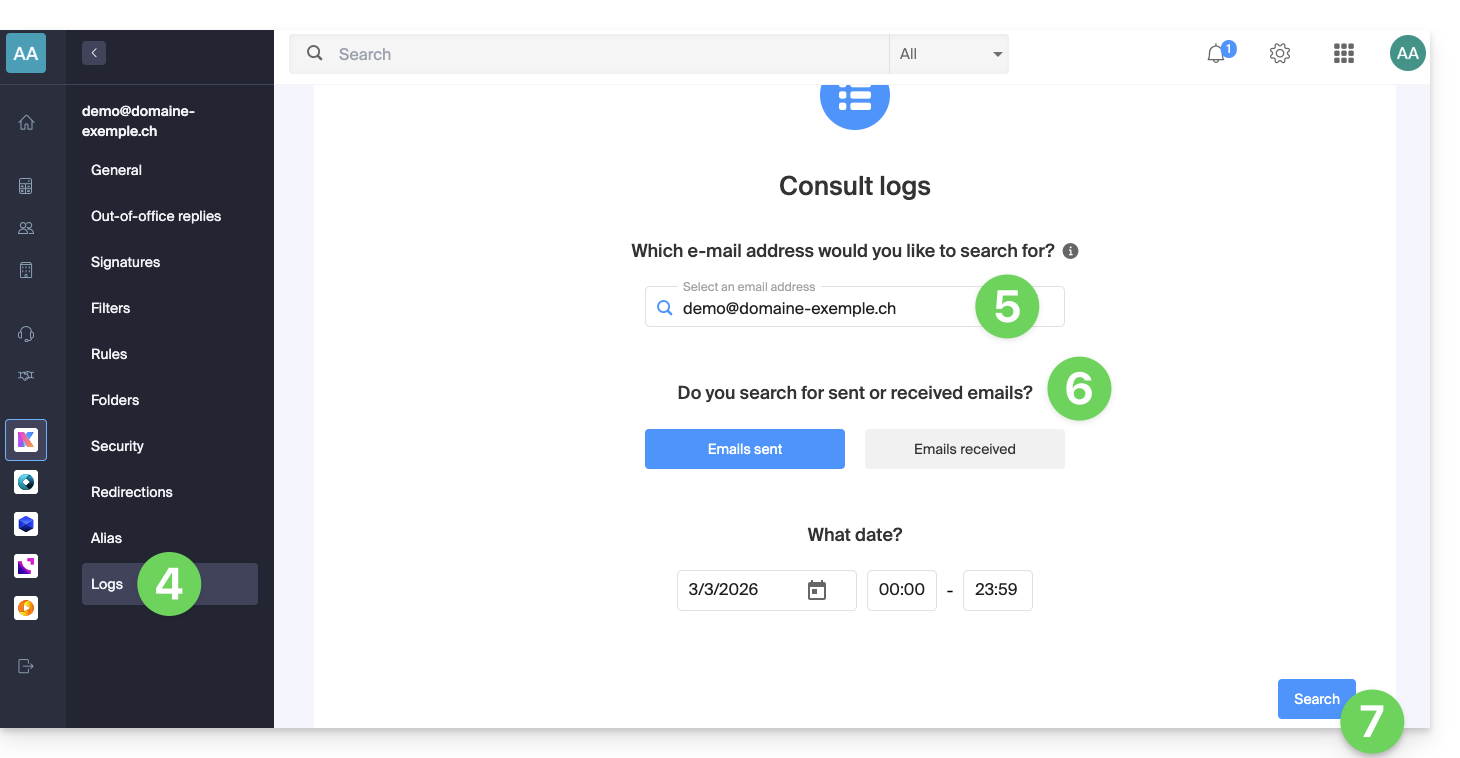
- Click on Logs in the left sidebar menu.
- If necessary, from the dropdown menu, select the email address concerned.
- Choose to view the logs of sent or received emails, and set the date and time.
- Click on Search:
Log results
The email sending and receiving logs will be presented in a table format.
Hover your mouse over the possible ⓘ icon in the Status column to display more information if necessary: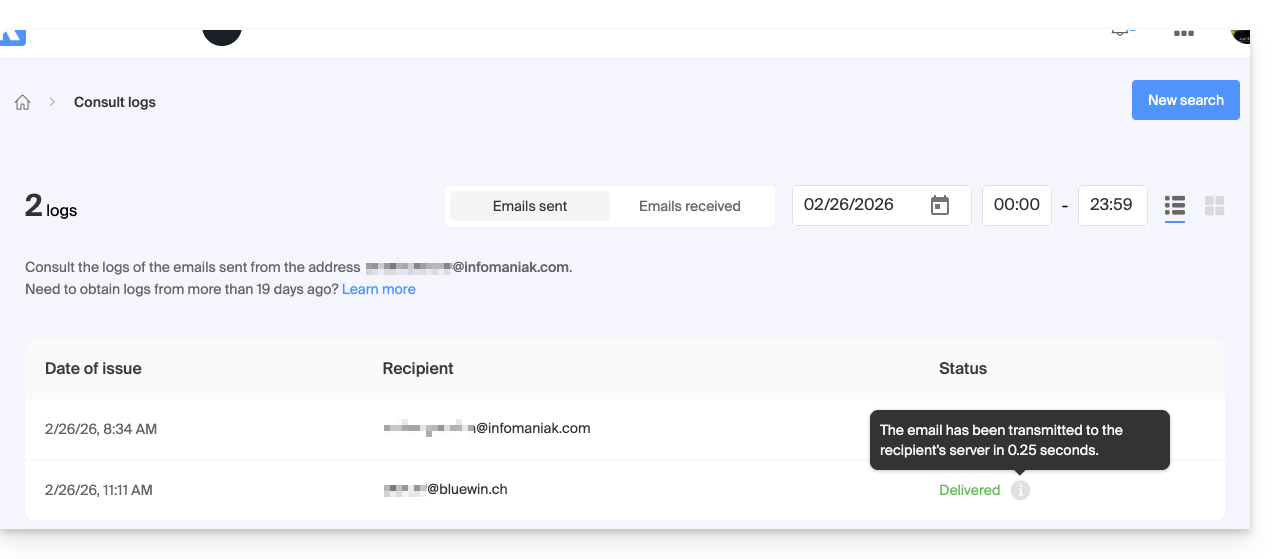
Link to this FAQ: https://faq.infomaniak.com/2630
Has this FAQ been helpful?