Knowledge base
1000 FAQs, 500 tutorials and instructional videos. Here, there are only solutions!
Install the Acronis Agent on AlmaLinux 9
This guide explains how to prepare your server and install the Acronis Backup Agent for Swiss Backup on AlmaLinux 9.
Install the Acronis CyberProtect Agent
1. System requirements
- Use an account with root privileges.
- Internet access required for uploads and downloads.
- Available disk space: approximately 2 GB.
2. System Preparation
Switch to the root user:
# Switch to root user
sudo -i
Update the DNF metadata cache:
# Refresh DNF metadata cache
dnf -y makecache
Check the current kernel and GCC versions:
# Check current kernel and GCC version
cat /proc/version
If the kernel version does not match the available kernel-devel package, an update will be necessary in the next step.
Install the build tool (make):
# Install make utility
dnf install -y make
# Verify installation
make -v | head -n 1
Install the GCC compiler:
# Install GCC compiler
dnf install -y gcc
# Verify version (should match the one in /proc/version)
gcc -dumpfullversion
Install the latest kernel and its headers (kernel-devel):
# List available versions
dnf list kernel kernel-devel --showduplicates | sort -r
# Install latest kernel and headers
dnf install -y kernel kernel-devel
Restart the server to load the new kernel:
# Reboot the system
systemctl reboot
After the restart, reconnect and switch back to root (
sudo -i).Confirm that all required tools are present:
# Final environment check
uname -r
rpm -qa | grep ^kernel-devel
make -v | head -n 1
gcc -dumpfullversion
perl -v | head -n 2
3. Downloading the installer
Install wget if necessary:
# Install wget dnf install -y wget- Get the download URL:
- Log in to https://acronis.infomaniak.com.
- Go to Terminals → All terminals.
- Click on Add and select Linux.
- Copy the complete URL containing your token.
Download the binary to your server:
# Download the installer using your URL
wget -O CyberProtect_AgentForLinux_x86_64.bin "metre_ici_URL_obtenue_avant"
Make the file executable:
# Set execution permissions
chmod +x CyberProtect_AgentForLinux_x86_64.bin
4. Installing the agent
Start the installation:
# Run the installation script ./CyberProtect_AgentForLinux_x86_64.bin- Use the Tab key to navigate and Enter to confirm in the text interface.
- Select Install.
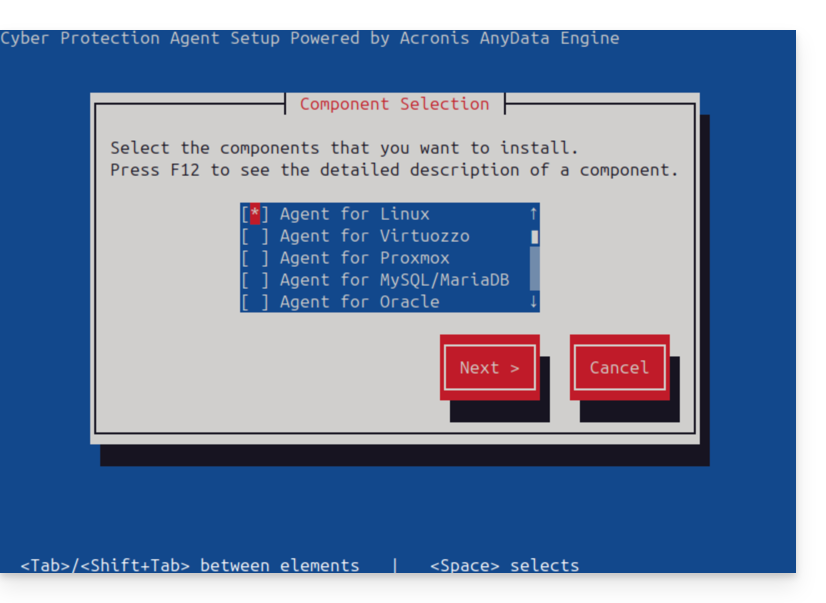
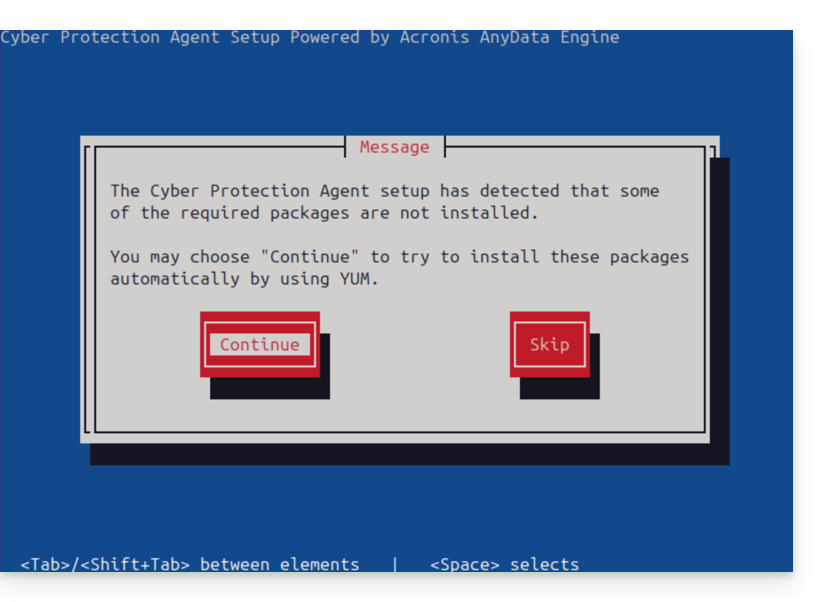
- Accept the automatic installation of any missing dependencies via YUM.
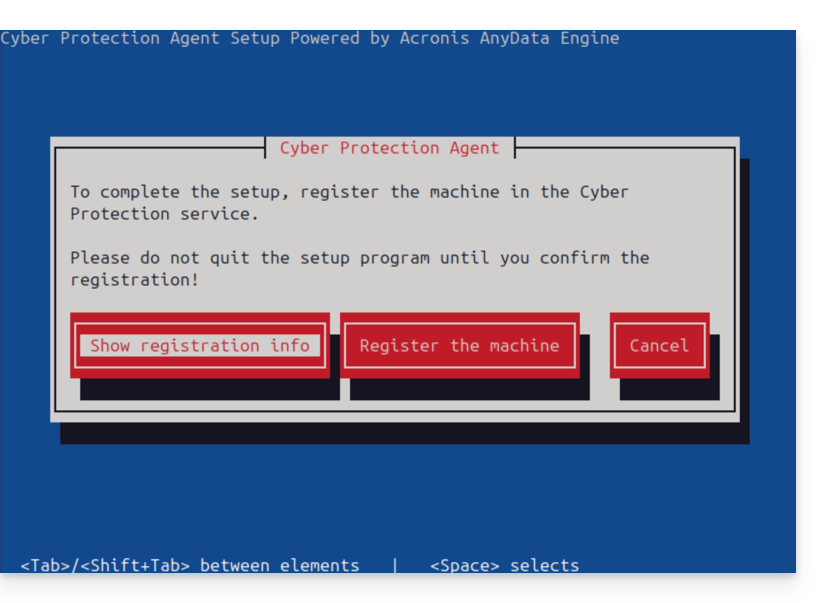
- At the end of the process, select Display registration information.
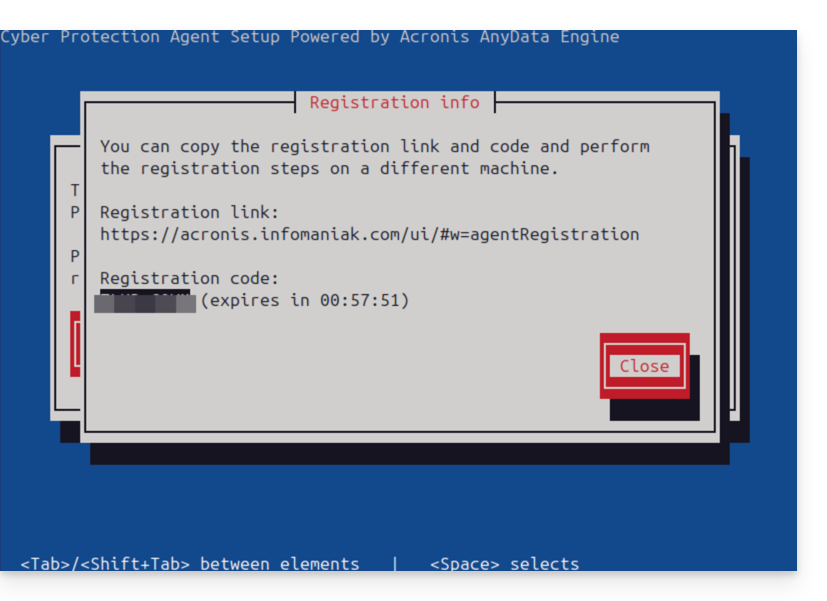
- Carefully note the Registration Code displayed (e.g., ABCD-1234).
5. Registration on the Acronis console
- Go back to your Acronis console (browser).
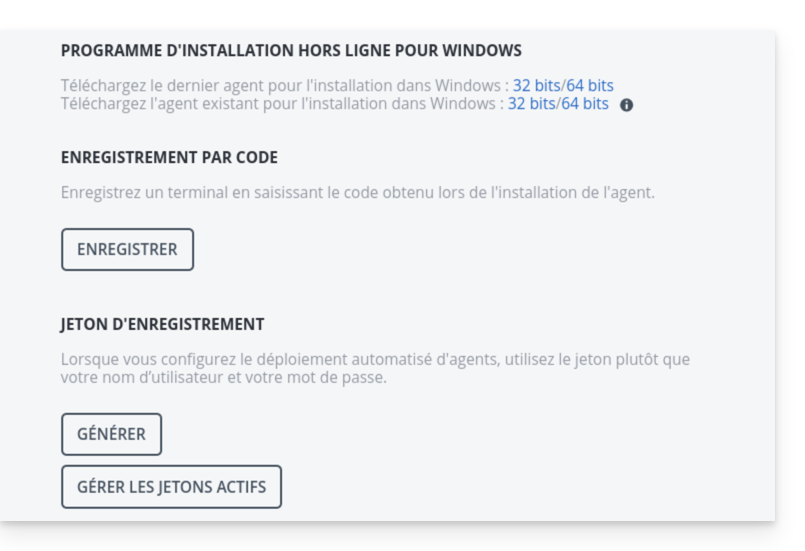
- Click on Add, then at the very bottom of the list, choose Registration by code.
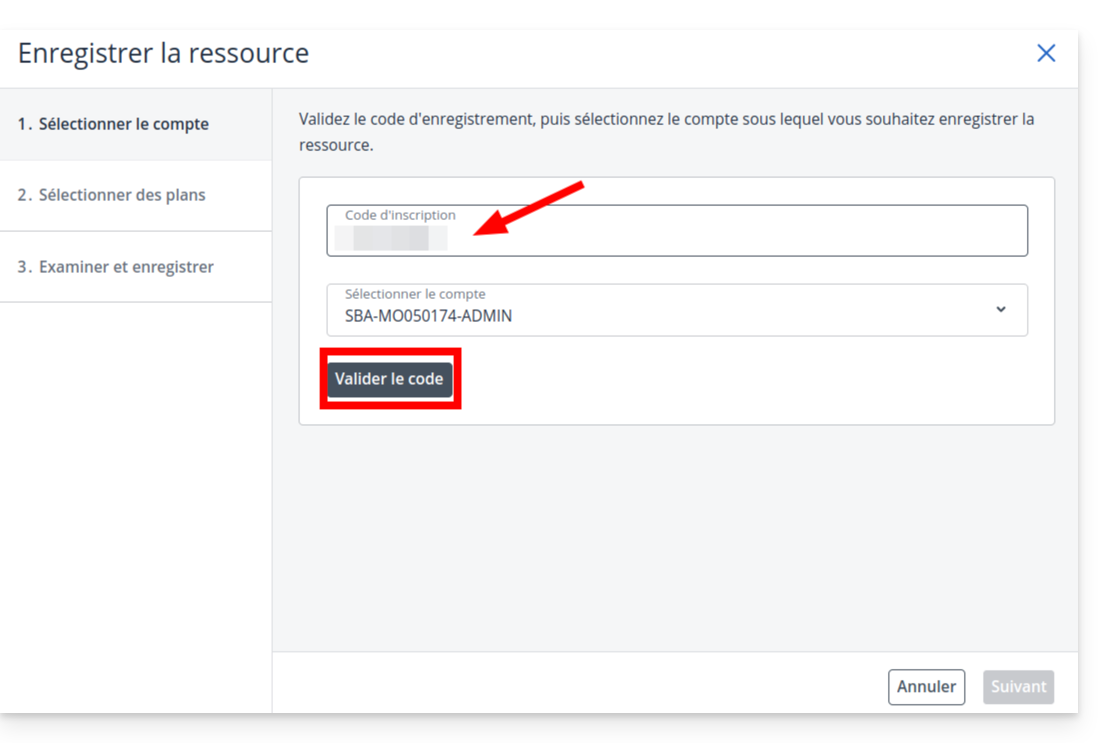
- Enter the code obtained from the server and click Validate.
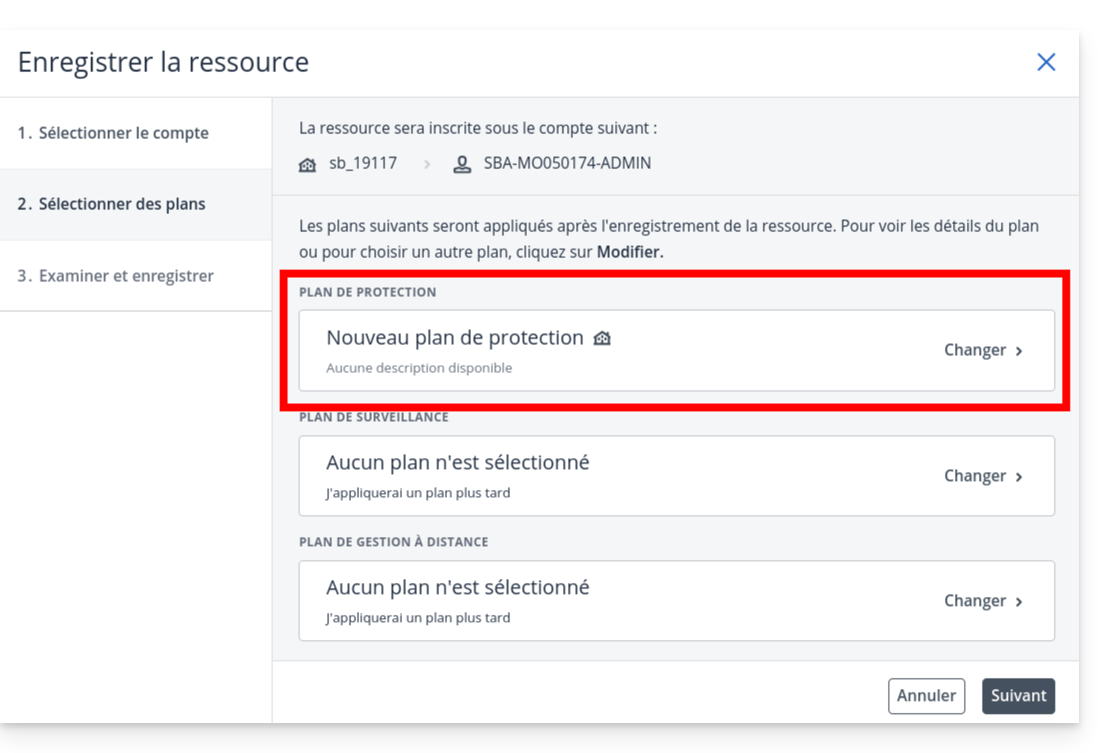
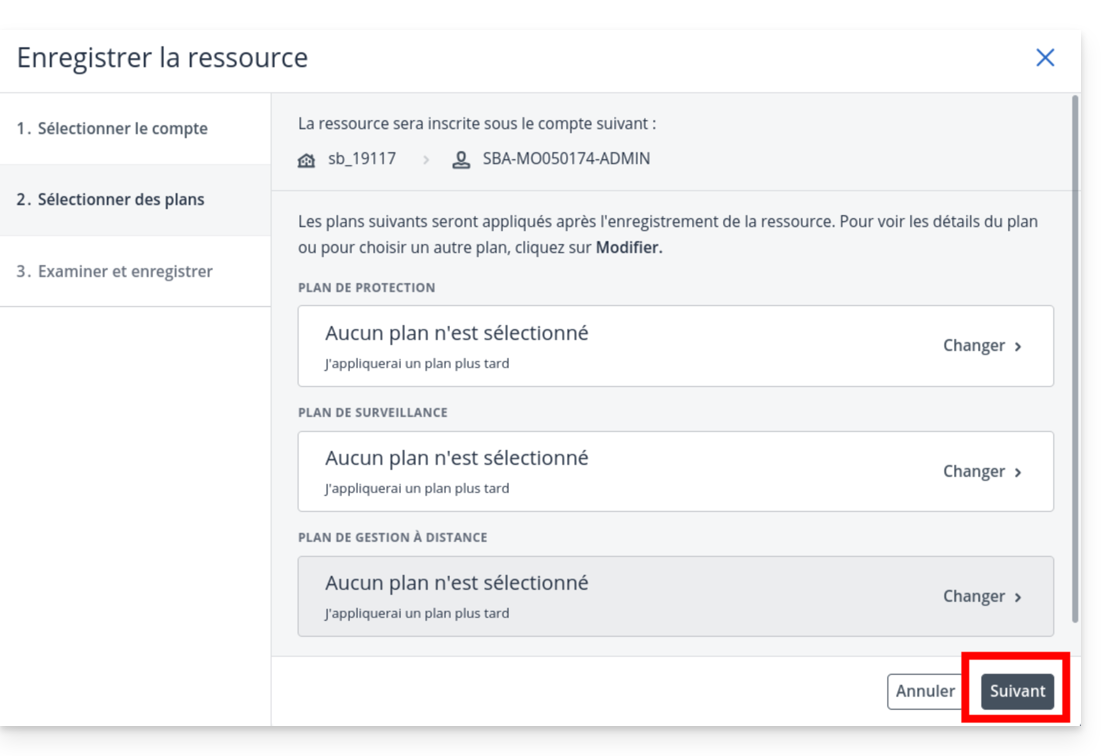
- Important: On the plan selection screen, click on the drop-down menu.
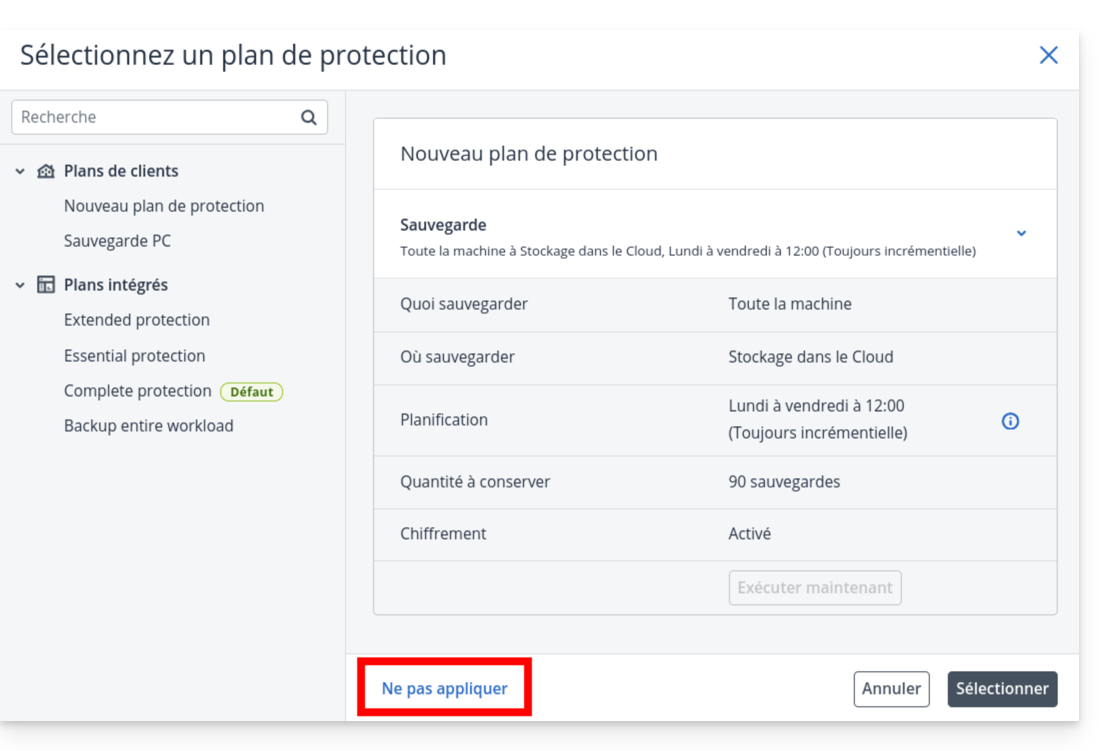
- and choose Do not apply.
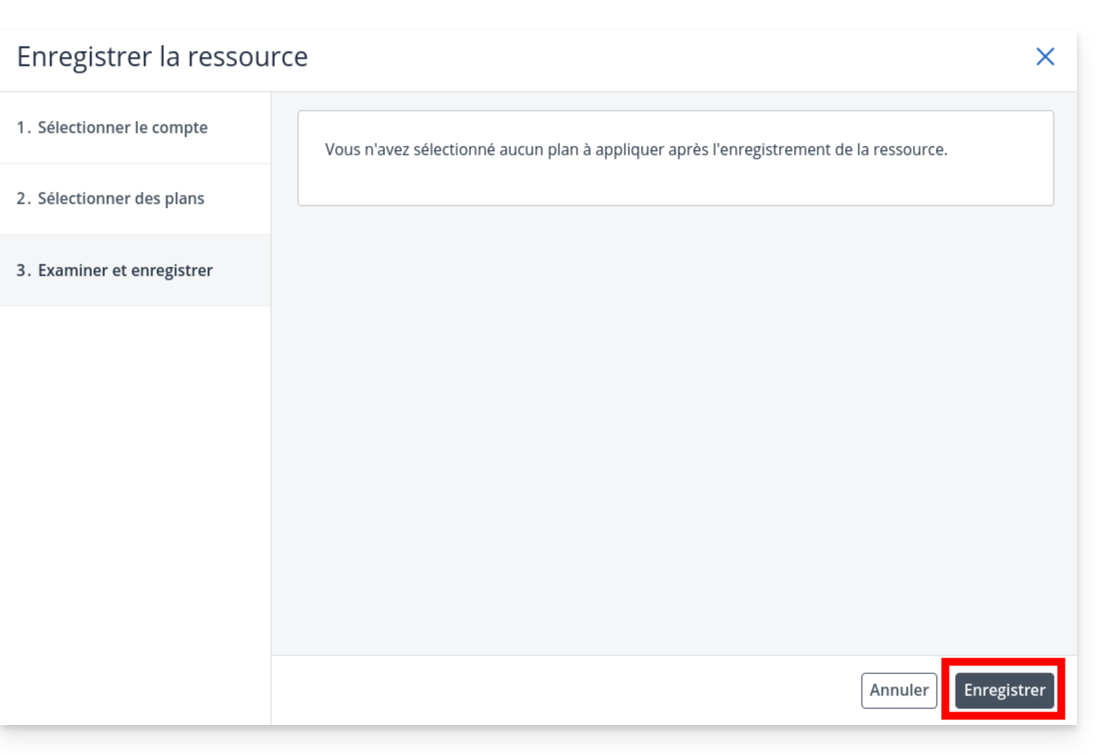
- Click on Next
- then click on Save.
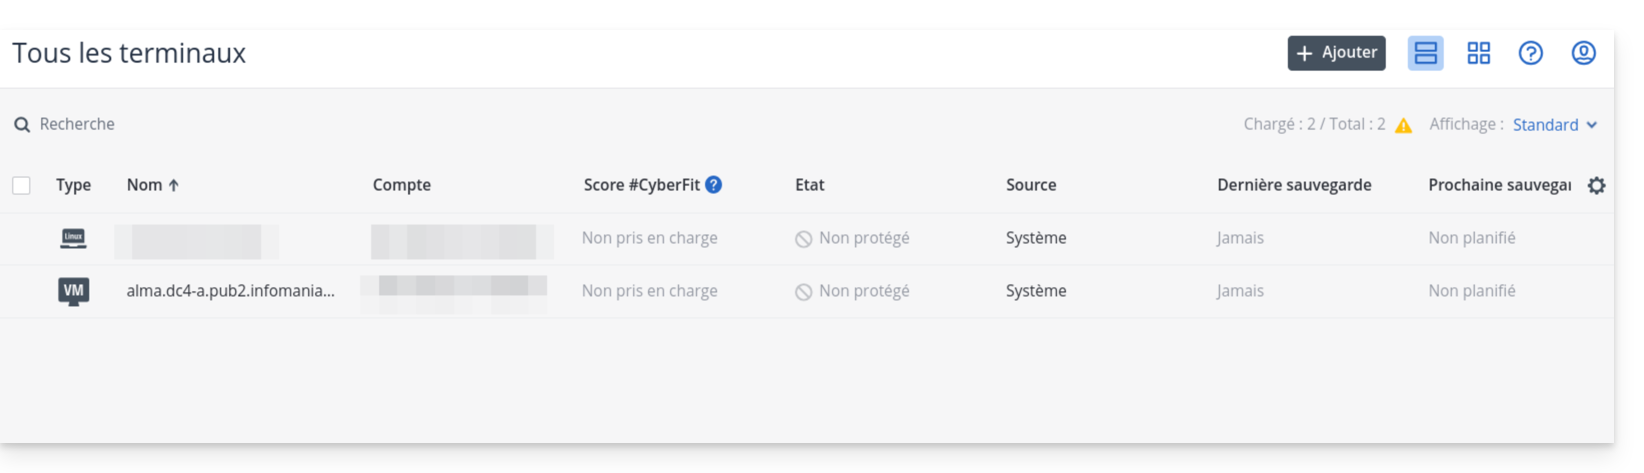
- Check that your server appears in the list of devices after a few seconds.
6. Creating the protection plan
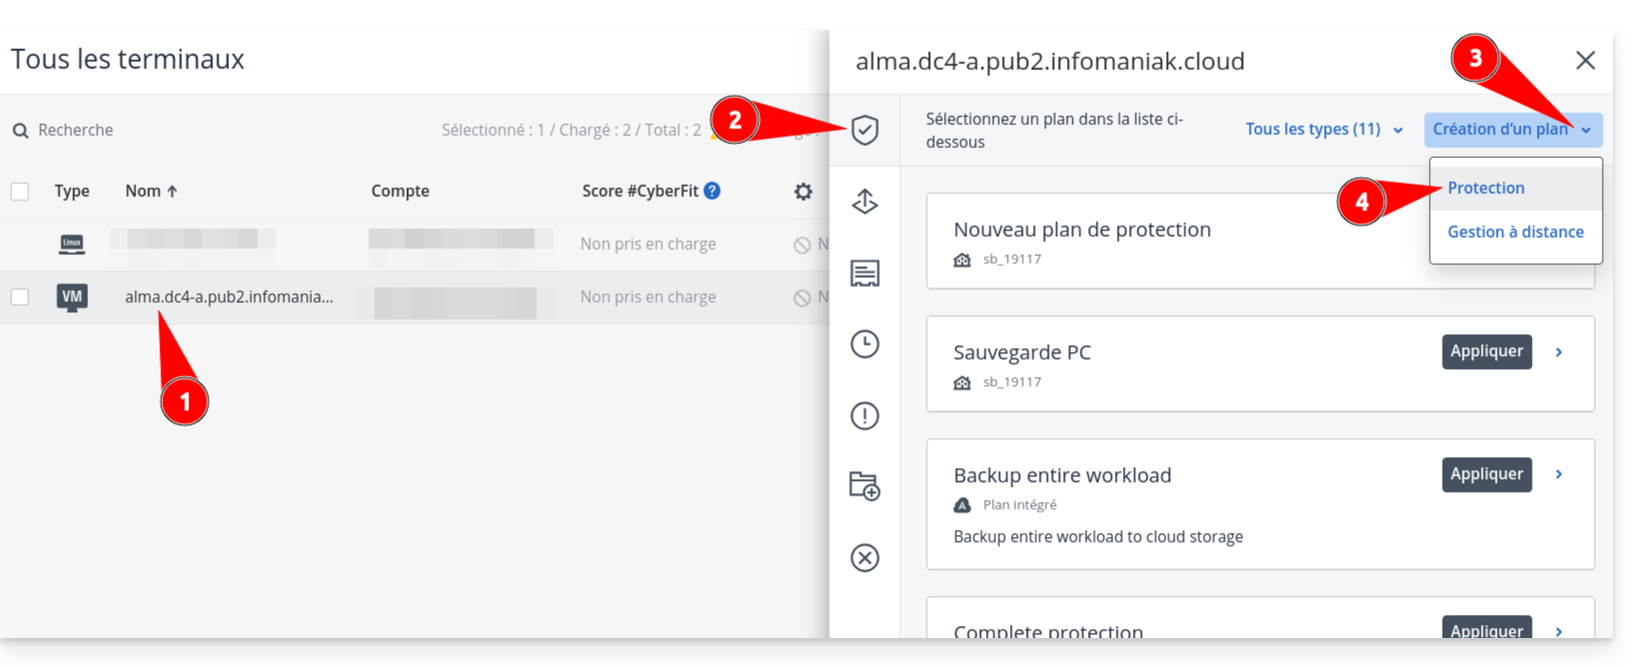
- Click on your server's name in the list, then click the Protect button.
- Choose Create a plan → Protection.
- Define your backup settings (frequency, retention, destination).
- Warning: If you enable encryption, keep the password in a safe place. Without it, your backups will be unusable.
- Check the configuration and click Create.
Link to this FAQ: https://faq.infomaniak.com/2555
Has this FAQ been helpful?