Knowledge base
1000 FAQs, 500 tutorials and instructional videos. Here, there are only solutions!
Create a Node.js website with Infomaniak
Update 10/05/2026
Infomaniak's Node.js hosting solutions allow you to run Node.js applications in a flexible, ready-to-use environment, without having to manage server infrastructure.
Introduction
- Offering the flexibility of a server without the complexity of its administration, this type of hosting is particularly suitable for API REST projects, for deploying the CMS Ghost, n8n, Strapi or frameworks like Express.js, NestJS or even socket.io, next.js, business tools or prototypes for:
- developers who want to deploy Node.js applications without managing infrastructure.
- webmasters looking to experiment with or learn Node.js.
- agencies and freelancers working on multiple client projects.
- students, teachers and schools needing a simple environment to test code.
- The NPM and Yarn package managers are supported.
- If you install
Node.json a web hosting within a Cloud Server, your site will not function with the guaranteed resources of the managed Cloud Server.- Refer to this other guide to use Fast Installer and deploy NVM.
Node.js= official name of the language/environment;NodeJS= "technical" or simplified name in certain contexts (often for practical reasons, no real technical difference).
Create a Node.js site
To access a web hosting plan and add a Node.js site to it:
- Click here to access the management of your web hosting accounts in the Infomaniak Manager (need help?).
- Click directly on the name assigned to the relevant web hosting account.
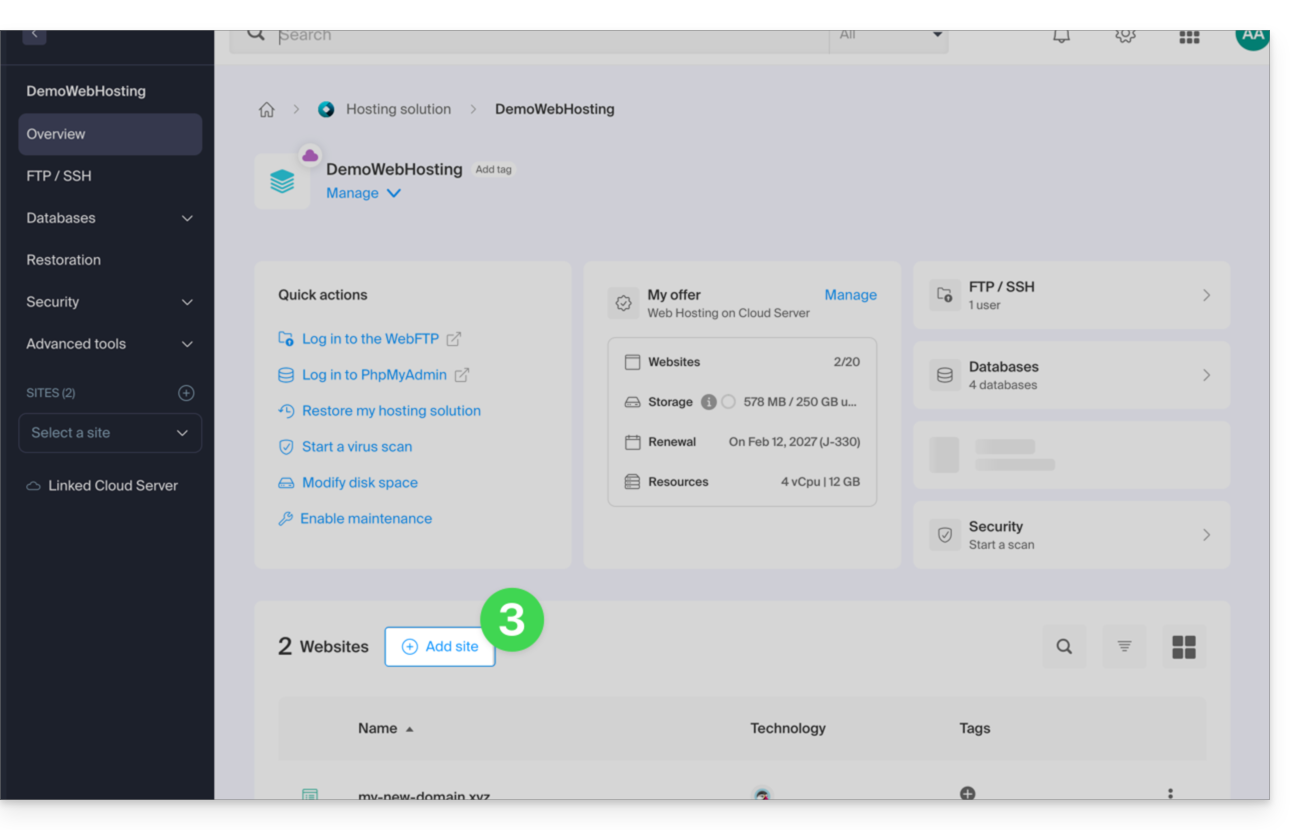
- Click on the blue Add button:
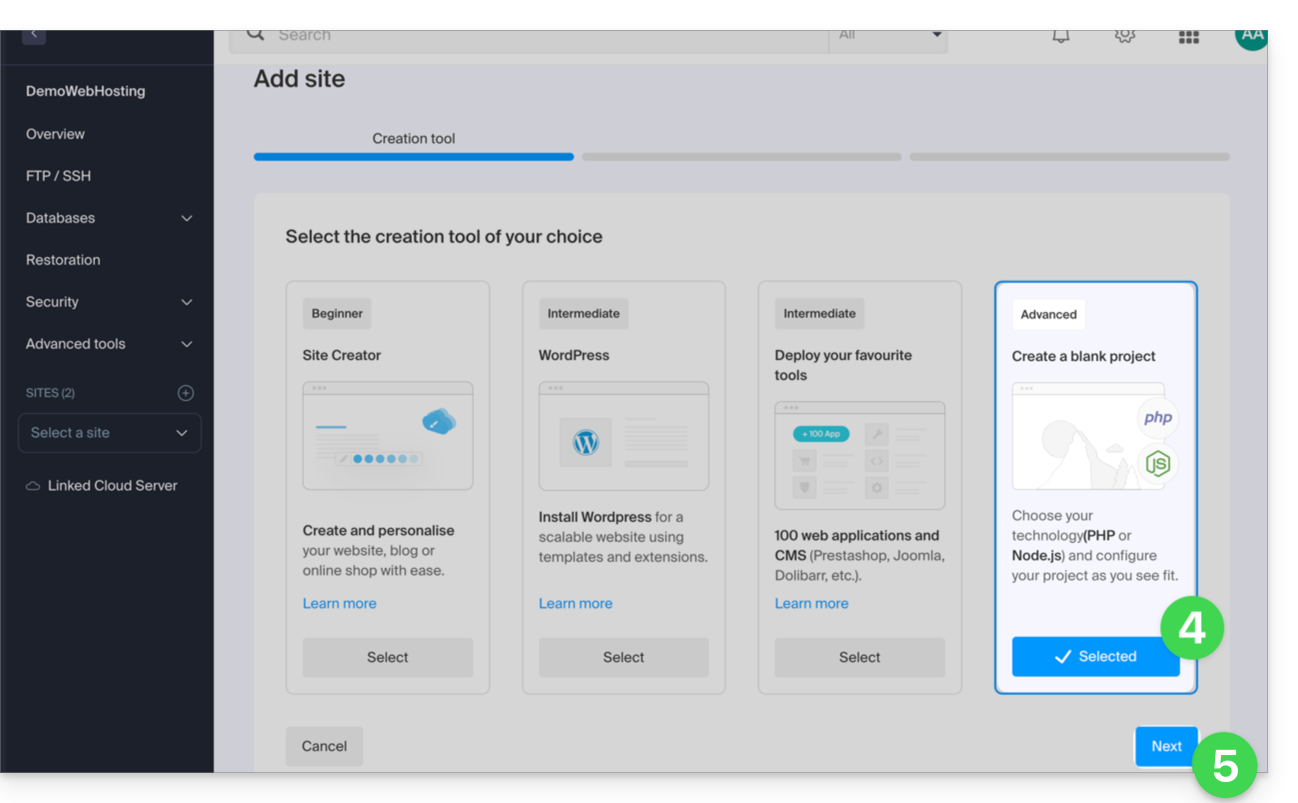
- Choose a project using advanced technologies.
- Click on Next:
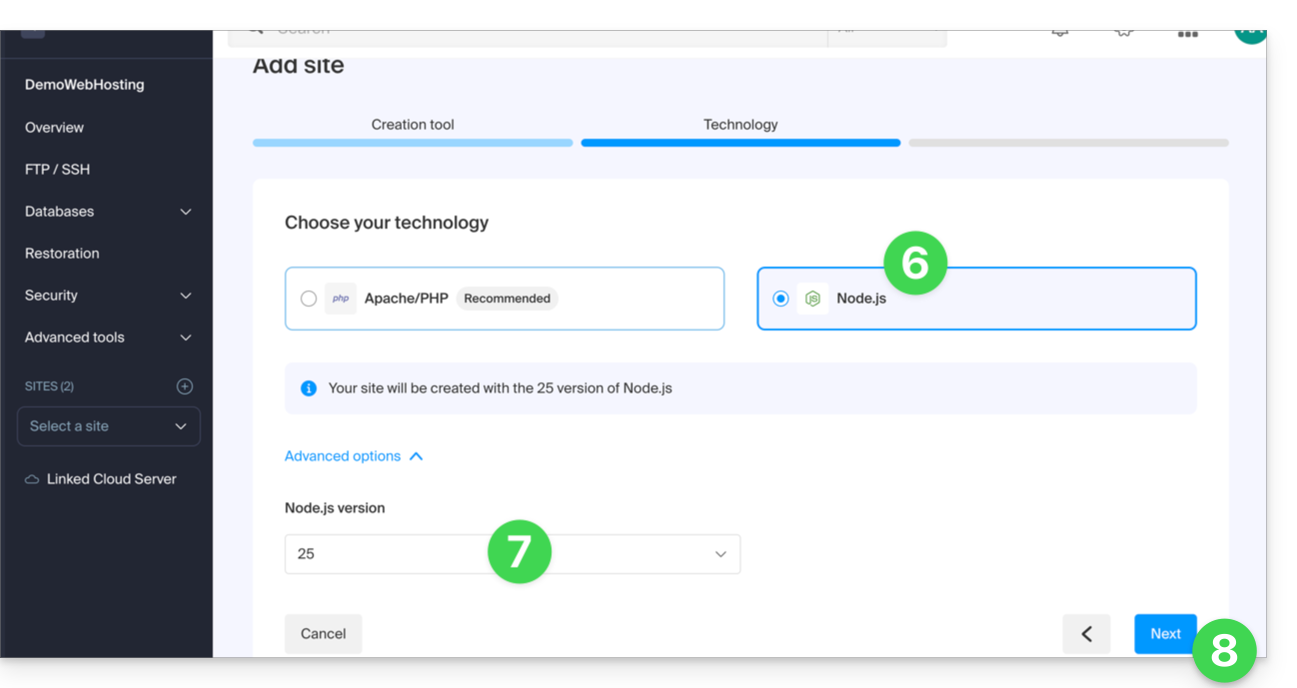
- Choose Node.js.
- Select any other version if necessary.
- Click on Next:
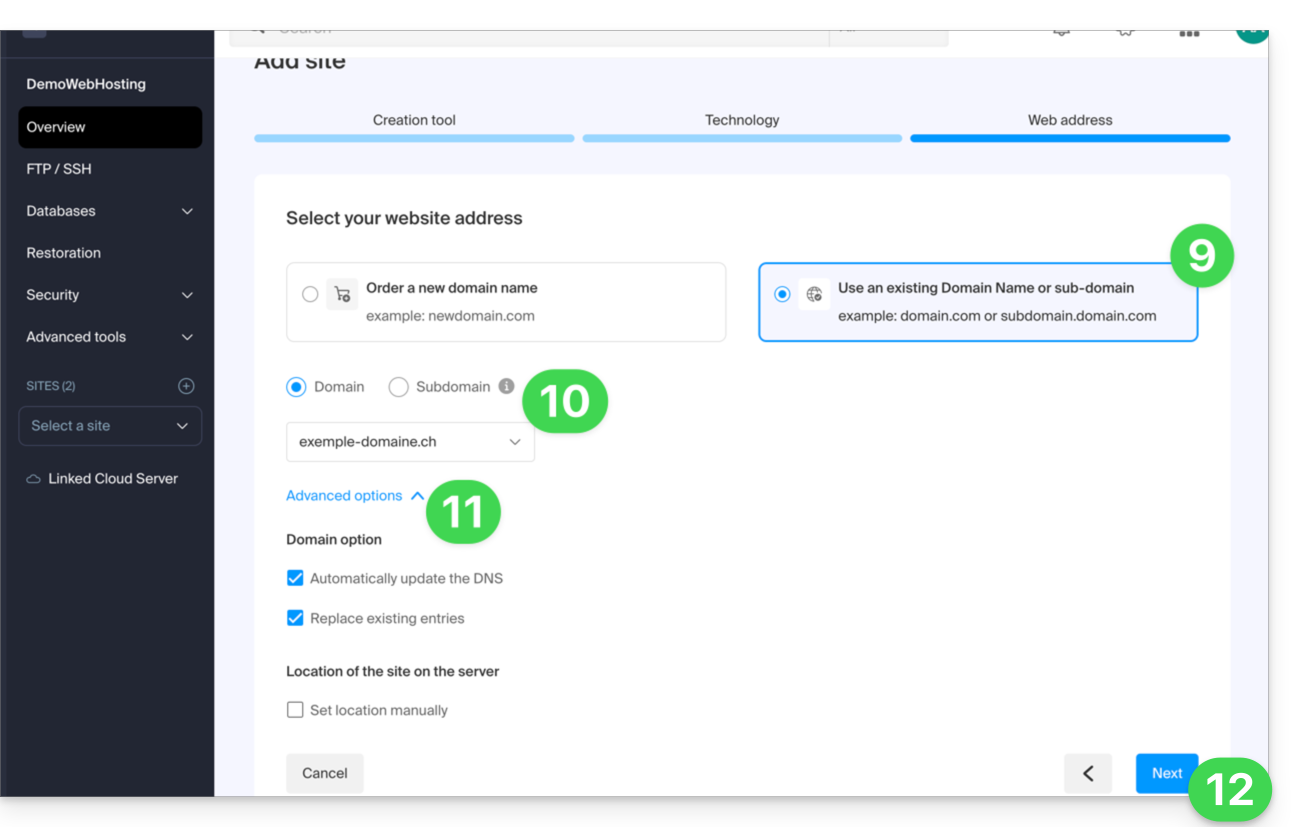
- Choose the type of domain to assign to this new site:
- an already acquired domain name
- a subdomain created from an already acquired domain name
- a domain name that is still available and to be ordered
- Enter the domain name or subdomain.
- Choose any desired advanced options.
- Click on Next:
- Choose one of the two possible approaches:
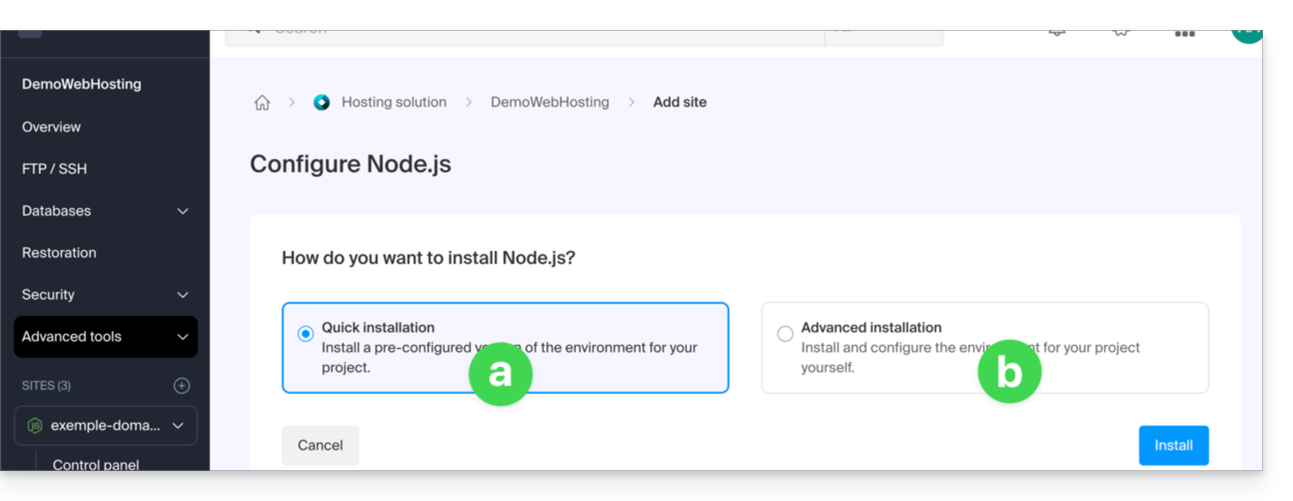
- Quick method:
- A preconfigured sample project is automatically installed.
- This approach is ideal for discovering Node.js or quickly setting up a functional base.
- Custom method:
- The source code can be imported via ZIP archive, SSH, or SFTP.
- You can also choose to use public repositories hosted on GitLab, GitHub, or any other platform compatible with Git.
- Private repositories are also supported using HTTP Basic authentication:
https://username:password@github.com/… - You define the scripts, entry points, listening port, and build commands yourself.
- Quick method:
- That's it, the site is ready:
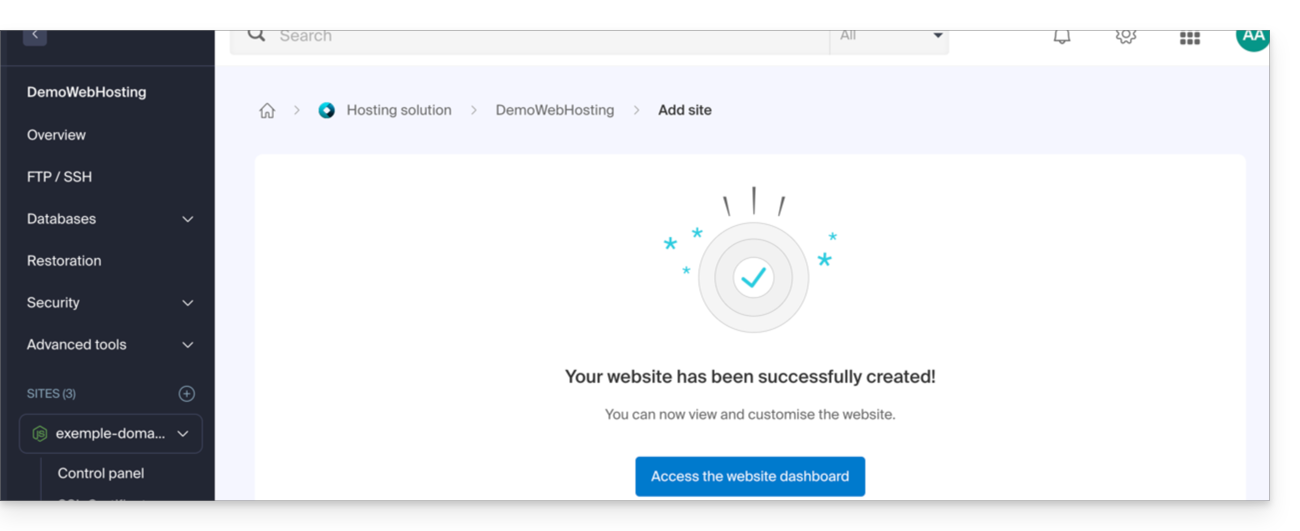
Each site has a dedicated dashboard to control the application (start, stop, restart), view the execution console, manage Node.js versions, configure domains, and activate SSL certificates: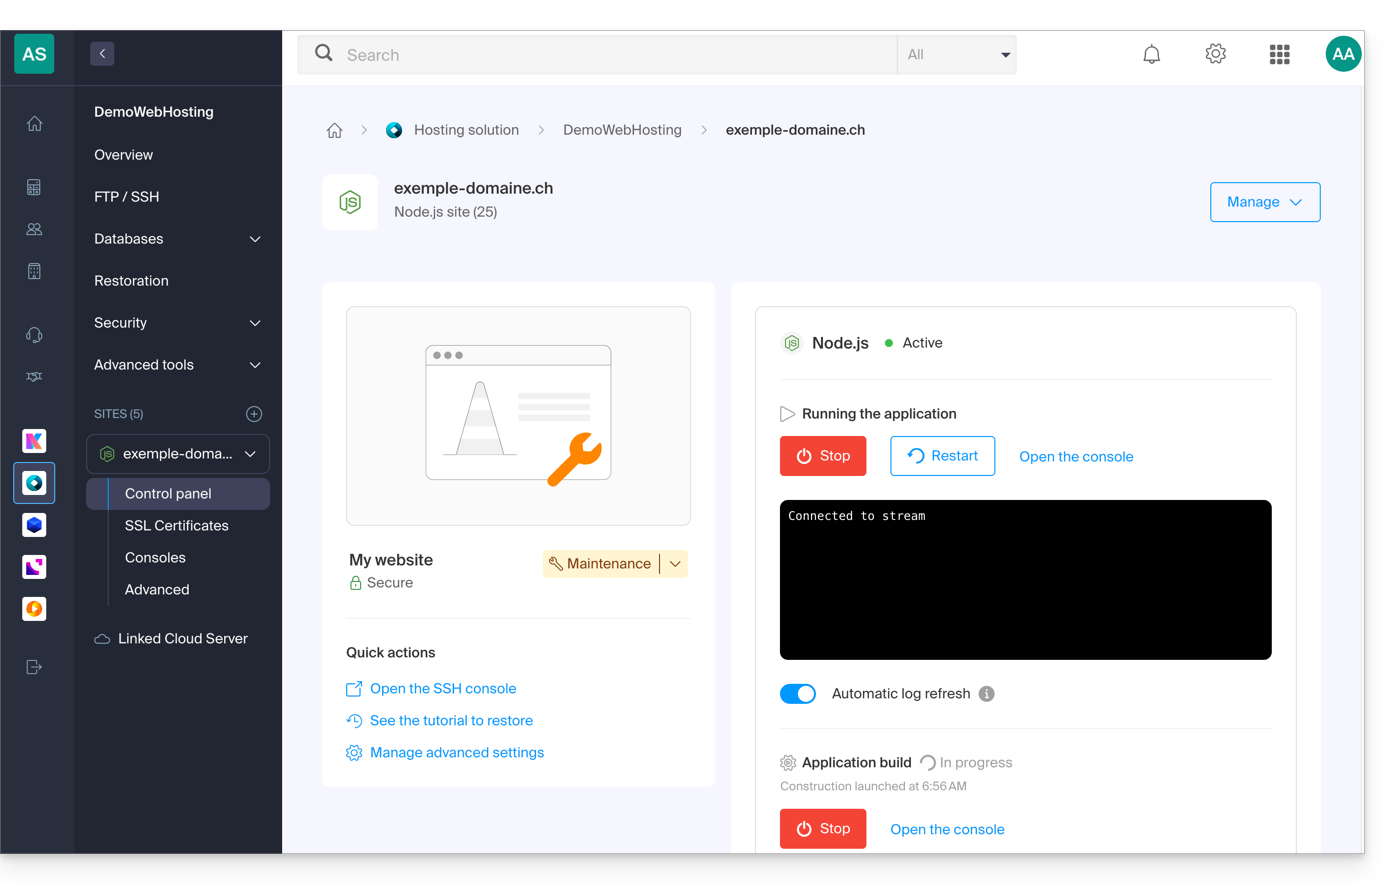
To go further in the configuration of your Node.js site, please refer to this other guide.
Link to this FAQ: https://faq.infomaniak.com/2537
Has this FAQ been helpful?