Knowledge base
1000 FAQs, 500 tutorials and instructional videos. Here, there are only solutions!
Use the "Infomaniak_Connect" extension for Drupal
Update 10/06/2026
This guide concerns the Drupal module Infomaniak_Connect, which allows users to log in to your Typo3 site (whether hosted by Infomaniak or not) using their Infomaniak credentials (❓: help).
Introduction
- Allowing login via an Infomaniak account on your Drupal site enables your visitors to comment, register for courses, or access any content reserved for members with a single click, without having to create a new account.
- This saves them time and provides a more secure method for you, as you don't have to manage additional passwords.
- This external module functions identically to the "Log in with Google", "Log in with Facebook", or “Log in with Apple” options; it uses the standard OAuth2 and OpenID Connect protocols to enable single sign-on (SSO).
A. Create an application with Auth Infomaniak
To do this:
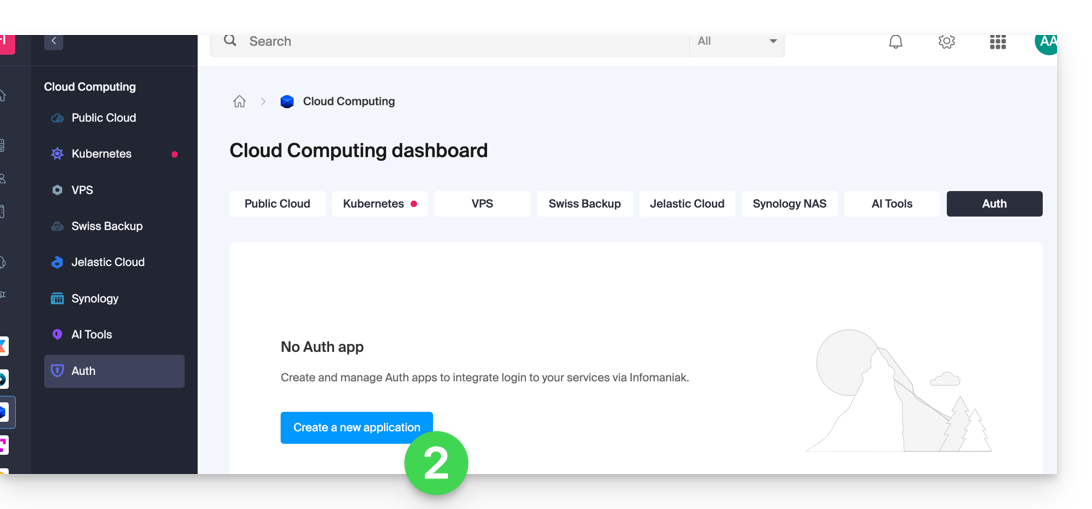
- Click here to access the Auth service management in your Infomaniak Manager (❓: help).
- Click on the button to Create a new application:
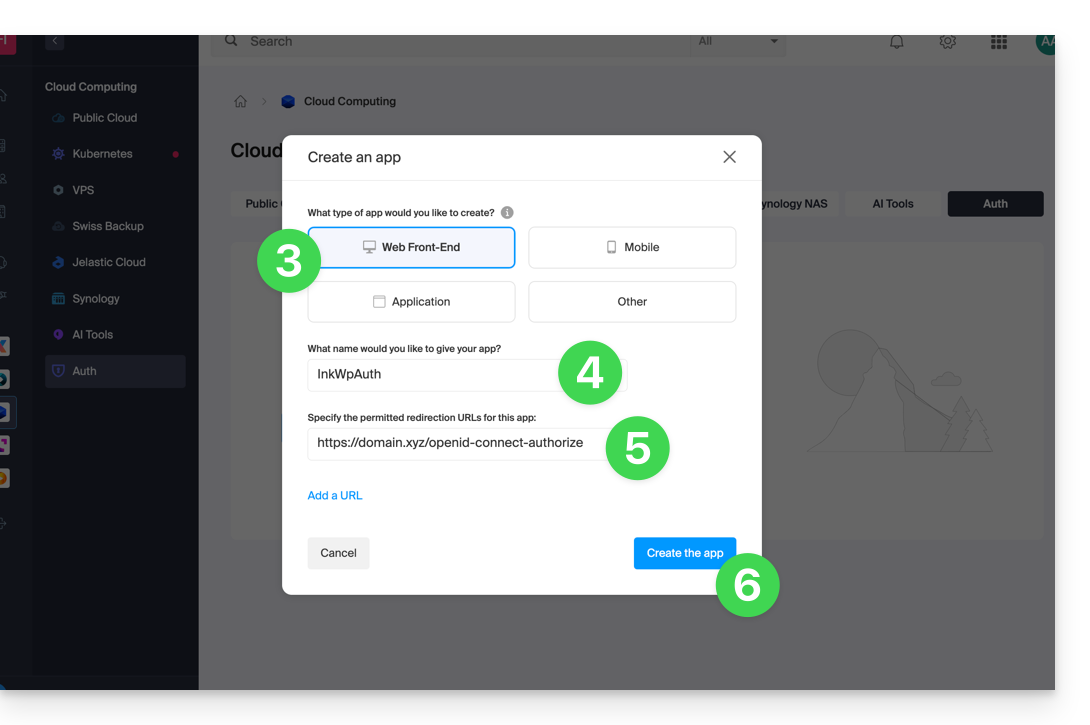
- Choose the “Web Front-End” type.
- Give your application a name.
- In the URL field, enter the domain name corresponding to your WordPress site followed by
/openid-connect-authorize(❓: help). - Click the button to complete the app creation:
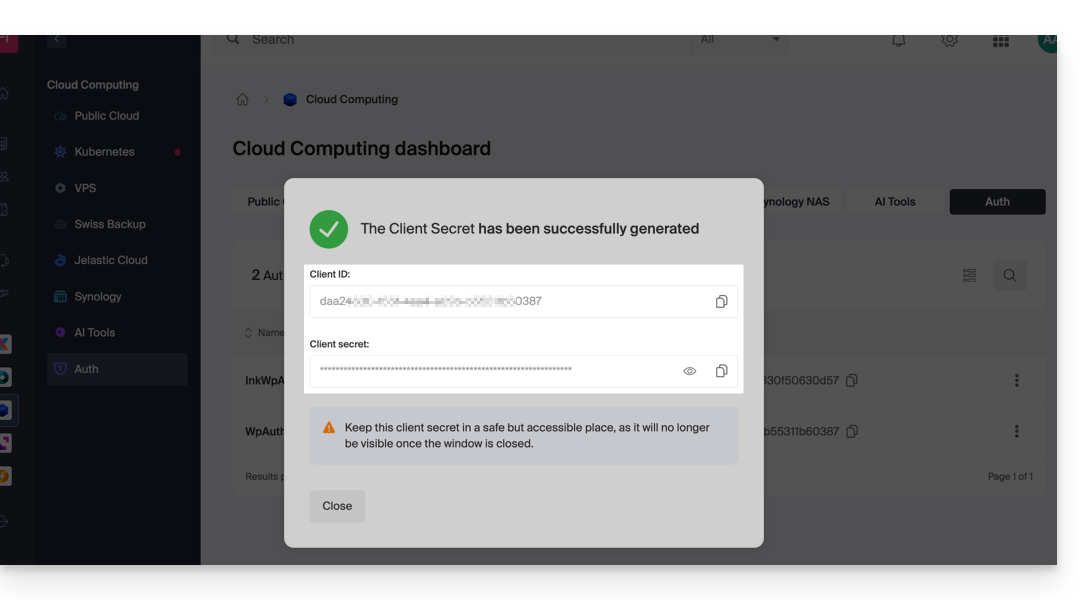
- Carefully note the 2 pieces of information obtained when finalizing your OAuth2 application:
B. Configure the Drupal extension
Via SSH, deploy Composer if necessary to install the openid_connect (❓: help) and infomaniak_connect (❓: help) extensions.
- You may need to edit the composer.json file, as the version of
openid_connectis not yet considered stable. Add: "minimum-stability": "dev", "prefer-stable": true
Next, in Drupal:
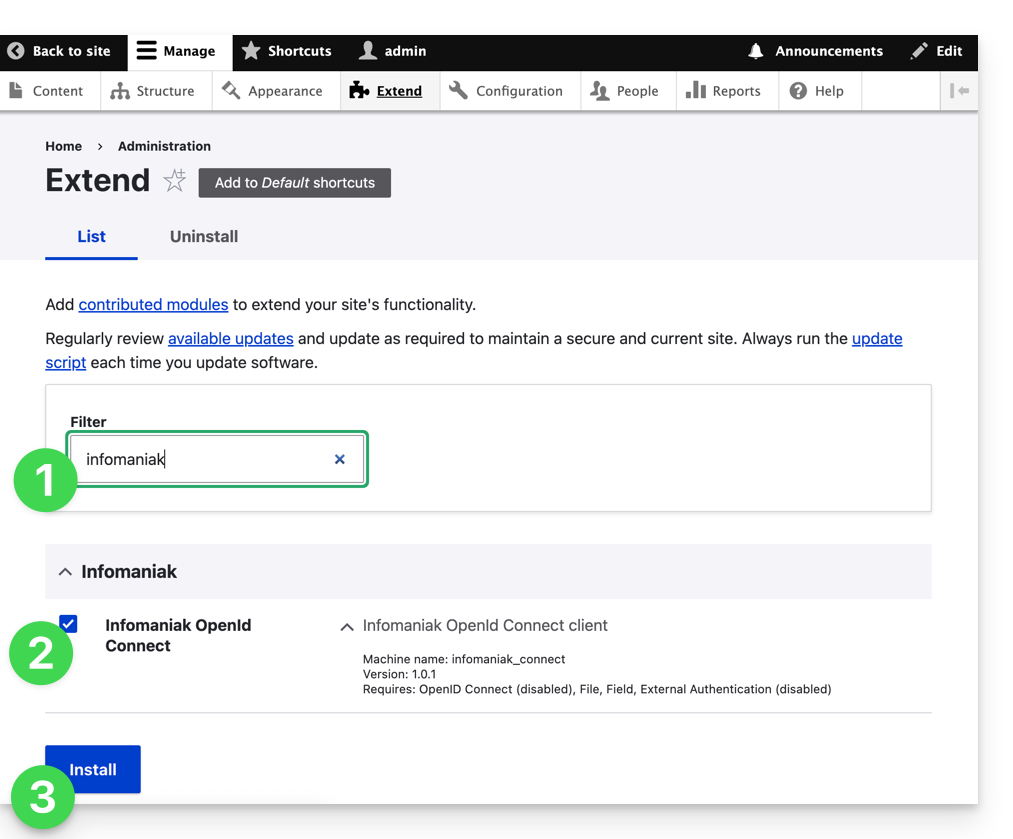
- Find the Infomaniak module among your pre-installed modules.
- Select it.
- Click on the Install button:
- The dependencies will now be installed:
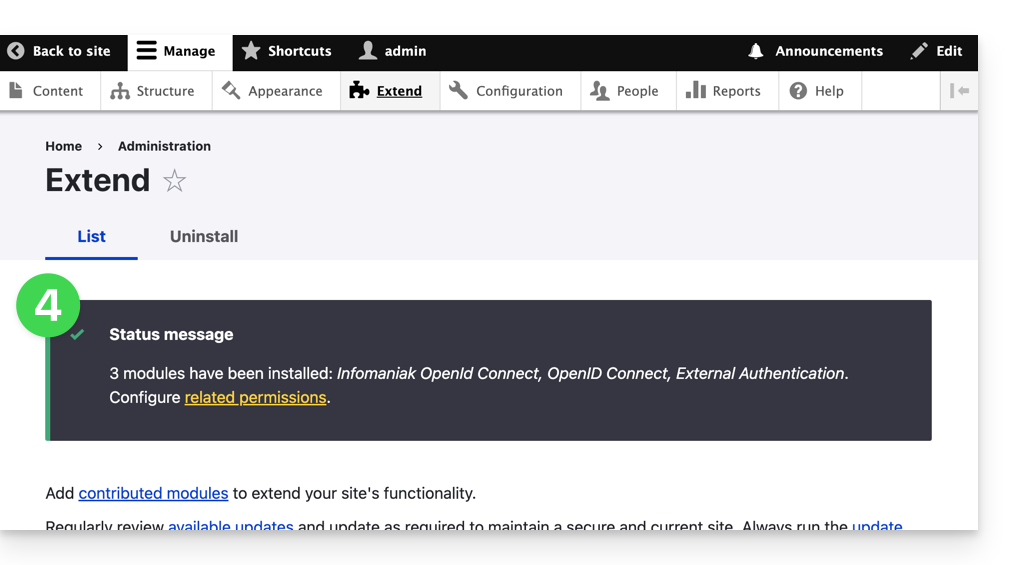
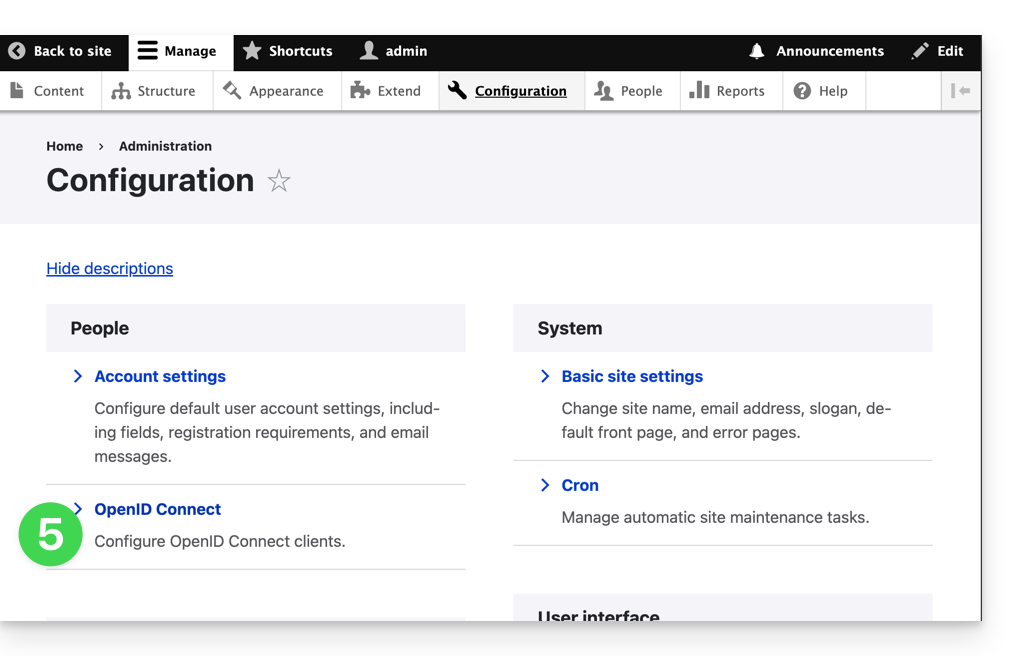
- Under Configuration, click to configure the OpenID connection:
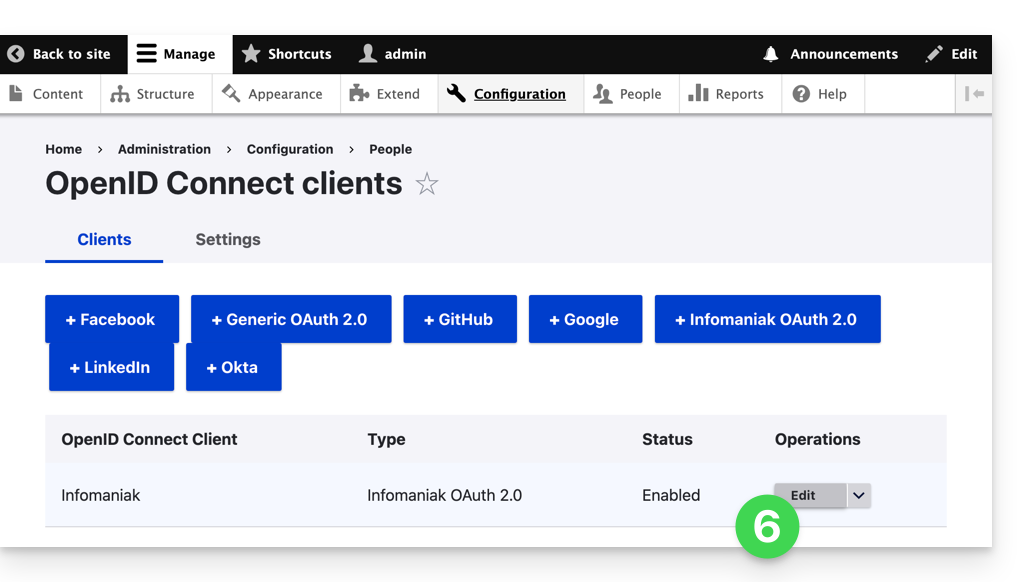
- Click on the Edit button:
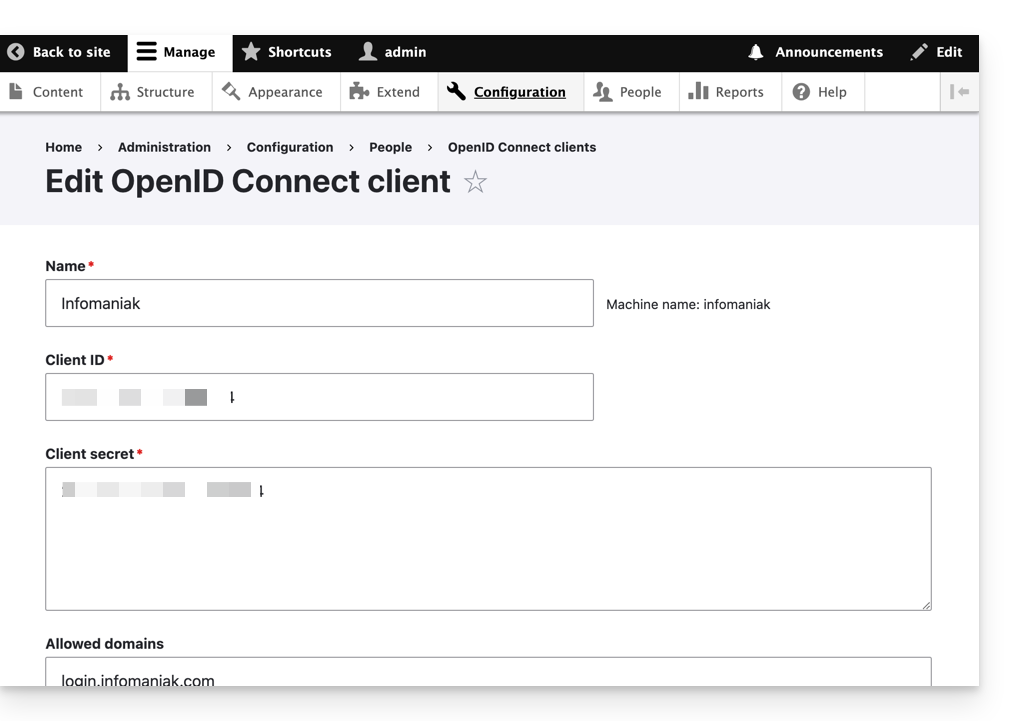
- The only fields to fill in are Client ID and Client Secret, and they come from the information obtained in step A above:
- Remember to save the changes you made to the extension settings.
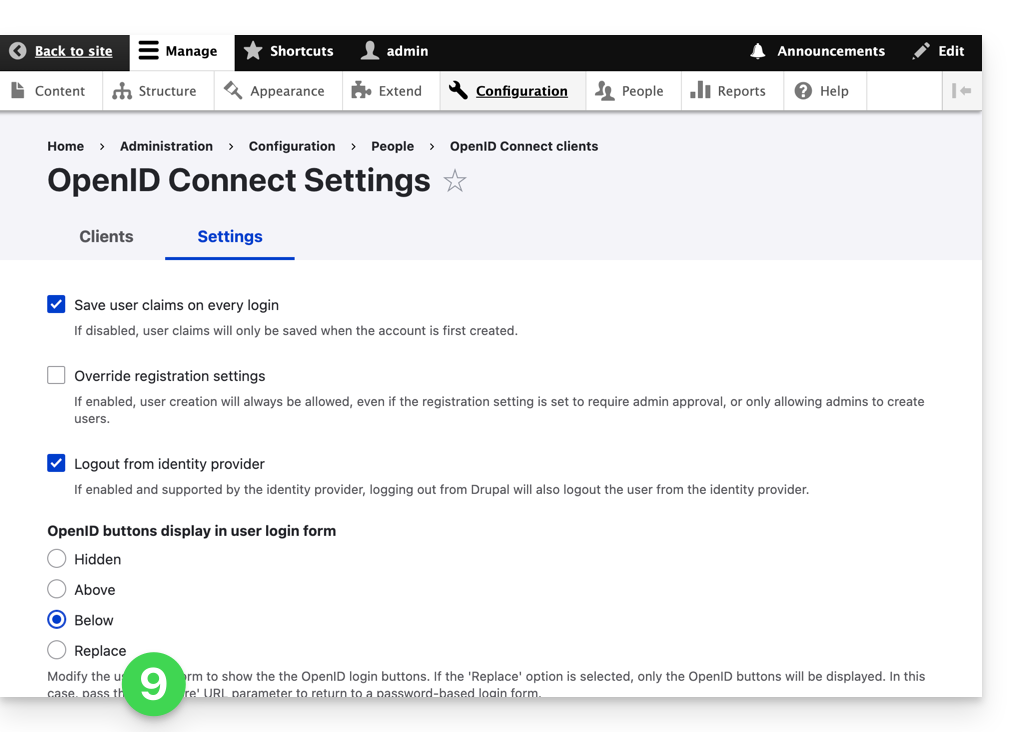
- In the Settings tab, you can choose the display type for your login page; remember to save:
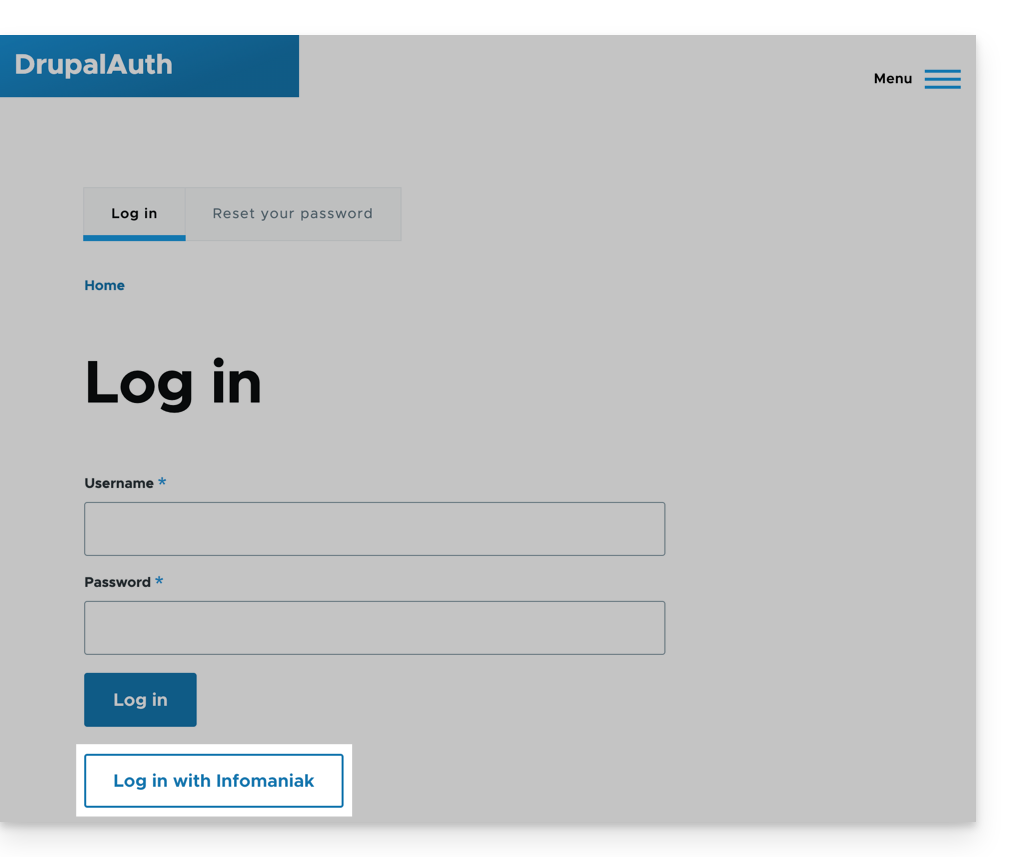
- An additional button, for logging in with your Infomaniak credentials, is now visible on your login page:
Link to this FAQ: https://faq.infomaniak.com/2532
Has this FAQ been helpful?