Knowledge base
1000 FAQs, 500 tutorials and instructional videos. Here, there are only solutions!
Manage email forwarding addresses
✘ UNAVAILABLE with
my kSuite / my kSuite+ (ik.me, etik.com, ikmail.com)
Introduction
- This feature allows you to create a "virtual" email address without affecting the available quota for email addresses on the paid Mail service.
- It does not store any received messages; it is impossible to access, view, or restore them, or to view the logs of messages that have been forwarded.
- It is intended solely to forward incoming emails to one or more (max. 10 users per redirection) other existing addresses.
- Recipients who have subscribed to receive the redirected emails must first accept their addition for the redirection to them to work (see point 3 below).
- Emails considered as spam by Infomaniak will not be redirected (they will bounce back to the sender – and please refer to this other guide regarding potential Gmail to Gmail redirections).
- To manage redirects for existing email addresses on your Mail Service, please refer to this other guide.
- Number of redirect addresses that can be created per available address (depending on the Mail Service quota):
- kSuite Free = 1
- kSuite Standard = 20
- kSuite Business = 20
- kSuite Enterprise = 20
- Mail Service Starter = 1
- Mail Service Premium = 20
- For example: Paid Mail Service for 10 addresses = 200 redirect addresses available
Create the address to which emails will be redirected
1. Open the email redirection address management page
To access the feature:
- Click here to access the management interface for your product in the Infomaniak Manager (need help?).
- Click directly on the name assigned to the product in question.
- Click on the chevron to the right of the blue Create a mail address button.
- Choose to Create a forwarding address:
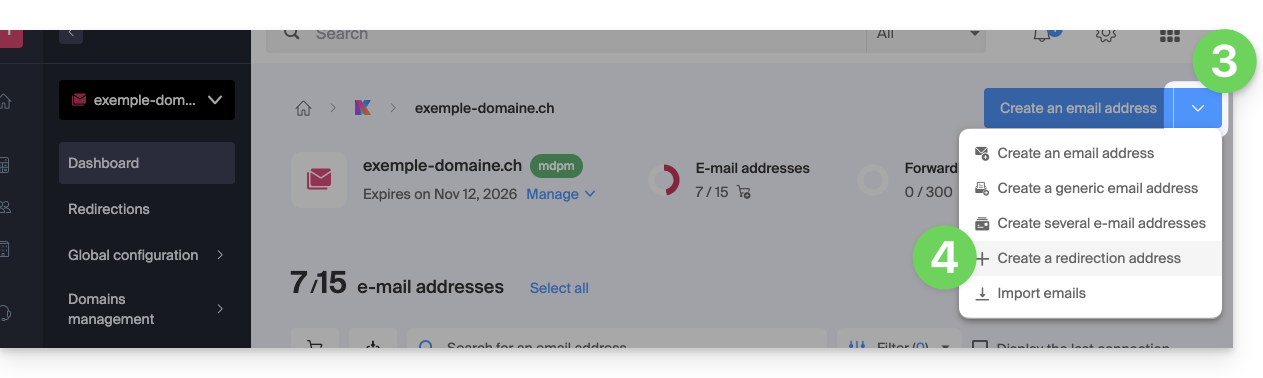
- You can also click on Forwarding mail in the left-hand menu:
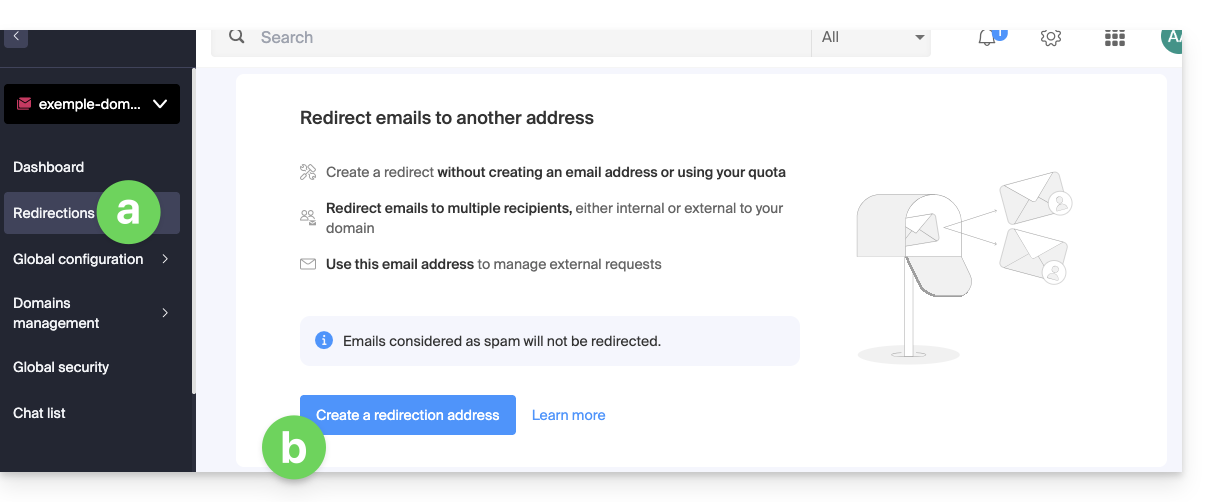
- You can also click on Forwarding mail in the left-hand menu:
2. Add a new forwarding address
Once on the redirection page:
- Click the button to Create a redirection address.
- Enter the email address that will receive the emails to be redirected (it will be valid on the main domain and its associated domains).
- Enter an email address that will receive the emails.
- Click the button to add the valid email address to the table below.
- If necessary, delete an address added to the table by clicking the trash can icon.
- Click on the Create button:

3. Confirm adding as a redirection recipient
The recipient addresses entered in the table will automatically receive an email requesting confirmation of the addition.
The entire redirection will not function until at least 1 of the mentioned users confirms the addition! As soon as 1 user has confirmed the addition, the redirection will function (to the user or users who confirmed the addition).
- The user must click on the link in the email to validate the addition.
- As long as the addition is not confirmed, the Pending status will remain displayed next to the destination address (visible if you modify the redirection address - see below).
Modify or delete the redirection
You cannot rename a redirection address after it has been created. However, to modify the list of recipients for the redirection, resend a confirmation request, or delete the redirection email address:
- Once on the redirection page:
- Recipients who have not yet confirmed their addition are preceded by a gray icon.
- Click on the action menu ⋮ to the right of the redirection address in question:
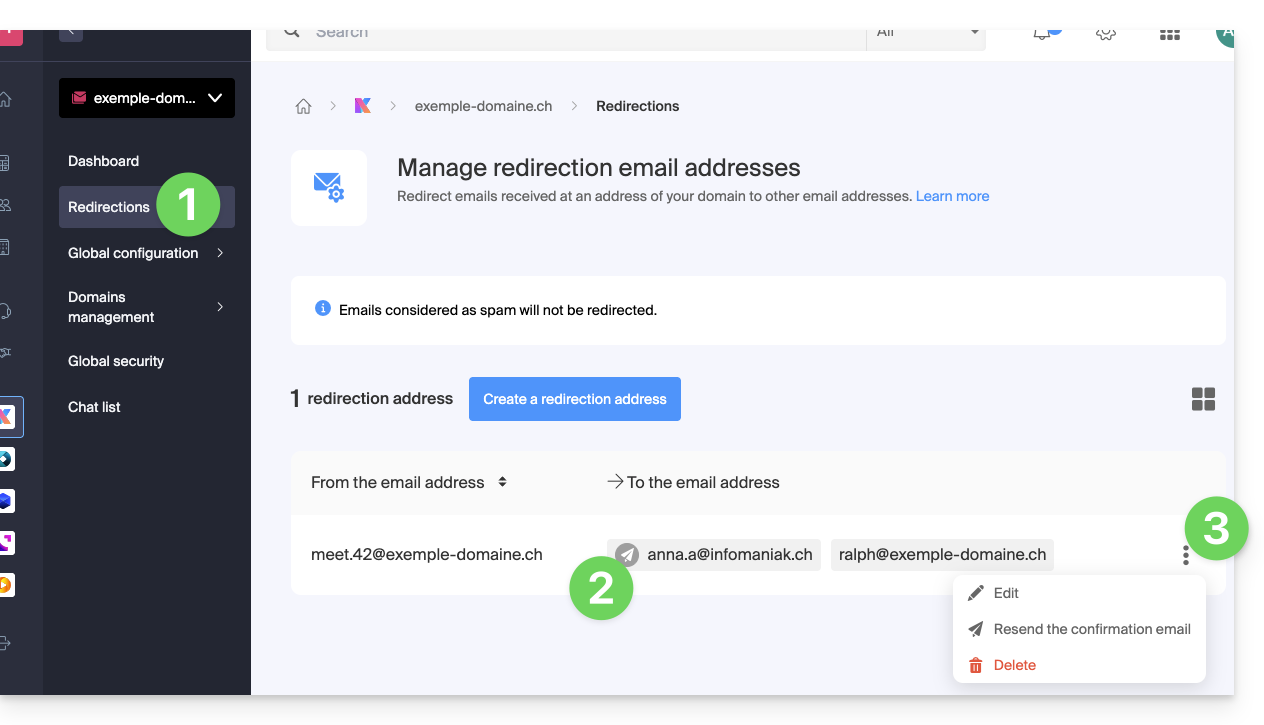
From this action menu ⋮, click on:
- Modify to add recipient email addresses:
- Click on the button to add the valid email address to the table below.
- Save the changes.
- Alternatively, click on the trash can icon to remove a recipient email address from the list.
- The detailed acceptance status is displayed to the right of the recipient address.
- Resend to immediately request the user to accept their addition to the list via email (a second reminder will only be possible after 24 hours; otherwise, the button will remain grayed out).
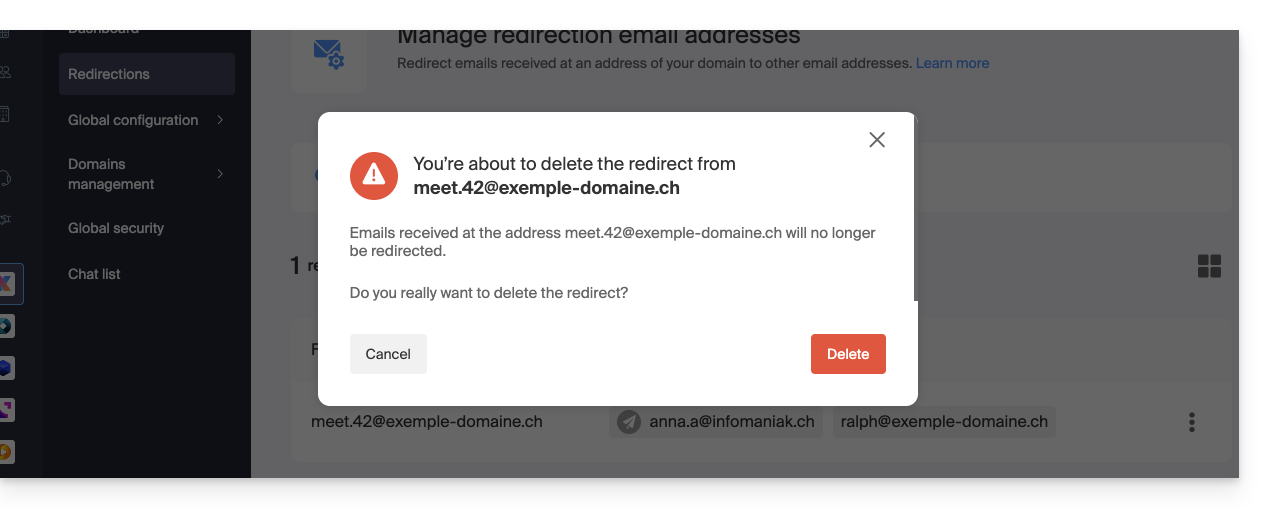
- Delete to remove the entire address (click on the confirmation pop-up to execute the deletion):
Link to this FAQ: https://faq.infomaniak.com/2524
Has this FAQ been helpful?