Knowledge base
1000 FAQs, 500 tutorials and instructional videos. Here, there are only solutions!
Save a kMeet meeting on kDrive
This guide explains how to start recording an online meeting organized with kMeet, the ethical free videoconferencing solution by Infomaniak, to obtain a video of the presentation stored on kDrive Infomaniak (this only when a user stops the recording).
Preamble
- Recording the video
- is done on the server side
- does not generate any load for the participant's computer that started it
- is in the video format
.mp4 - has a maximum duration of 3 hours.
- The video will not be available if everyone leaves the videoconference without someone stopping the recording.
- In other words, steps 5 and following below are mandatory for the recording to work!
Record a kMeet meeting on kDrive as a video
Prerequisites
- Have a kDrive (standalone/independent or as part of an offer kSuite, my kSuite, etc.).
- Be the moderator of the videoconference to be recorded.
- Do not create a videoconference encrypted with a custom key.
To record the meeting on kDrive, from the moment someone clicks on Start to begin, but also clicks on Stop to finalize the recording and make it available:
- Start kMeet via kmeet.infomaniak.com or from one of the apps for computers and mobile devices.
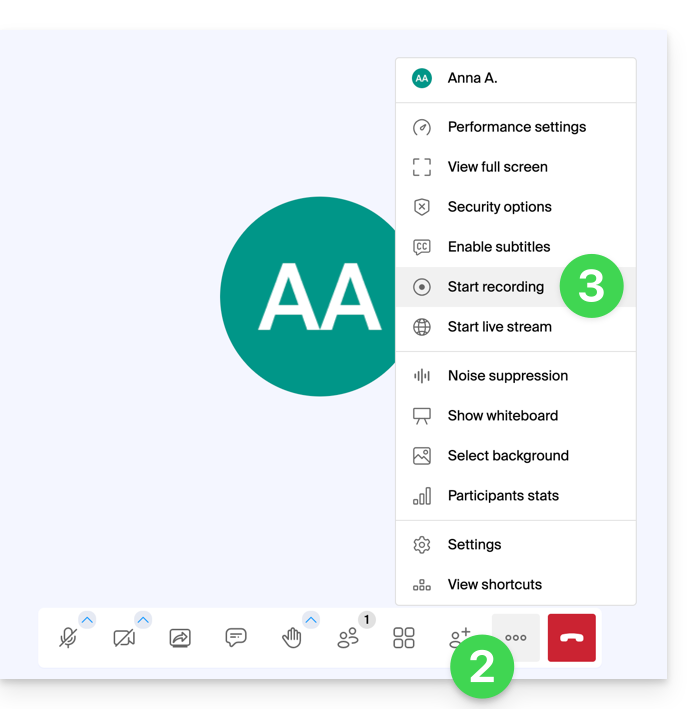
- Once in the meeting, click on the action menu ○○○ in the kMeet toolbar.
- Click on the icon ◉ Start Recording:
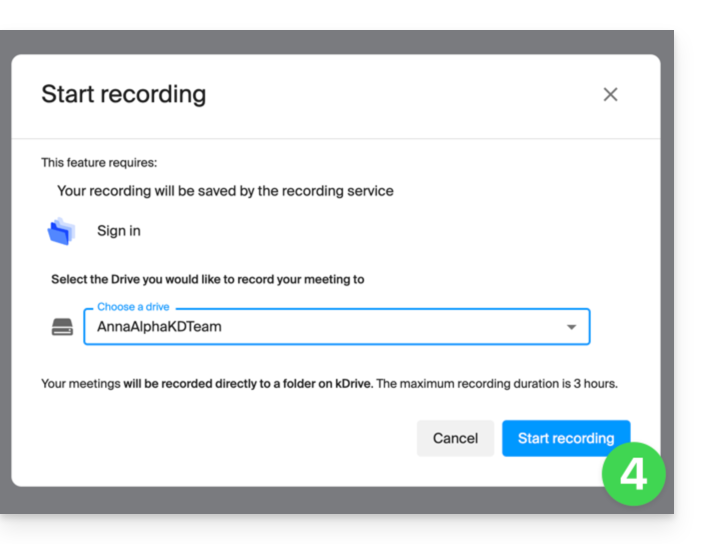
- Confirm the operation and if necessary, log in to your Infomaniak account, then select a kDrive to record the videoconference on; then click the button to start the video:
- To stop recording the video (mandatory step to obtain the video), click on the toolbar again, then choose Stop Recording:
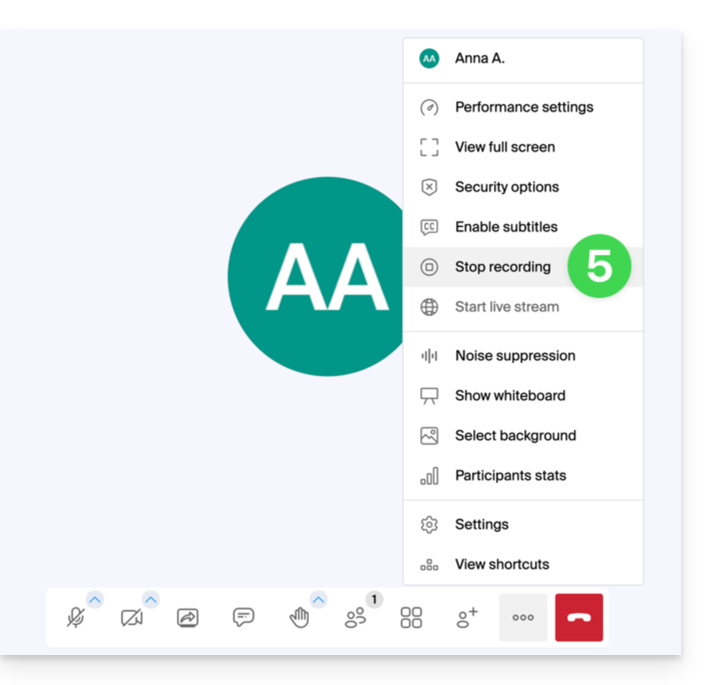
- Confirm, then choose if you want to go to the recording location on kDrive.
- The recording is available at the root of the selected kDrive as soon as the virtual fair is closed in which the meeting took place (i.e., as soon as all participants have left the video conference).
Link to this FAQ: https://faq.infomaniak.com/2472
Has this FAQ been helpful?