Knowledge base
1000 FAQs, 500 tutorials and instructional videos. Here, there are only solutions!
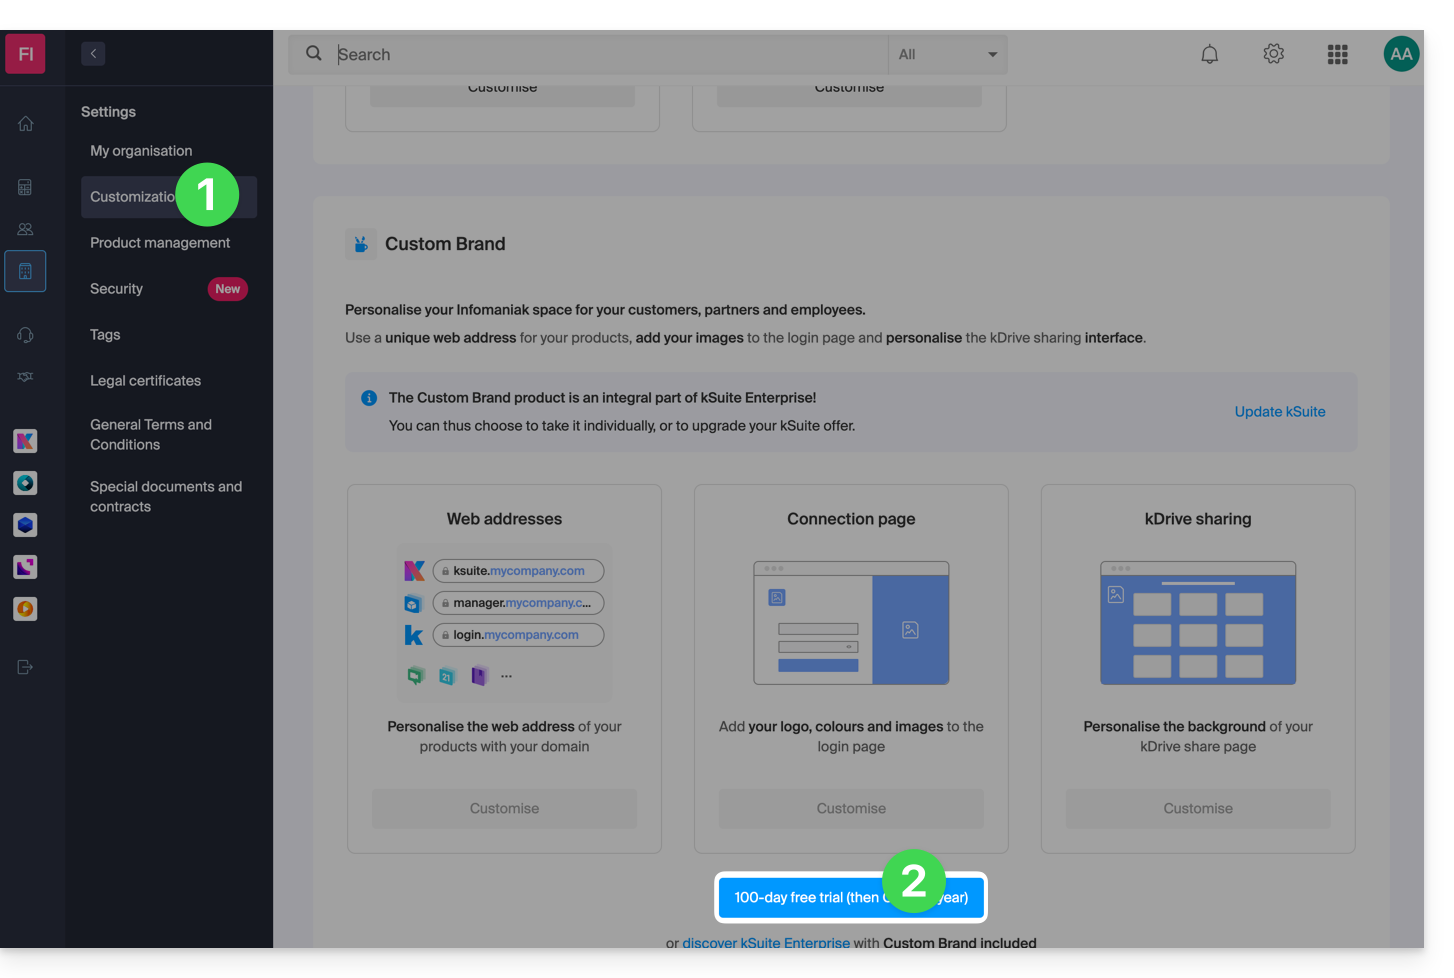
Customize URLs and interface with Custom Brand
This guide details the customization options for the Infomaniak Organization, including custom URLs (Custom Brand addresses) for the Manager and kSuite tools such as kDrive or Euria.
Custom Brand is a service already included with kSuite Enterprise.
Creating custom URLs
To obtain Custom Brand:
- Click here to access Custom Brand on the Infomaniak Manager (need help?).
- Click the blue Try for Free button (in the Custom Brand section)
- Enter the domain name to use in your custom web address:
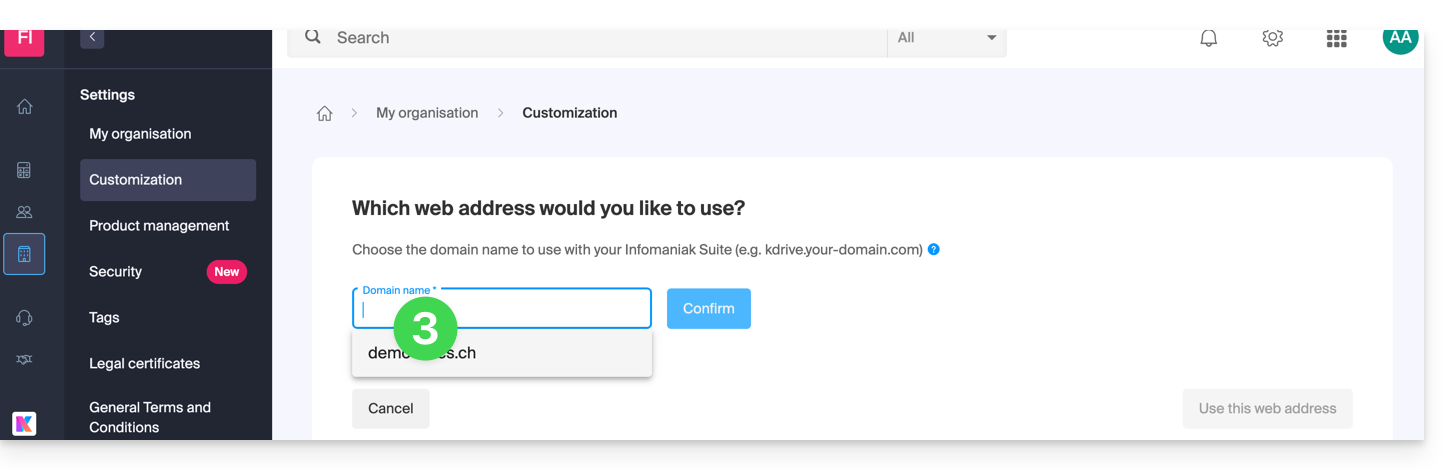
- If you do not yet have a domain name, you will be able to order one at this step.
- If your domain name is already used for another service, you will be able to choose another one, or use a subdomain (example:
my.domain.xyz).
- When choosing the domain name, the interface will present examples of custom web addresses (example: manager.domain.xyz).
- Click the blue “This web address suits me” button or select another domain name or subdomain until you find a custom web address that suits you.
- Preparing custom web addresses may take a few minutes; a confirmation email will be sent to the account owner's email address.
To disable access via custom URLs:
- Click the blue Disable button at the top right of the Custom Brand section:
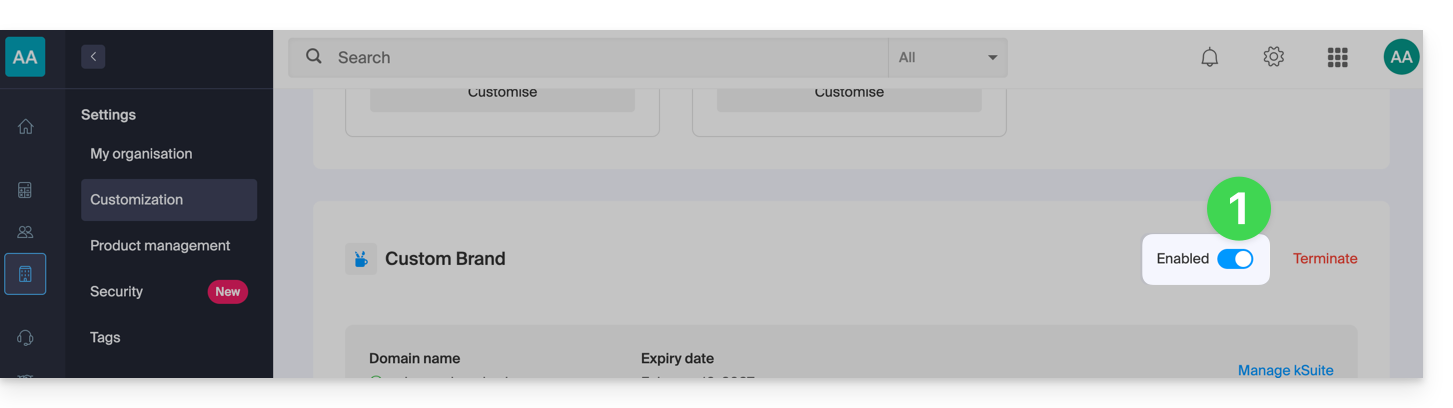
- You can reactivate the addresses later using the same button.
- You can also remove this service completely.
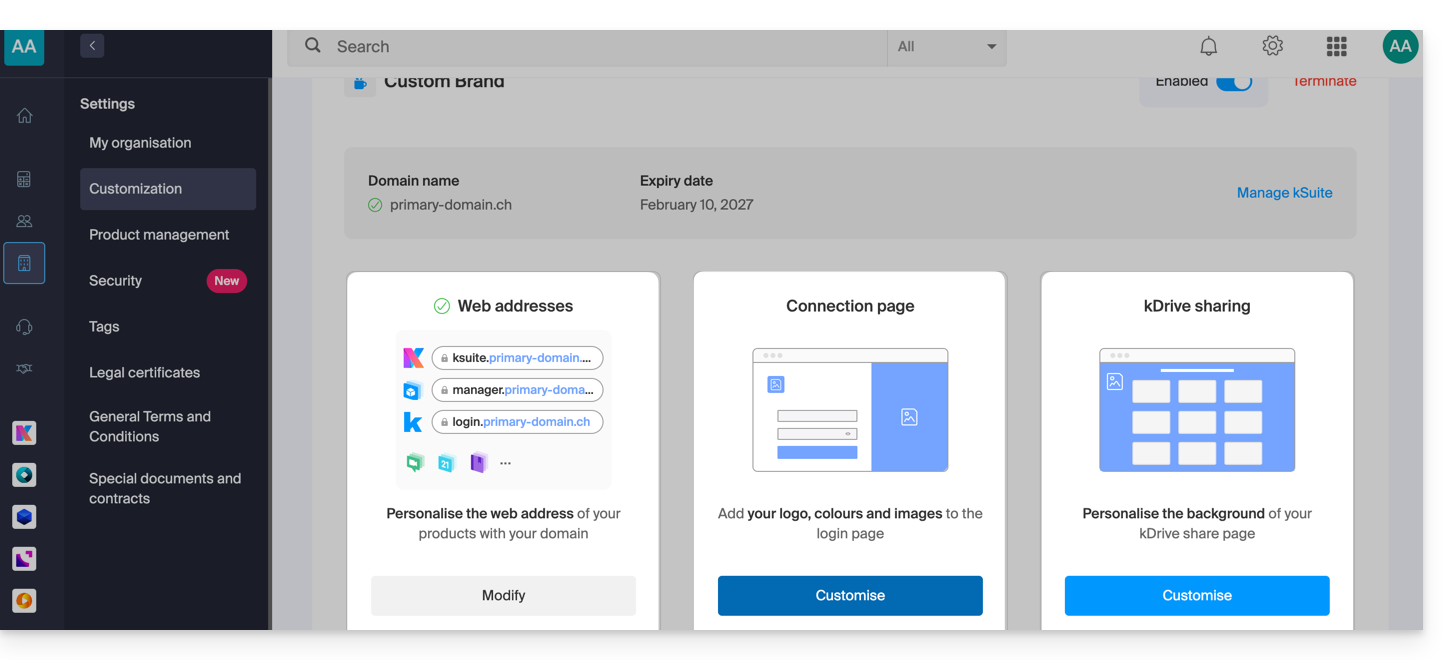
Customizing the interface
In addition to customizing the web addresses of your Infomaniak products, you can add a logo. You can also customize your login page via a slideshow of 3 images:
- Click here to access Custom Brand on the Infomaniak Manager (need help?).
- Click the blue Customize button (in the Custom Brand section):
- Upload an image or click Select an image to add it as a logo.
- Resize the image with the tool if it exceeds the maximum size of 270 x 70 pixels.
- The tool allows you to preview how your logo will look on a dark or light theme.
- Click on Validate.
- To customize your login page, click on the blue Next button on the far right.
- From the two color selection fields, choose the color of the text and login buttons.
- Drag and drop or click on Select an image to create a slideshow of 3 images to the right of the login page (images must be at least 865 x 1200 pixels).
- Click on Add then on Finish to save the changes.
Link to this FAQ: https://faq.infomaniak.com/2467
Has this FAQ been helpful?